Auto-generate personalized sales proposals
Use Zapier and AI to automatically generate tailored sales proposals for high-ticket clients in your CRM.
2024-11-13
Automating the creation of sales proposals can significantly boost your team's productivity and help you capitalize on high-value opportunities more efficiently. This tutorial introduces a powerful system that combines HubSpot's CRM capabilities, Zapier's workflow automation, and Claude AI's natural language processing to generate personalized proposals for your most promising leads.
In this tutorial, you will learn how to:
- Set up criteria for high-ticket clients in your CRM
- Create an automated workflow in Zapier
- Use AI to generate personalized sales proposals
- Automatically create email drafts with the proposals
You'll need:
- Zapier paid account
- CRM software (we'll use HubSpot, but you can adapt for others)
- Anthropic API key (for Claude AI)
Let's get to it.
Step 1: Define high-ticket client criteria in HubSpot
The first step in our automated proposal system is to establish clear criteria for identifying high-ticket clients. We'll use HubSpot for this tutorial, but you can adapt these steps for other CRM systems like Zoho, Salesforce, Pipedrive, or even Google Sheets.
Start by logging into your HubSpot account and navigating to the Lists section.

Click on "Create list" and choose "Active list" to create a dynamic list that updates in real-time based on your criteria.
Name your list something descriptive like "High Ticket Clients for Proposals". This name will help you easily identify the list when setting up your Zapier workflow later.
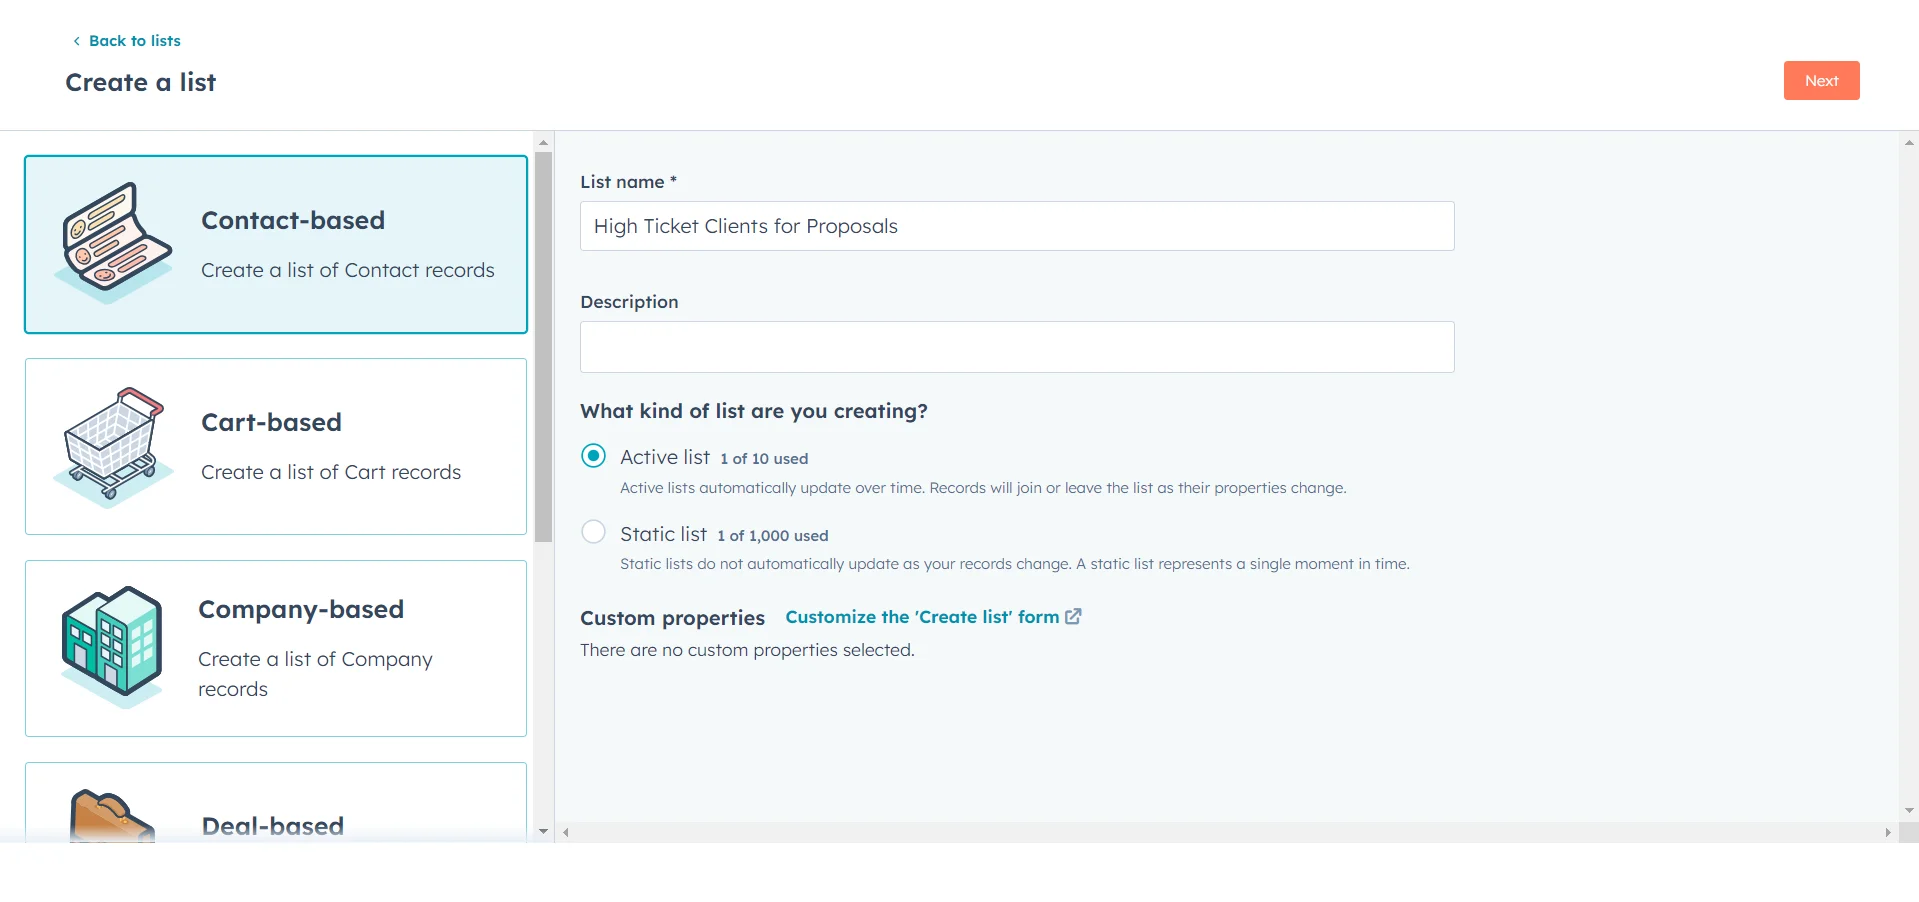
Now, let's set the criteria for what constitutes a high-ticket client in your business context. For this example, we'll use the following criteria:
- Company size is between 500-1000 employees
- Product focus is marketing automation
To set these criteria in HubSpot, use the "Add filter" option and select the appropriate fields. For company size, choose the "Number of employees" property and set the range. For product focus, you'll need to have a custom field in your HubSpot setup where you capture this information during user signup or onboarding.

Remember, these criteria are just examples. You should tailor them to match your business needs and the data you collect from your users. The key is to create a dynamic list that will automatically update as new contacts meet your defined criteria.
Once you've set your criteria, save the list. HubSpot will now continuously update this list in real-time, adding or removing contacts as they meet or no longer meet the specified criteria.
Step 2: Set up the Zapier workflow
With our high-ticket client list created in HubSpot, it's time to set up the automation workflow in Zapier. This workflow will trigger whenever a new contact is added to our list, initiating the process of generating a personalized sales proposal.
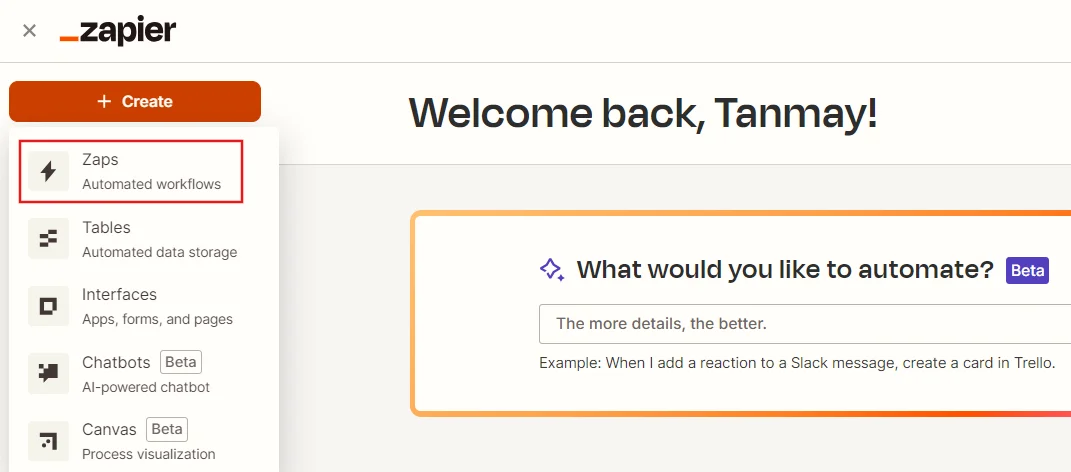
Head over to Zapier and log into your account. Click on "Create Zap" to start building your new workflow.
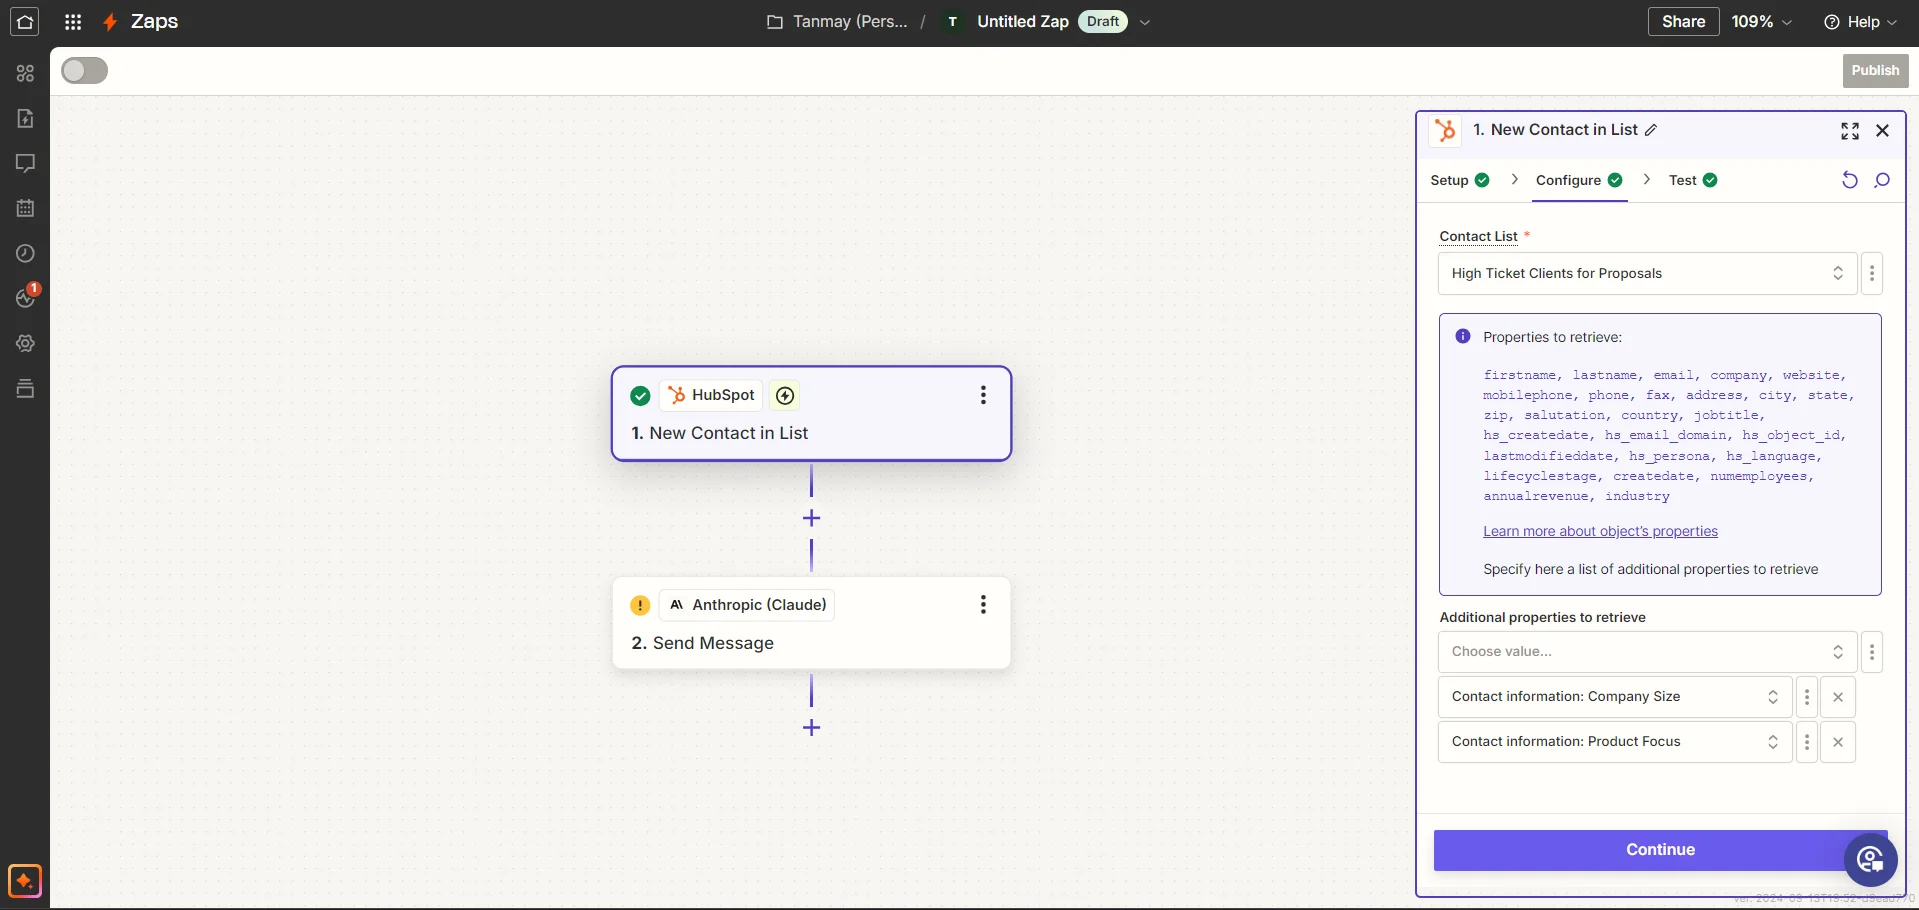
For the trigger step, search for and select HubSpot as your app. Choose "New Contact in a List" as the trigger event. This ensures that our workflow activates whenever a new contact is added to our "High Ticket Clients for Proposals" list.
After selecting the trigger, you'll need to connect your HubSpot account if you haven't already. Follow the prompts to authenticate and give Zapier the necessary permissions.
Once connected, select the "High Ticket Clients for Proposals" list you created earlier from the dropdown menu. In the additional properties to retrieve, select the contact properties you need to retrieve for use in our personalized sales proposal template.
Test the trigger to make sure it's working correctly. Zapier should be able to pull in a sample contact from your list for testing purposes.
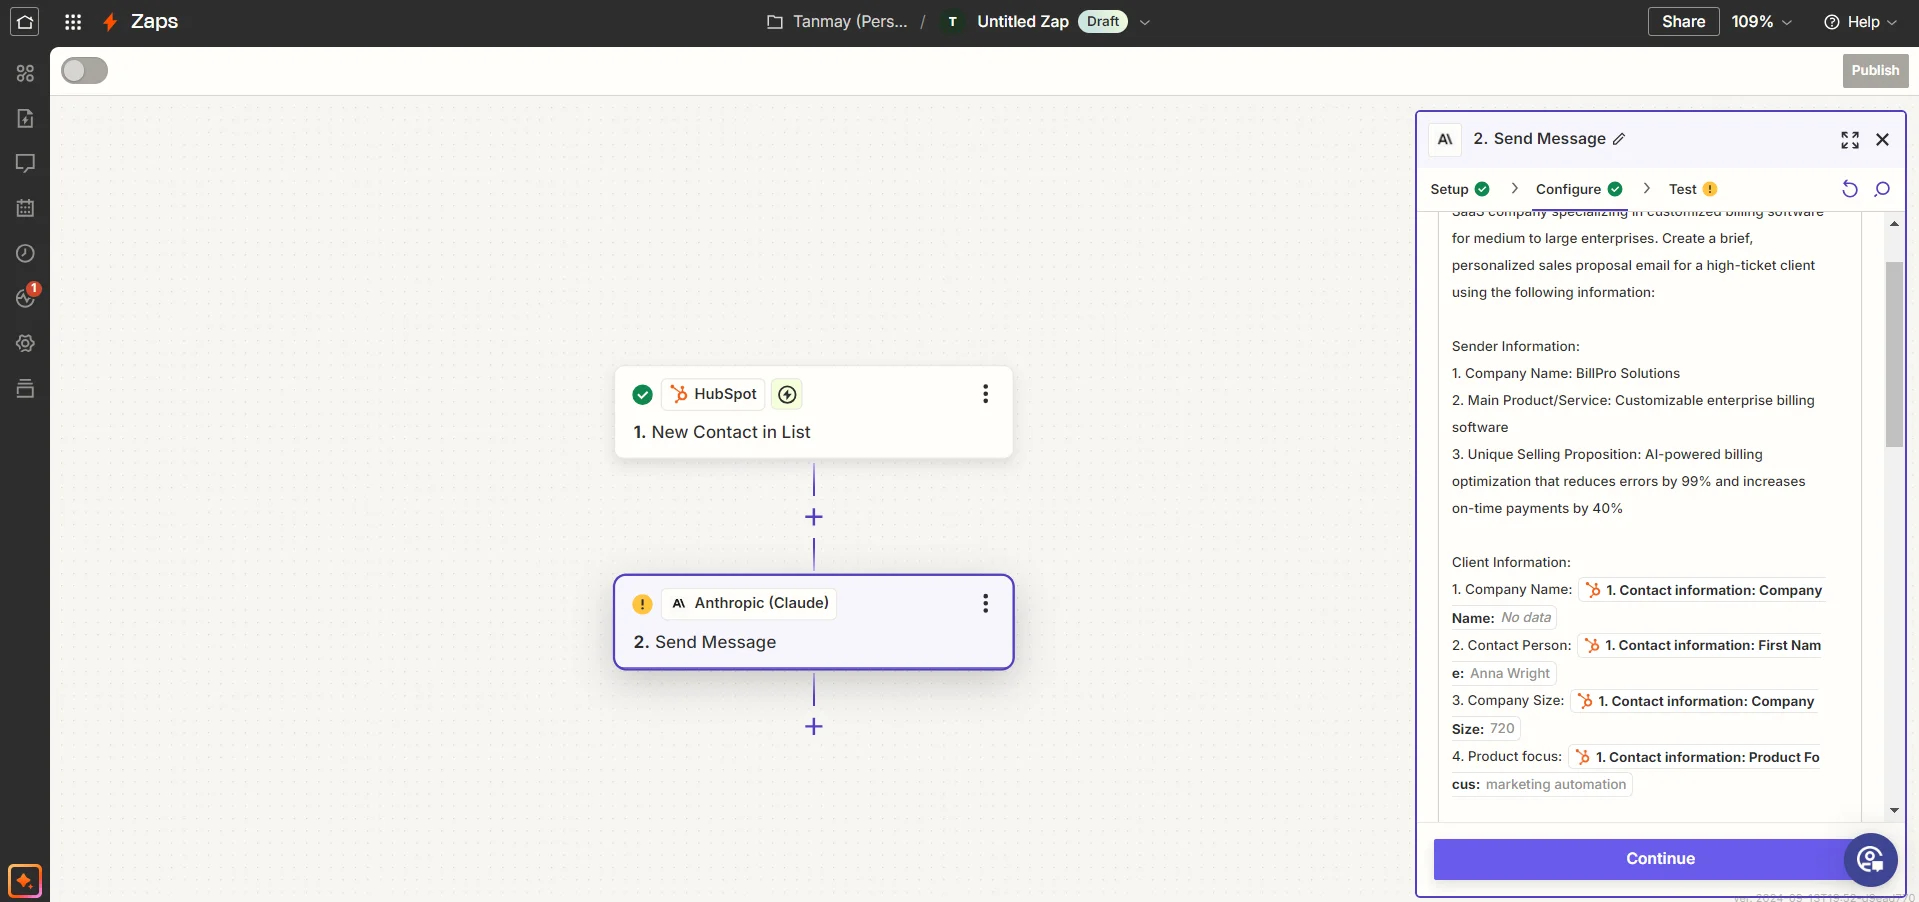
With our trigger set up, it's time to add the action step that will generate our personalized sales proposal. Search for and add an Anthropic step to your Zap. This is where we'll use Claude AI to craft our proposal.
In the Anthropic step, you'll need to provide your API key and select the model. For this tutorial, we'll use Claude 3.5 Sonnet, which offers a good balance of capability and cost-effectiveness.
Now comes the crucial part: crafting the prompt for Claude. This prompt will serve as the instructions for generating our personalized sales proposal. Here's a template you can use:
You are an AI assistant for [Company Name], a [brief company description]. Create a brief, personalized sales proposal email for a high-ticket client using the following information:
Sender Information:
1. Company Name: [Company Name]
2. Main Product/Service: [Main Product/Service]
3. Unique Selling Proposition: [USP]
Client Information:
1. Company Name: {Client Company Name}
2. Contact Person: {Client Contact Person}
3. Company Size: {Client Company Size}
4. Product focus: {Client’s Product Focus}
Proposal Details:
1. Proposed Solution: [Proposed Solution]
2. Key Benefit: [Key Benefit]
3. Brief Success Story: [Success Story]
Create an email proposal that:
1. Opens with a personalized greeting and briefly acknowledges how the client found us
2. Addresses the client's primary pain point and introduces our solution
3. Highlights the key benefit and our unique selling proposition
4. Briefly mentions a relevant success story
5. Ends with a clear, low-pressure call-to-action (e.g., scheduling a call)
The tone should be professional yet friendly. Keep the email concise, around 2-3 short paragraphs (150-200 words total).
Don't acknowledge this task in your response. Generate the email proposal directly. Don't generate a subject line in your response.
Replace the placeholders in curly braces with the corresponding mapped data from your HubSpot trigger step. For the fields in square brackets, fill in your company information.
Test this step to ensure Claude generates a proposal that meets your expectations. You may need to tweak the prompt a few times to get the output just right.
Step 3: Create email drafts with the proposals
Now that we have our personalized sales proposal, the next step is to create an email draft. This allows for a final human review before sending, ensuring quality control while still benefiting from the automation.
Add a new action step to your Zap, choosing your preferred email provider. Common options include Gmail, Outlook, or your company's email system if it's supported by Zapier.
Set up the action to create a new email draft. Map the generated proposal from the Anthropic step into the body of the email. Use data from your HubSpot trigger to fill in the recipient's email address and other relevant fields.
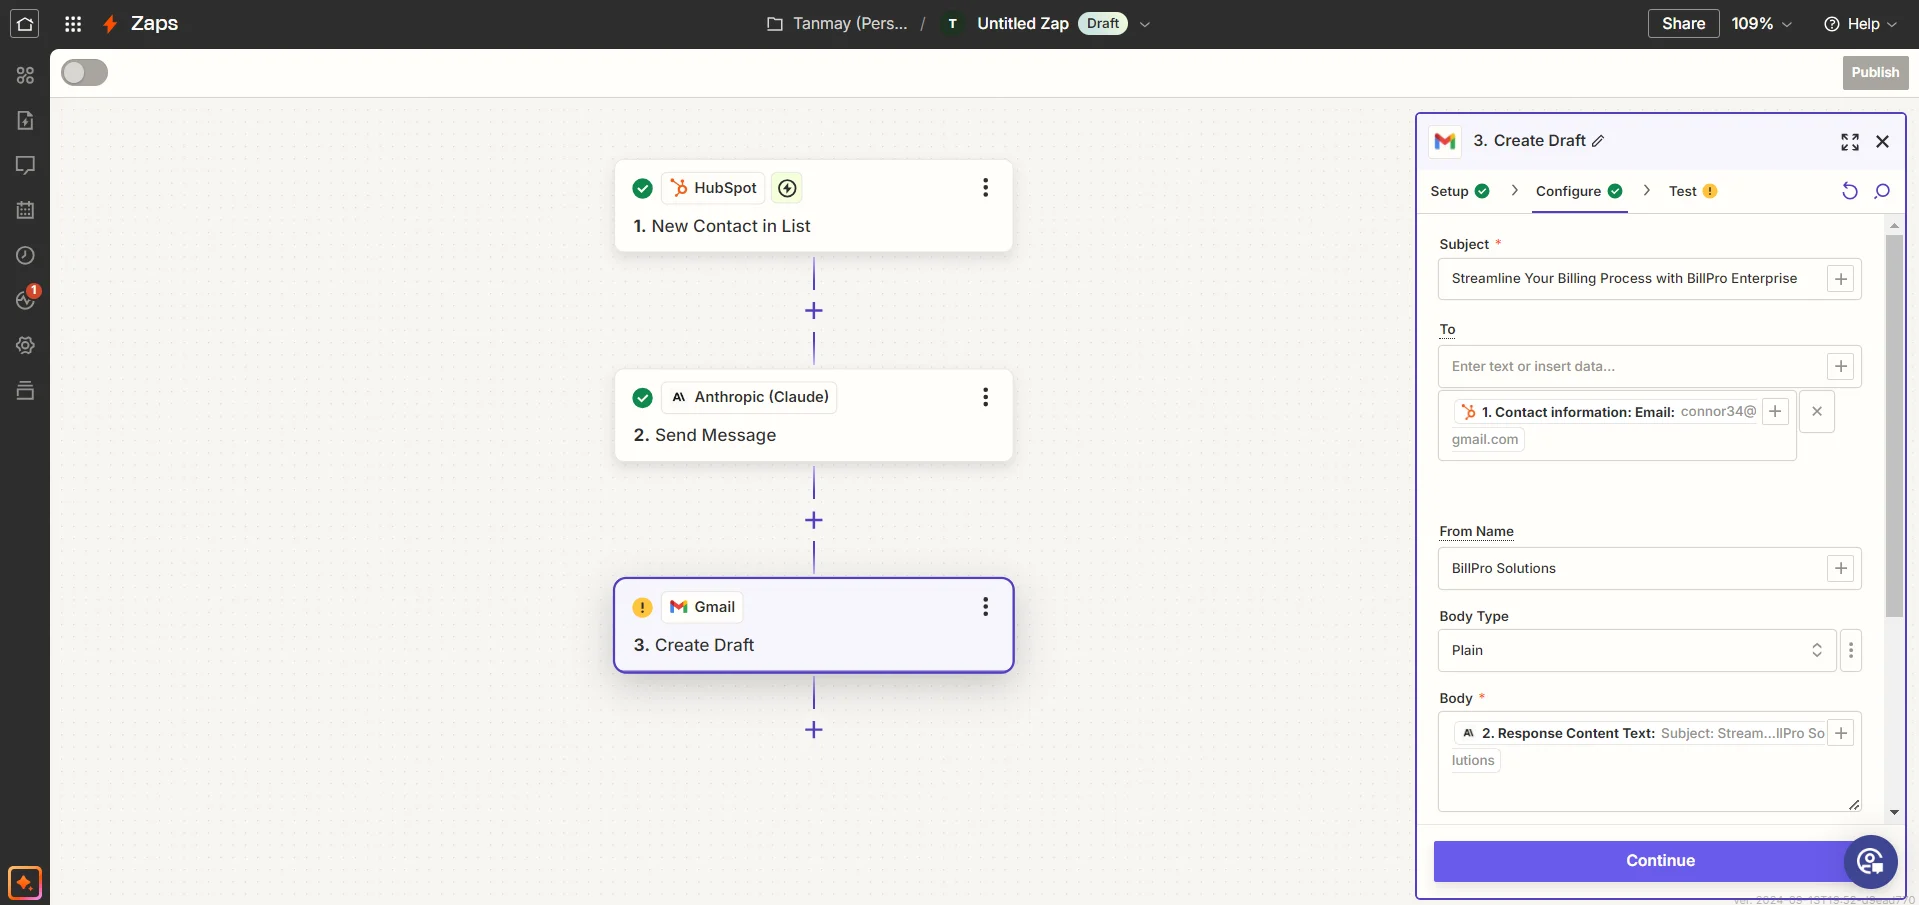
Test this step to ensure a draft email is created successfully with the personalized proposal.
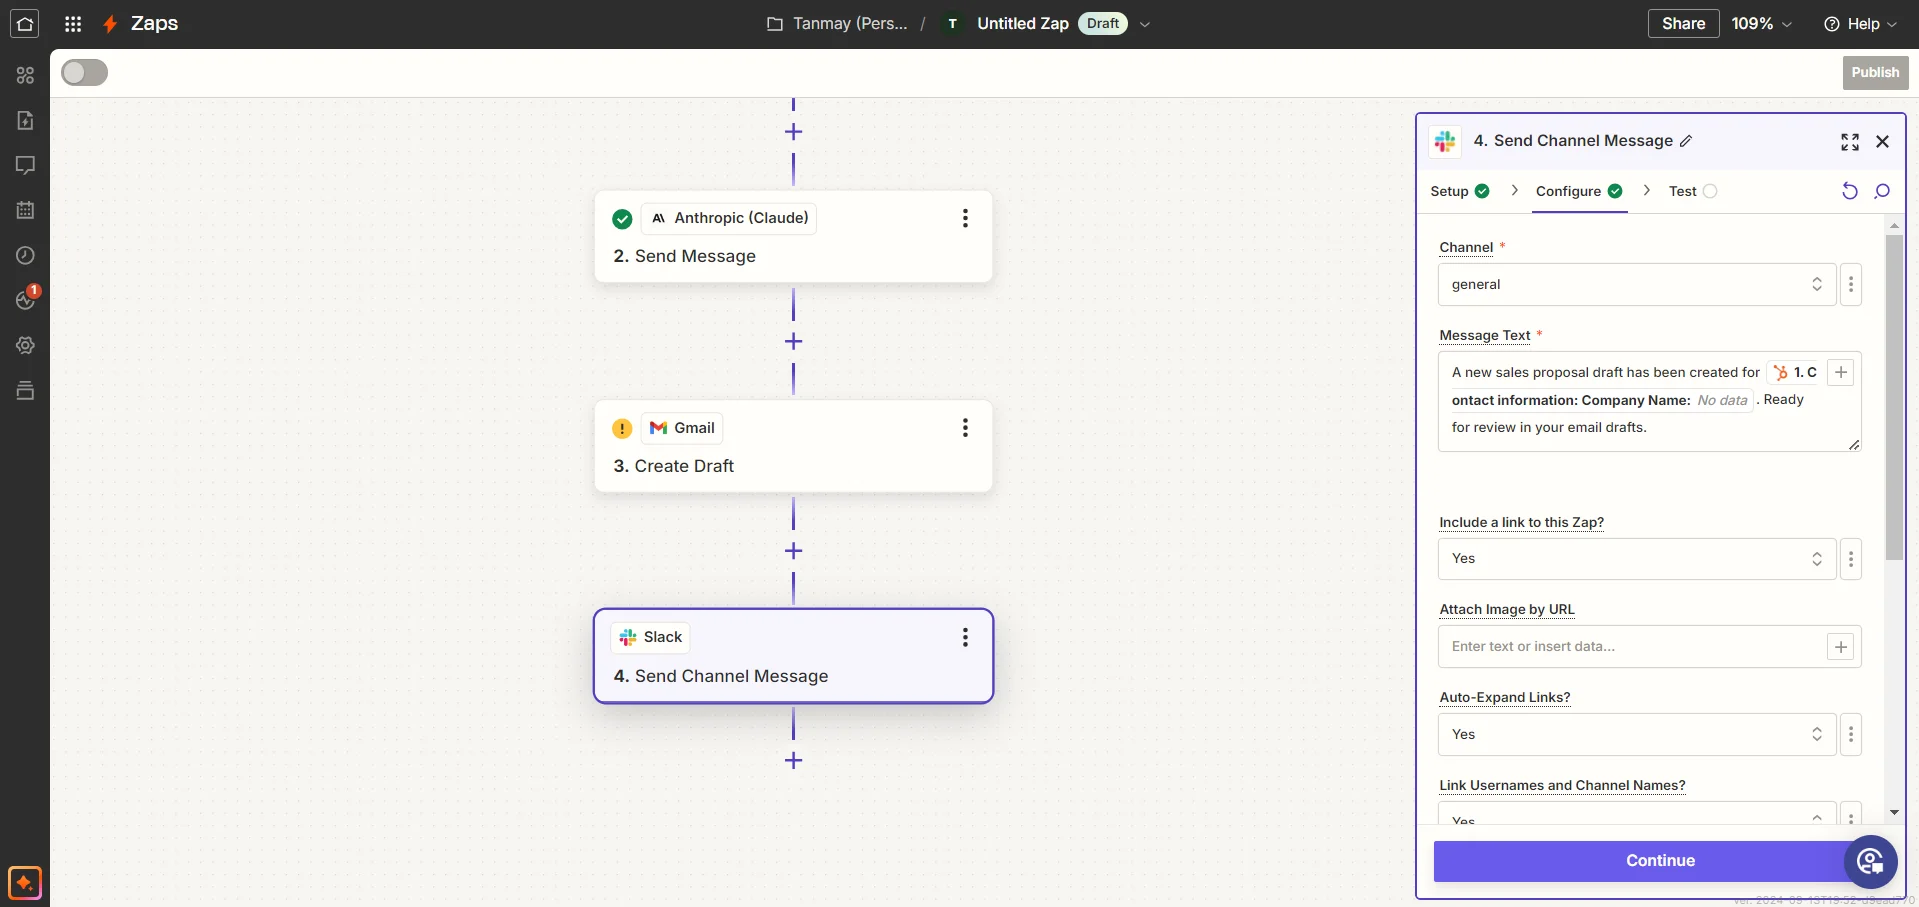
Step 4: Set up notifications and finalize the workflow
The final step in our workflow is to set up a notification system. This will alert you or your sales team whenever a new proposal has been generated and is ready for review.
For this example, we'll use Slack, but you can adapt this to your preferred communication tool, be it Microsoft Teams, email, or even a text message.
Add a Slack action to your Zap. Choose "Send Channel Message" as the action event. Select the appropriate Slack channel where you want the notifications to appear.
In the message text field, craft a notification message like this:
A new sales proposal draft has been created for {Client Company Name}. Ready for review in your email drafts.
You can customize this message to include more details if needed, such as the contact person's name or any other relevant information from your HubSpot data.
With all steps in place, it's time to test your entire Zap from start to finish. Zapier will run through each step, simulating what would happen when a new contact is added to your HubSpot list.
If everything looks good, turn on your Zap. You now have an automated system that generates personalized sales proposals for high-ticket clients based on your specific criteria!
Remember, while this system can save you significant time and effort, it's crucial to review each proposal before sending it. The human touch is still valuable in high-stakes sales situations.
This automated proposal system is just the beginning. Consider creating multiple lists in your CRM for different client segments, each with its own tailored Zapier workflow and proposal template. You could even incorporate special offers or discounts for clients meeting certain criteria, embedding these details directly in your prompt to Claude.
Happy automating!
This tutorial was created by Tanmay.