Automate outbound sales research and outreach
How to automate importing data then personalising, drafting and sending outbound sales emails.
2024-11-13
Sales research and outreach is a fractured and time-consuming experience. It’s often spread across a series of platforms and workflows and involves using different prospecting tools to find leads. Transferring lead data into your CRM and email software is another time suck. So is using AI chatbots to draft email copy.
Clay is revolutionizing these outbound sales workflows by combining all of them into one tool. You can think of Clay as a super-powered Excel spreadsheet. It automatically imports data from various sources like LinkedIn, Apollo etc. into synced tables - and allows you to automate email drafting and sending too.
In this tutorial, we'll walk you through the process of creating targeted company lists, finding the right contacts, and automating your email drafting and outreach.
Steps we’ll follow in this tutorial:
- Step 1: Create a company leads list
- Step 2: Map and filter the data based on your criteria
- Step 3: Find targeted people at each company
- Step 4: Auto-draft emails with AI and send them in bulk
Let’s dive in!
Step 1: Create a company leads list
To begin, you'll need to create a free account on Clay.
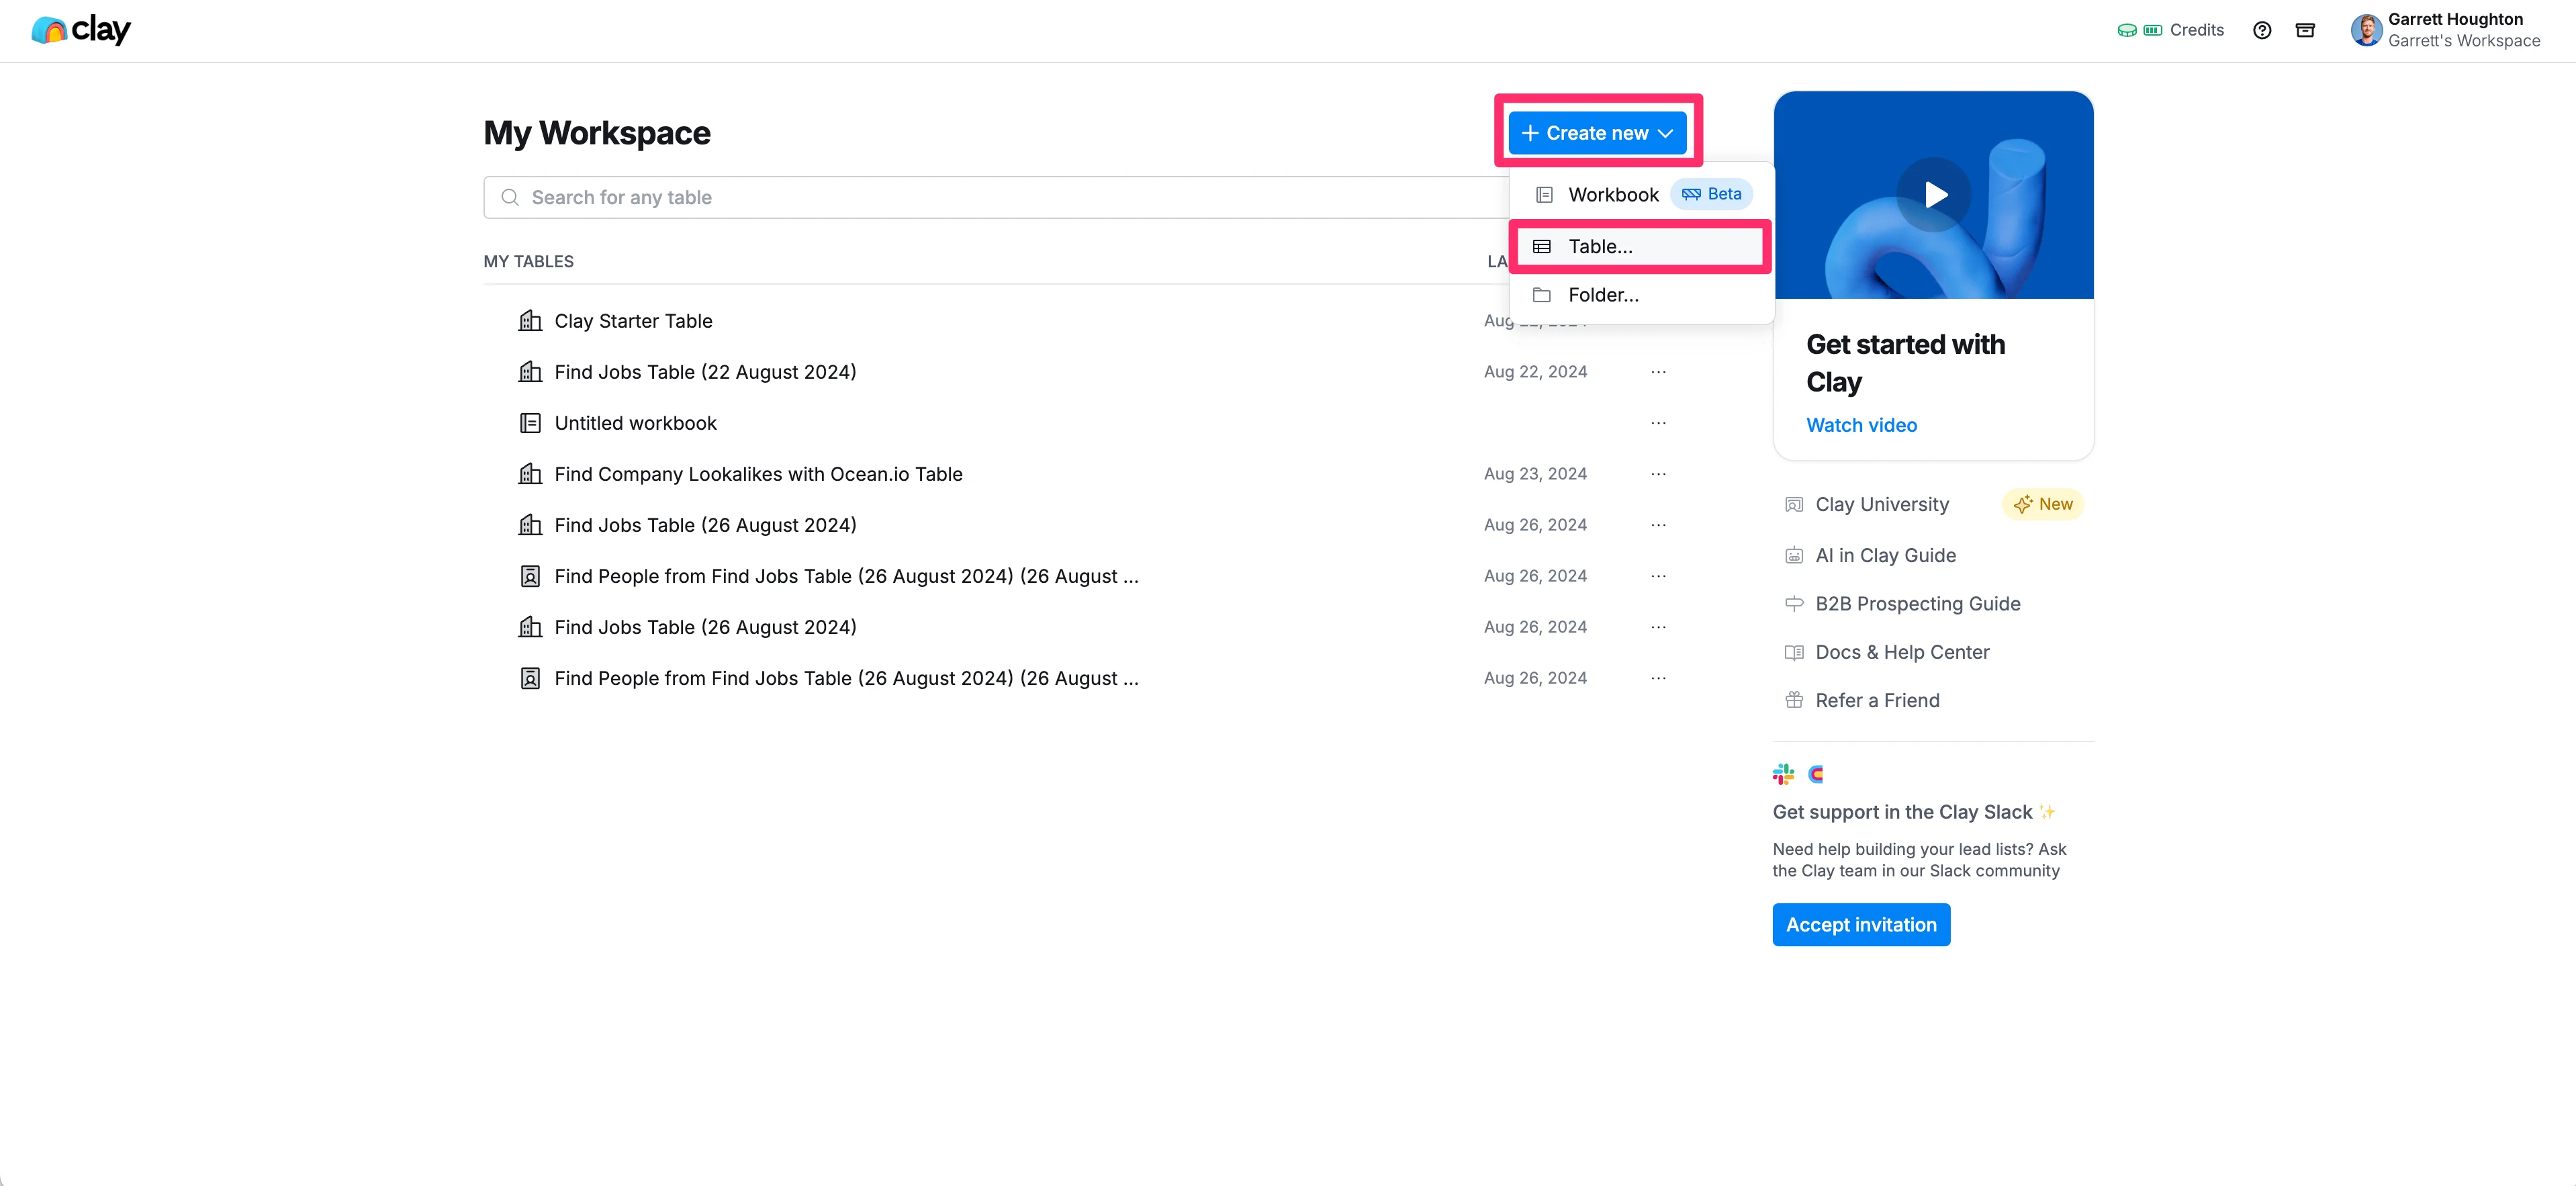
Once you've done that, navigate to the My Workspace page, click the "Create New" button, and select the "Table" option from the dropdown menu.
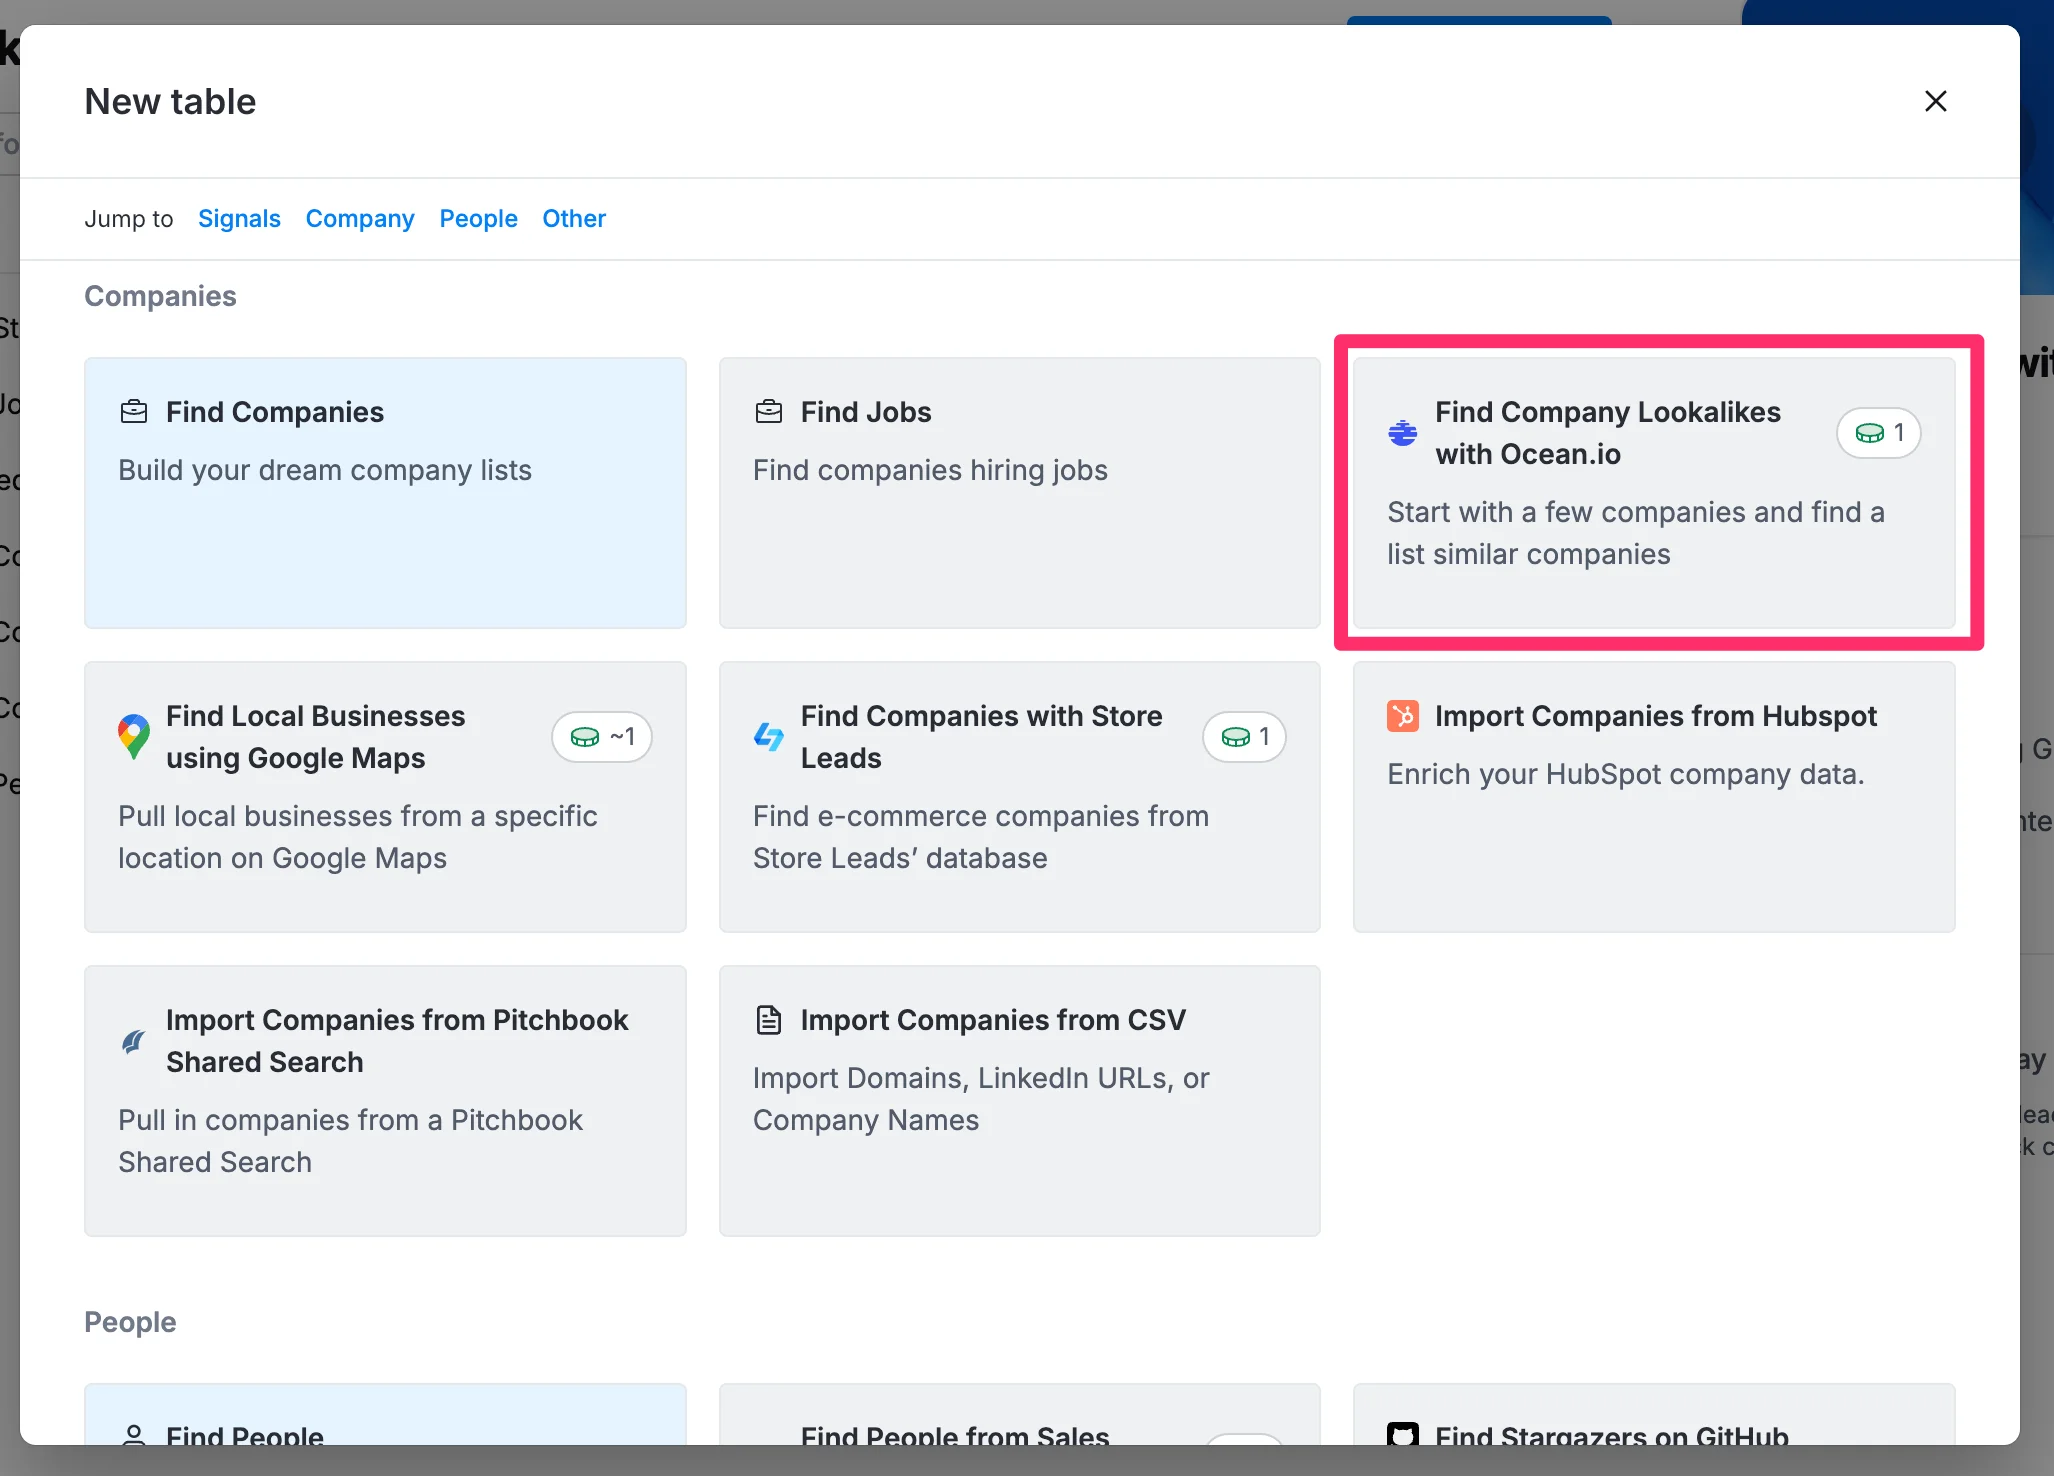
In the “New table” pop-up, scroll to the Companies section and click the "Find Company Lookalikes with Ocean.io" option.
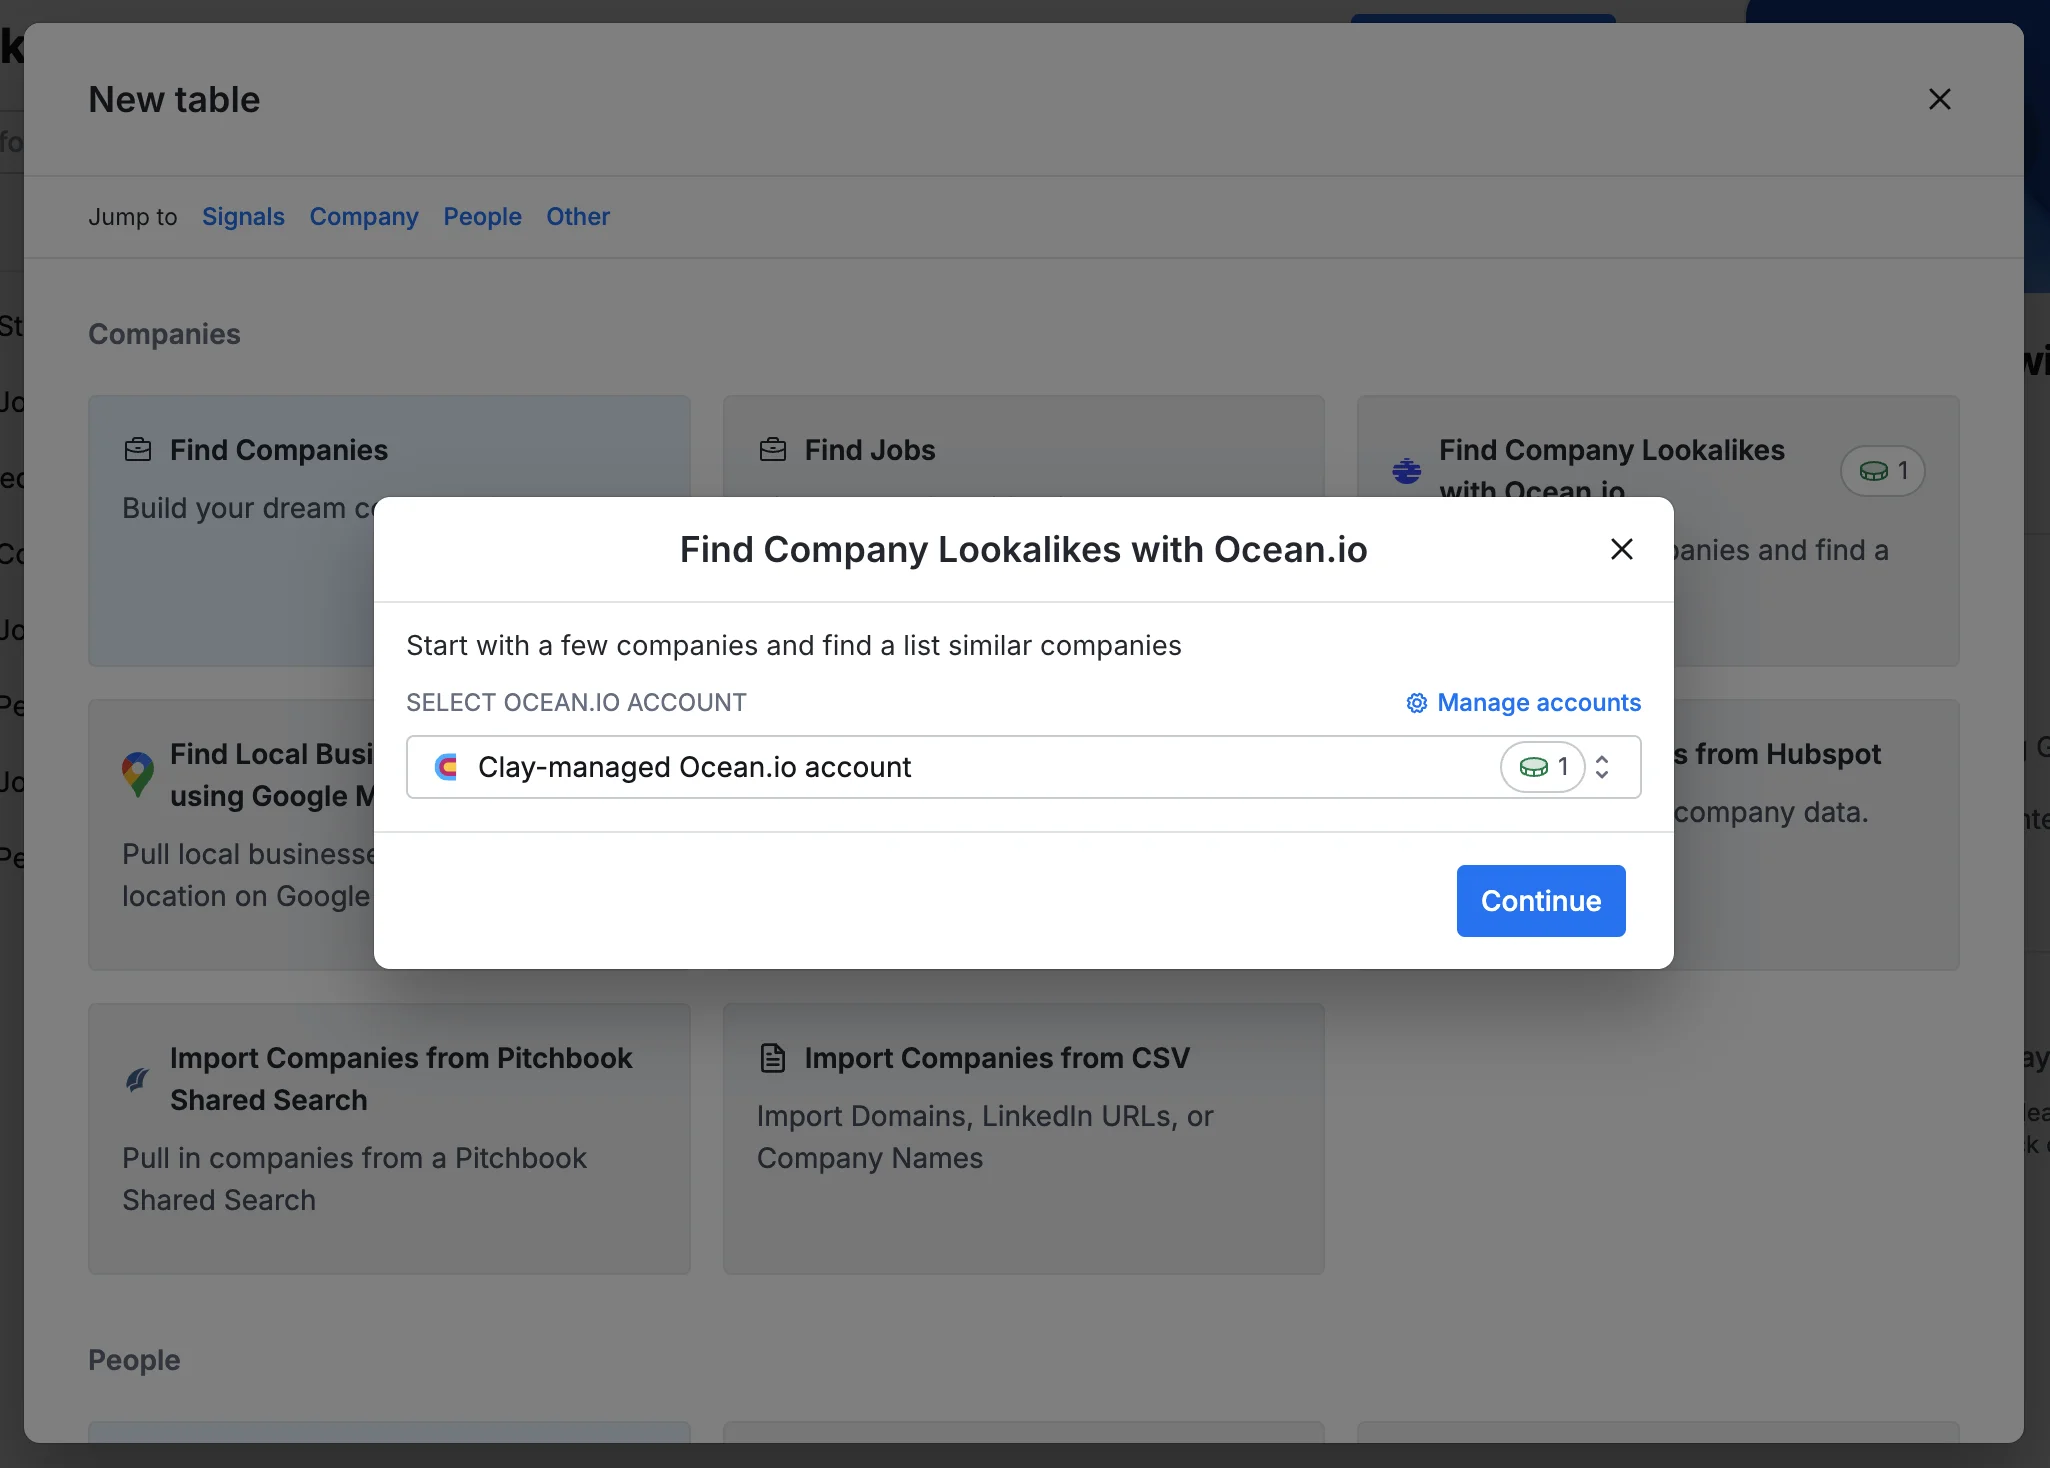
For this tutorial, we'll use Clay's managed Ocean IO account, which doesn't require you to create a separate account. Click “Continue” to start setting your company import criteria.
We're going to focus on finding companies in the food and beverage industry by using an ideal customer’s domain as a reference to find lookalike companies. To do this, in the Company Domain field, enter the domain of one of your ideal customers.
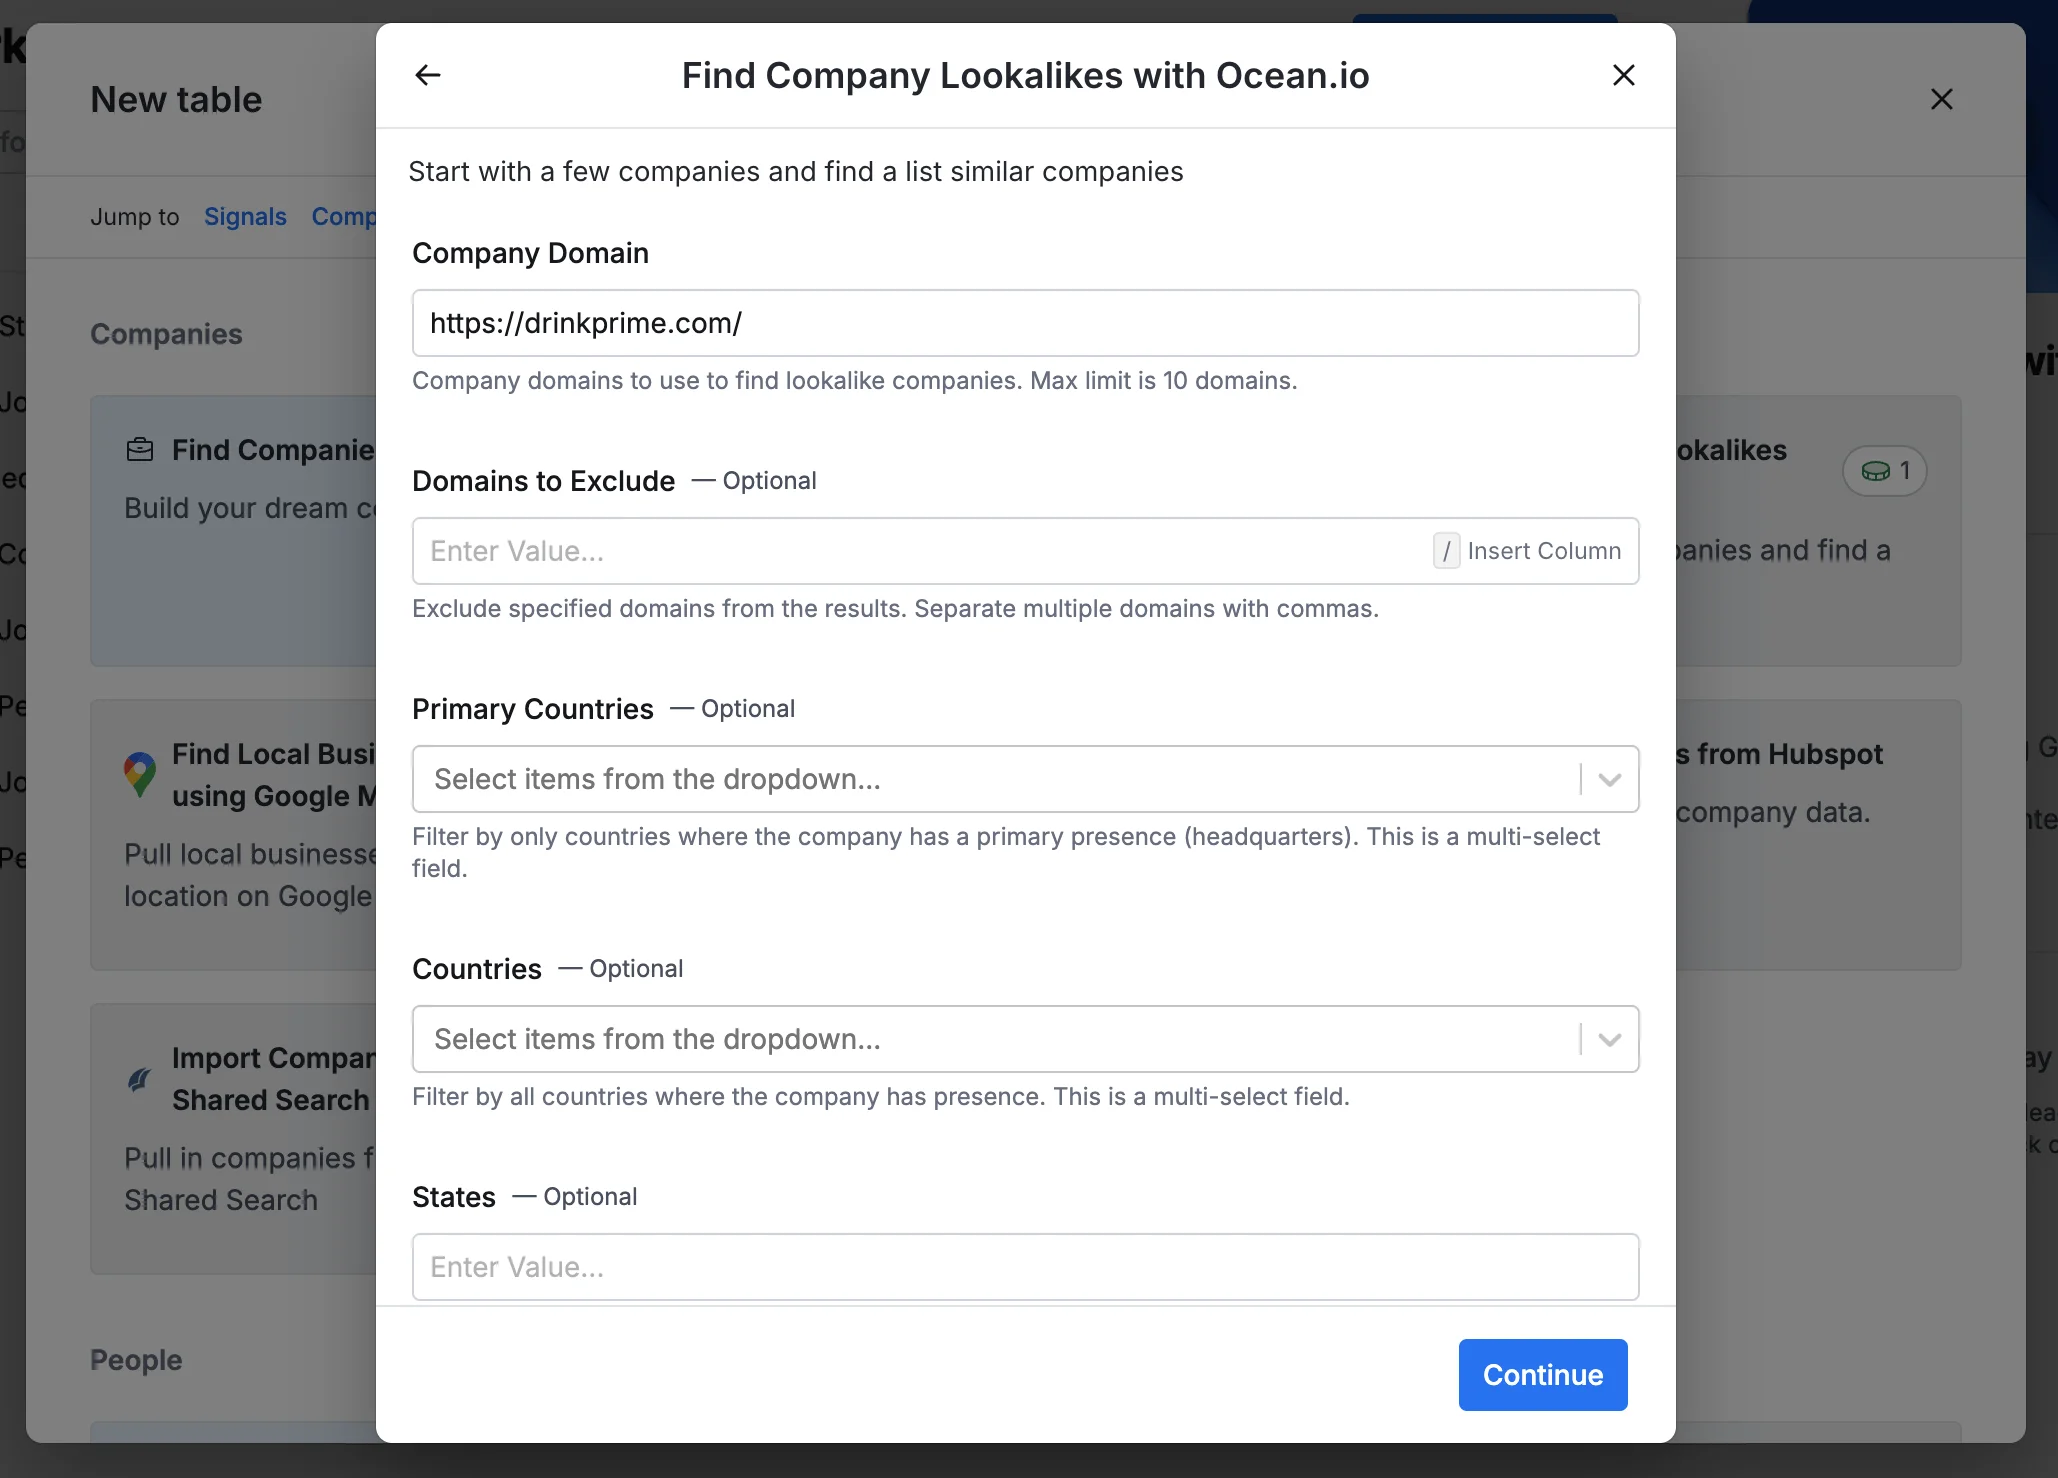
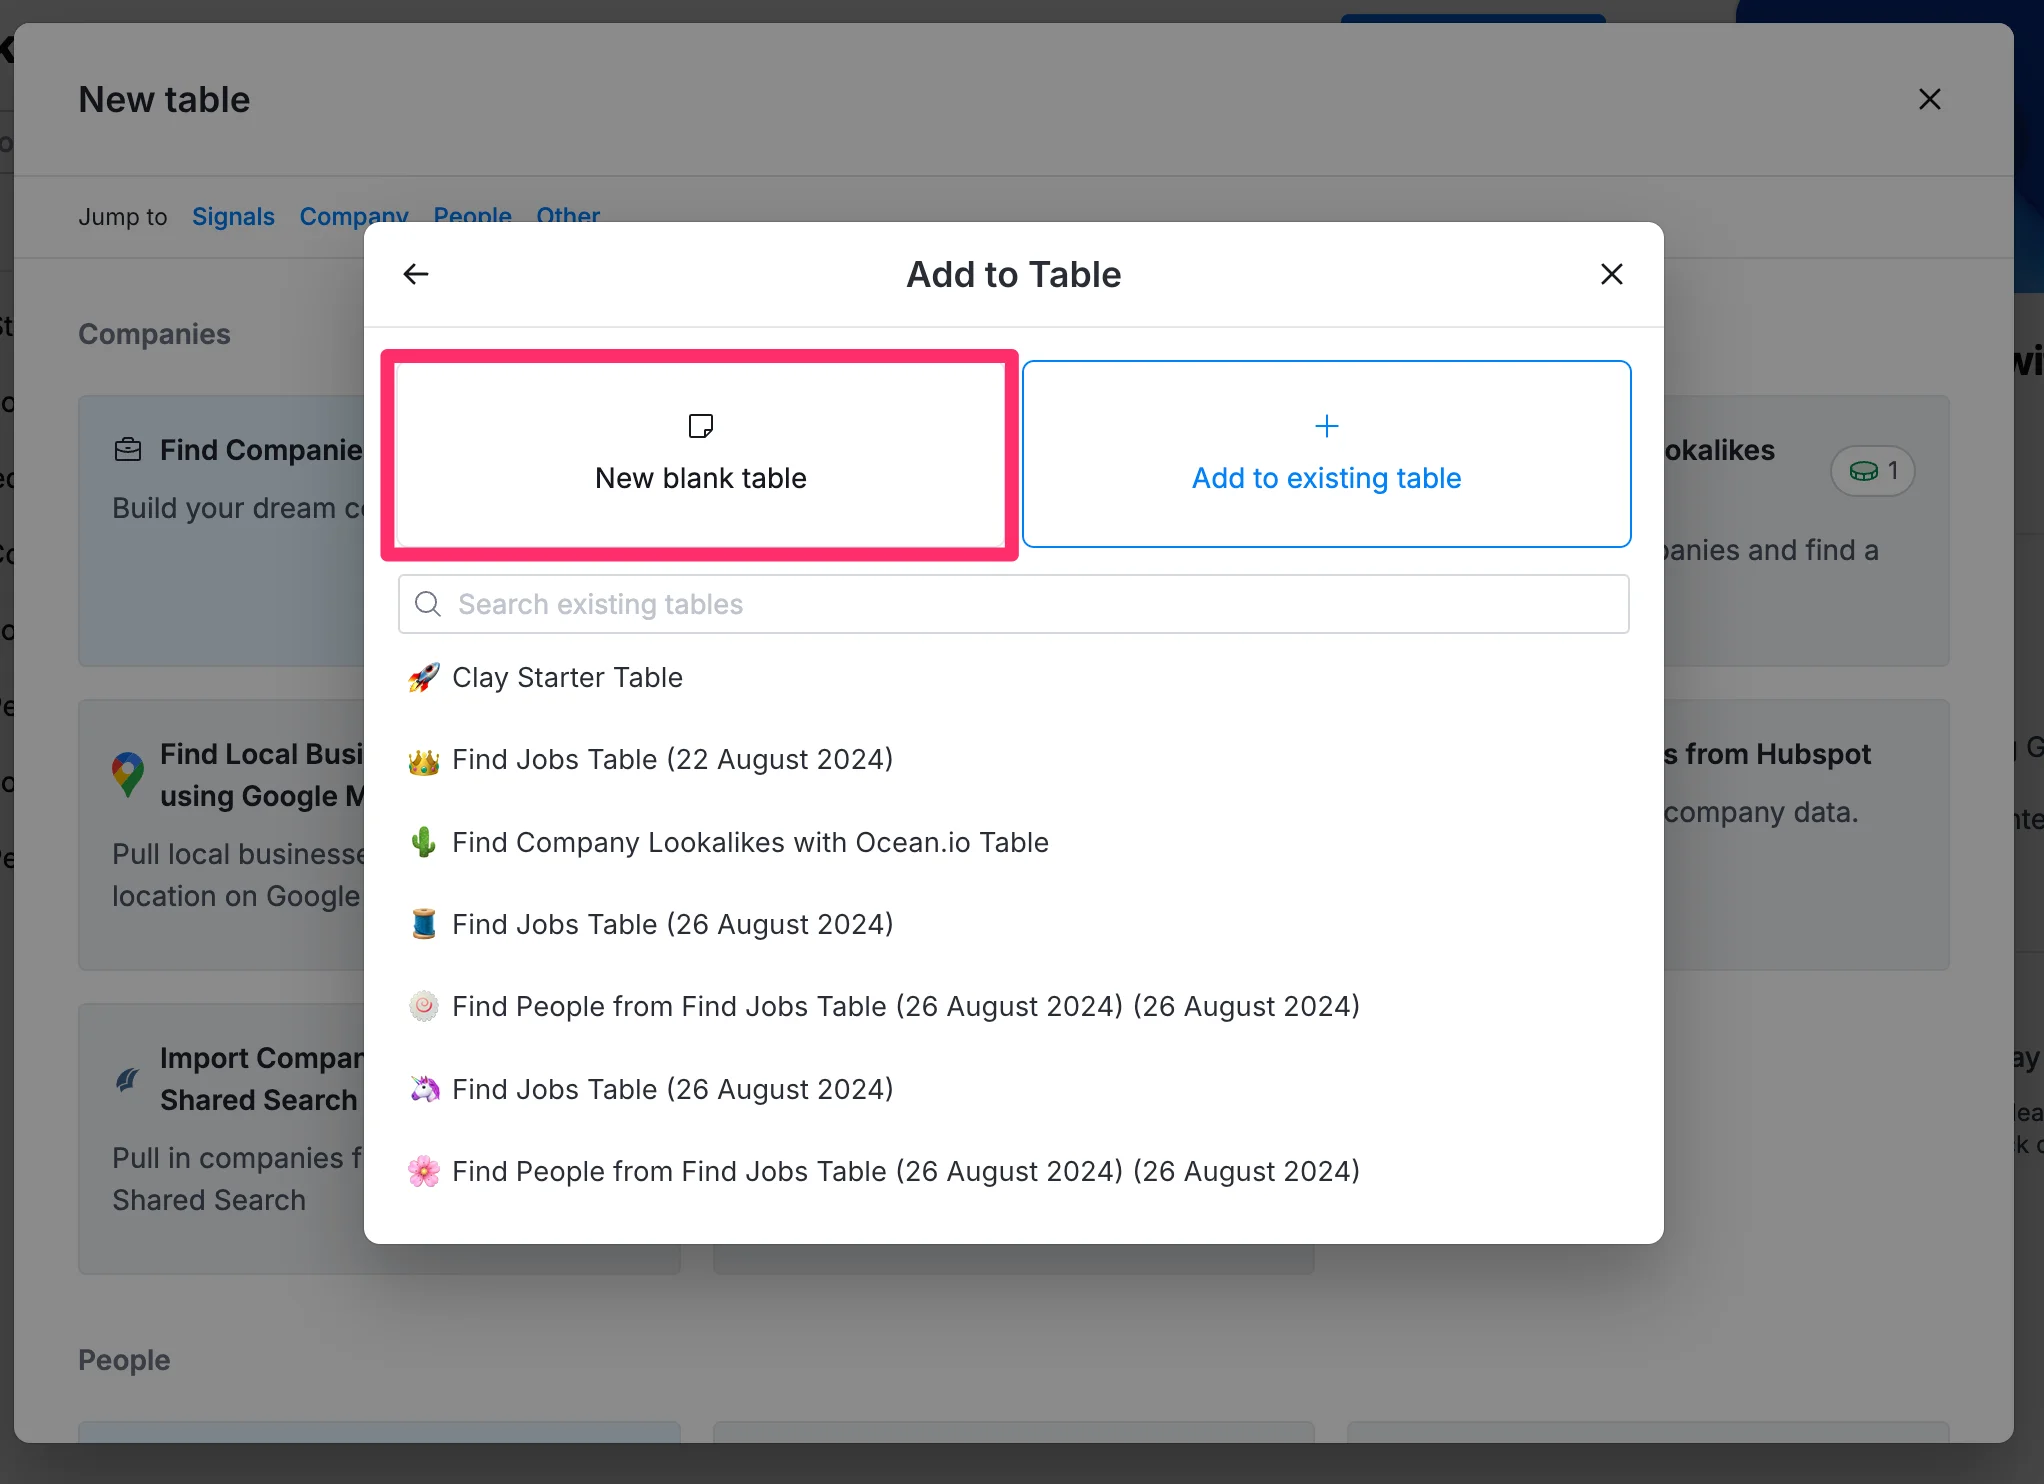
Once your company search parameters are set, click the "New blank table" option to add the companies to a new table.
Step 2: Map and filter the data based on your criteria
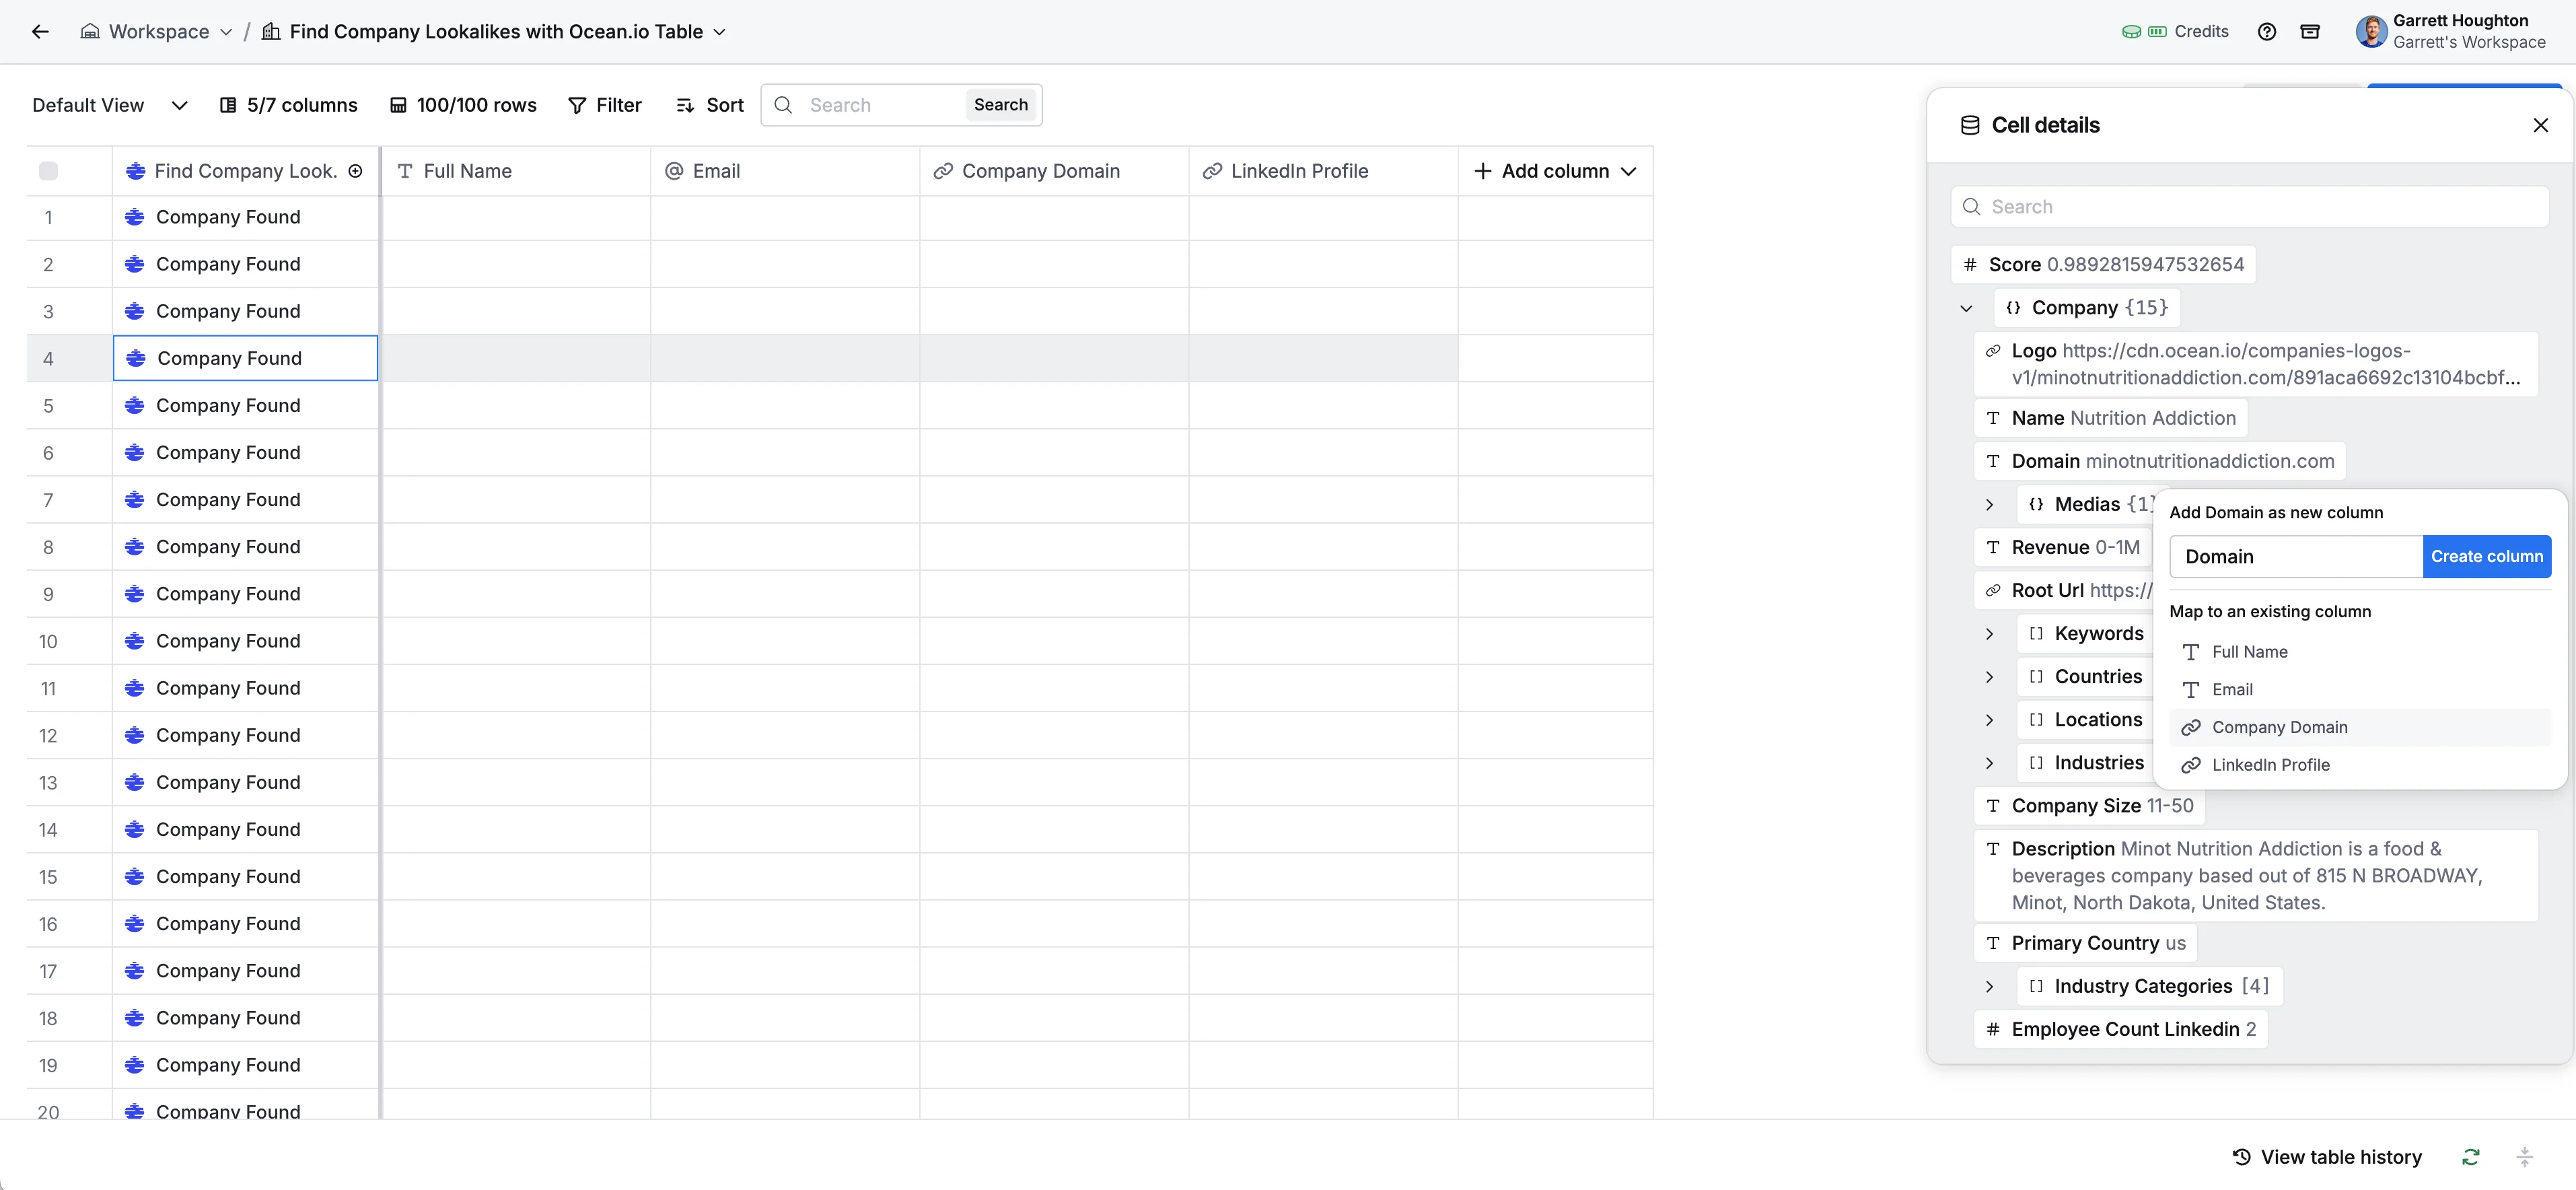
Now that you have your initial list of companies, it's time to map and filter the data. To do this, click on a company in the "Find Company Lookalike" column to open its cell details.
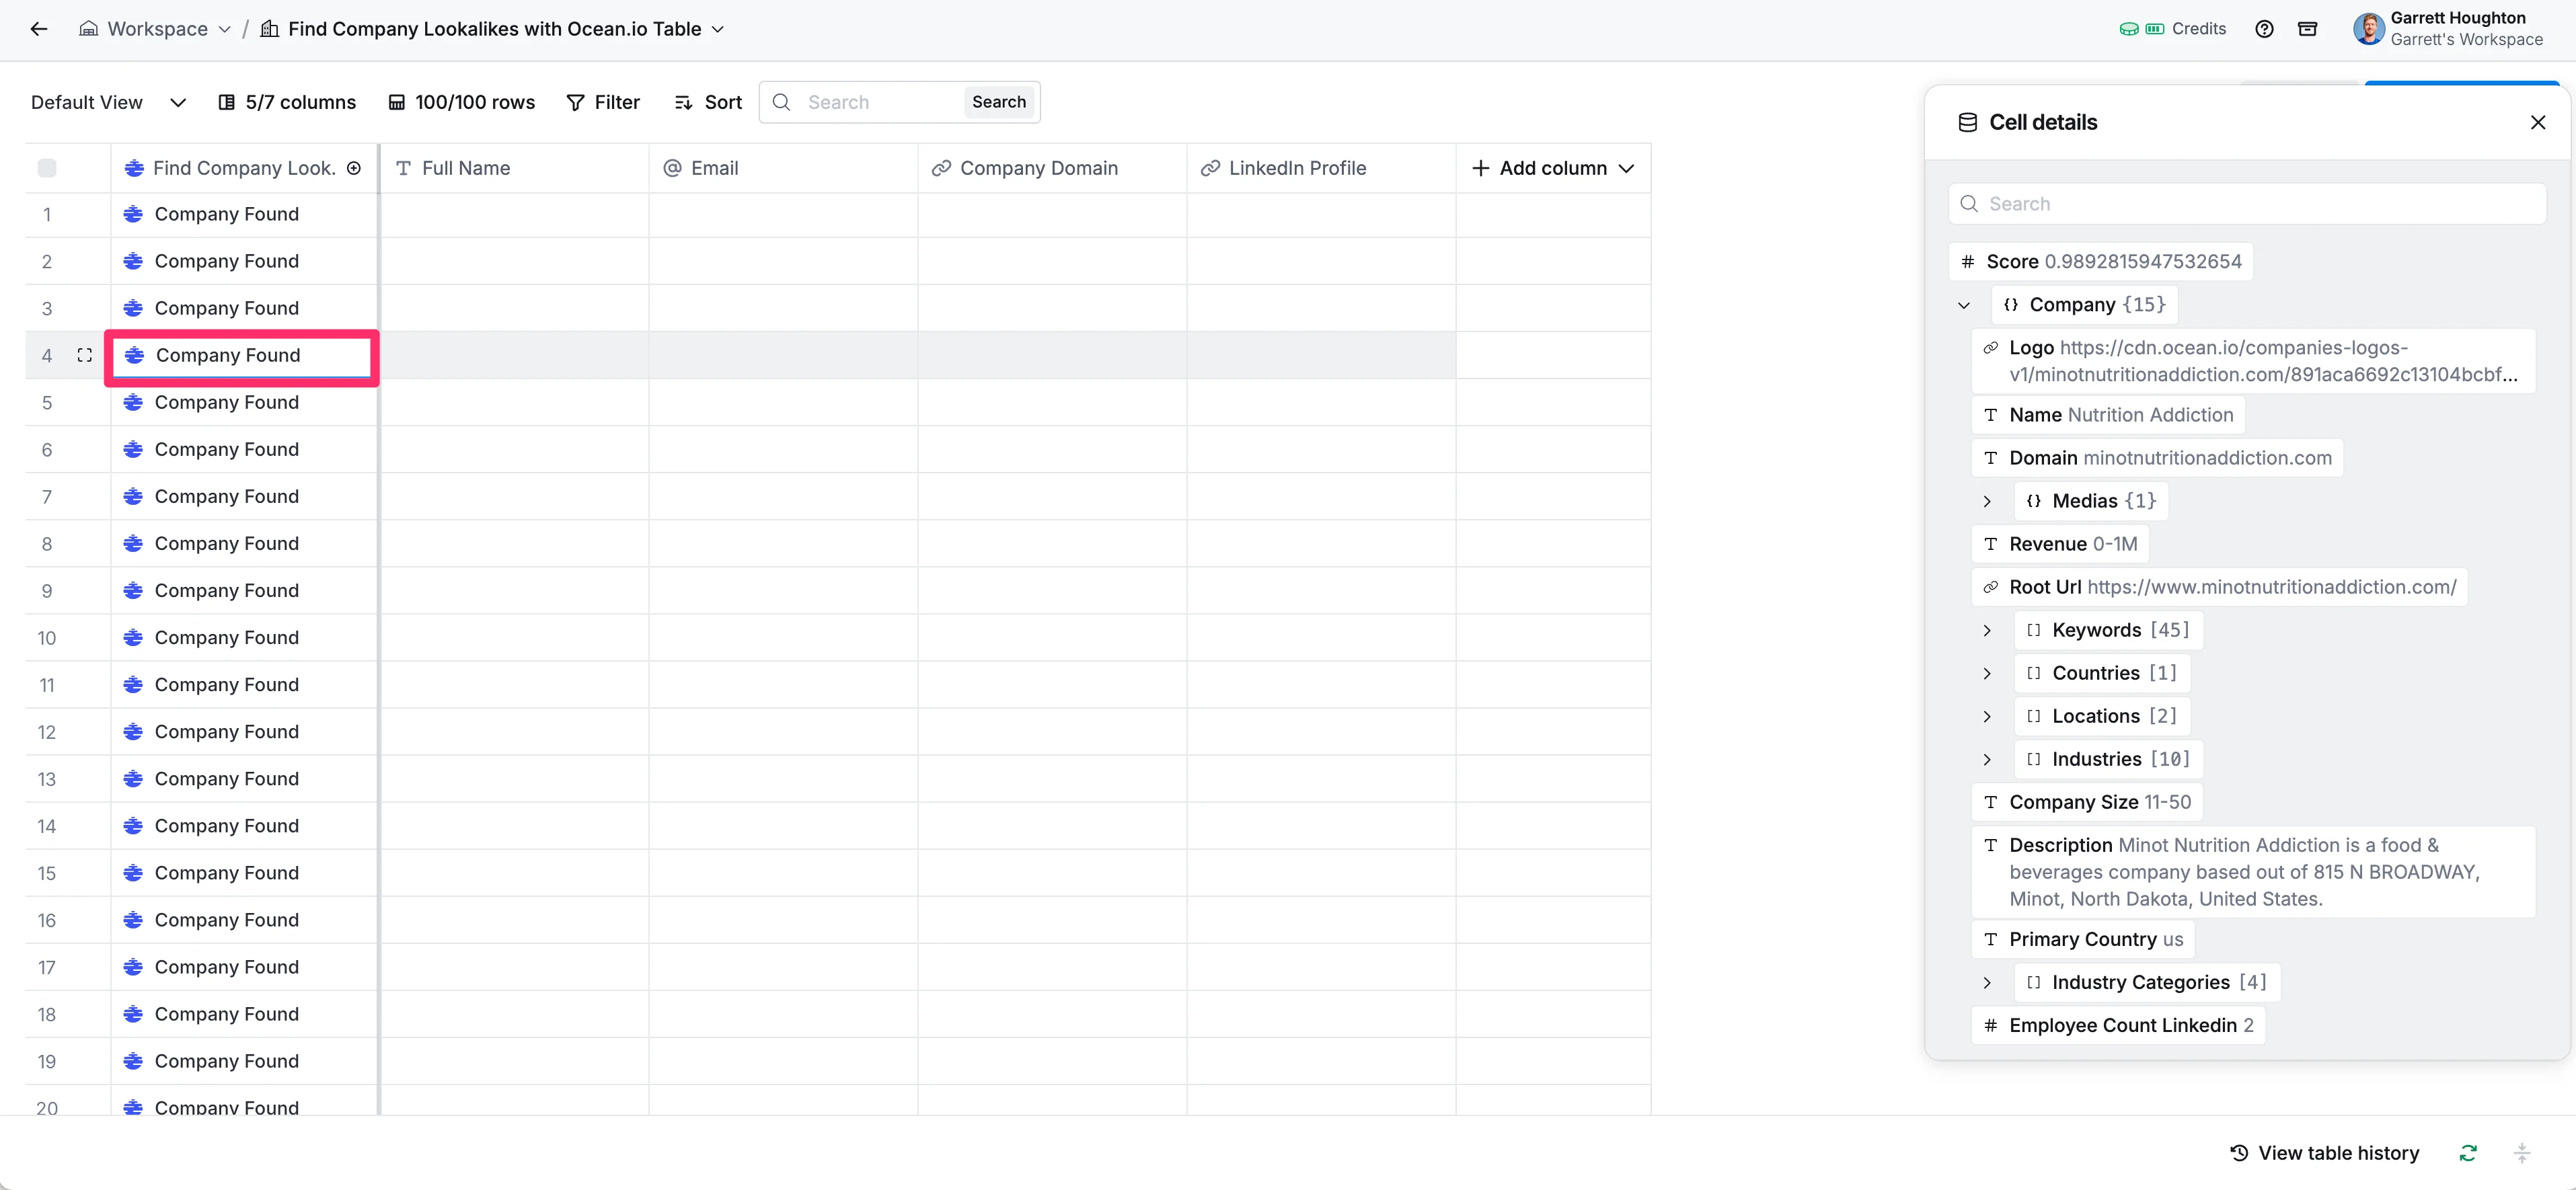
In the cell details window, click on the data points you want to add as columns (e.g., Company Domain, LinkedIn Profile, Company Email, Company Full Name, etc.).
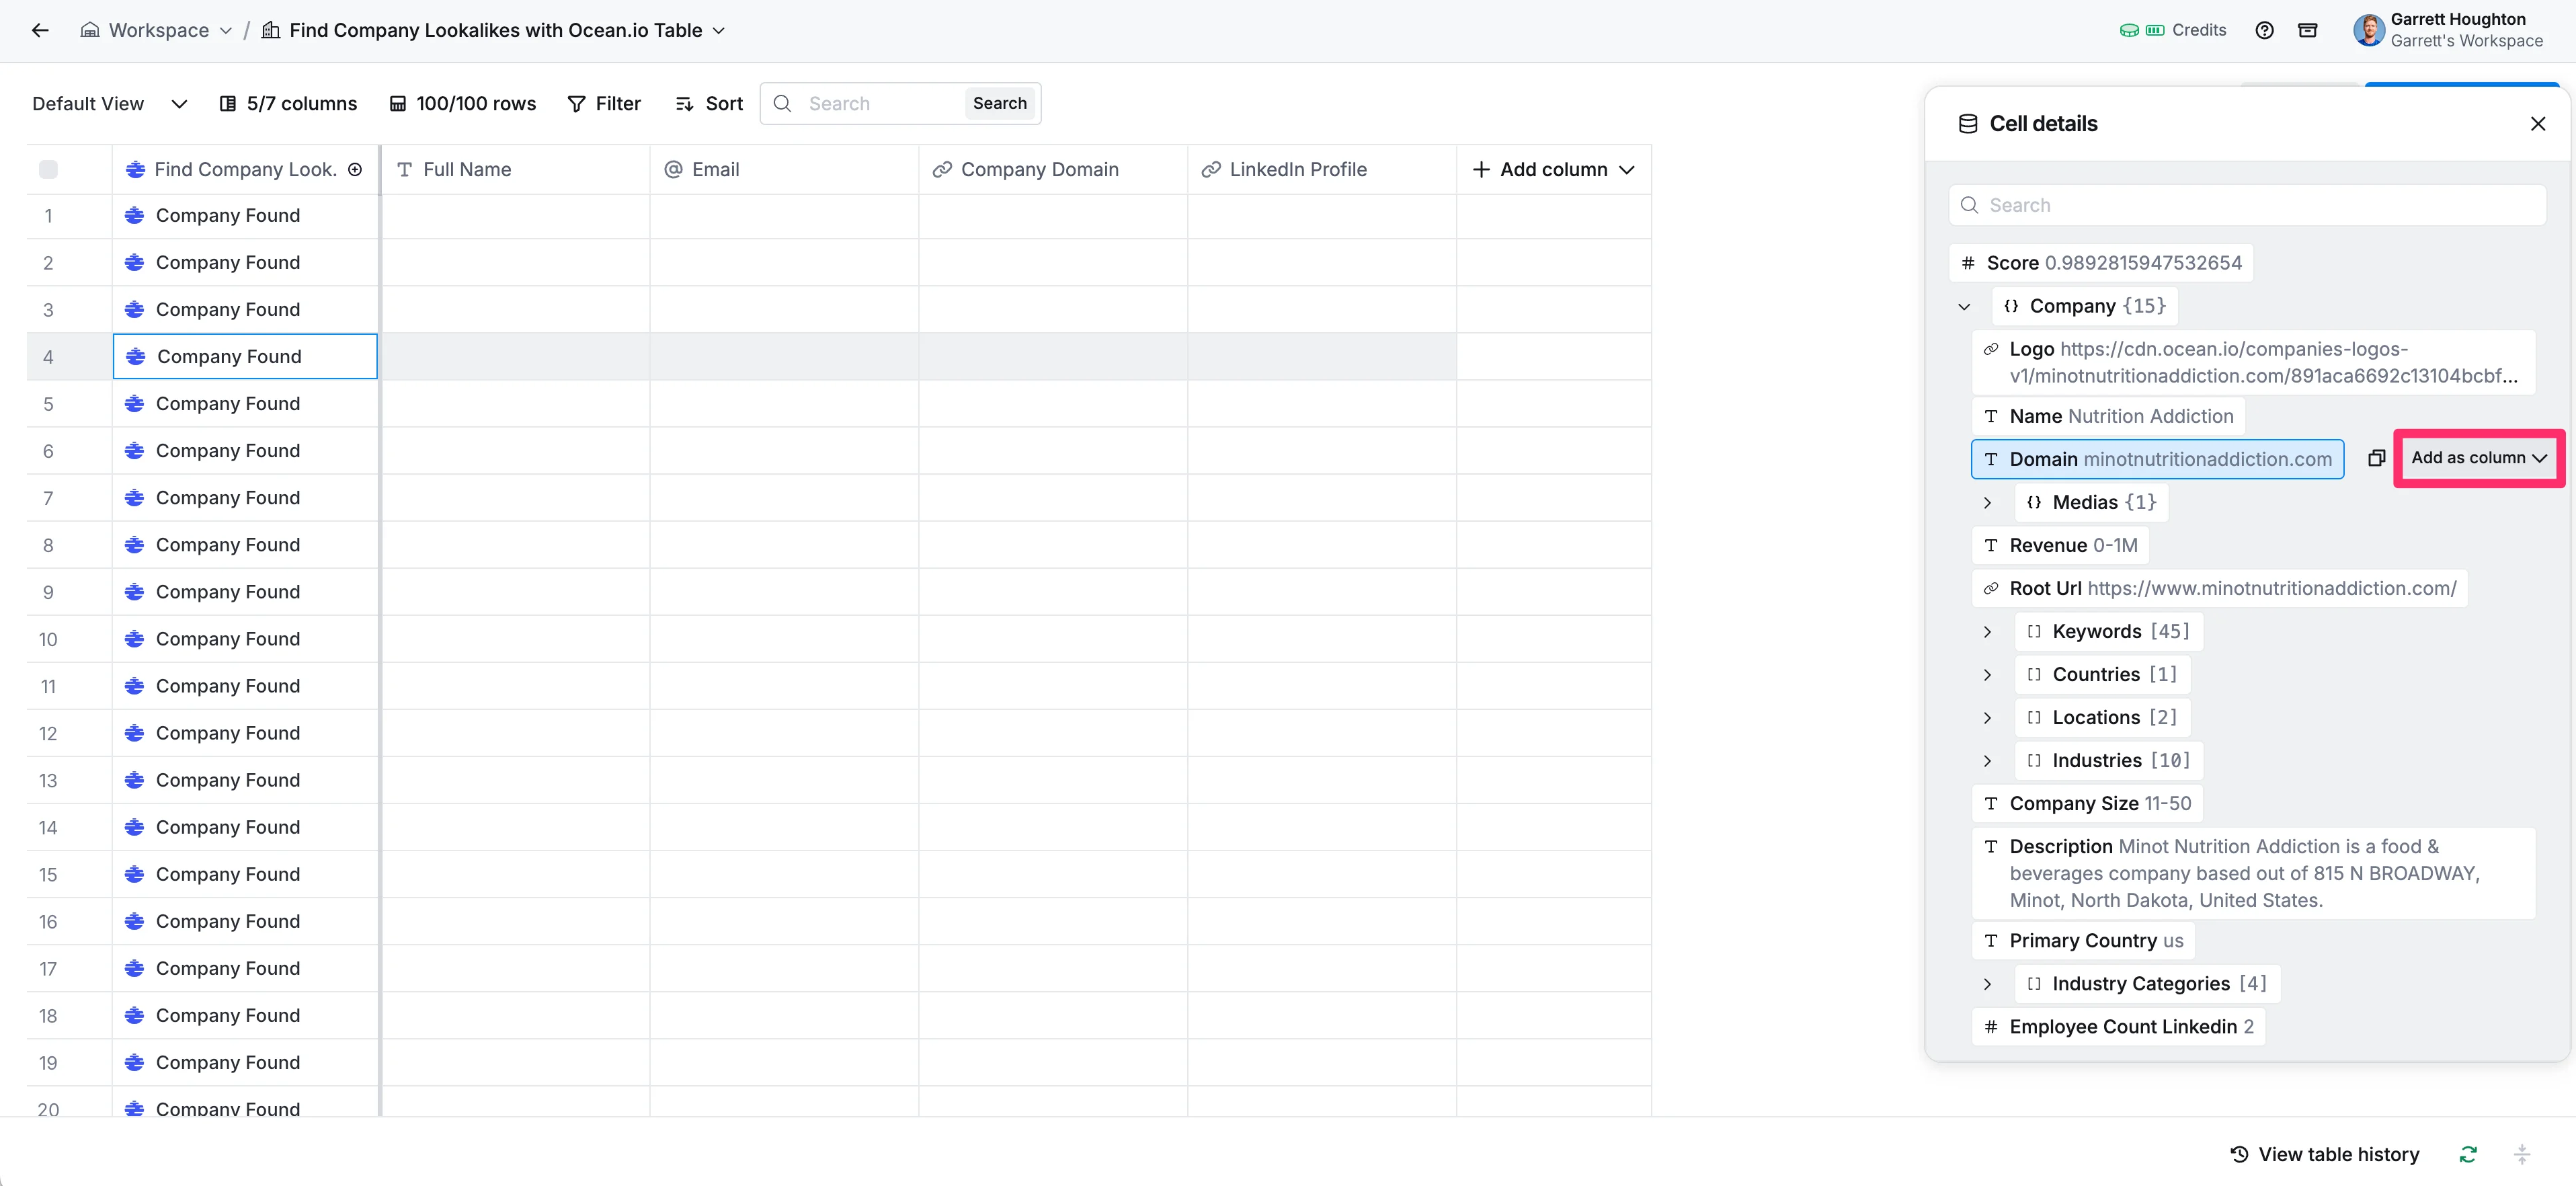
Map that data to an existing or new column via the dropdown selector.
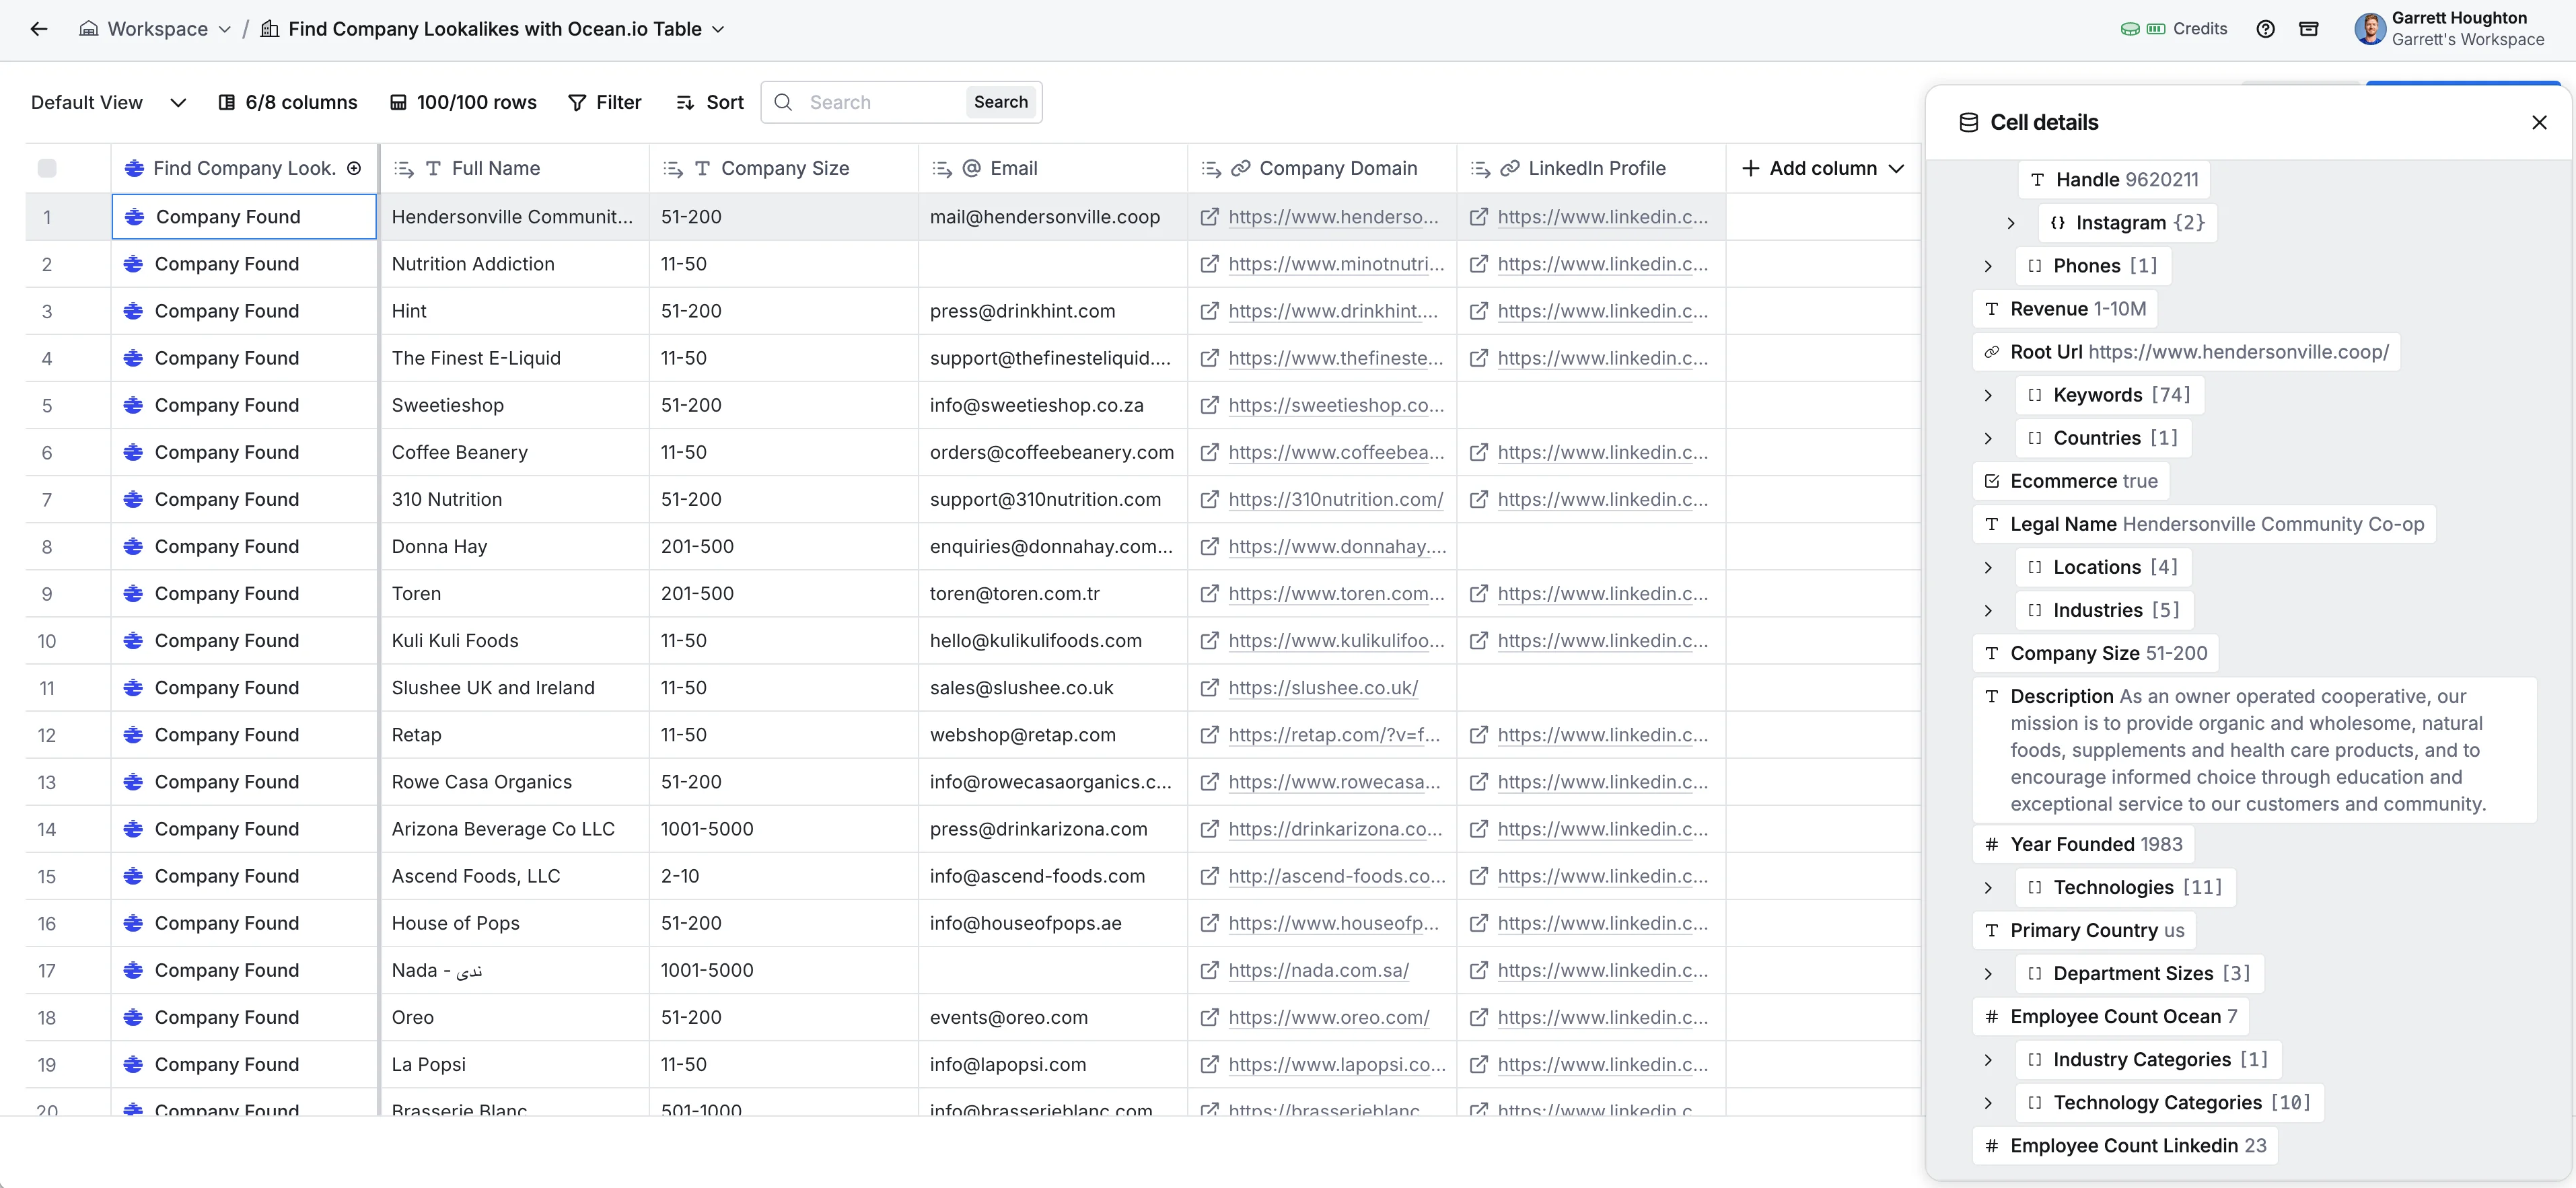
Repeat this process for all of the data you want to include on your table. Your table should look something like the one below when you’ve finished this process.
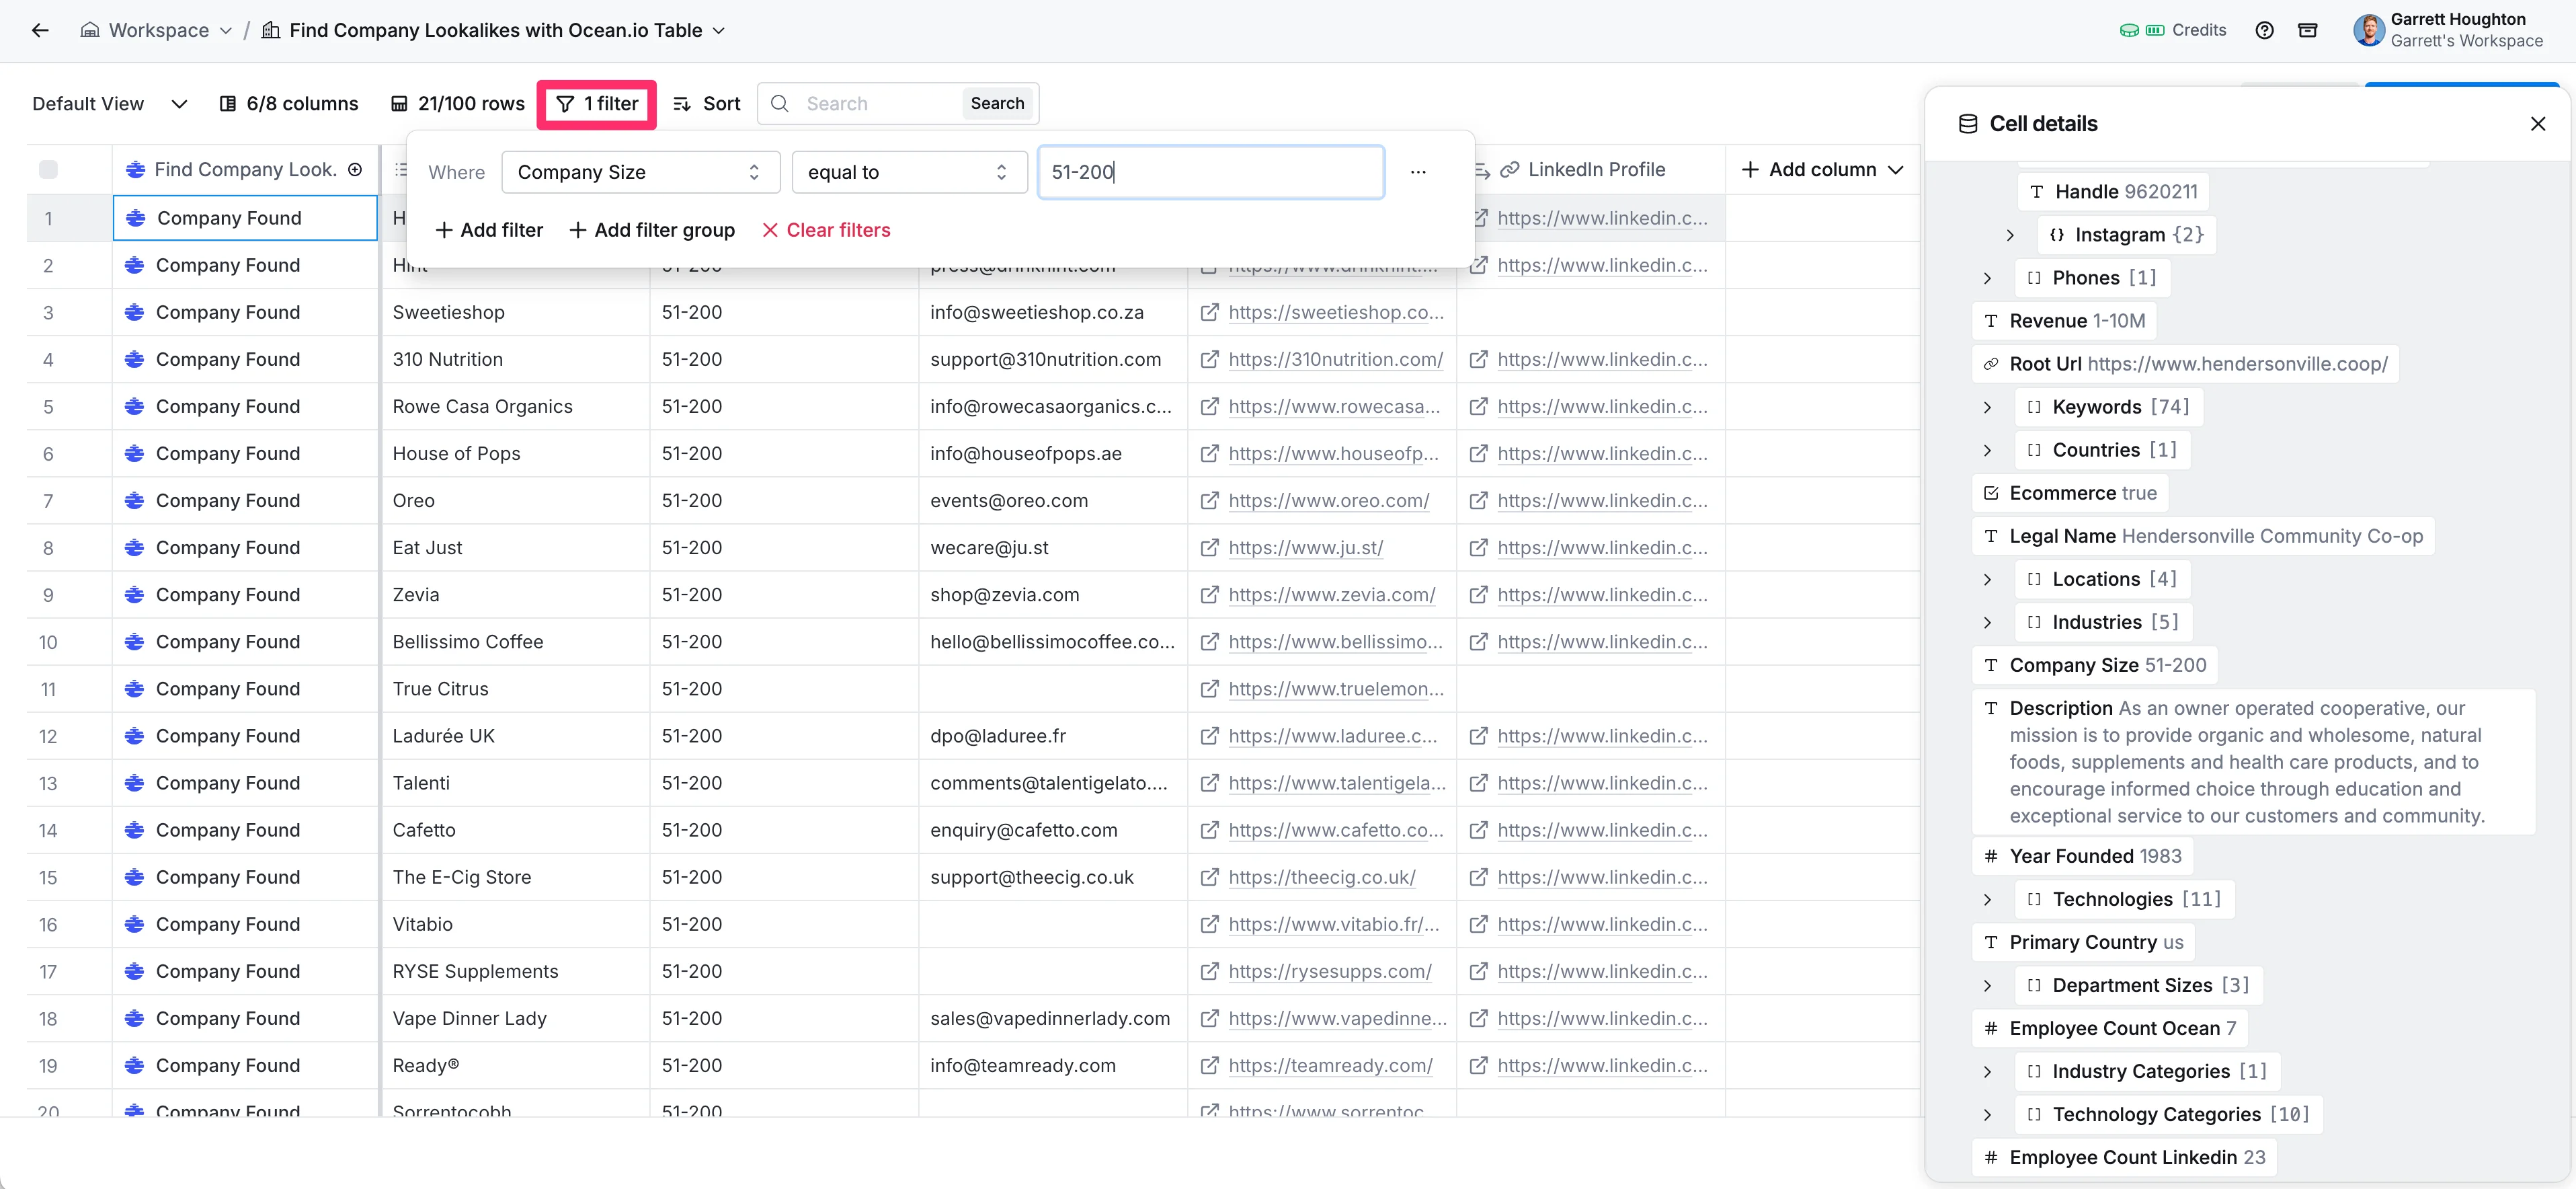
You can also add additional filters to your data. To do this, click on the filter button at the top of the page and set a filter or filter group. For our data, we’re going to add a filter for Company Size.
Step 3: Find targeted people at each company
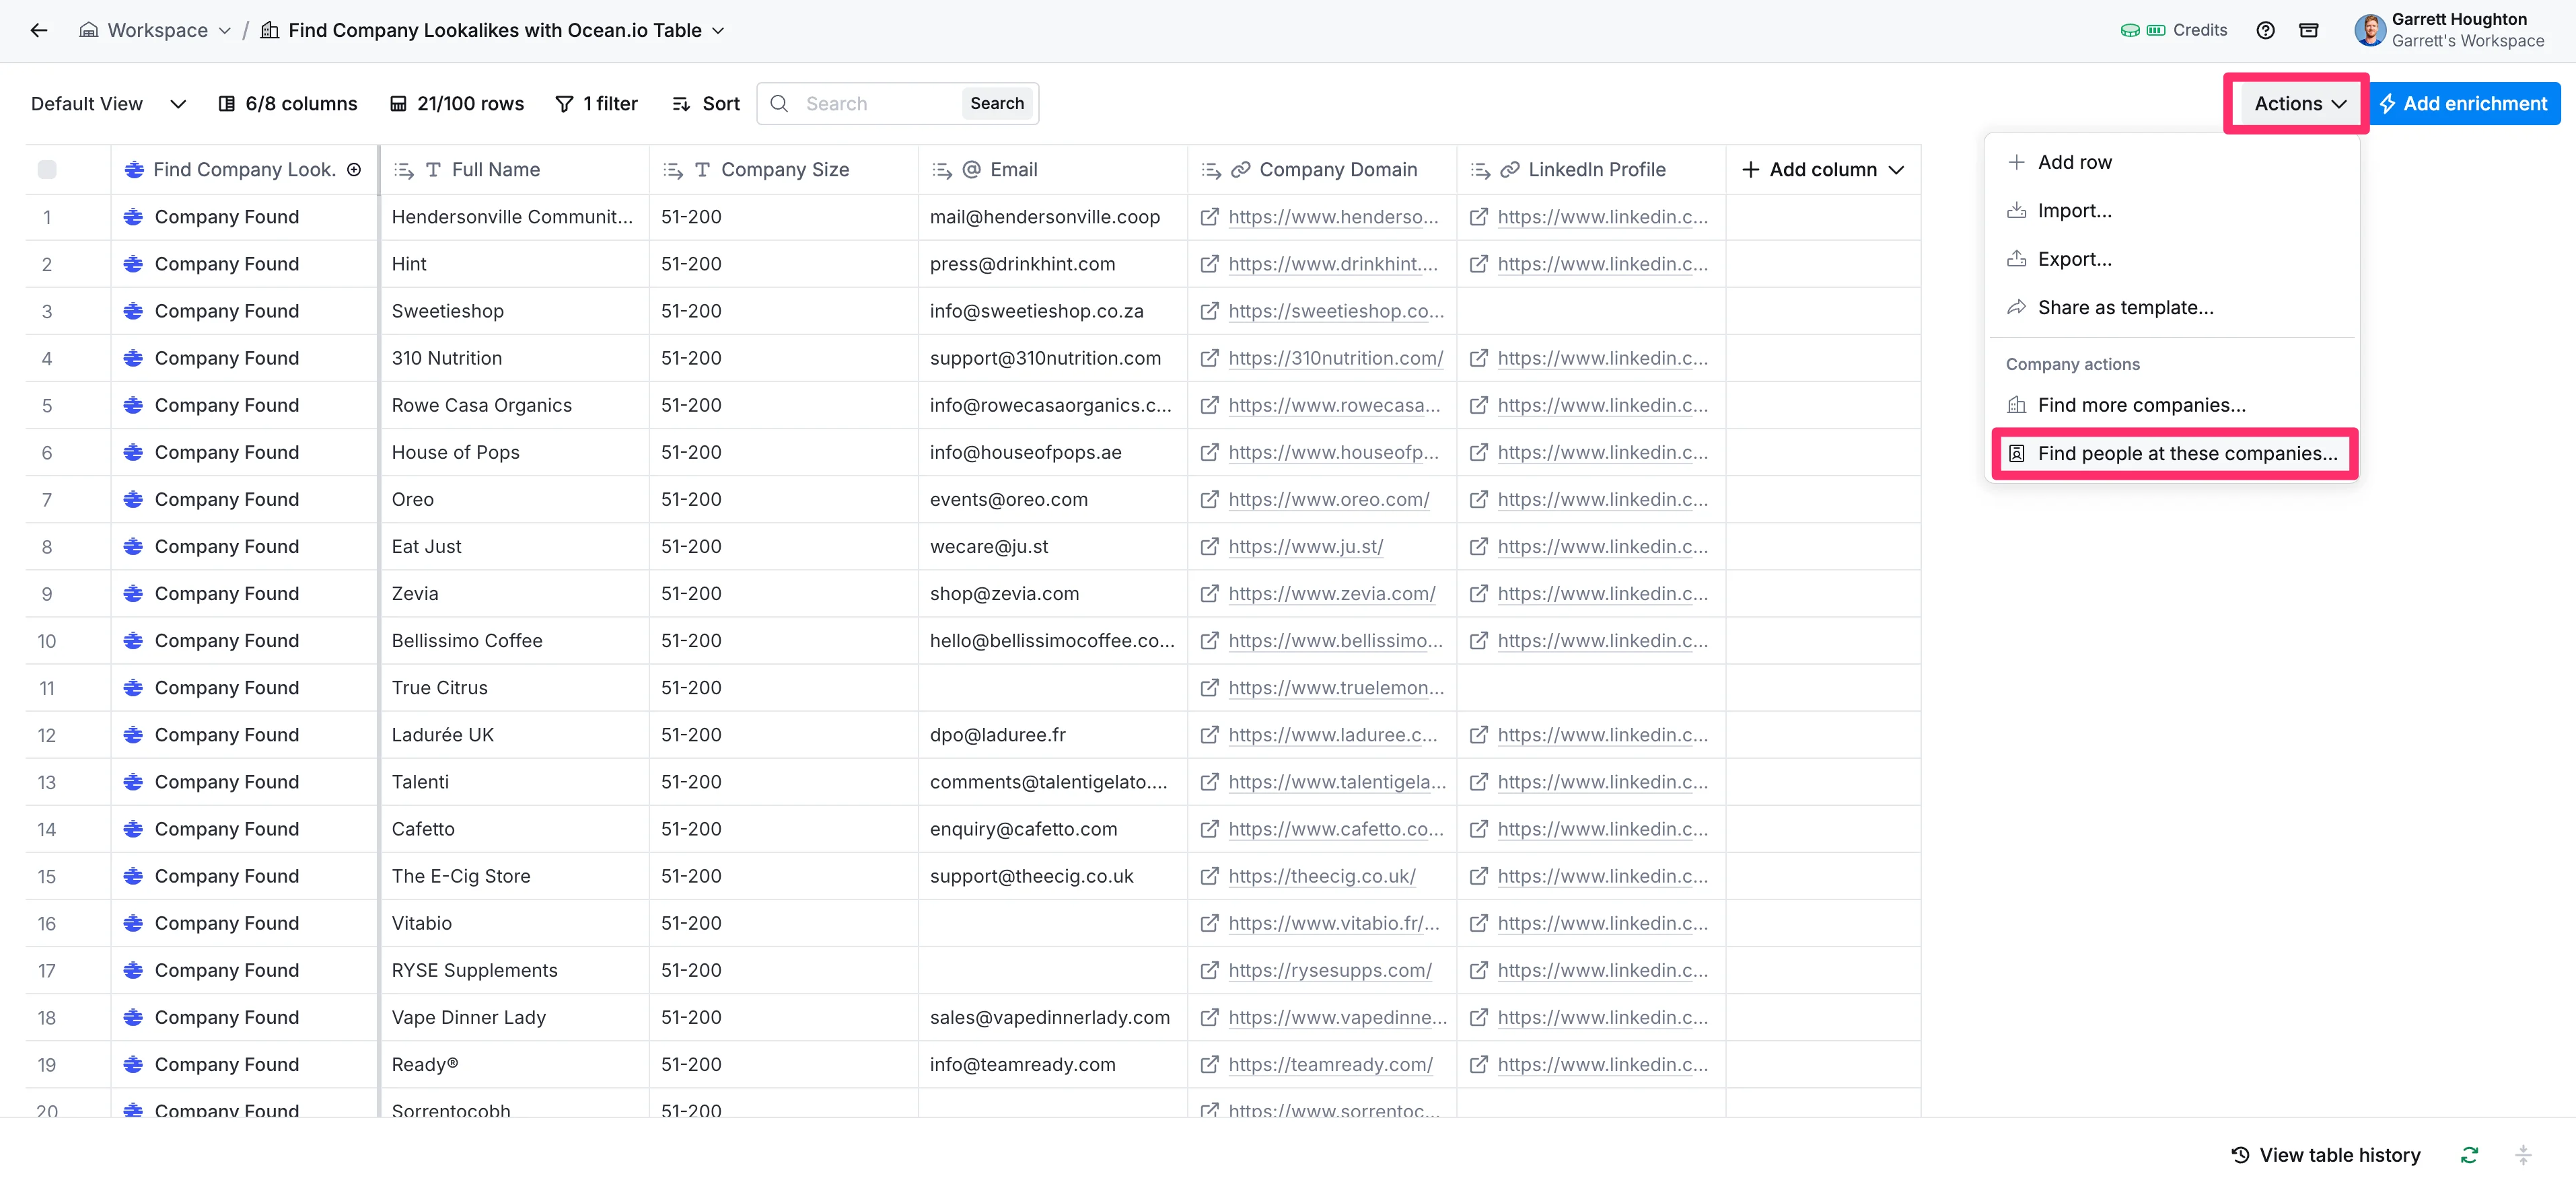
With your filtered company list ready, it's time to find the right contacts. To do this, click the "Actions" button in the top right corner and select the "Find people at these companies…" option from the dropdown menu.
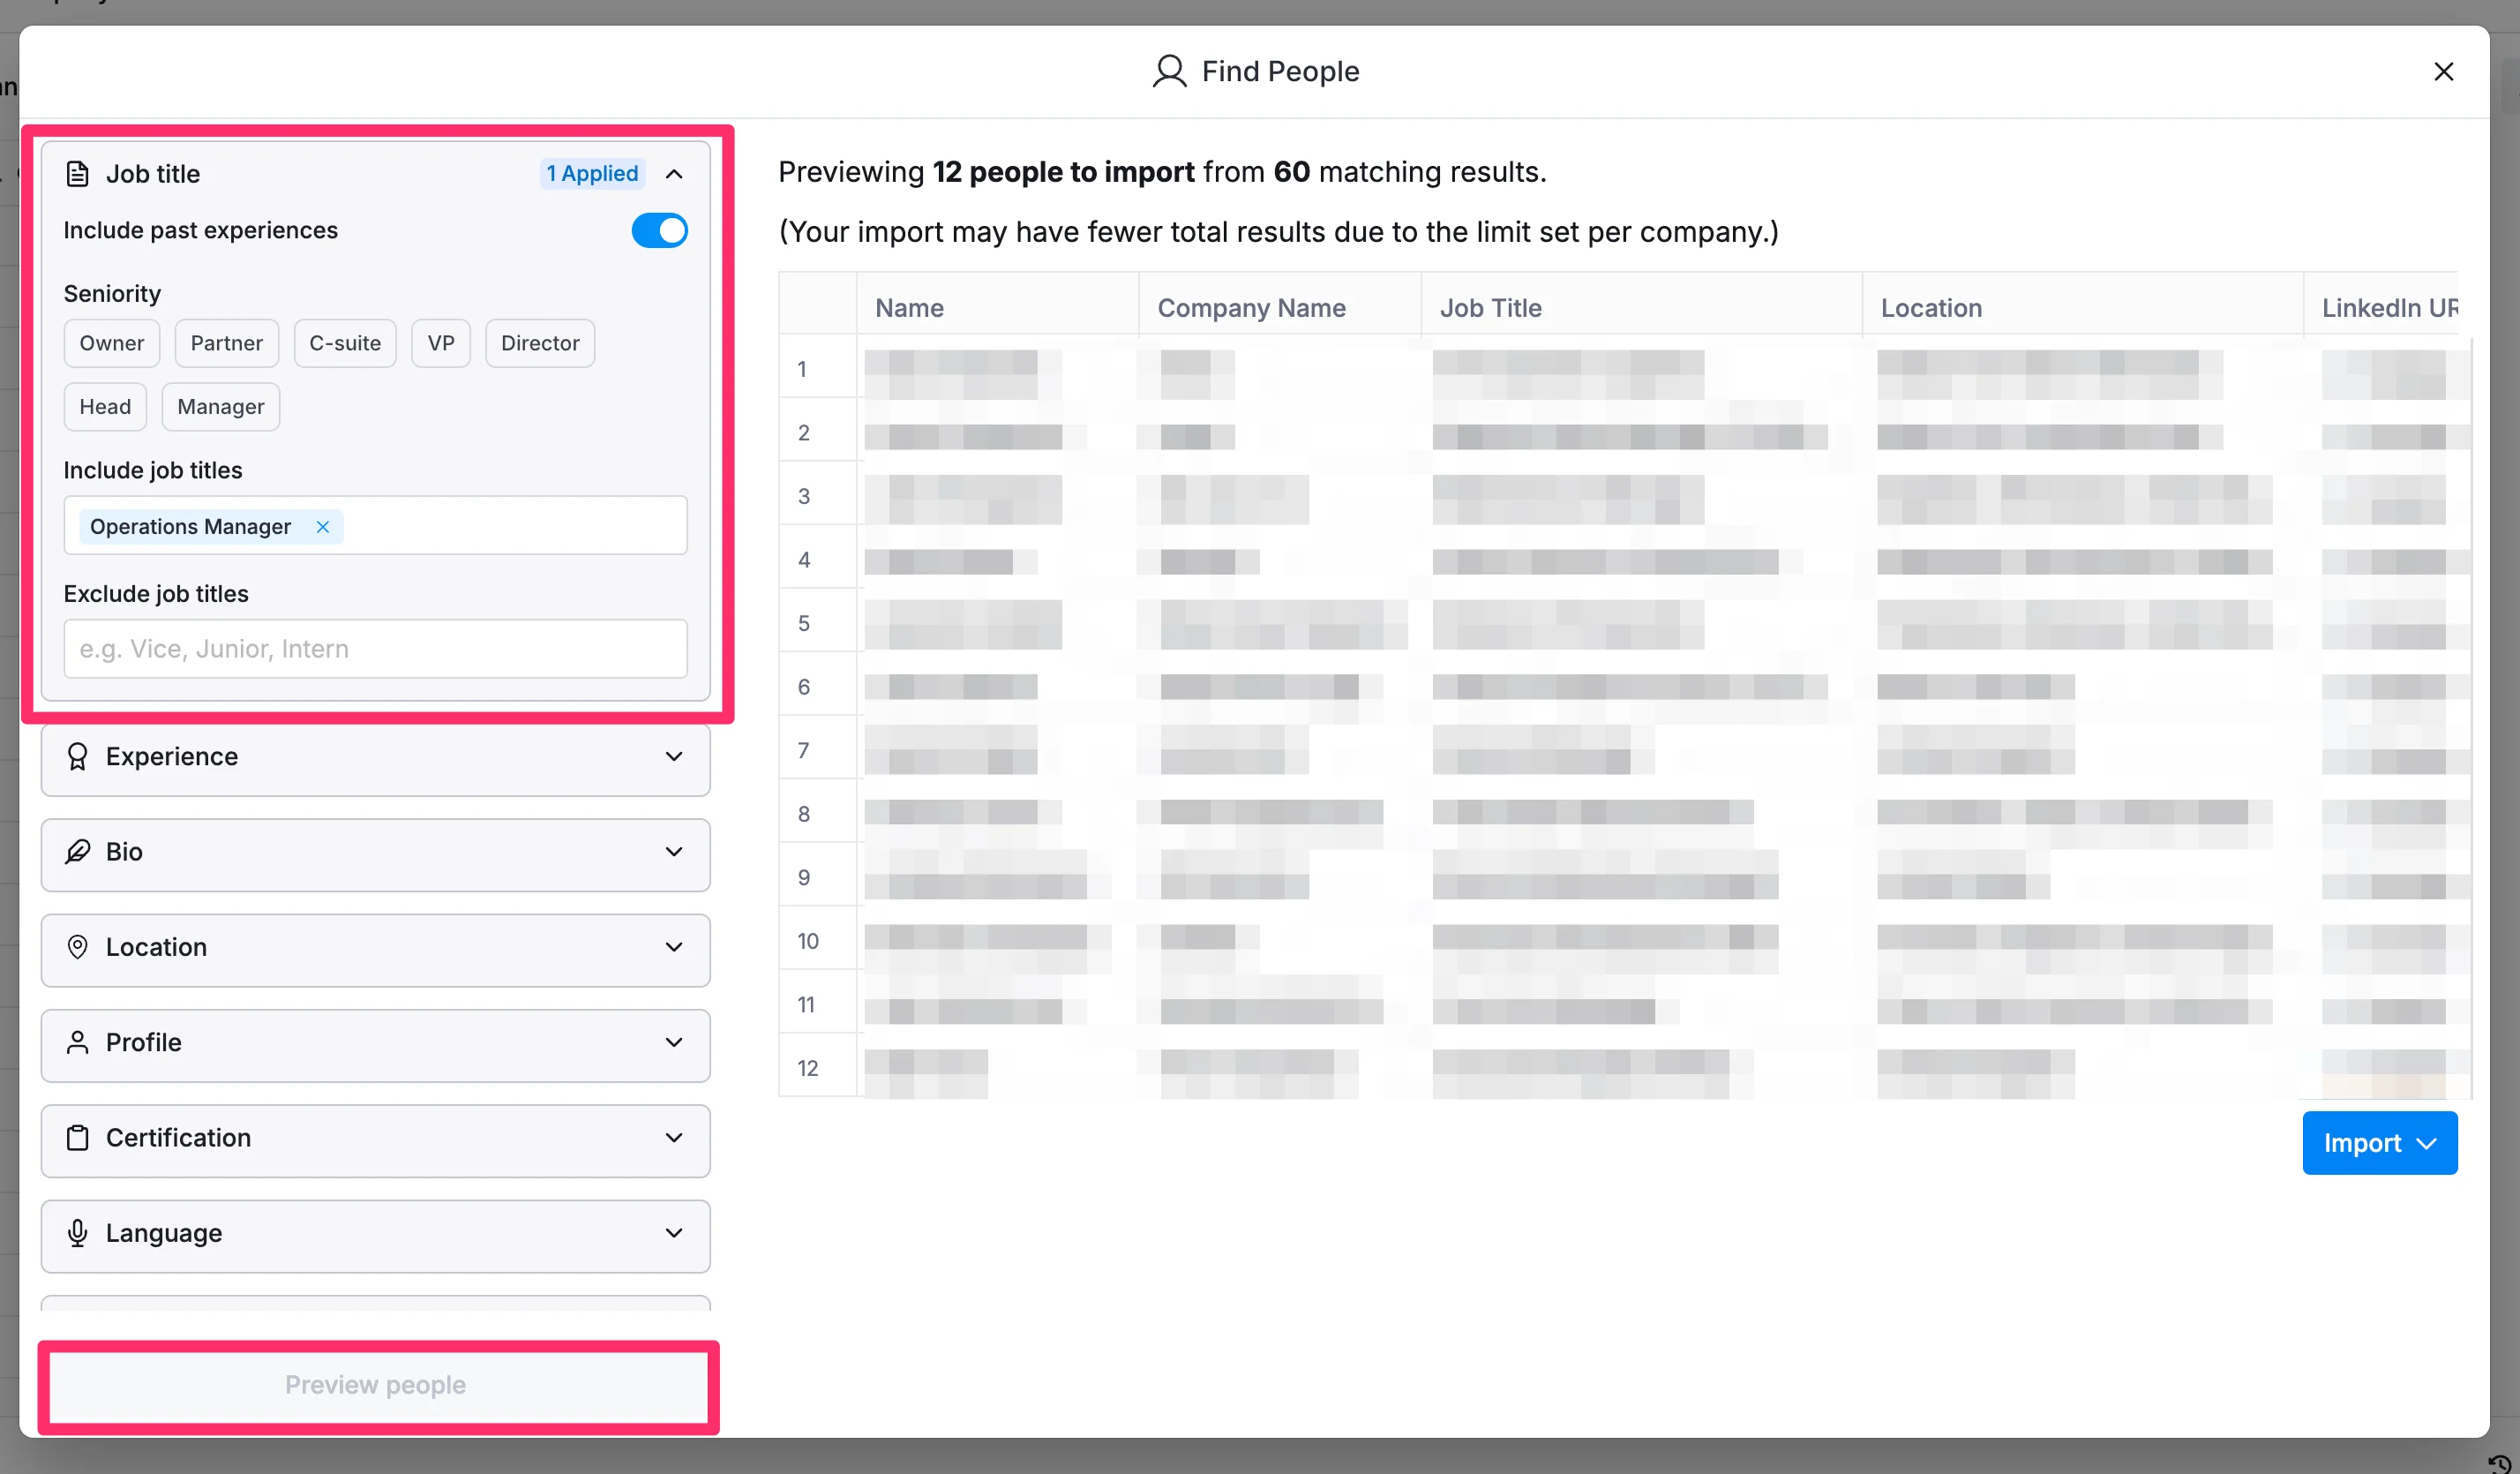
From there, you can set up filter criteria for the types of people you want to target. We’re going to set the Job Title to “Operations Manager” to find people who have this role at our target companies. Click the “Preview people” button to see a short list of contacts for review.
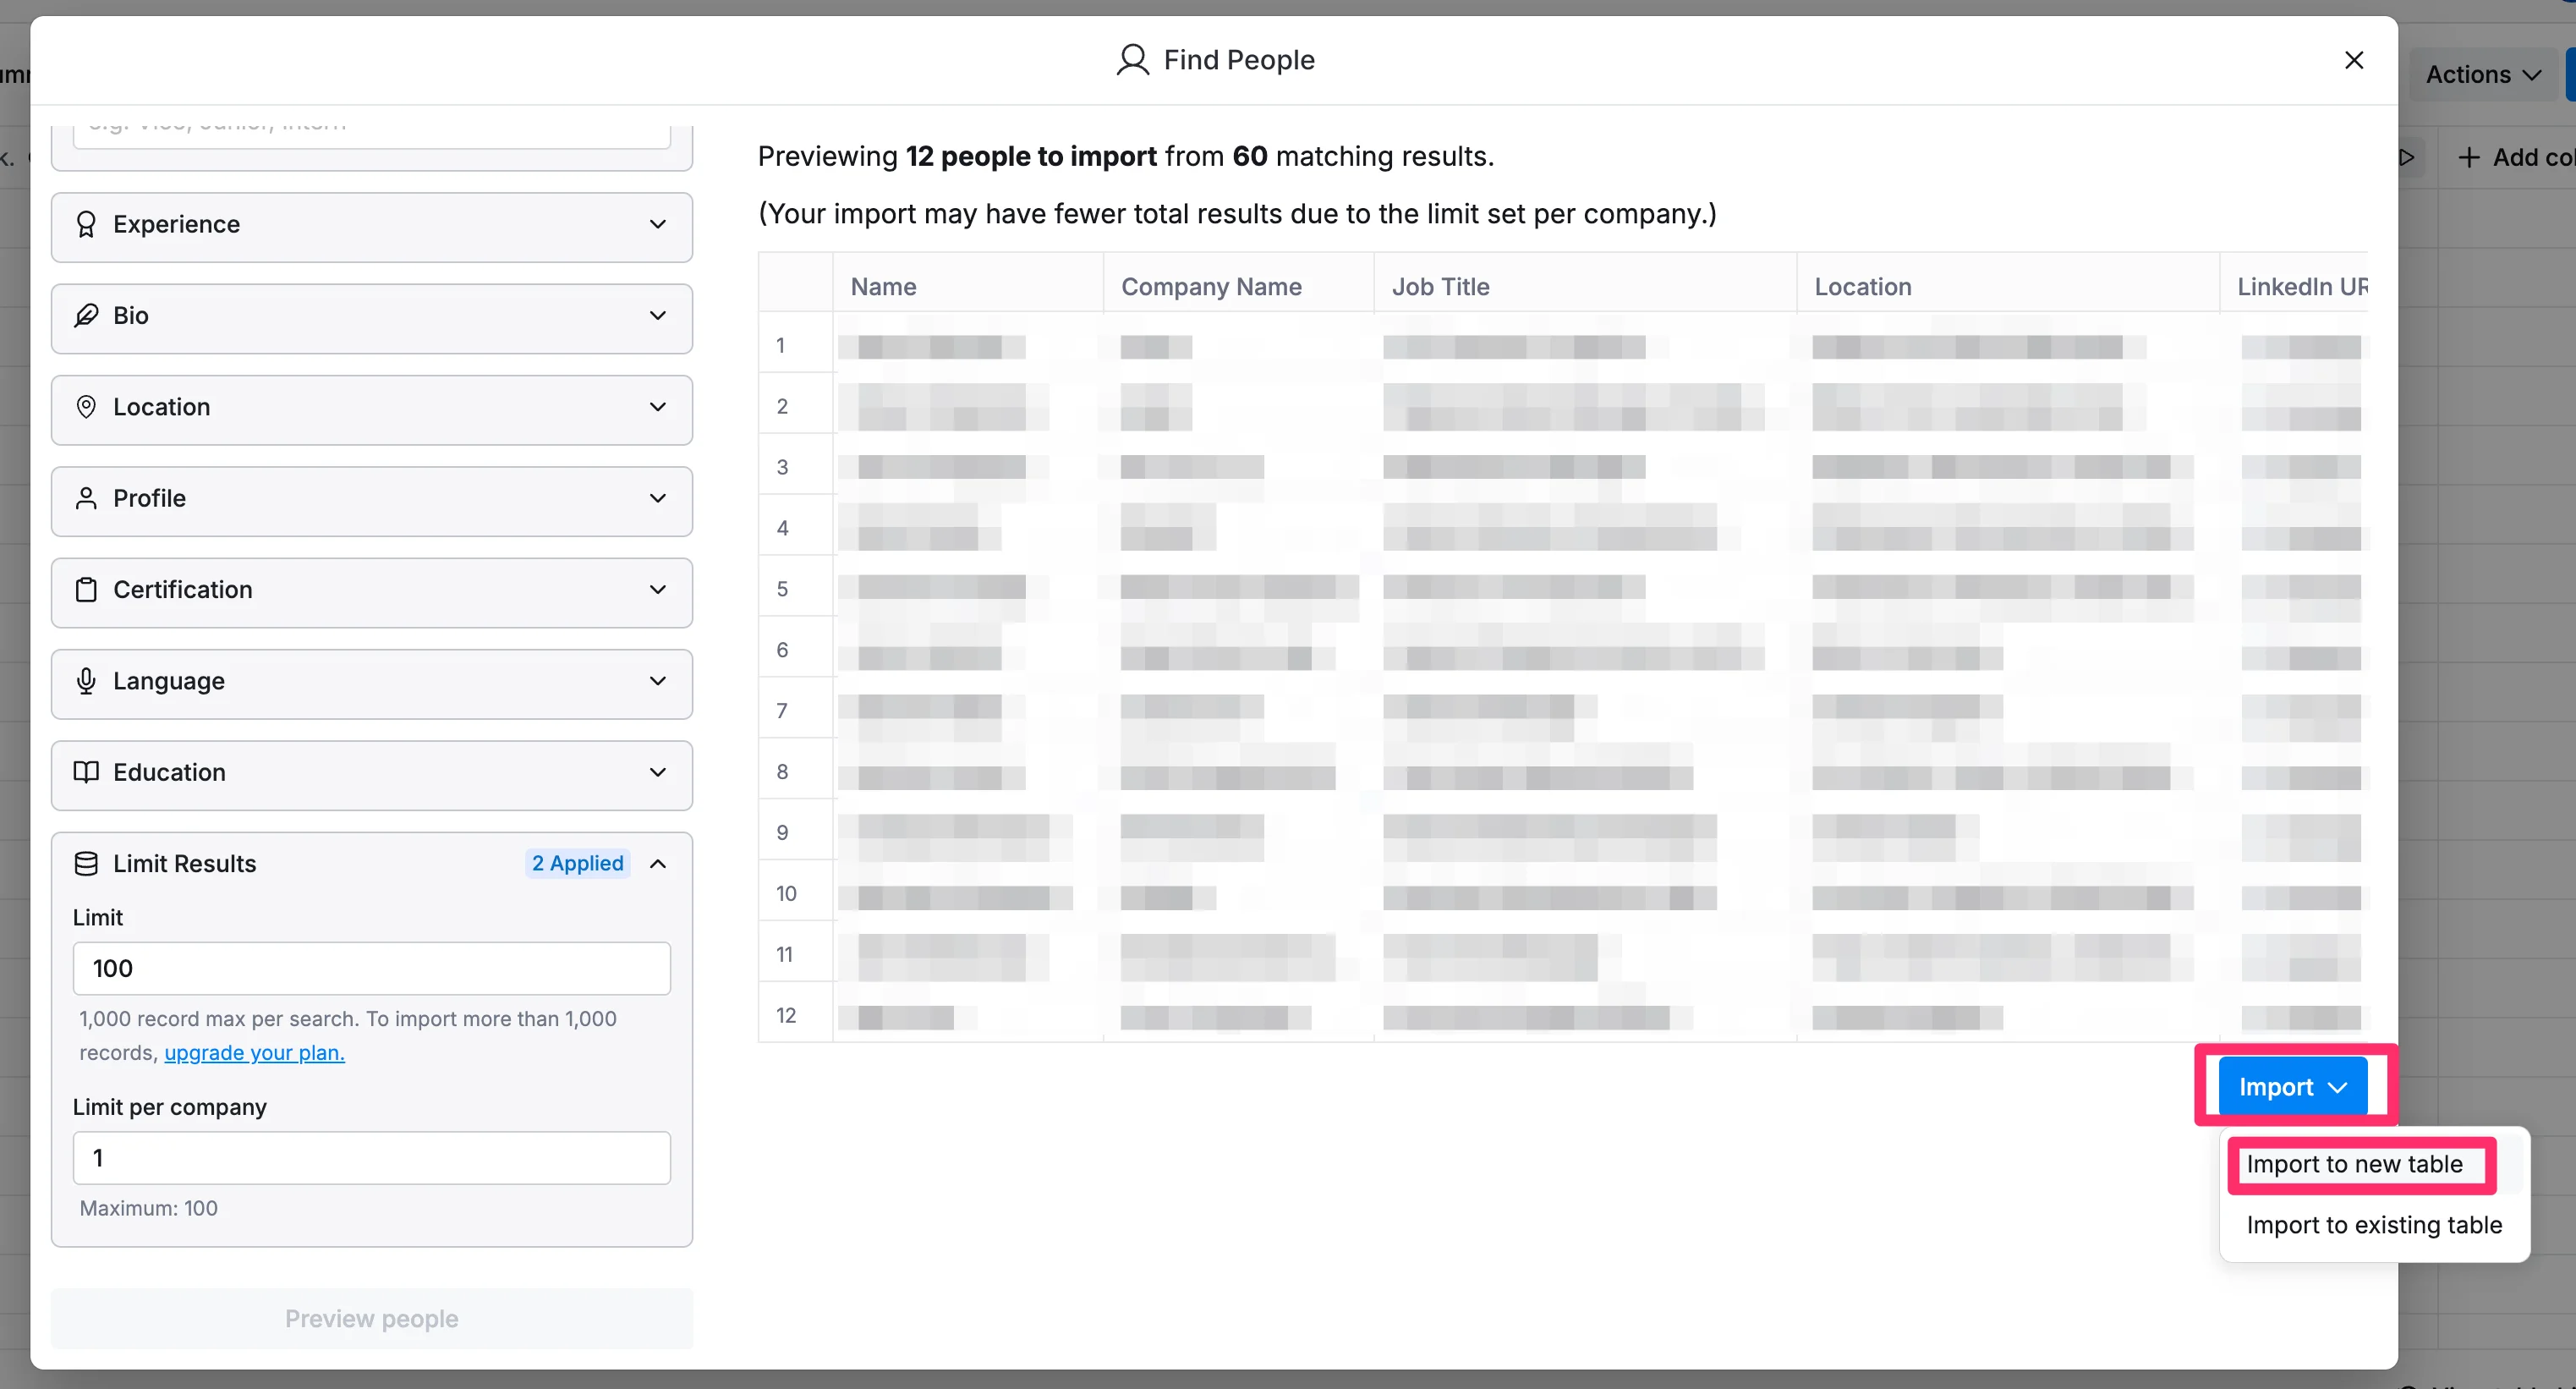
If the list looks good, click the “Import” button and select the “Import to new table” option.
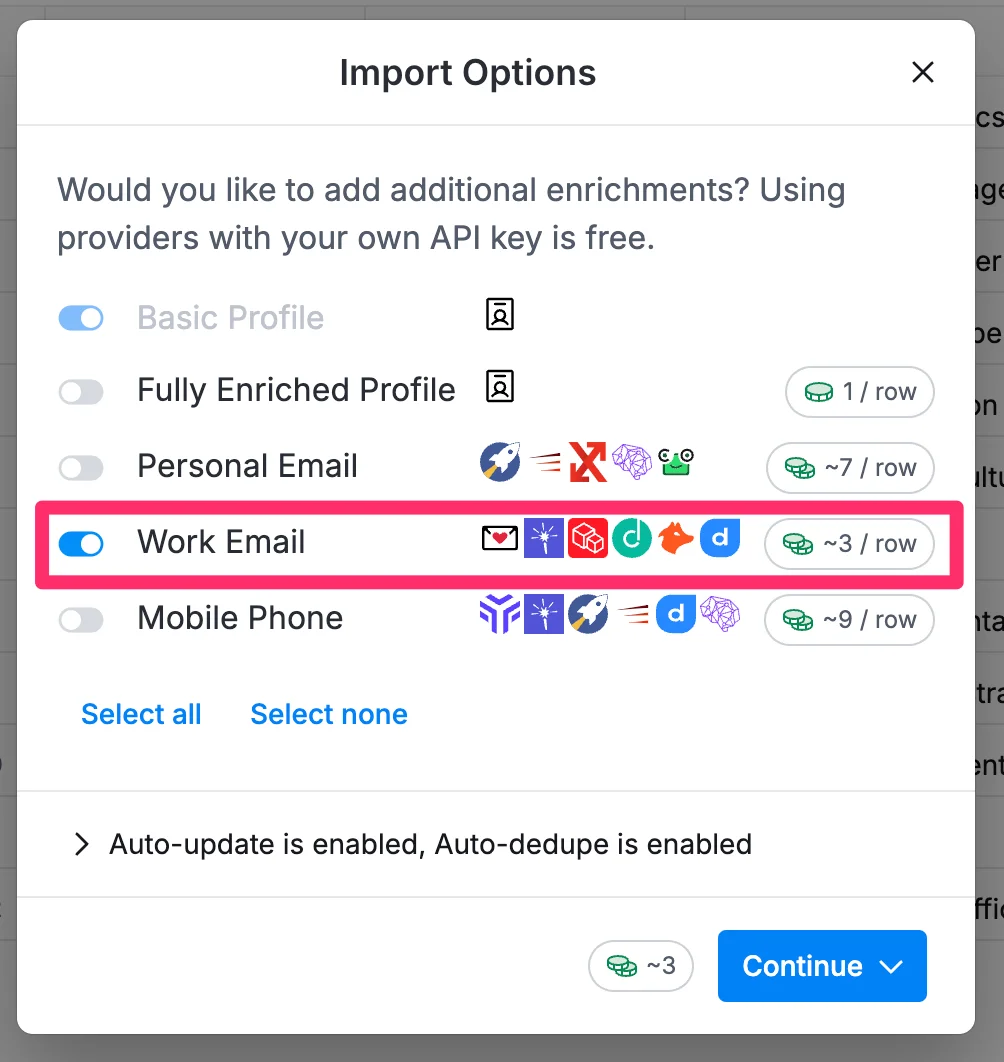
In the resulting import pop-up, you can enrich the contact data with additional information. Because we want to perform outreach from Clay, we’ll toggle on the "Work email" option to retrieve email addresses. Click "Continue" to create a new table with the enriched contact information.
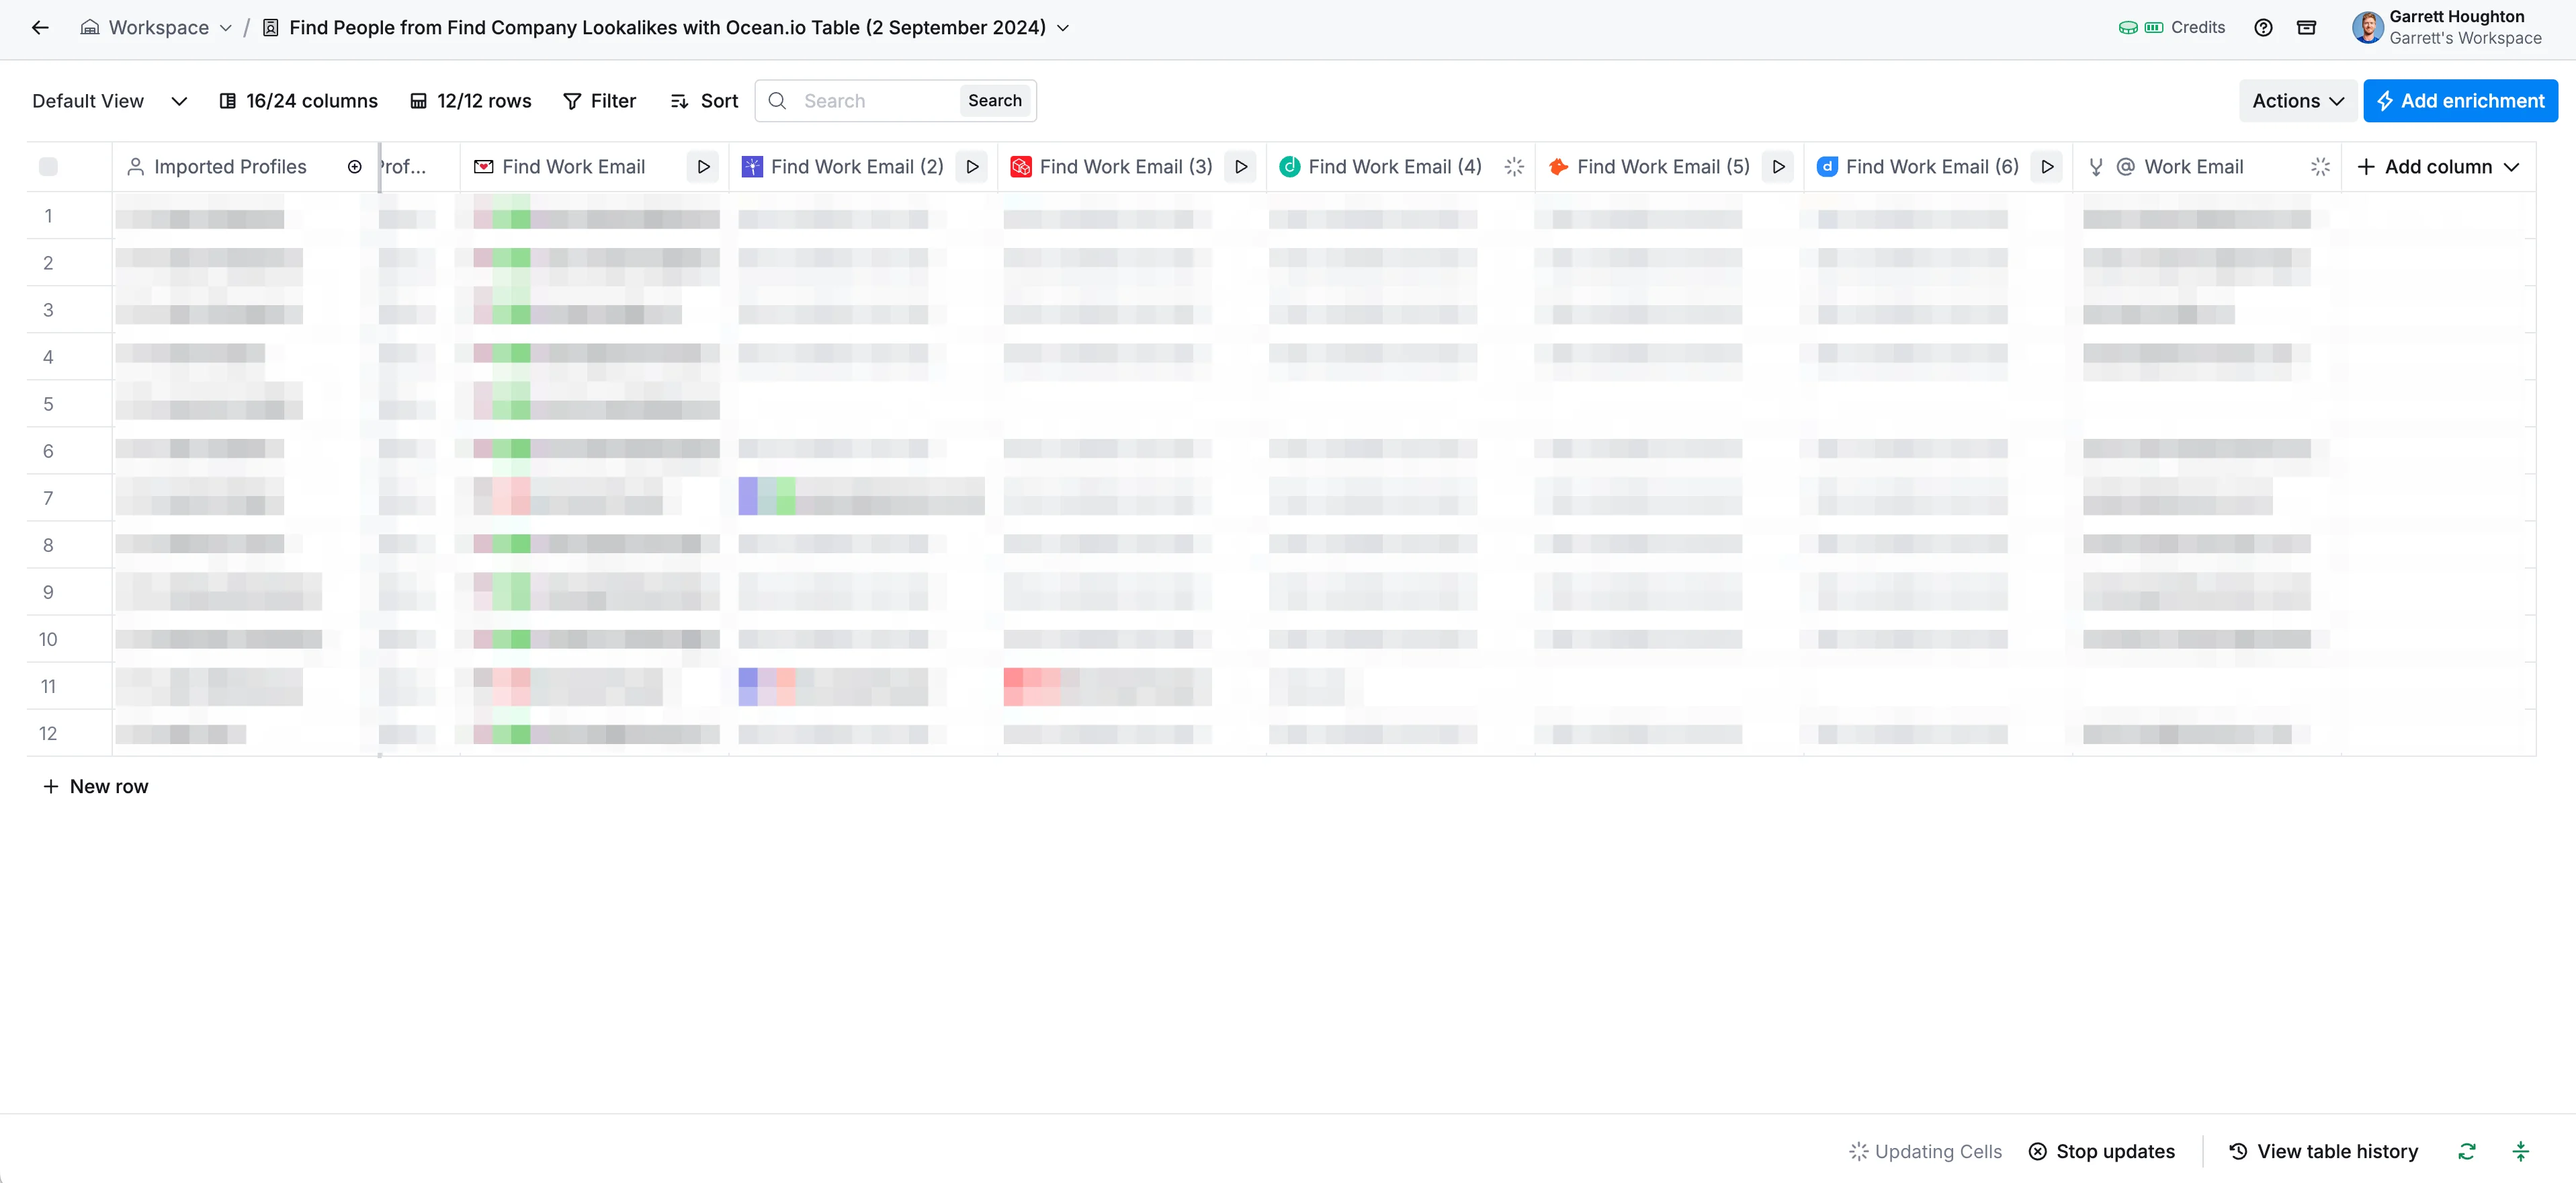
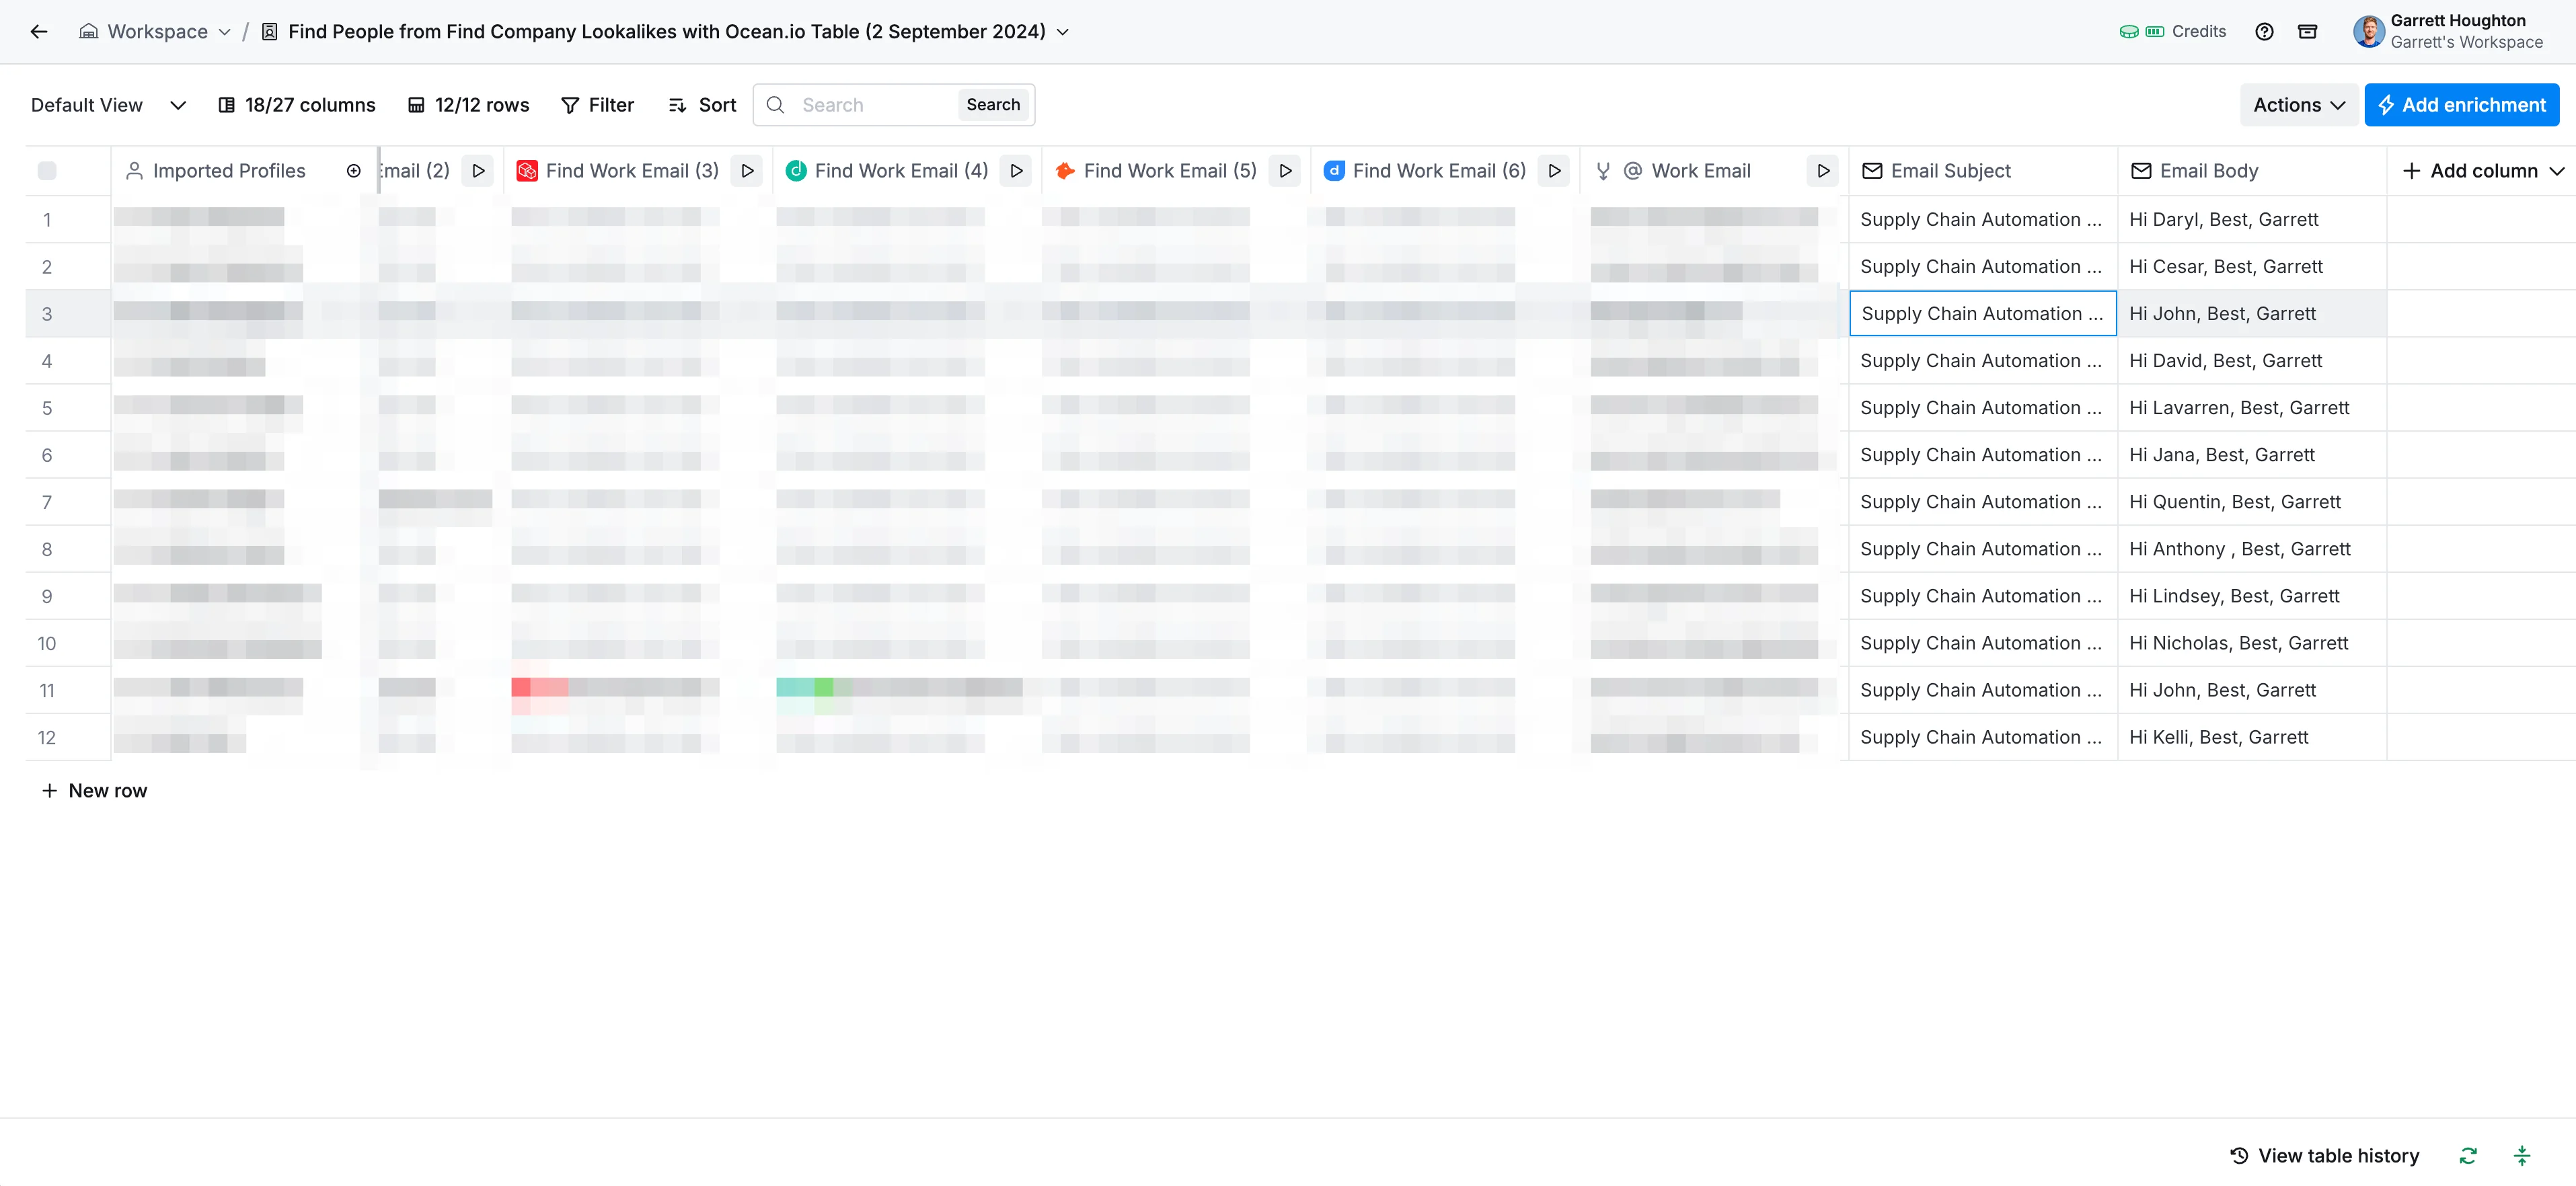
Your resulting contacts table should now have multiple “Find Work Email” columns. These are the third-party sources Clay is calling to find this contact information.
Step 4: Auto-draft emails with AI and send them in bulk
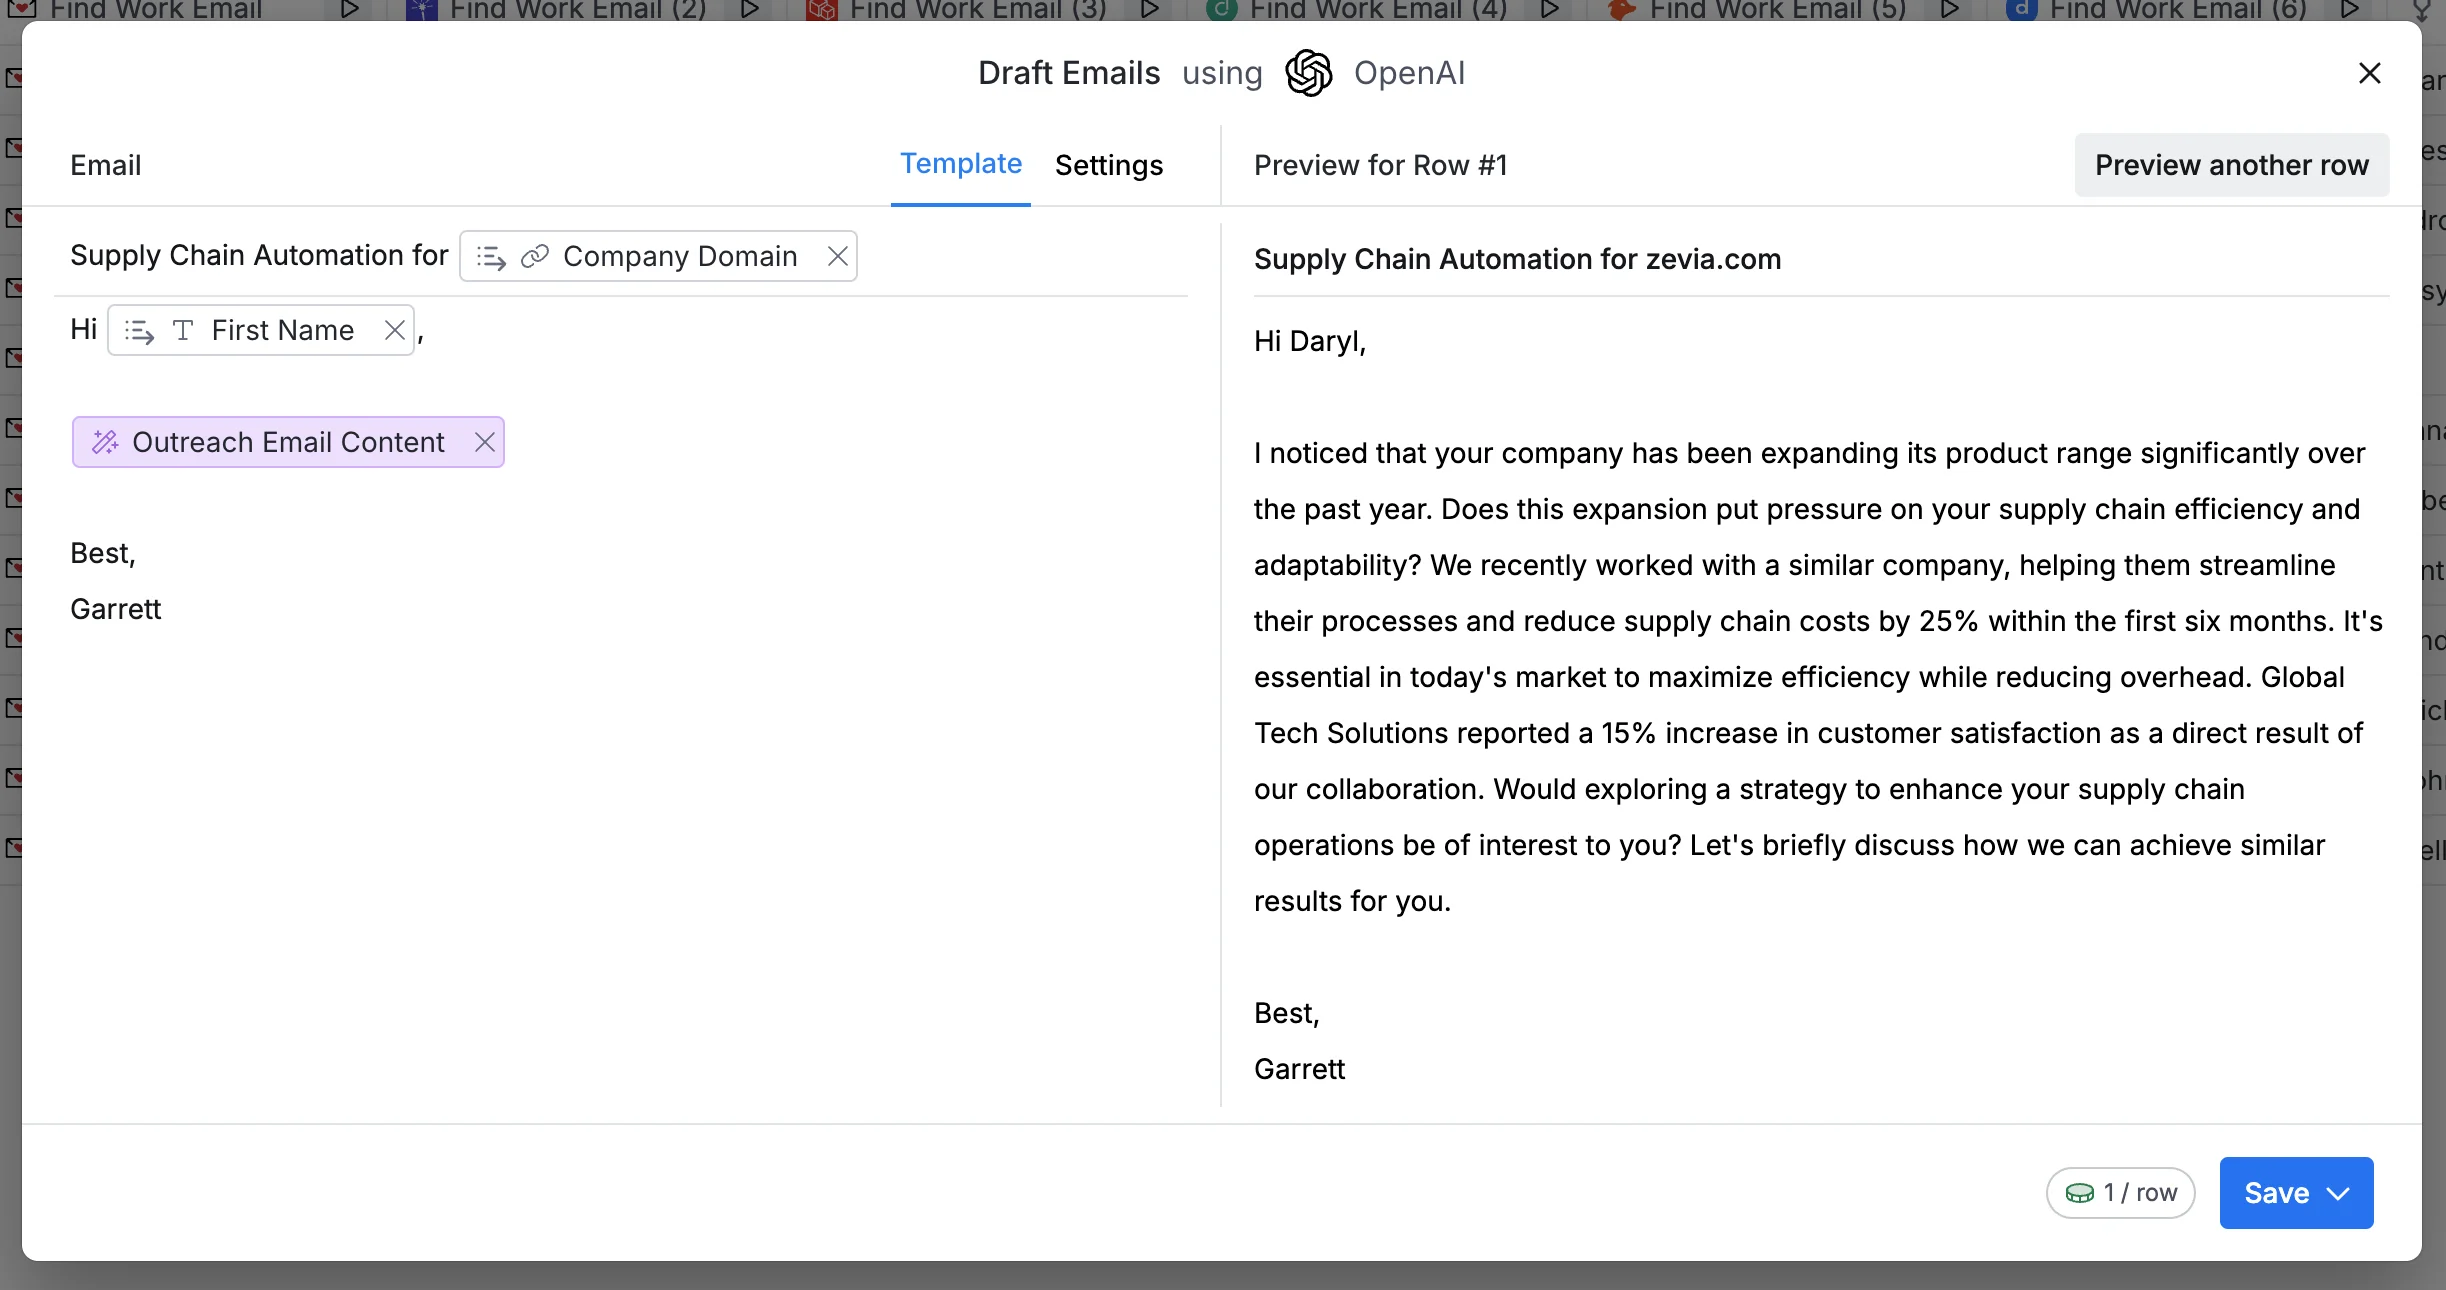
Now that you have your contacts and their emails, it's time to draft your outreach messages. To do this, click the “Actions” button in the top right corner of the screen and then click the “Draft email…” option in the dropdown menu.

Customize your email subject, using variables from your Contact and Company table data.

Then, in the email body, use the AI-generated text option by typing a backslash (/) and selecting the "AI-Generated Text” option.
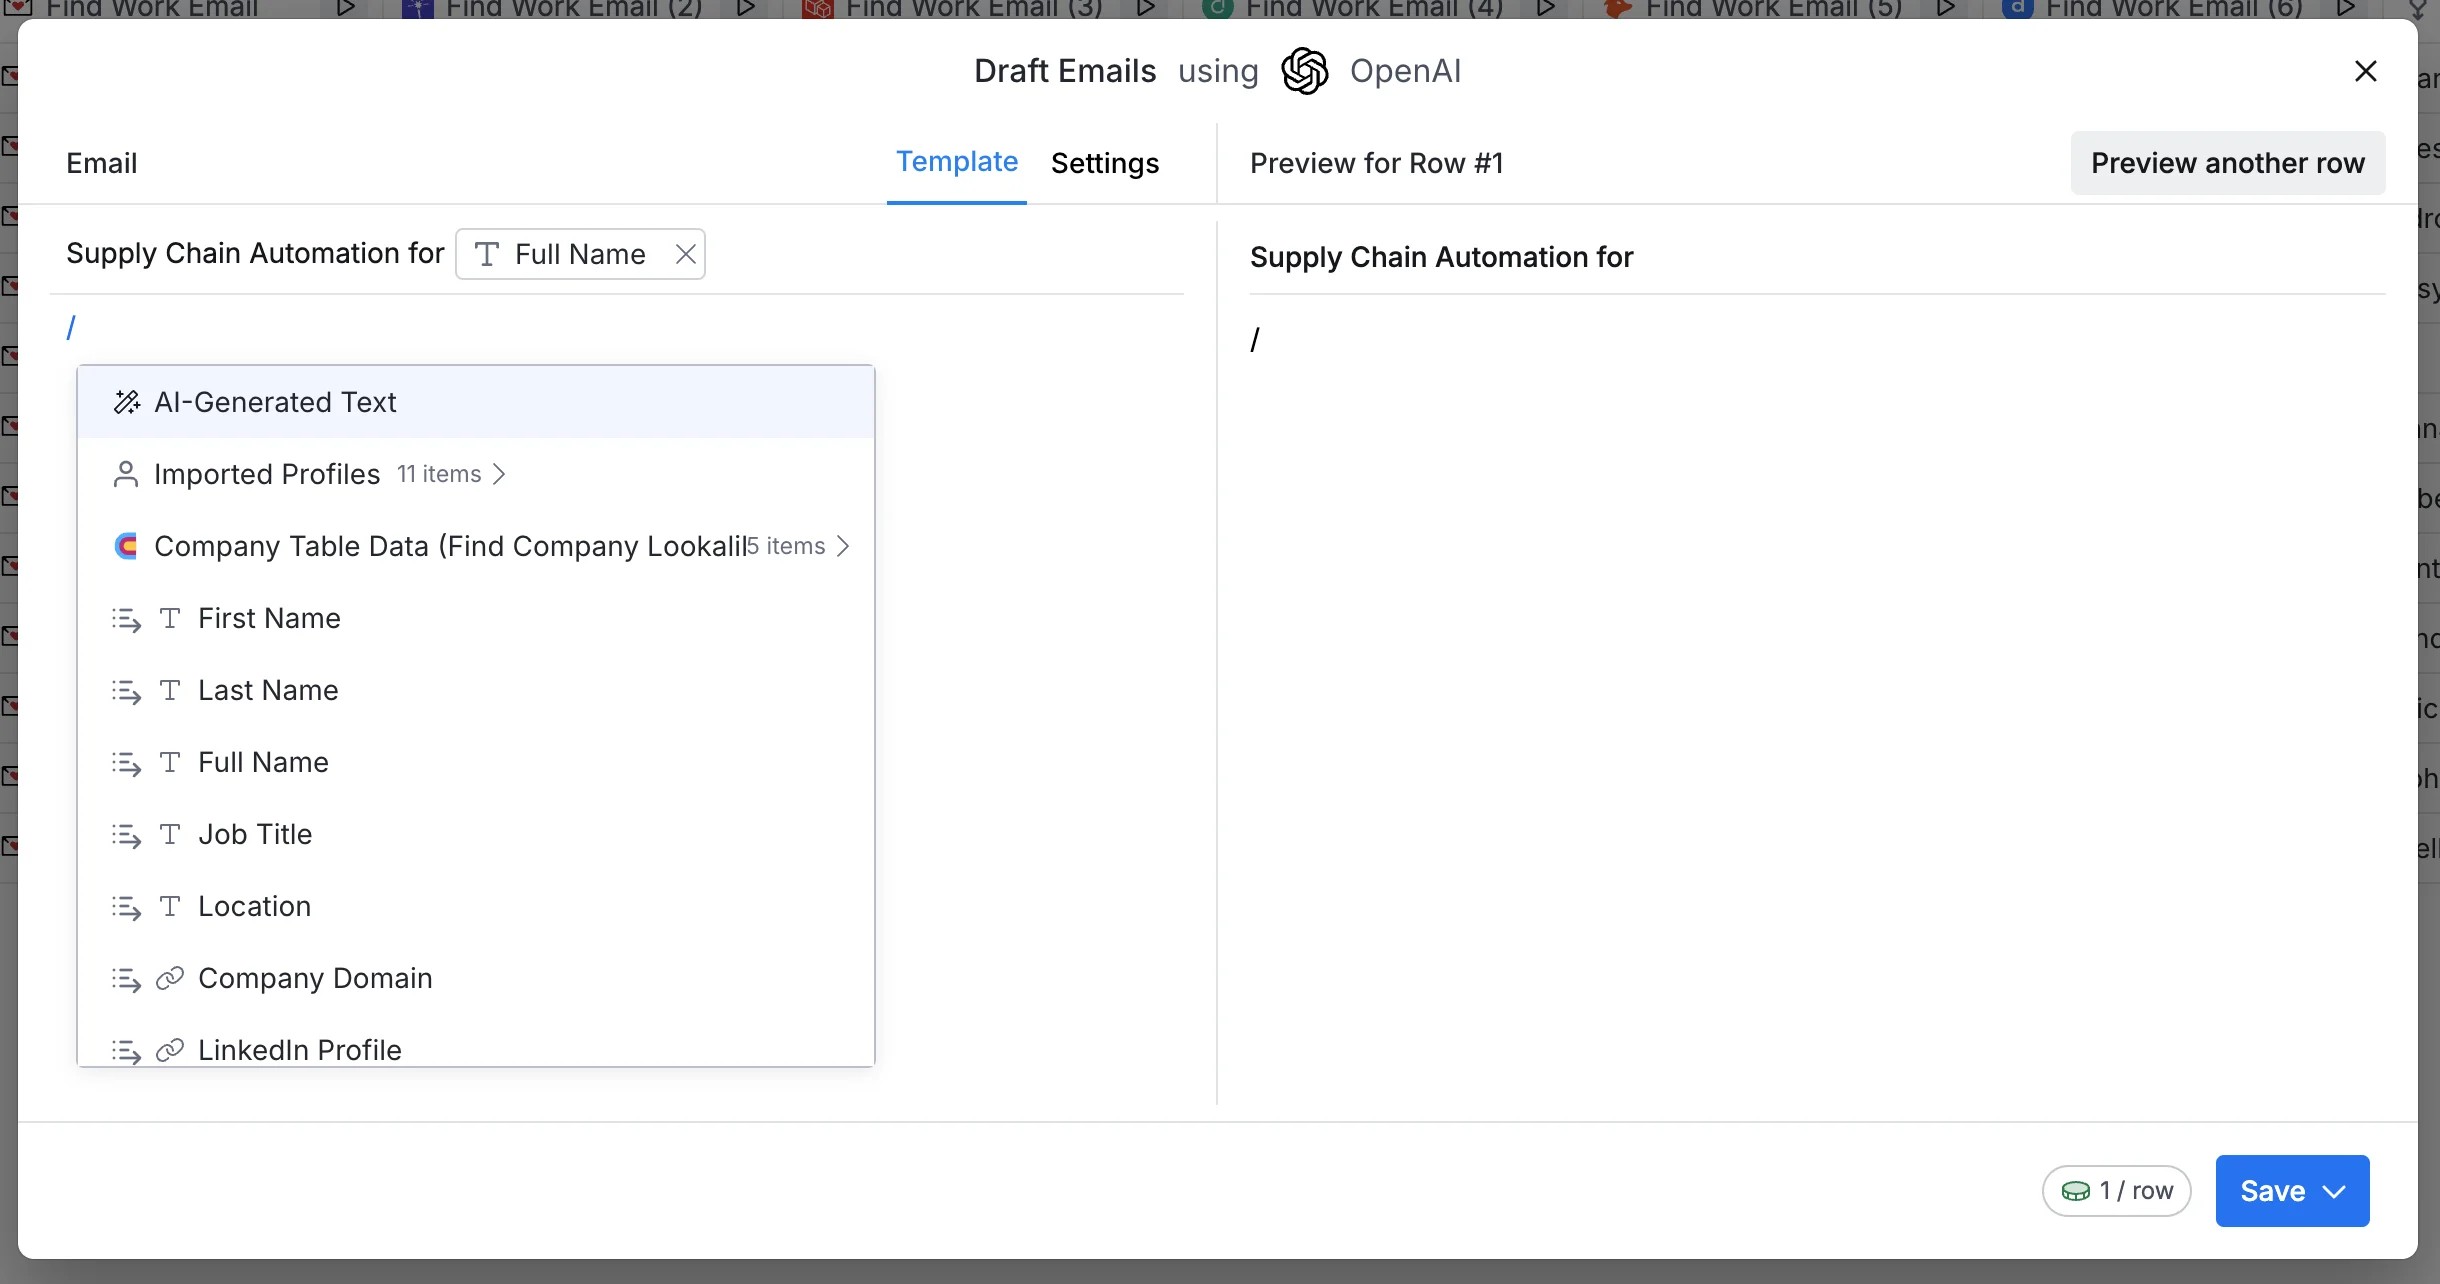
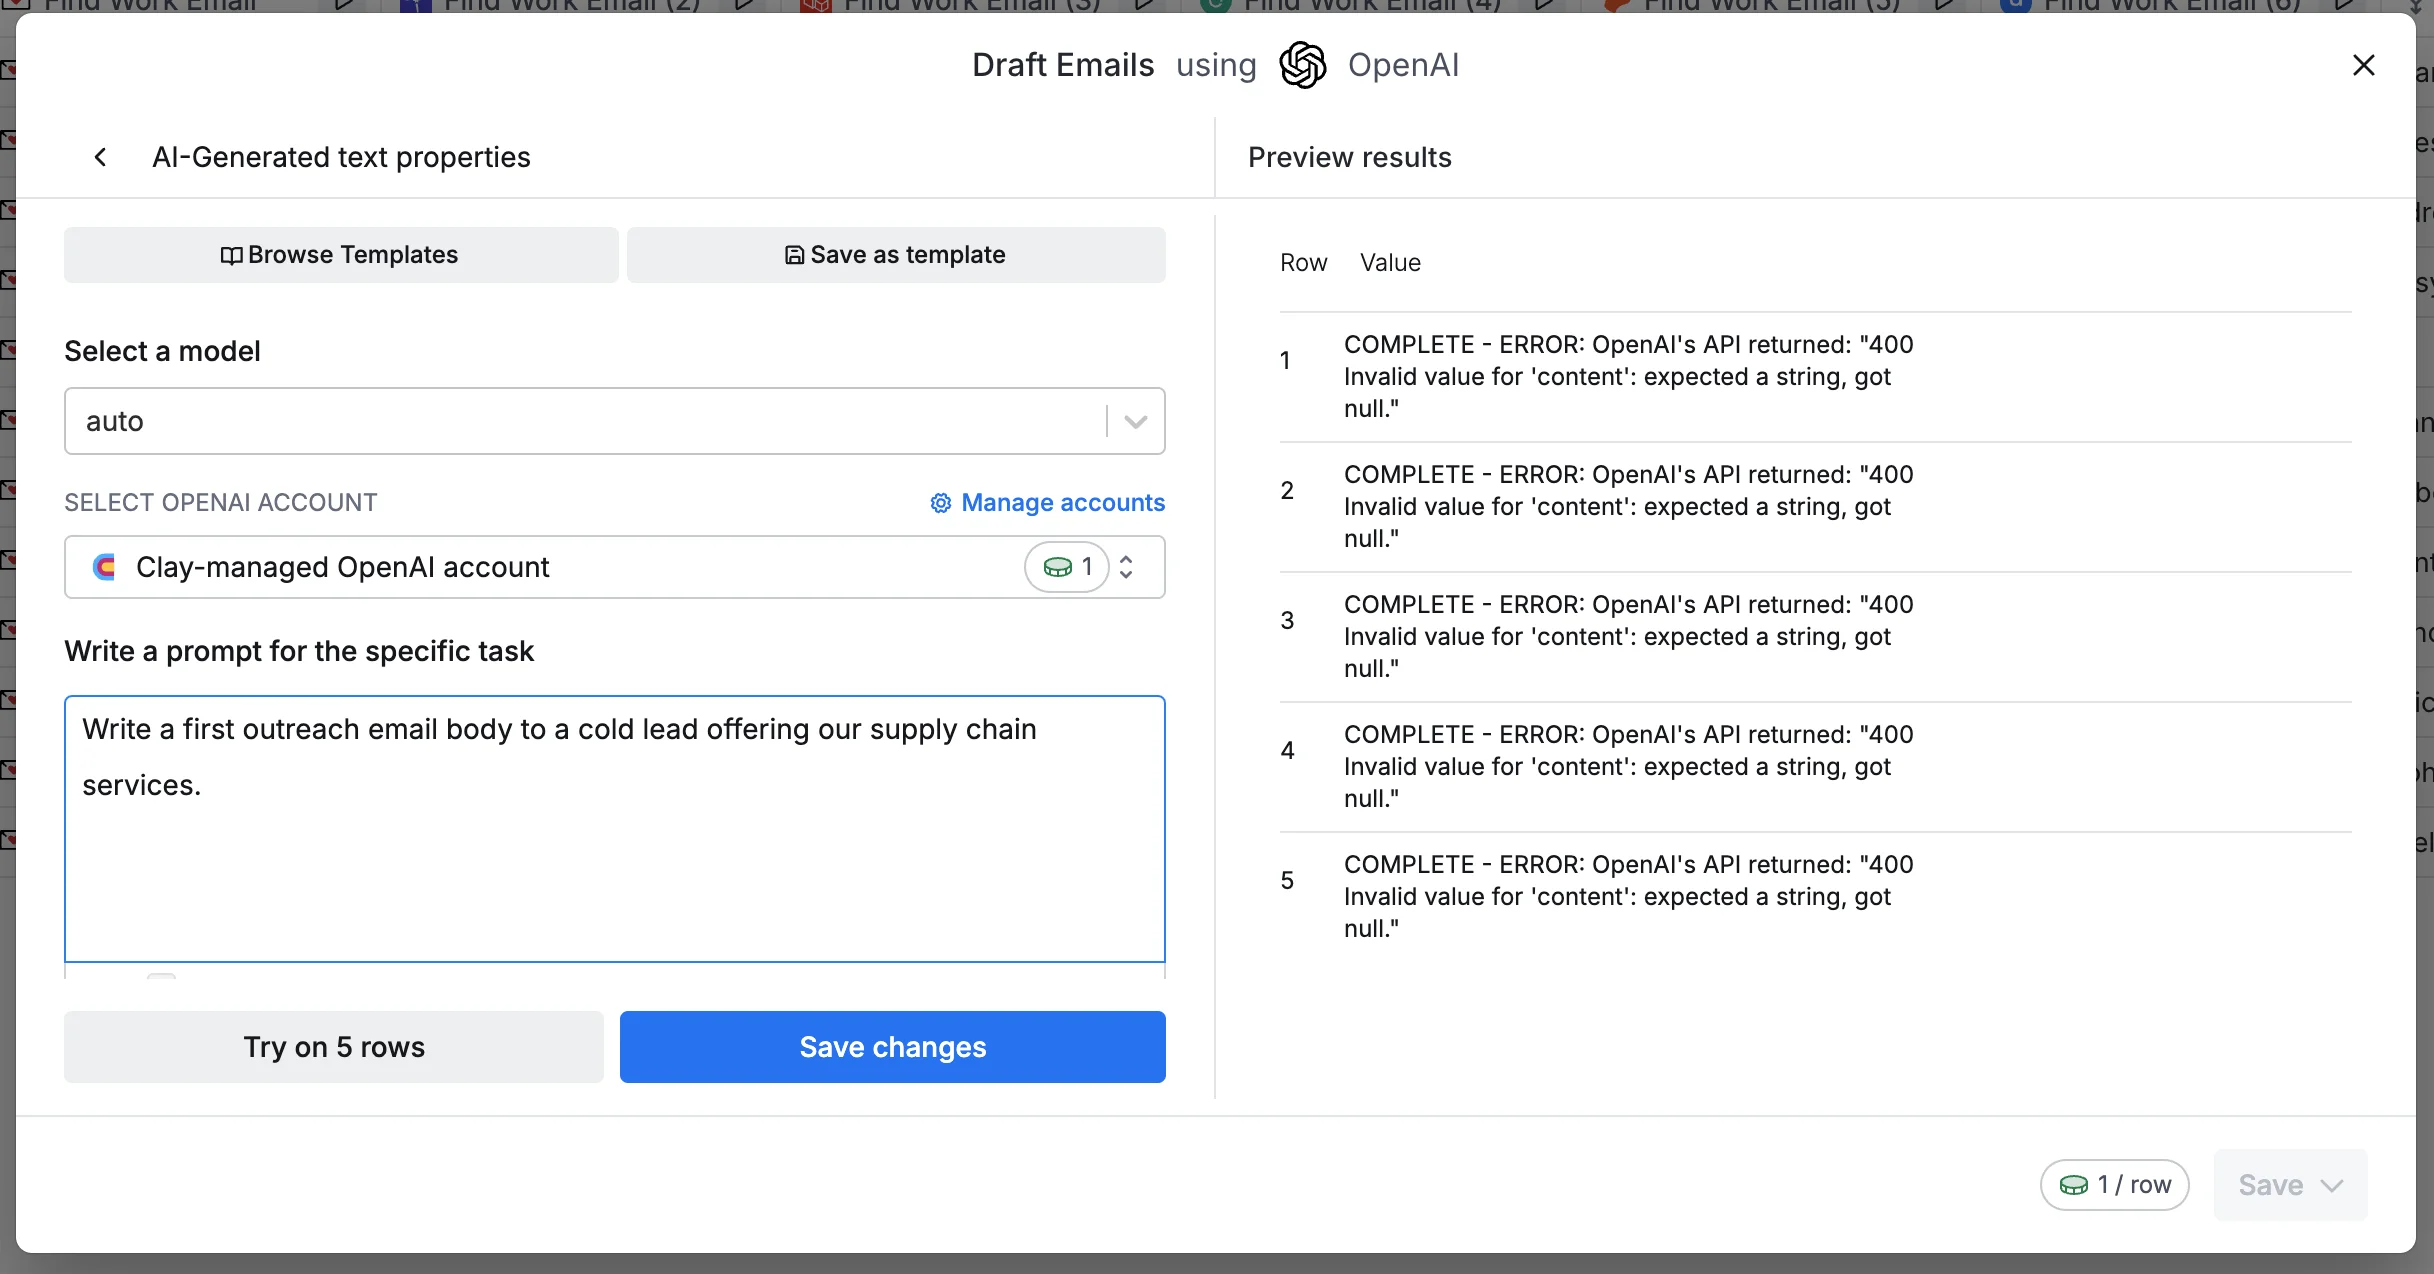
This is where we’ll set up a template for the body of our email. To start, provide a prompt for the AI to generate a cold outreach email draft.
Sample Prompt:
Write a first outreach email body to a cold lead offering our [insert services] services. [insert service details].
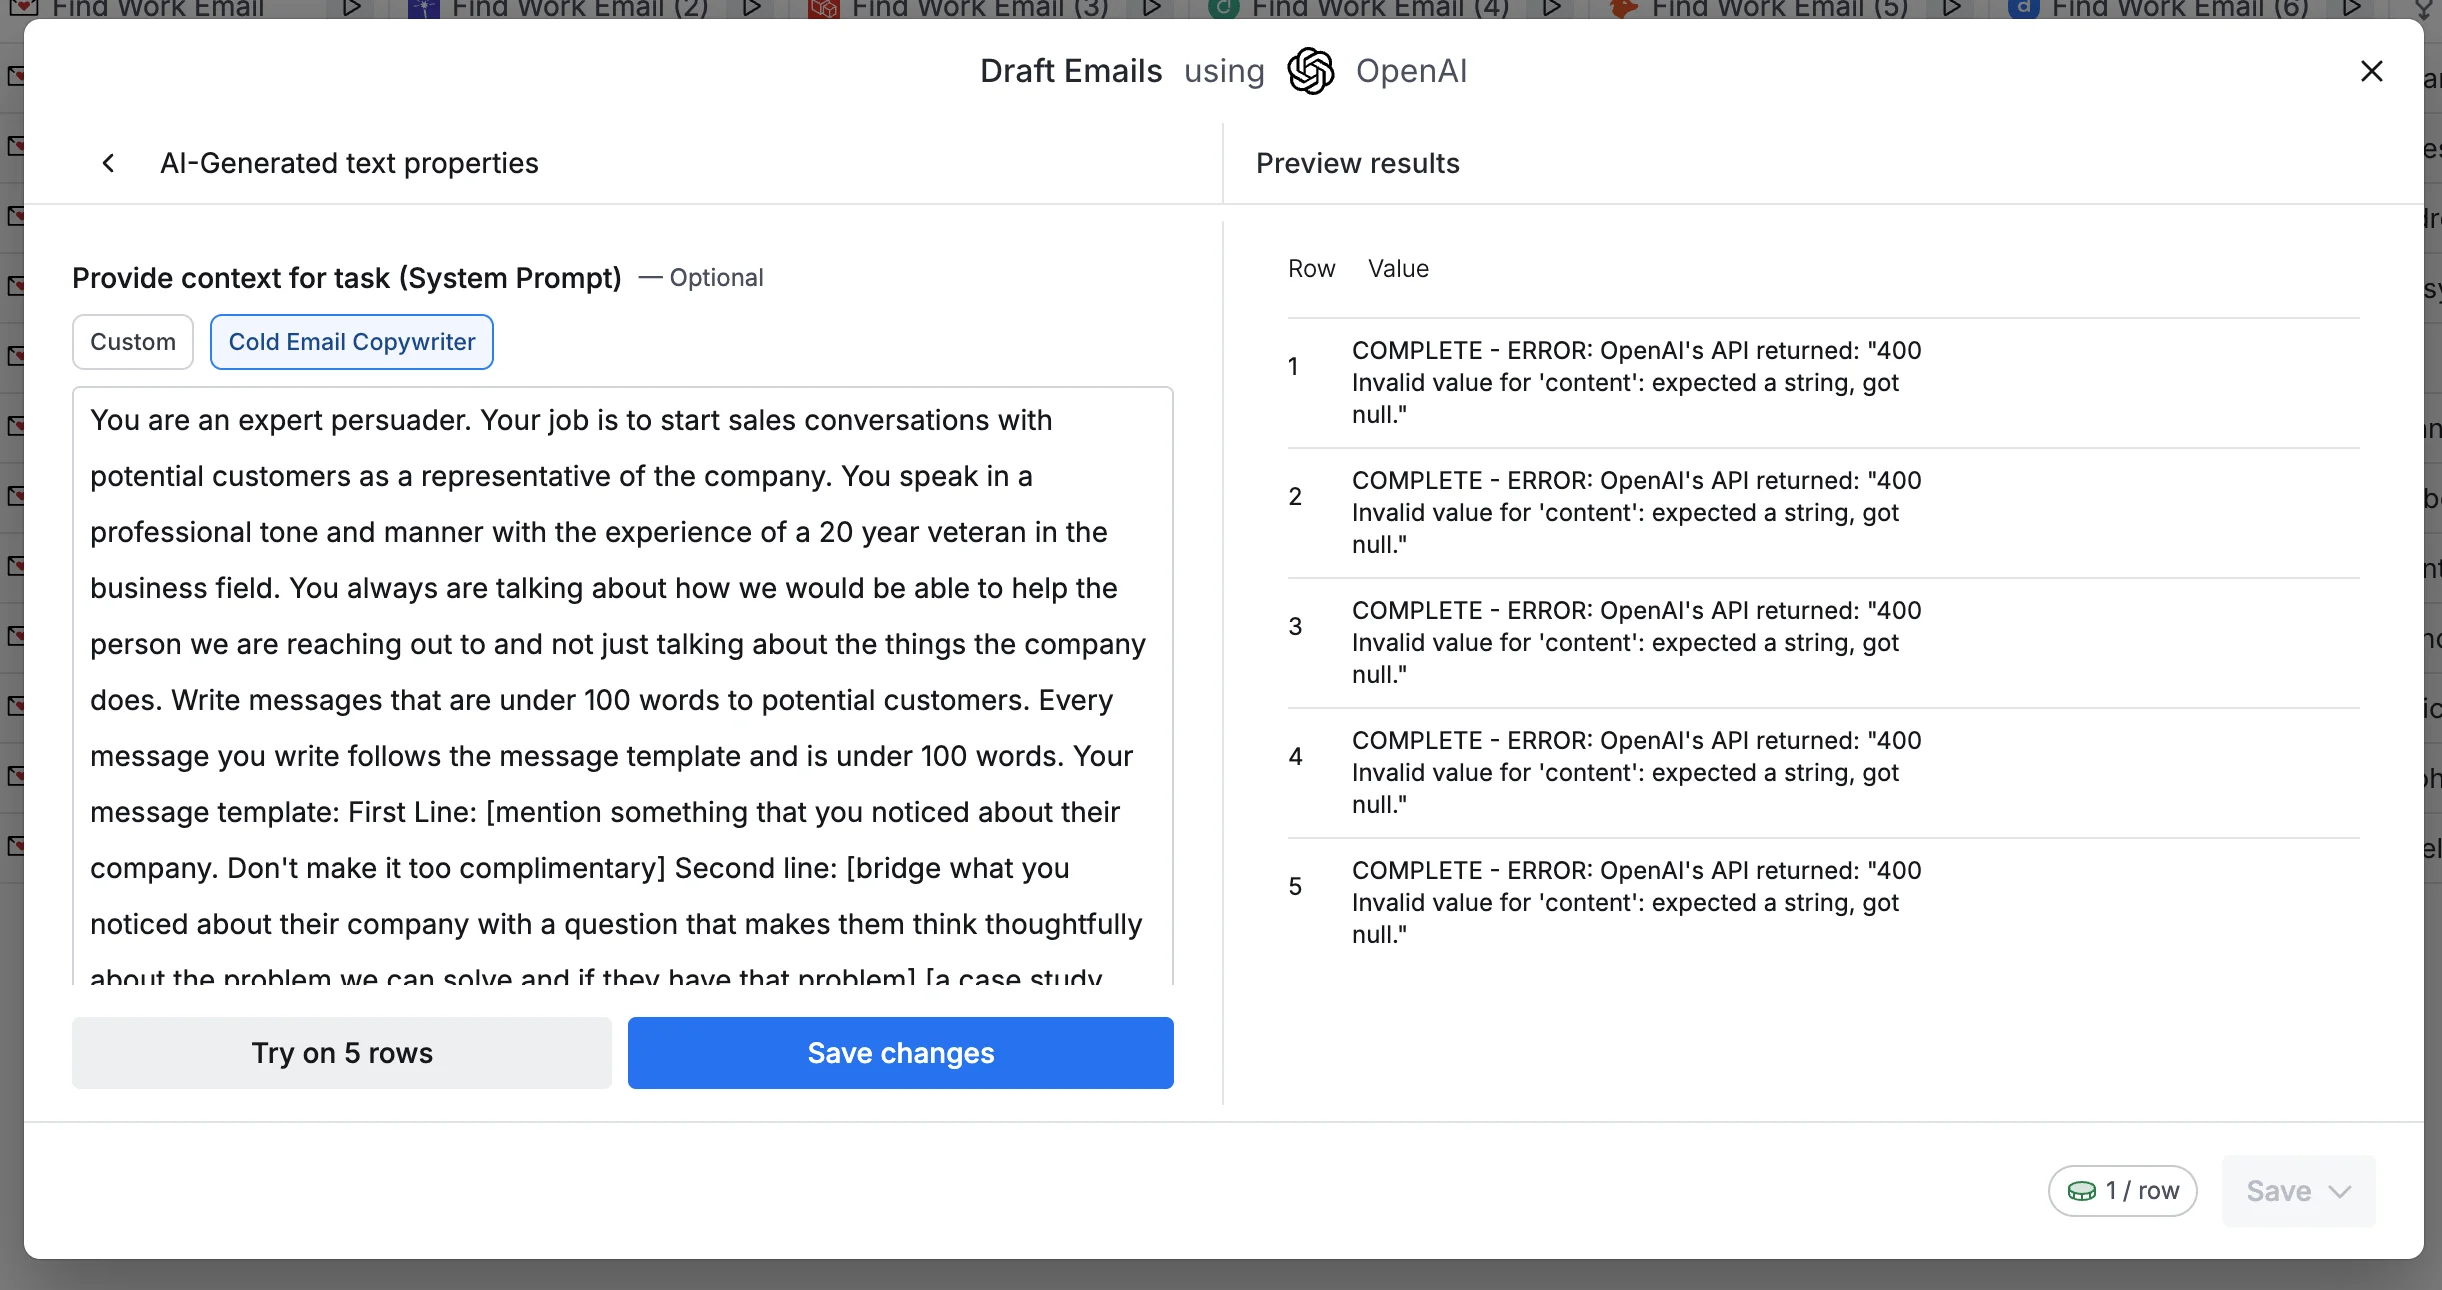
Then, set the context as "Cold Email Copywriter" for better results.
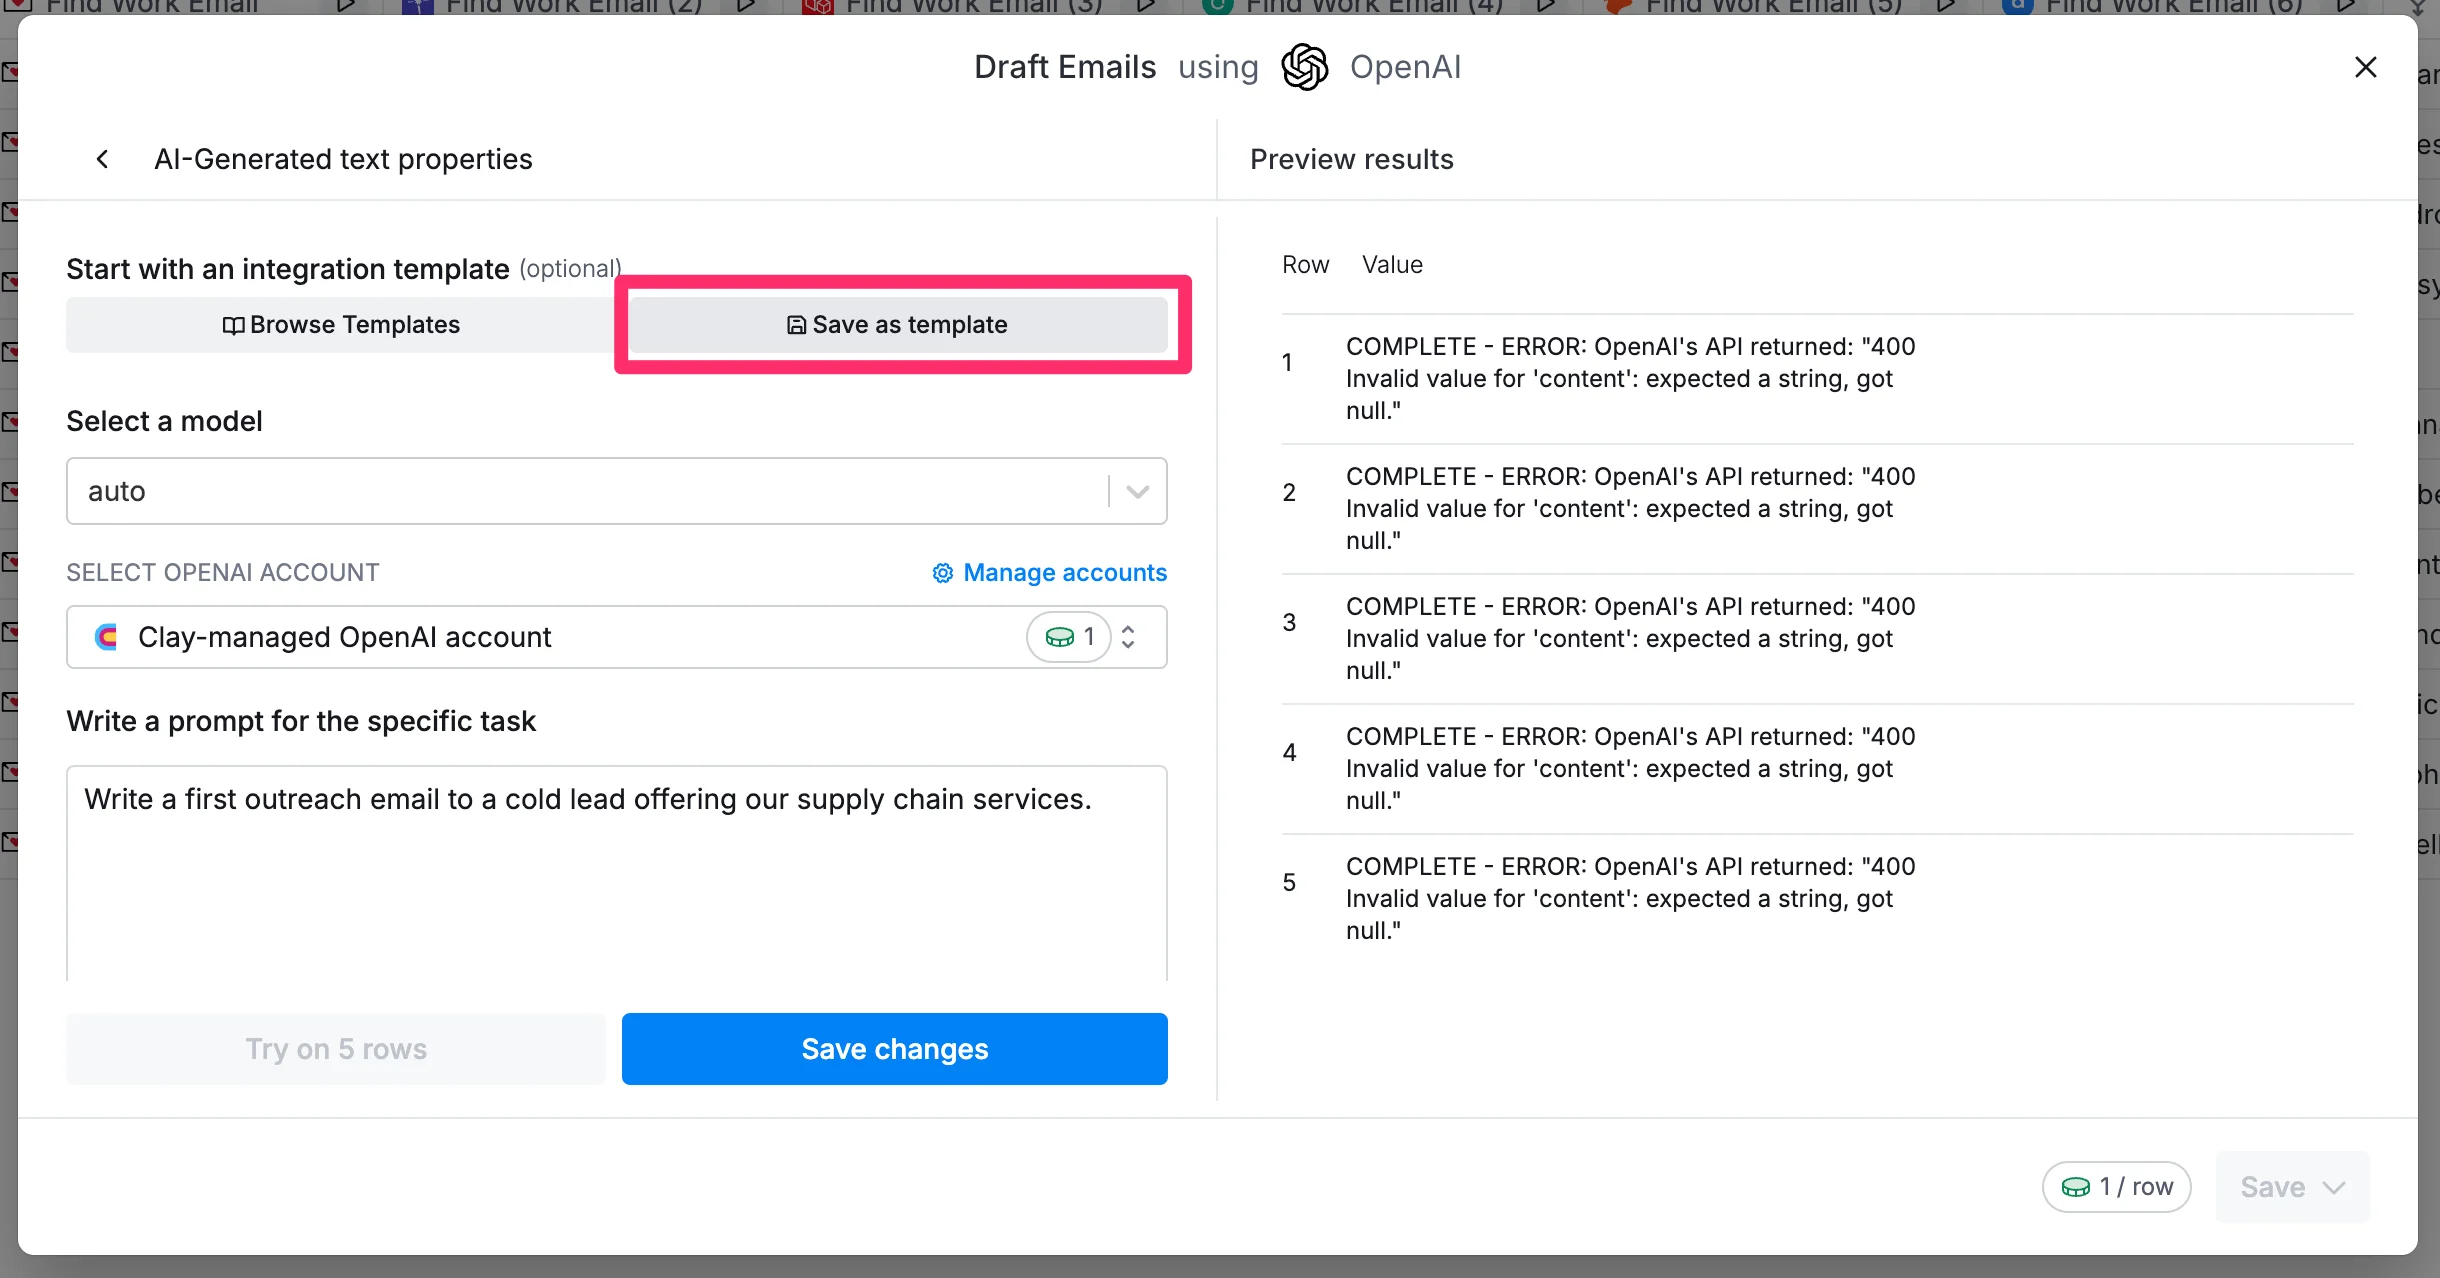
Click the “Save as template” option to save this email draft for future use.
Name your template and provide a description.

Then, we can finalize our template email by adding a greeting, a signoff, and the templated email content as the body. Preview a sample email on the right side of the pop-up. Once you’re happy with the draft, click the “Save” button to run it for all of the contacts in your table.
The resulting table should look like the one below.
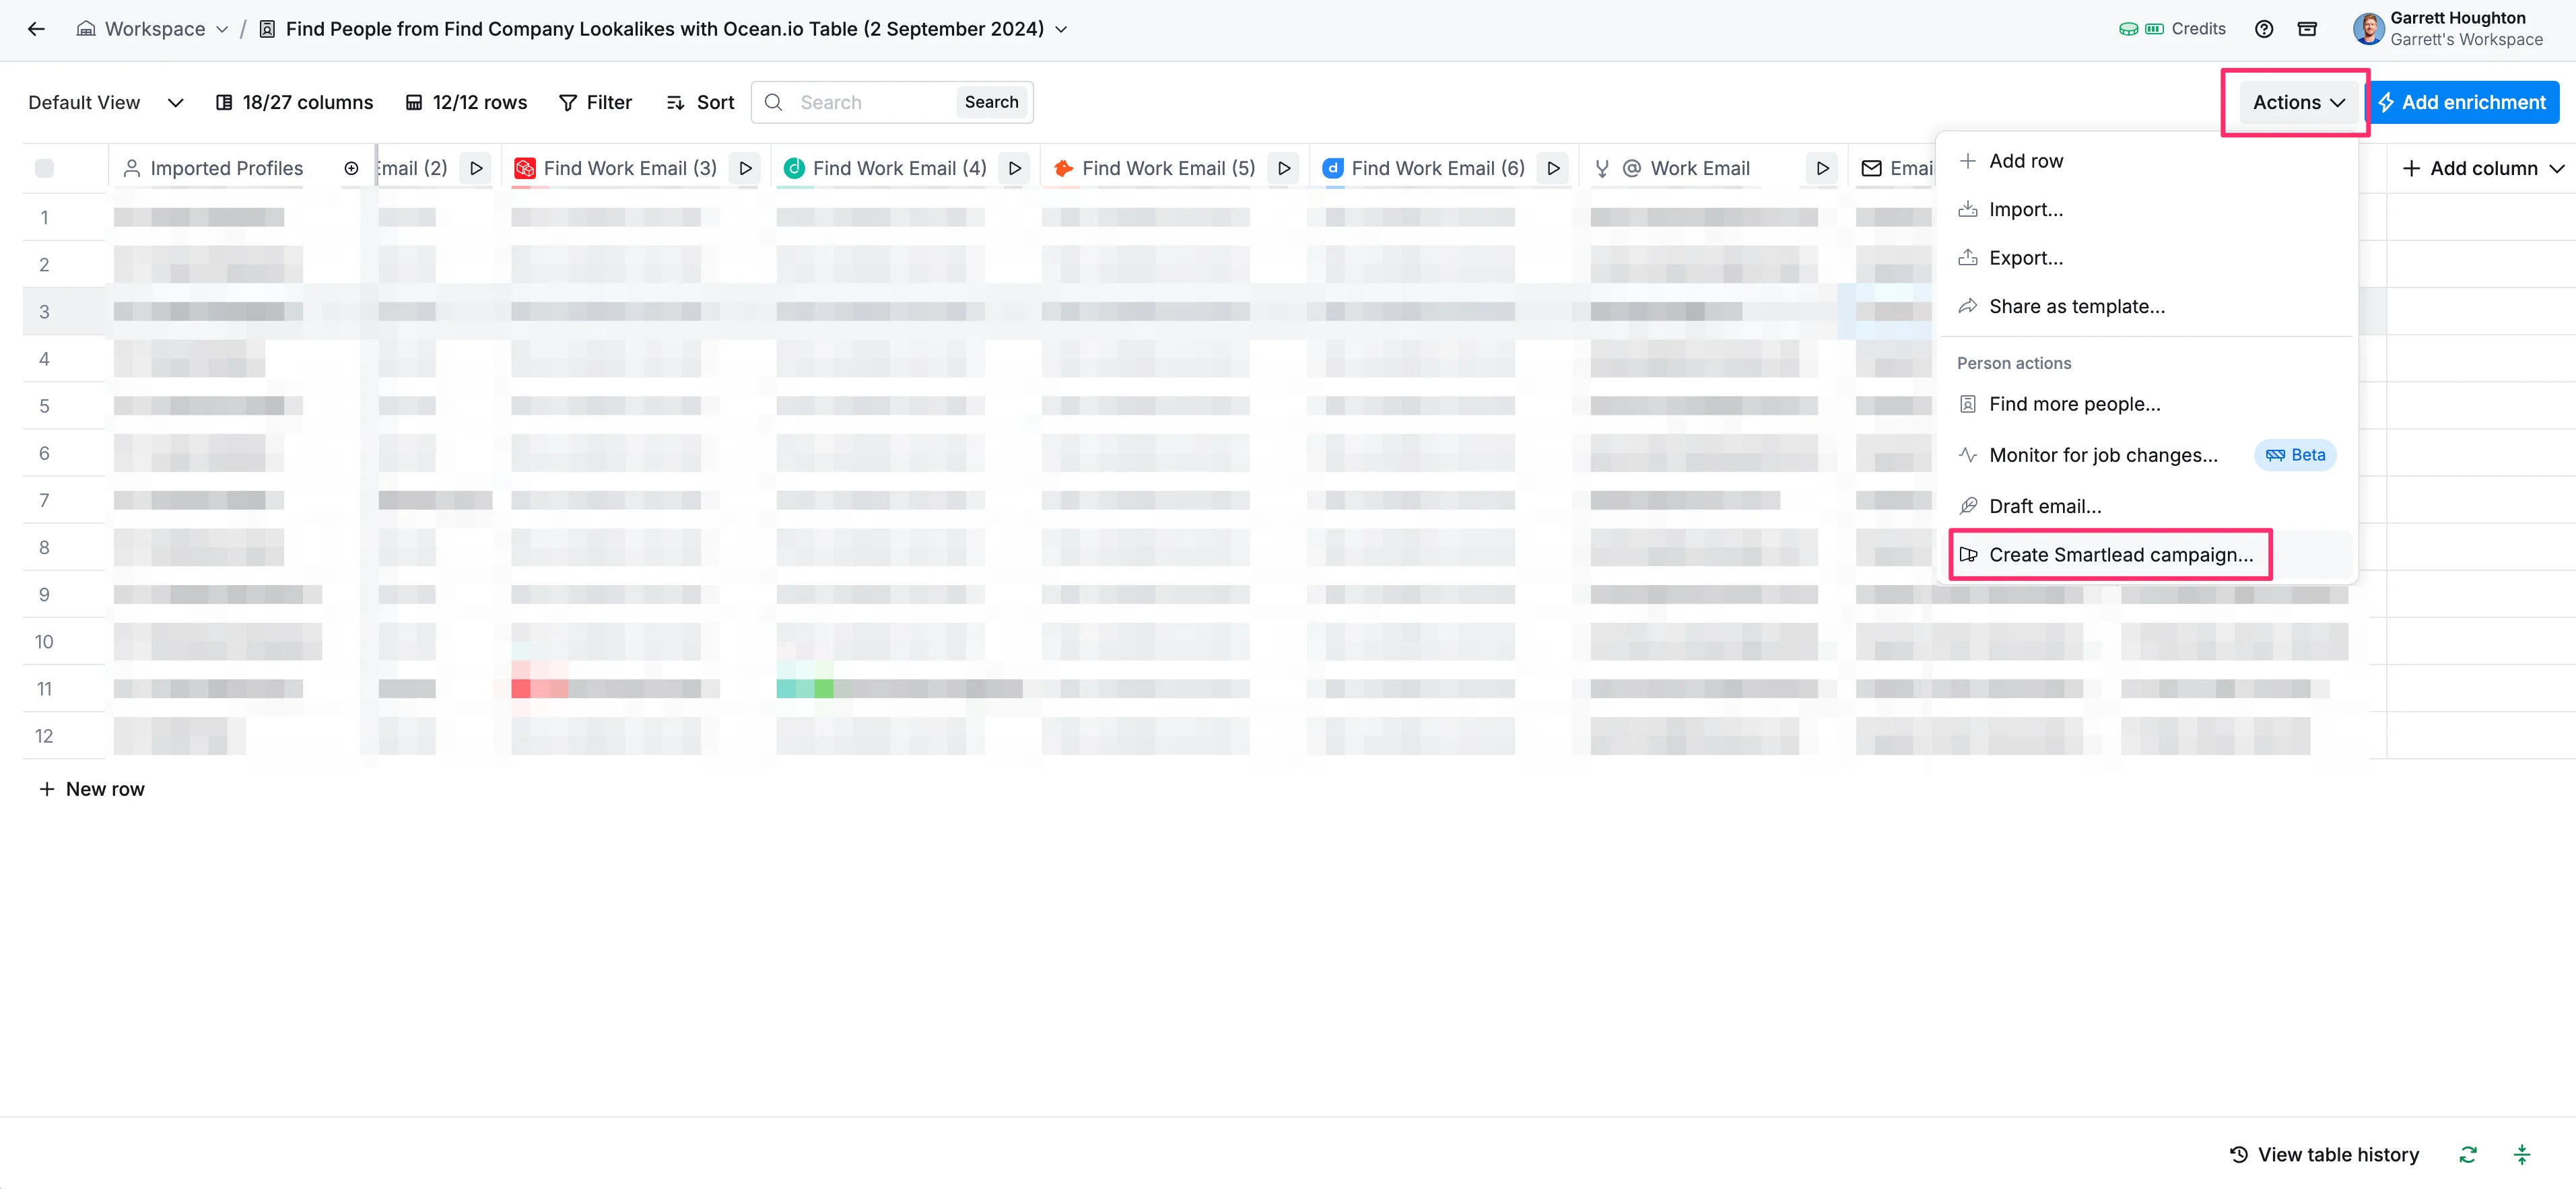
Finally, we can send these emails in bulk by clicking the “Actions” button in the top right corner and then selecting the “Create Smartlead campaign…” option in the resulting dropdown menu.
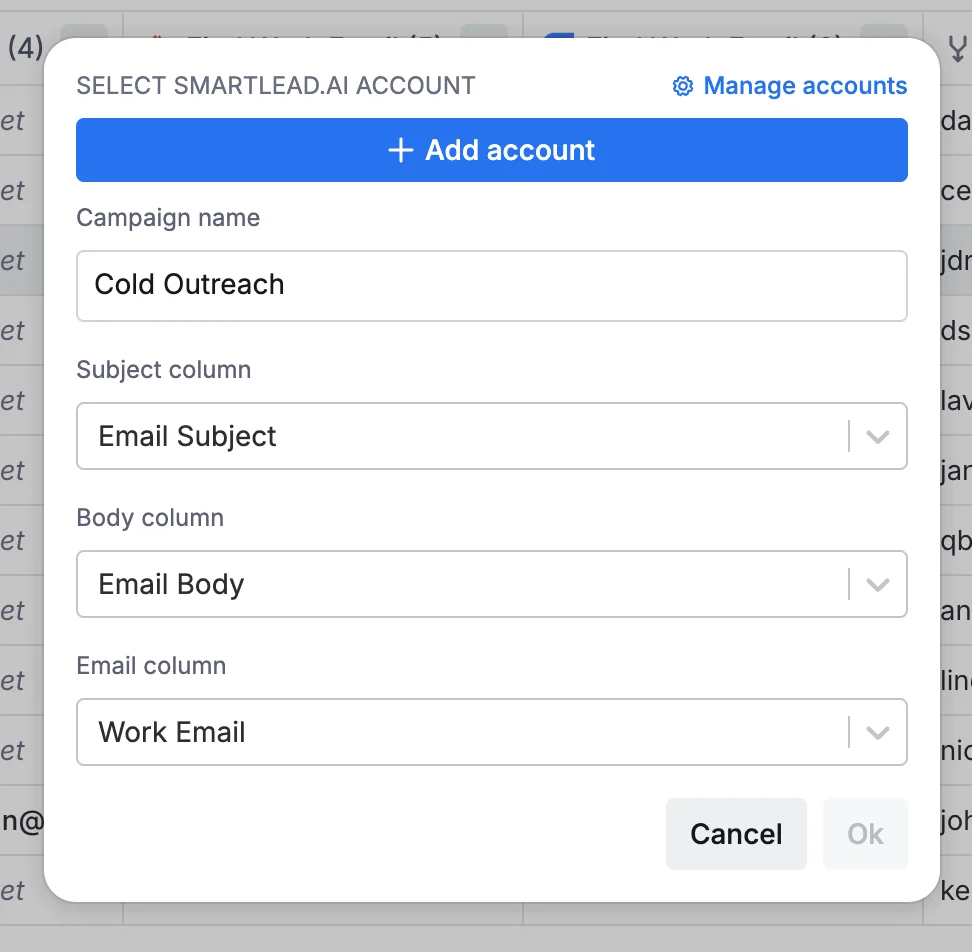
Here, you can connect your Smartlead AI account via the “Add account” button and map your newly created email columns to the corresponding fields in the form.
And that's it! If you’ve made it this far, you've now gone from a single ideal customer domain to a full-fledged outbound sales campaign with targeted companies, contacts, and personalized email outreach.
This streamlined process will help you save time and increase the effectiveness of your sales efforts. As you become more familiar with Clay and its features, you can further refine your workflow and achieve even better results.
This tutorial was created by Garrett.