Create a daily personalised industry news podcast with AI
Turn your favourite industry news into a daily audio podcast delivered to your inbox.
2024-11-13
Nothing beats starting your day with the latest industry news. If you’re someone that prefers to listen versus read, now you can get a personal podcast episode that summarizes everything - delivered to you each morning.
Thanks to OpenAI and automation tools like Zapier, you can build this workflow quite easily.
In this tutorial, you will learn how to:
- Monitor an RSS feed with Zapier
- Parse content from articles using PhantomJsCloud
- Add articles to a Zapier Digest
- Turn the articles into a podcast script using ChatGPT
- Convert the summary to an audio file using OpenAI's text-to-speech model
- Turn the audio into an actual podcast episode with Transistor
Step 1: Monitor an RSS feed with Zapier
First, let’s automate the collection of news articles.
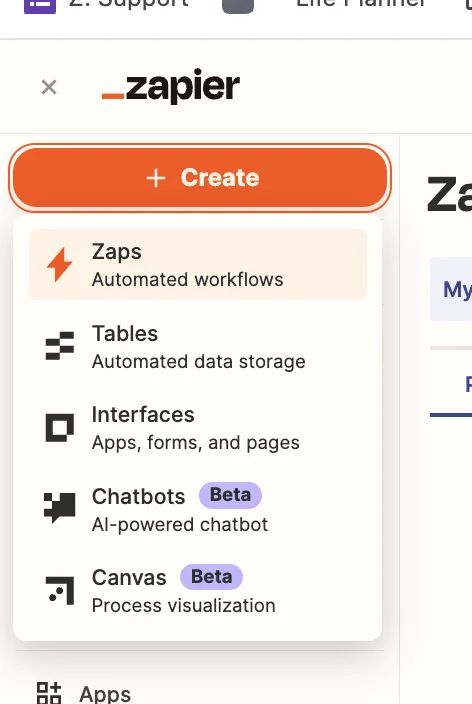
Head over to Zapier, then in the dashboard, in the top left, click the big orange “Create” button and select ‘Zaps’.
Inside the zap editor, you want to click on the box that says “Trigger” and select/search for ‘RSS by Zapier’ as the app.
Then select ‘New Item in Feed’ as the event (if you want to monitor multiple feeds, then select ‘New Items in Multiple Feeds’).
Enter the URL of the RSS feed you want to follow. I’m a fan of fintech news, and if you are too, you can use "https://www.finextra.com/rss/headlines.aspx” as an example.
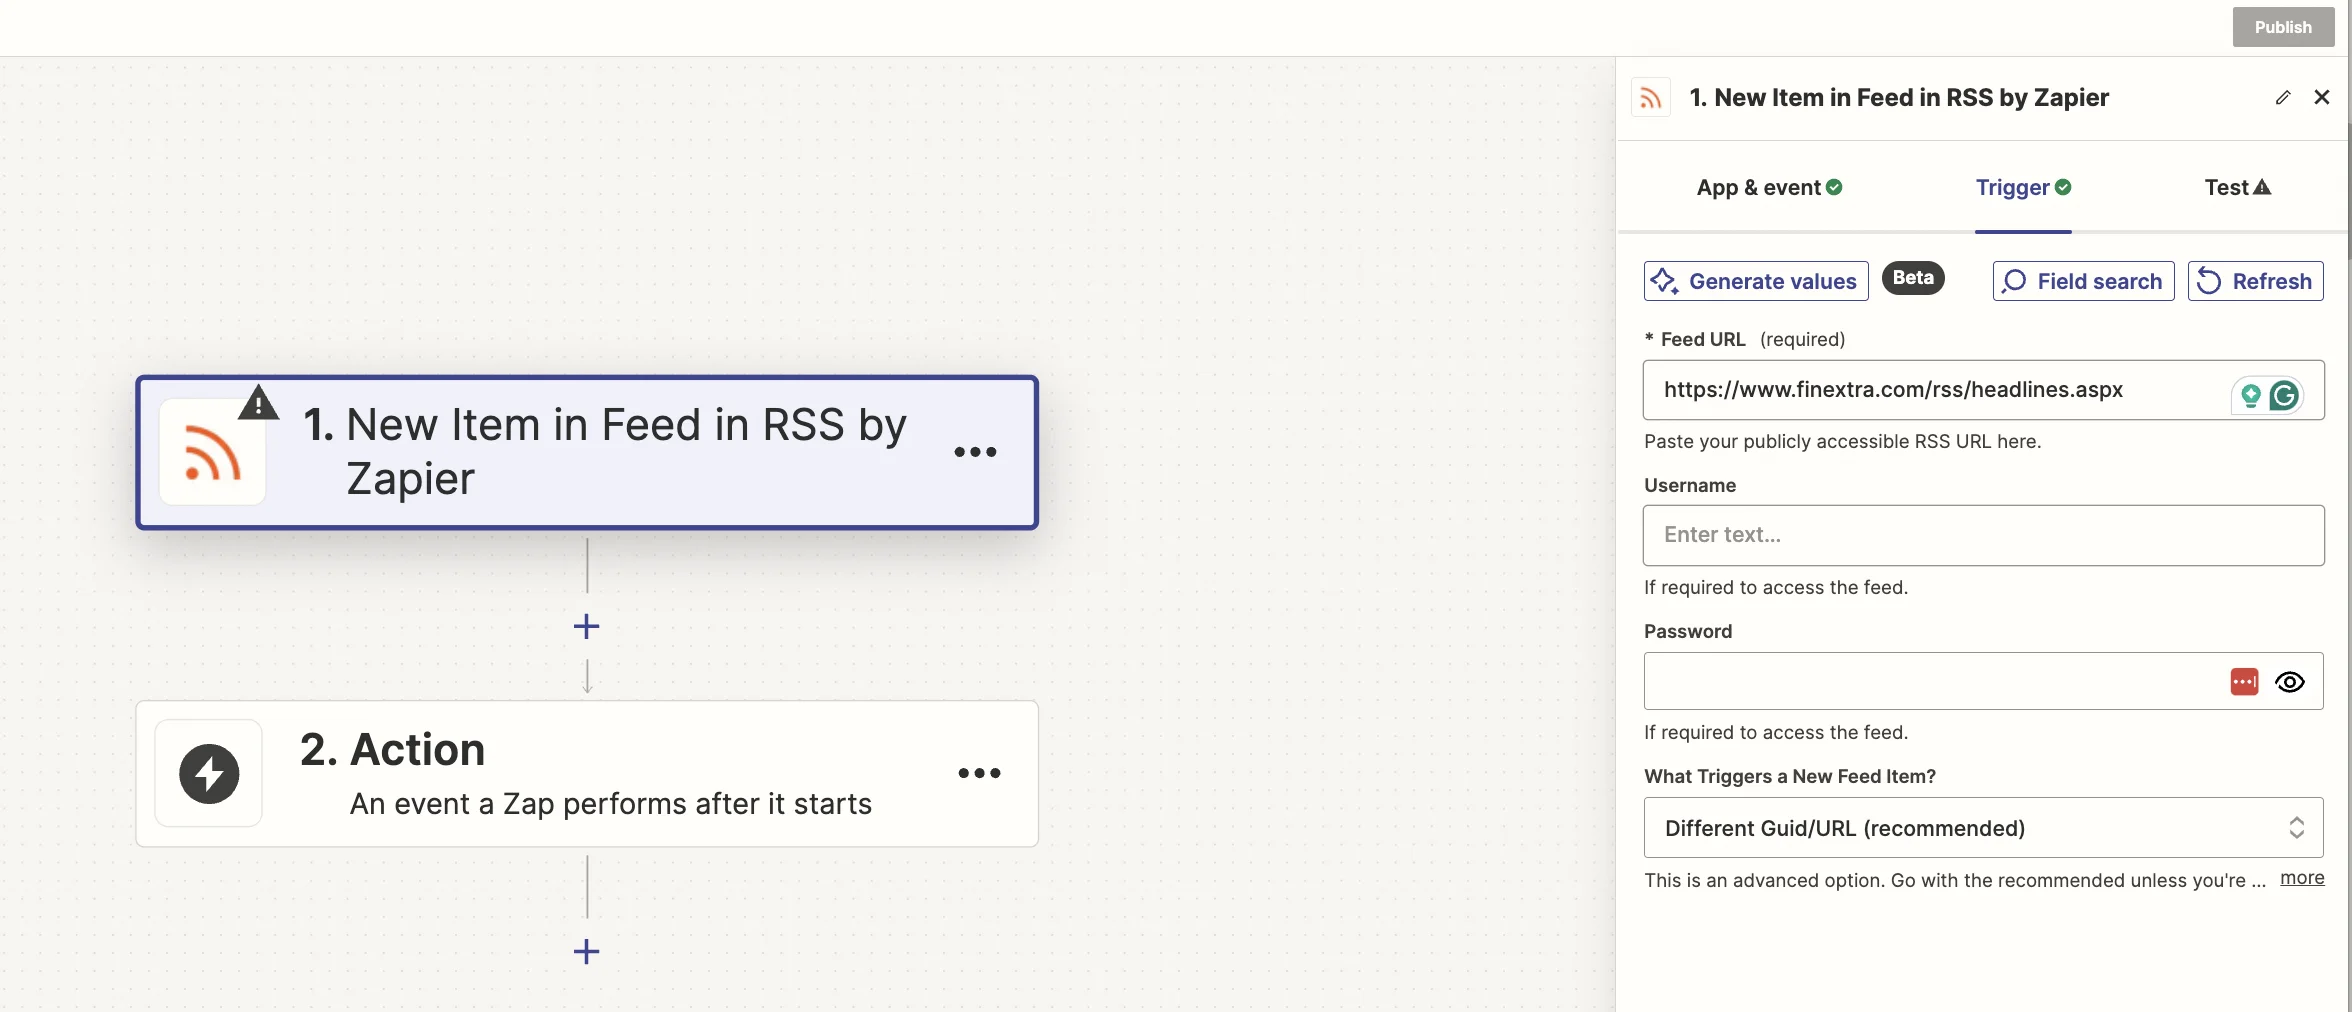
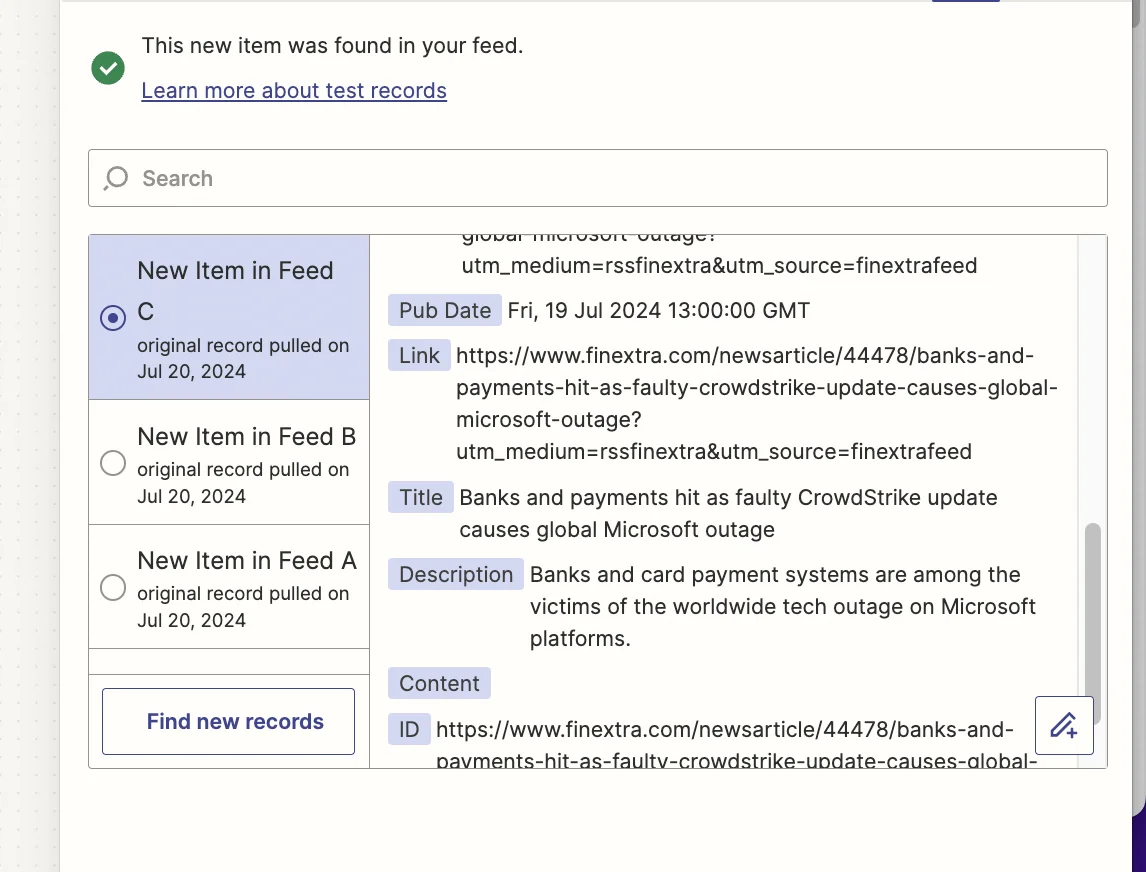
Test the zap and you should see the most recent article pulled through.
Step 2: Parse content from articles using PhantomJsCloud
Once you've set up the RSS feed trigger, the next step is to parse the content of these new articles.
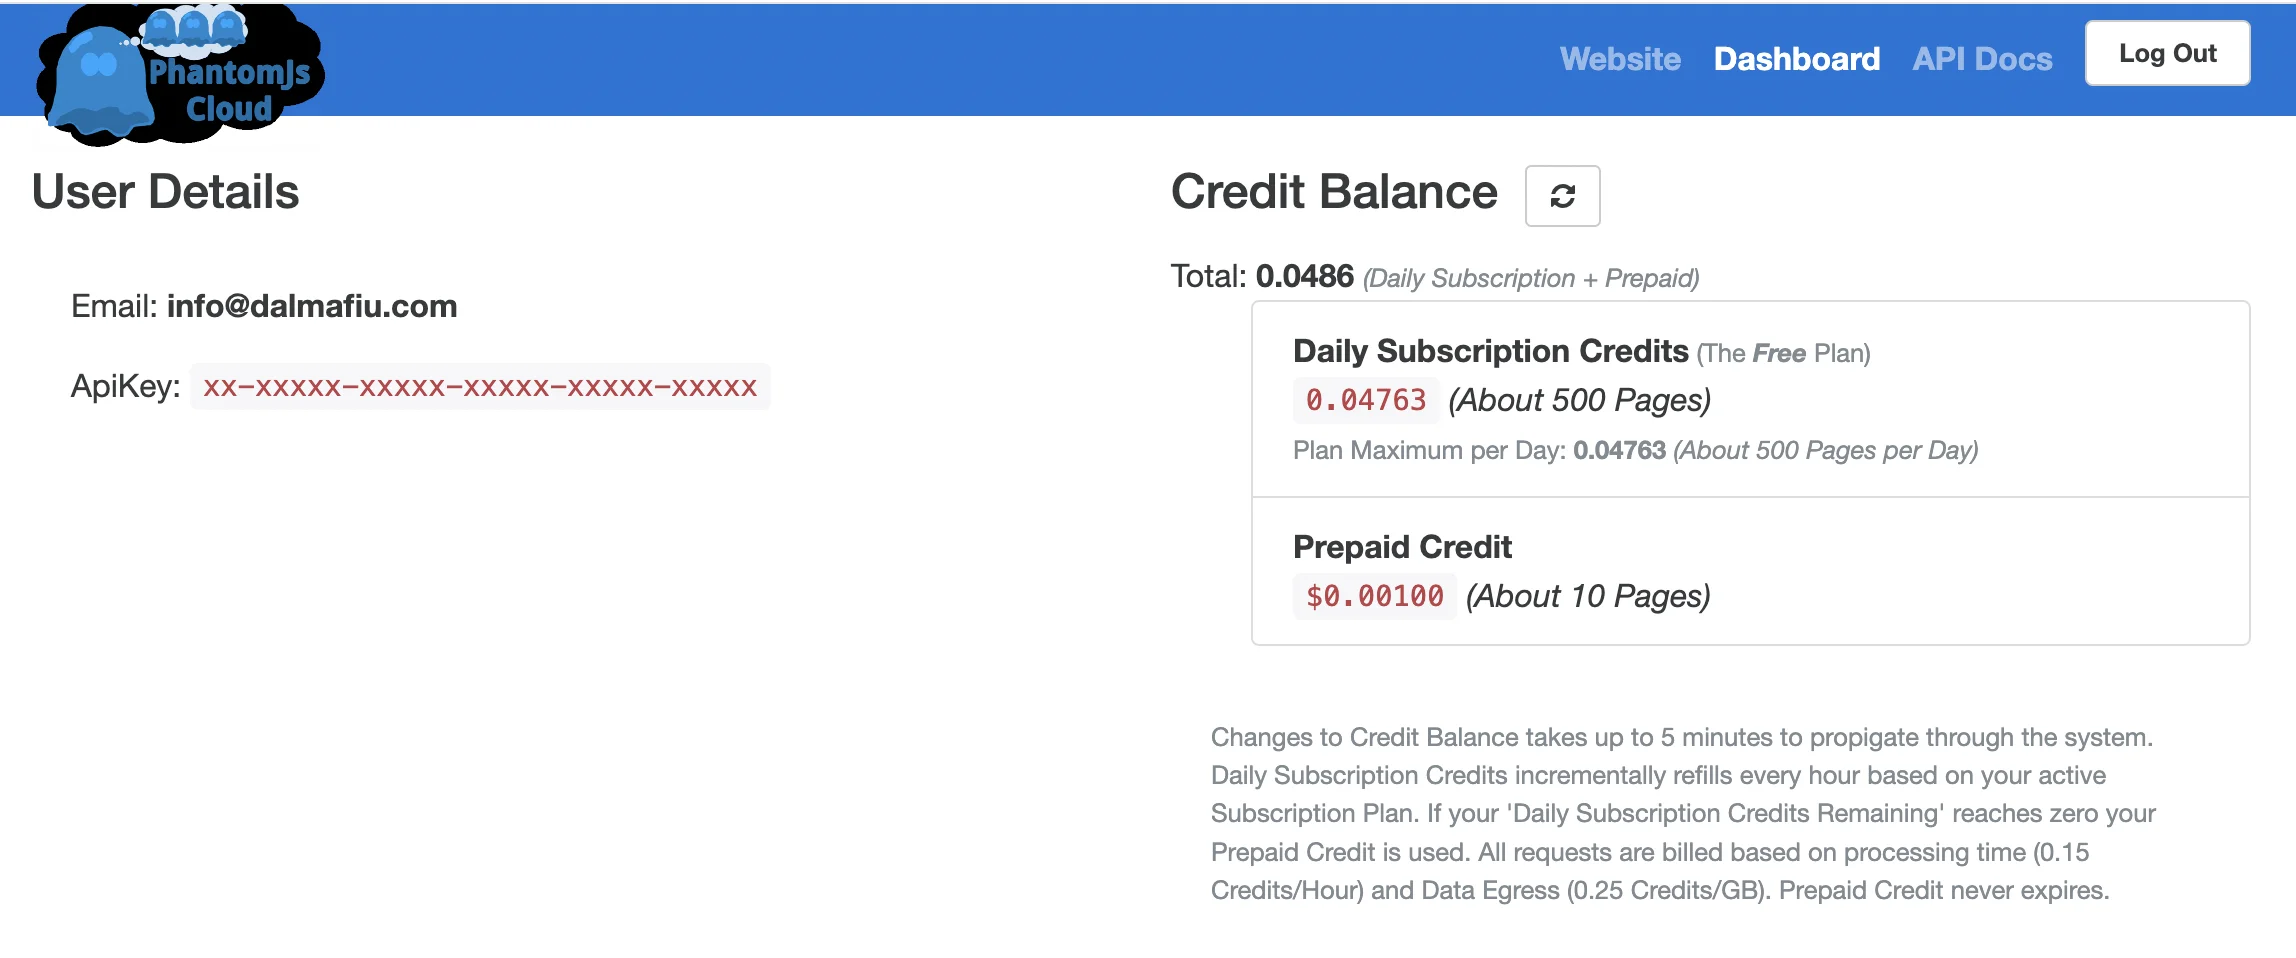
To do this, we’re going to use a (basically) free tool called PhantomJsCloud. Go ahead, sign up, and on the dashboard you’ll see your API key which we’ll need in the next part.
Unfortunately, PhantomJsCloud doesn’t have a Zapier integration, so we’re going to use a webhook step inside Zapier to send and receive data from the API.
In the zap editor, click the “Action” box. Then search for "Webhook by Zapier" and select ‘Custom Request’ as the event.
Here are the fields you need to configure:
- Method
Select ‘POST’.
- URL
Input ‘https://phantomjscloud.com/api/browser/v2/xx-xxxxx-xxxxx-xxxxx-xxxxx-xxxxx/’ (replacing the string between the last two slashes with your API key).
- Data
Input the following code, replacing {{link}} with a mapping of the ‘Link’ value from the trigger step.
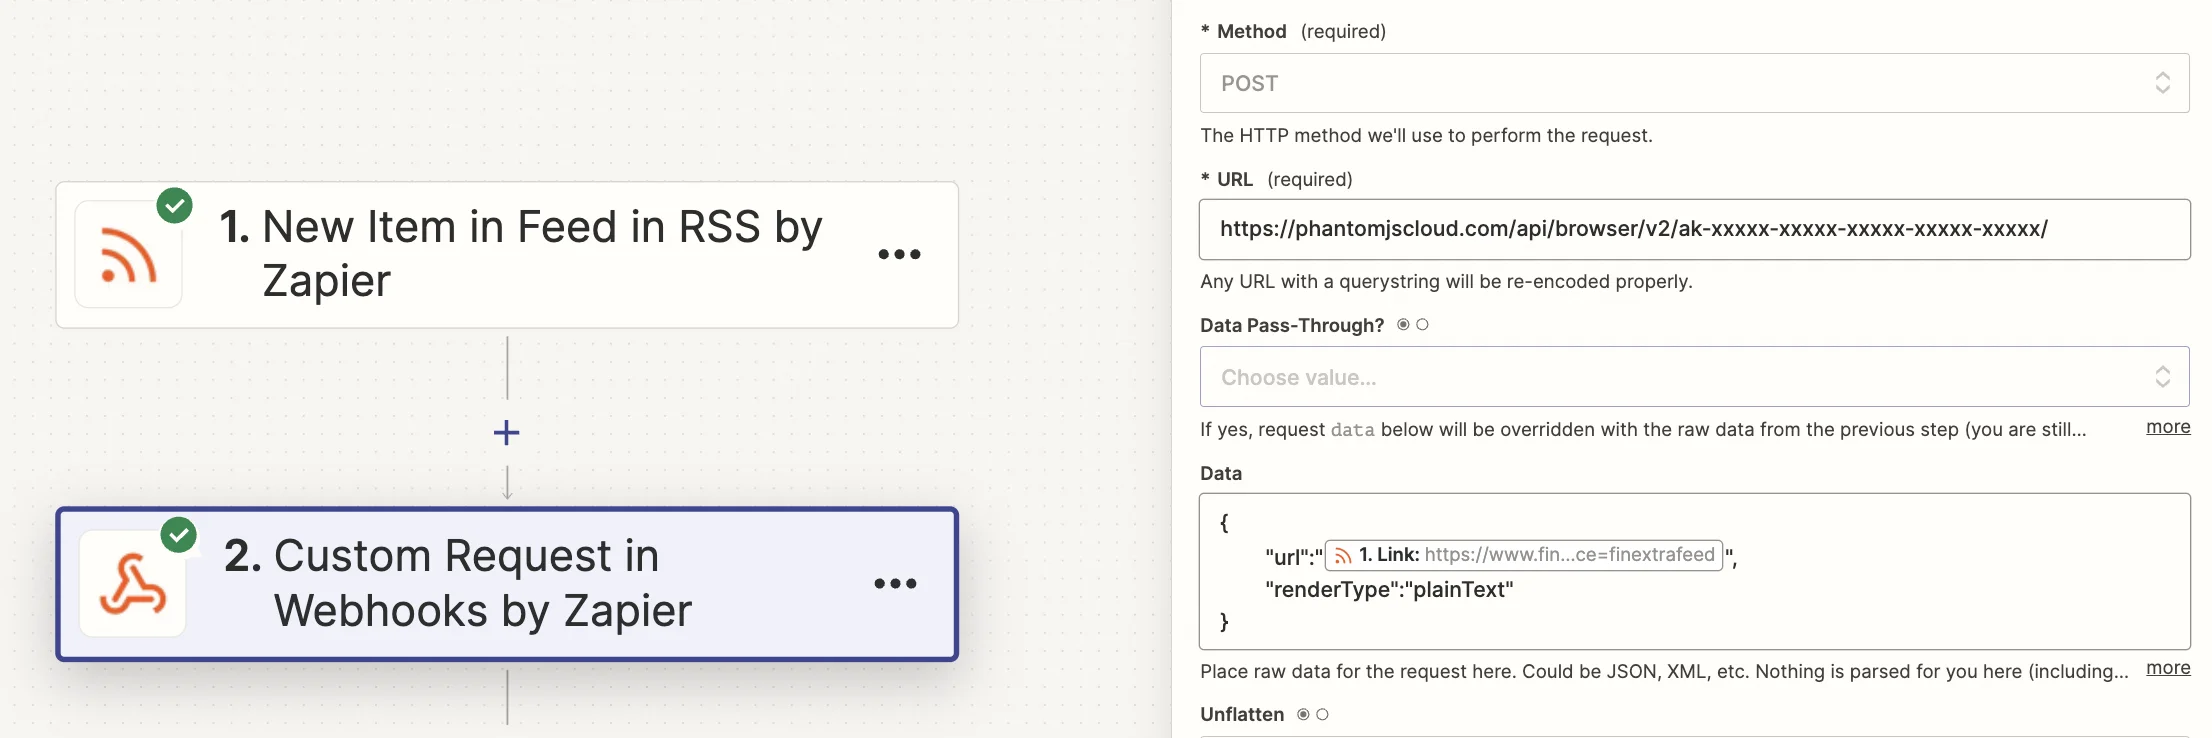
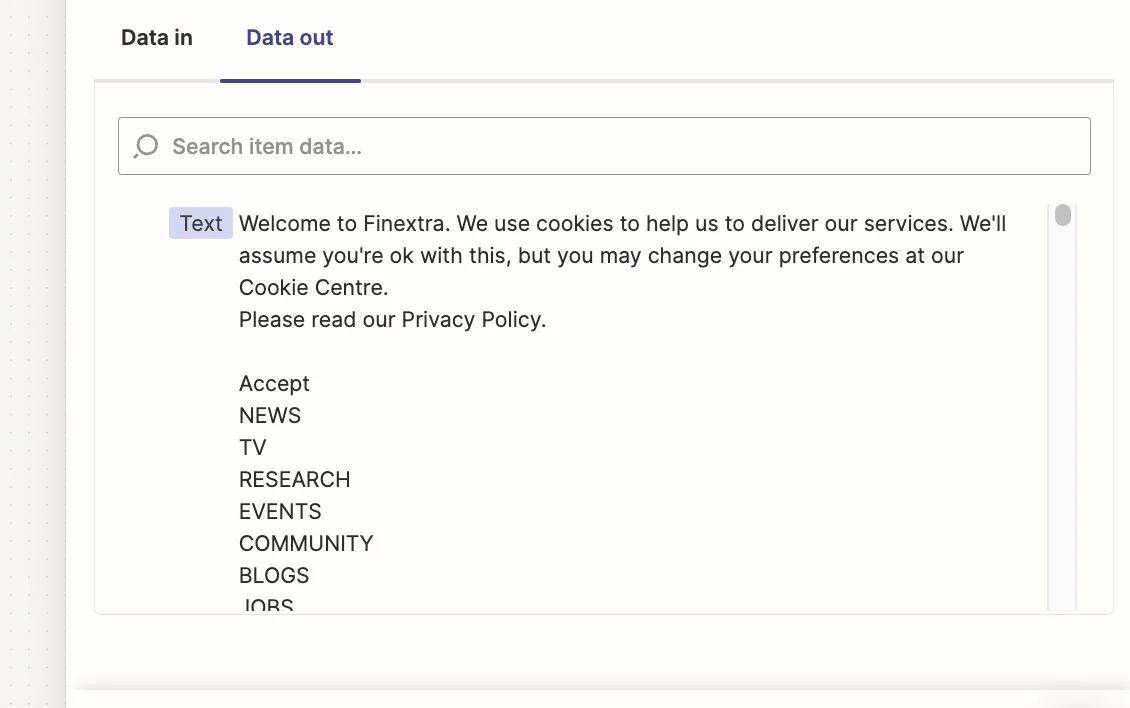
Test the step, and after a few seconds, you should see the text from the article.
Step 3: Add articles to a Zapier Digest
Next, we’re going to use a Zapier feature called “Digest”. This allows you to save information across multiple zap runs in a memory store, and then process it all together at a set time. In our case, we’ll store all the articles from the RSS feed to send OpenAI.
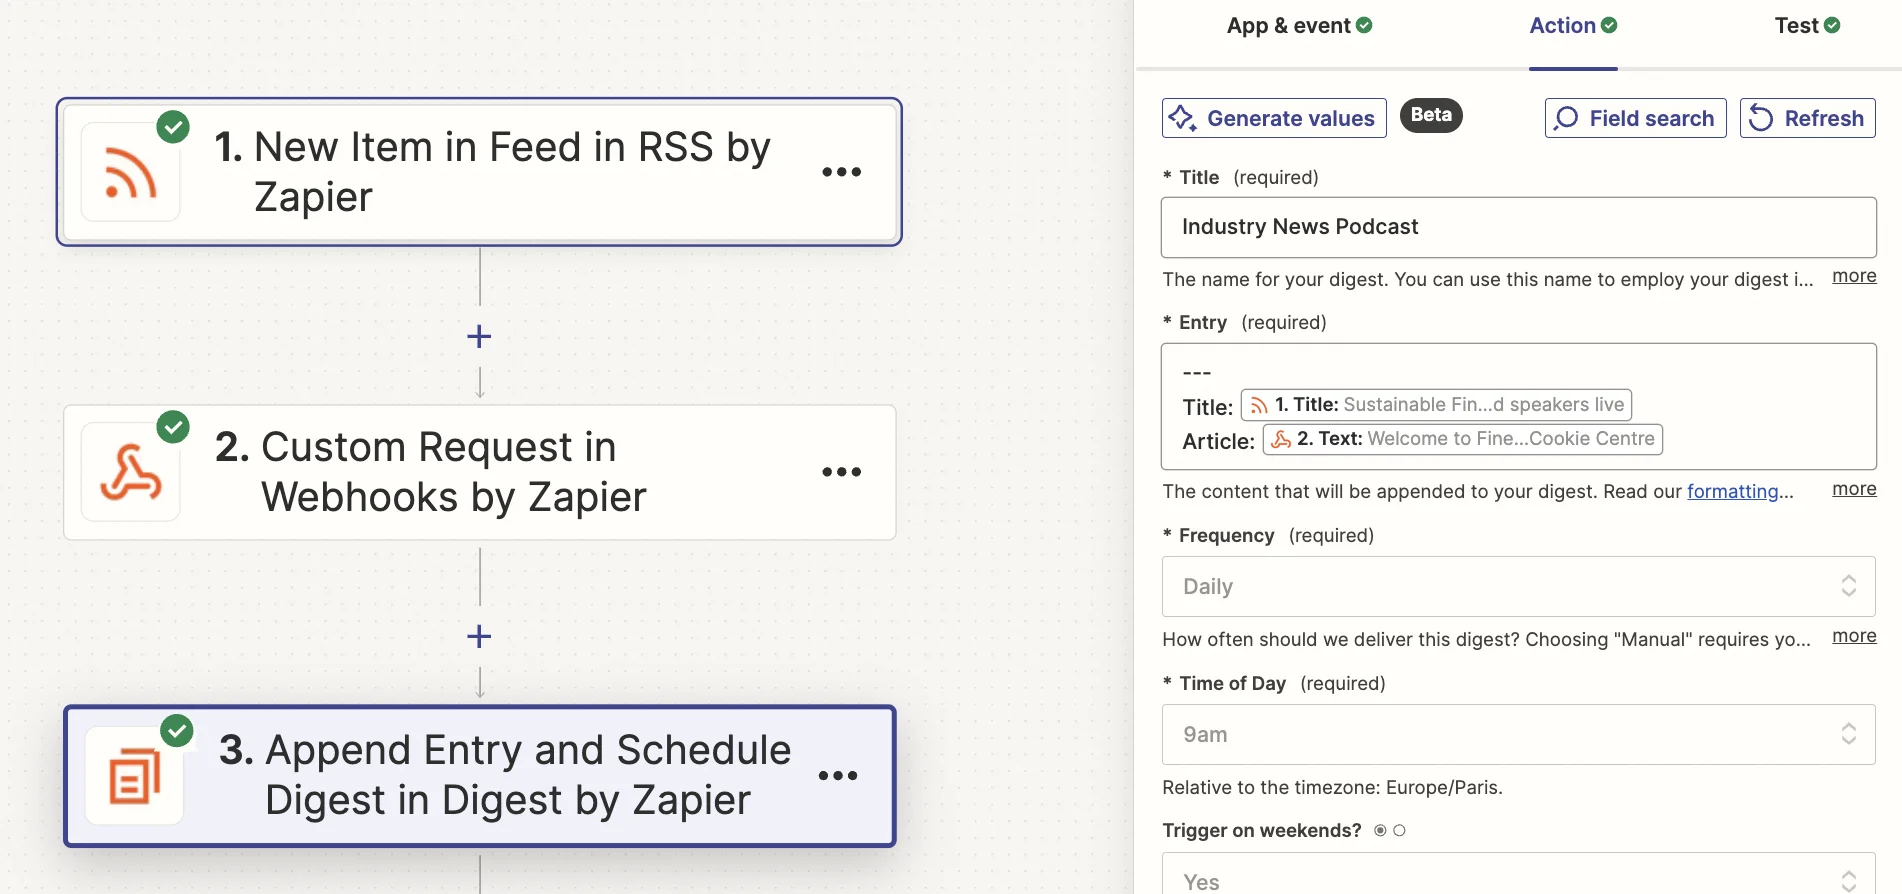
Add a new action step to your zap with ‘Digest by Zapier’ as the app and ‘Append Entry and Schedule Digest’ as the event.
When configuring the step, these are the important fields:
- Title
A digest has a title to identify it - think of it as a unique ID for the memory store.
- Entry
You build up a digest by adding new entries each time a zap runs.
Here we’ll map the ‘Text’ value from the previous webhook step and the ‘Title’ value from the RSS trigger step.
- Frequency & Time of Day
This refers to how often you want the memory store to process all its entries. In our case we want it to happen daily at 9am.
Every time a new article appears in the RSS feed, the zap runs and stores the article content in the digest. It will then pause after this step.
Then at 9am each day, the zap run that paused first (and only that zap run), will unpause and run all the subsequent steps. It will include all the entries from the digest combined.
Step 4: Turn the articles into a podcast script using ChatGPT
As it stands, every day at 9am we’ll have a block of text containing articles saved from the previous 24 hours. We now need to turn that into a script for our podcast.
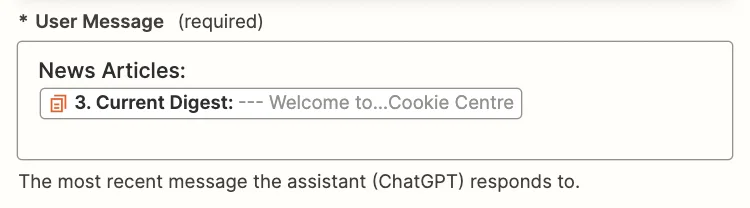
To do this we’re going to use a ChatGPT. Add a new action step to your zap, with “ChatGPT” as the app and ‘Conversation’ as the event.
When configuring the step, there are the important fields:
- User message
Here we should map the “Current Digest” field from the Digest step
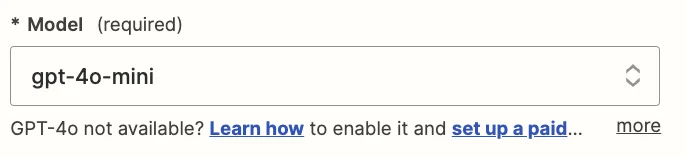
- Model
We’re going to use the “gpt-4o-mini” model, which is their cheapest and quickest model.
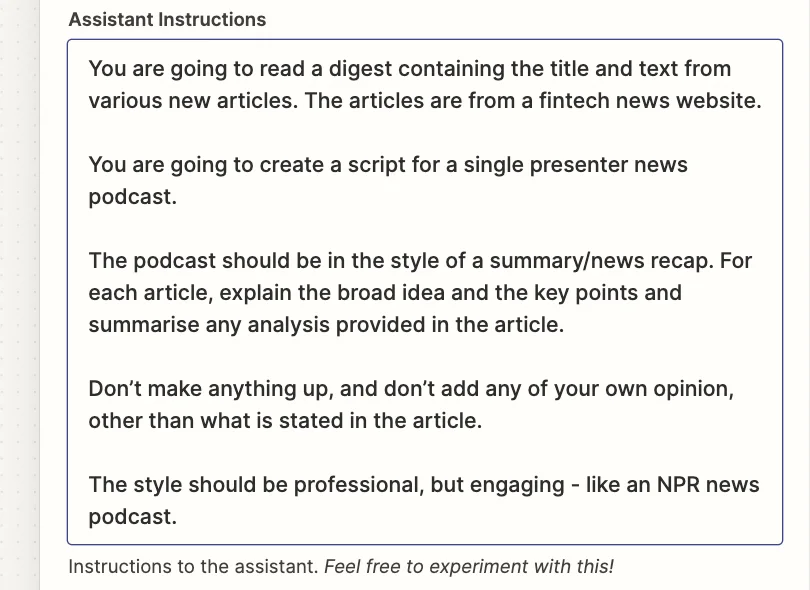
- Assistant instructions
You can experiment here to get exactly what you want, but this prompt worked well for this tutorial:
You are going to read a digest containing the title and text from various new articles. The articles are from a fintech news website.
You are going to create a script for a single presenter news podcast.
The podcast should be in the style of a summary/news recap. For each article, explain the broad idea and the key points and summarise any analysis provided in the article.
Don’t make anything up, and don’t add any of your own opinion, other than what is stated in the article.
The style should be professional, but engaging - like an NPR news podcast.
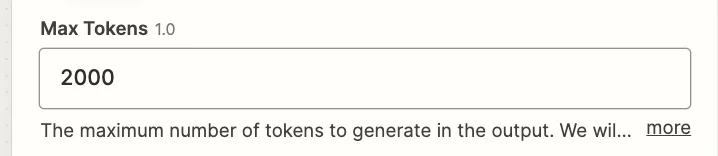
- Max tokens
This sets the length of your output. Unless you’re handling a lot of emails, 2,000 should be plenty.
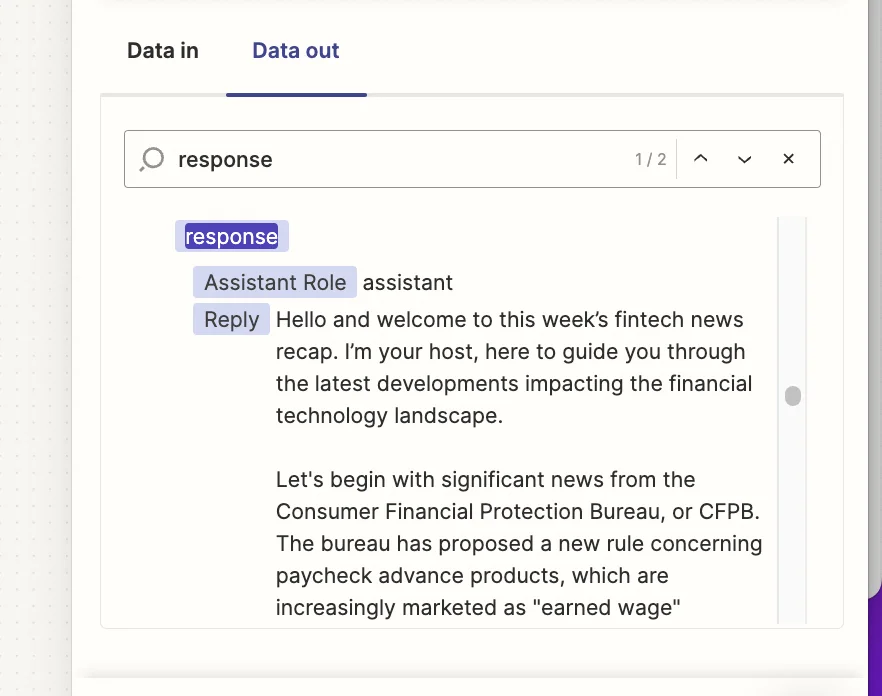
Go ahead and test the step, and in the “Data out” tab, search for ‘response’ and you’ll see the script created by ChatGPT.
Step 5: Convert the summary to an audio file using OpenAI's text-to-speech model
We have our script. Now we just need to hear it spoken.
Zapier’s ChatGPT integration also has access to OpenAI’s TTS (text-to-speech) mode which uses AI to turn text into natural sounding speech in seconds.
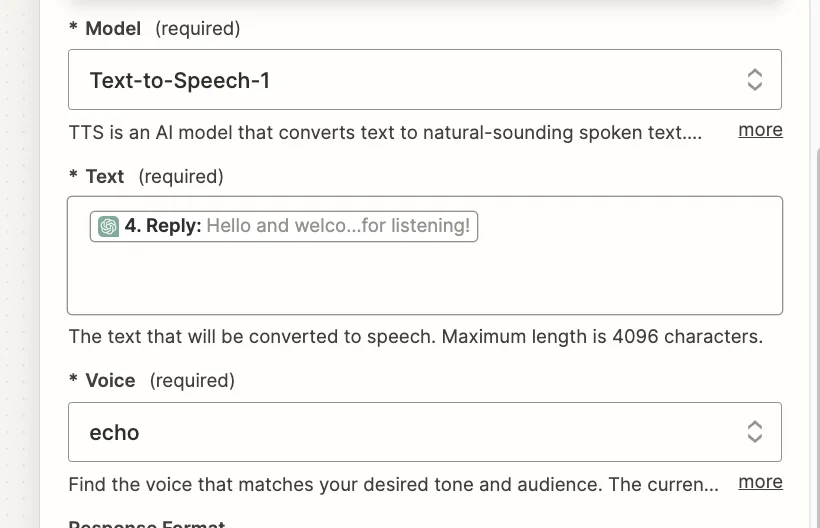
Add a new action step to your zap, with “ChatGPT” as the app and ‘Convert Text to Speech’ as the event.
This step is simple to set up. Here are the important fields:
- Model
It’s one model, but with an HD version. It’s best to select the non-HD version for a smaller file size. The quality is just fine.
- Text
Here you should map the ‘Reply’ field from the previous ChatGPT step. This is your script that AI will turn into speech.
- Voice
There are some options here. Feel free to test. ‘echo’ is pretty nice for news reading.
Test the zap step and within a few seconds your audio file is ready (although you can’t actually play it inside Zapier).
Step 6: Turn the audio into an actual podcast episode with Transistor
Now, at this point, you could just simply have Zapier email you the audio file every morning. This works just fine as you can play the file inside Gmail/Outlook.
But, keeping true to the title of this tutorial, we’re going to turn the audio file into an actual podcast, so you can listen to it on demand with your favourite podcast app (except Spotify which doesn’t support private podcasts).
We’re going to do this using a tool called Transistor. Go sign up - it has a 14 day free trial.
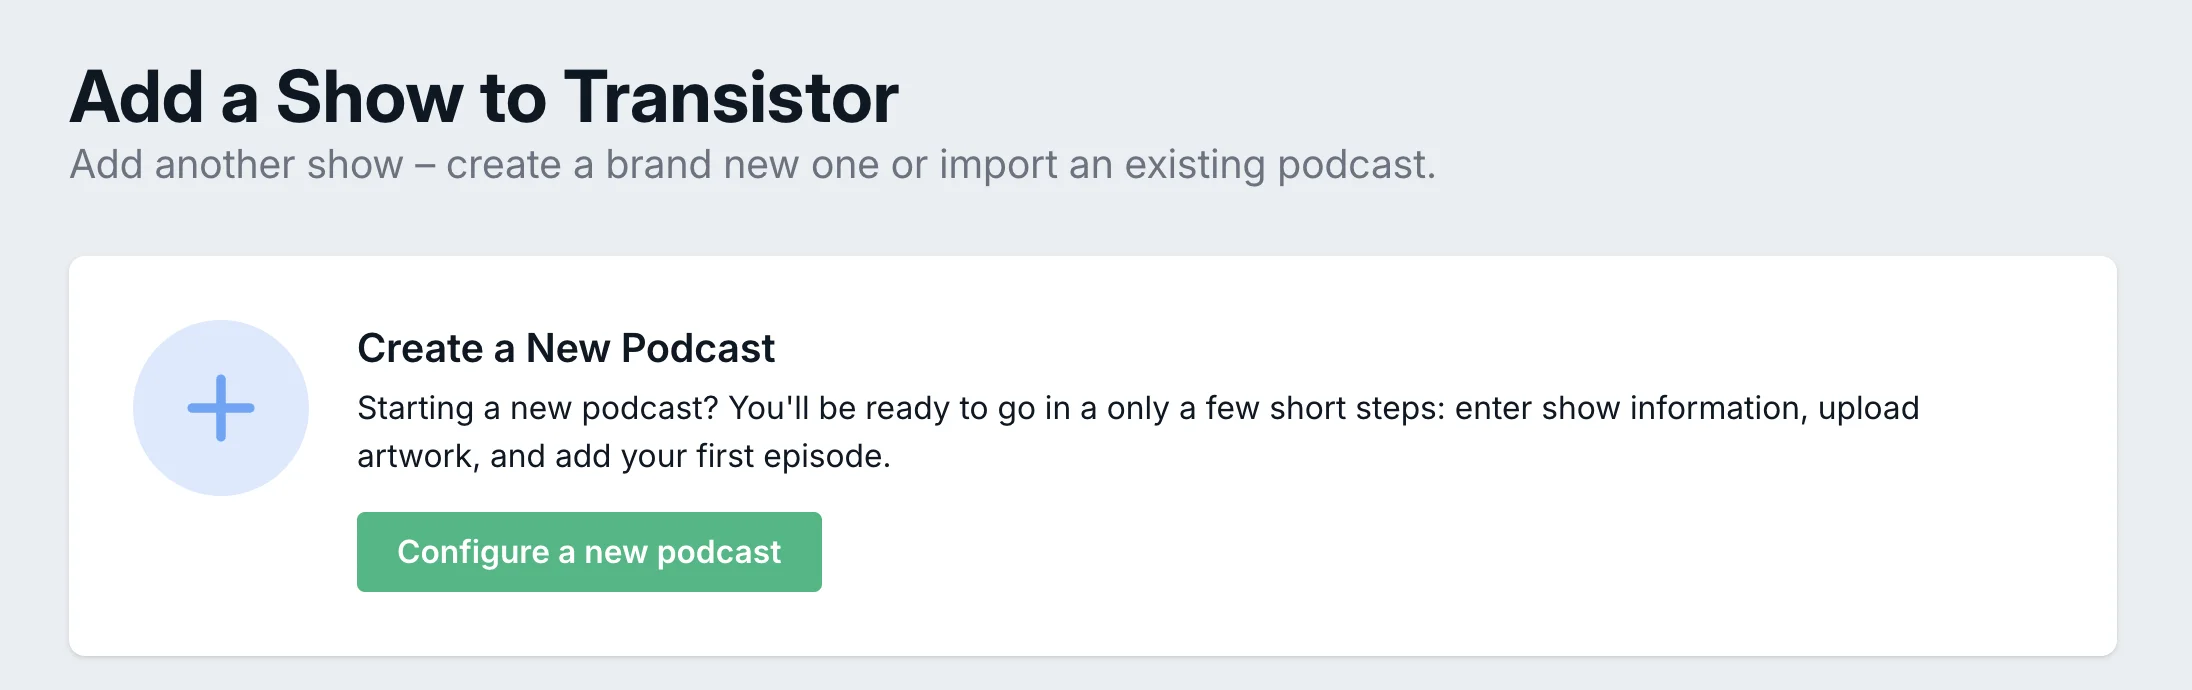
First, you need to create a show for your daily podcast episodes to live inside.
Once you’re logged in, go to the “My Shows” tab at the bottom and click the green ‘Add a Show’ button. Then on the next page, click the ‘Configure a new podcast’ button.
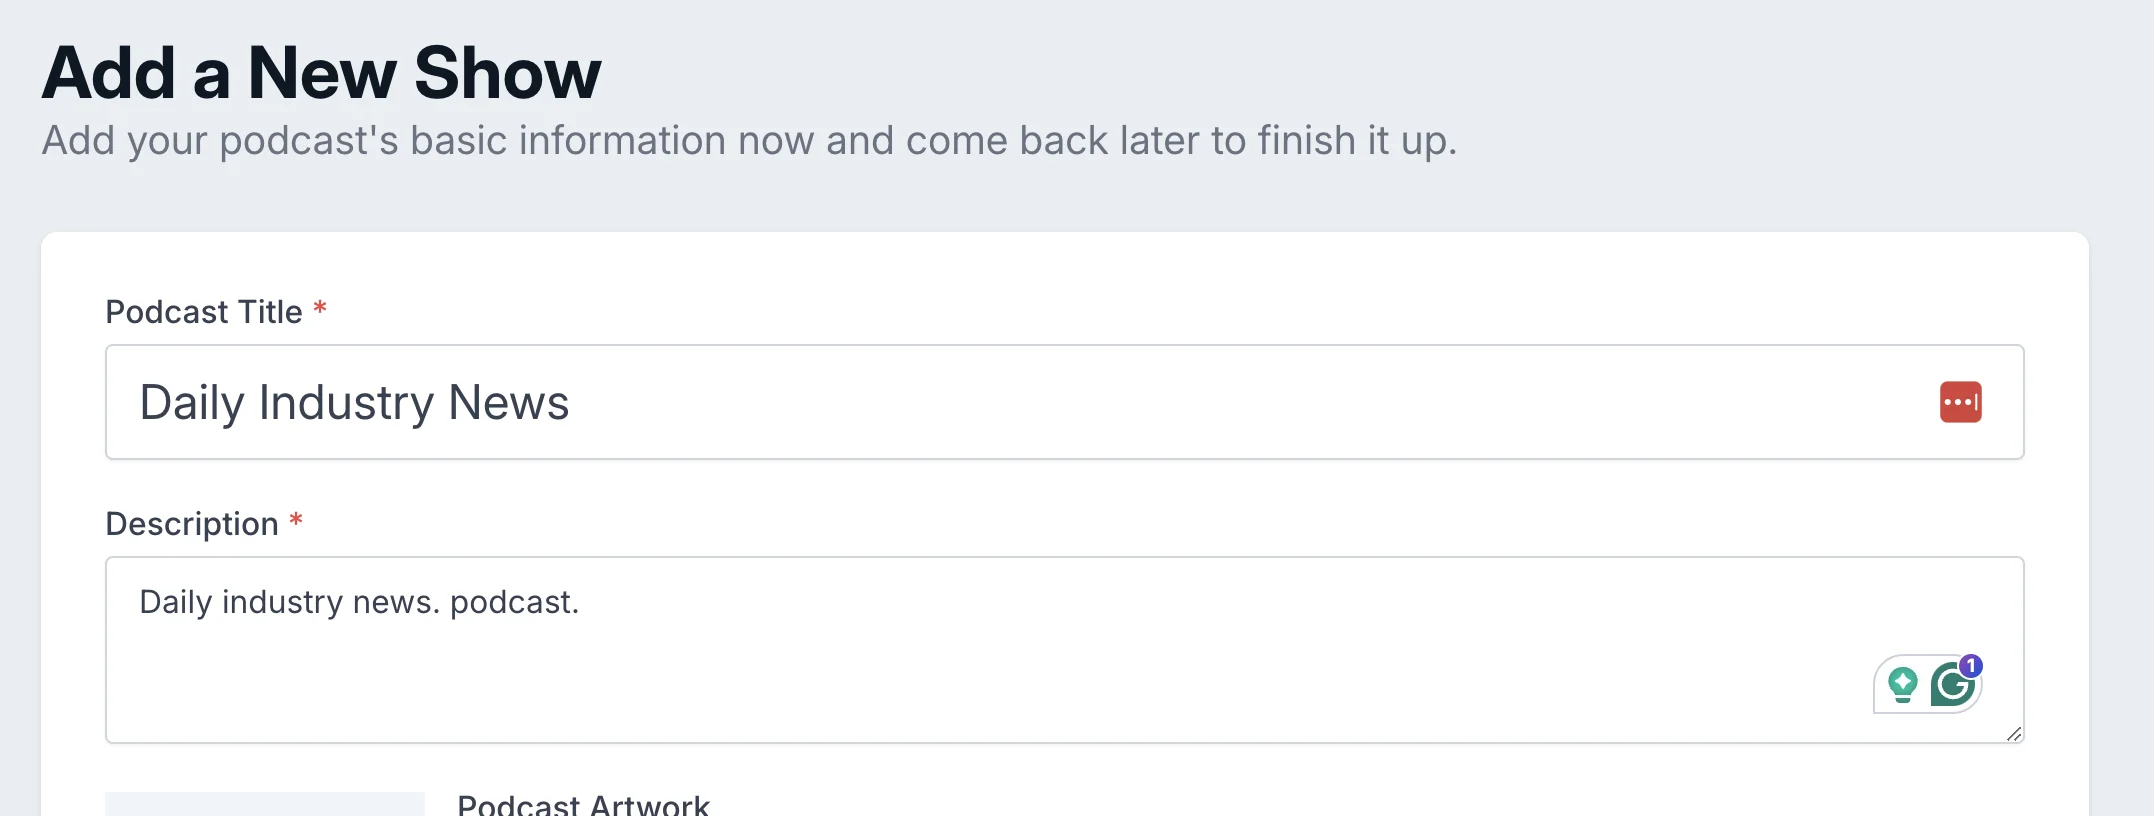
On the next page, you have to give your podcast a title and description, and further down the page you need to add your name to the ”Author” and “Show Owner”. Then you can click ‘Create My Show’.
Transistor has a Zapier integration, but it doesn’t allow you to upload and create episodes, so we’re going to do that via two custom webhook steps.
Add a new action step to your zap, with “Webhooks by Zapier” as the app and ‘POST’ as the event.
When configuring this step, here are the important fields:
- Data
This bit is quite complex but needs to look like this.
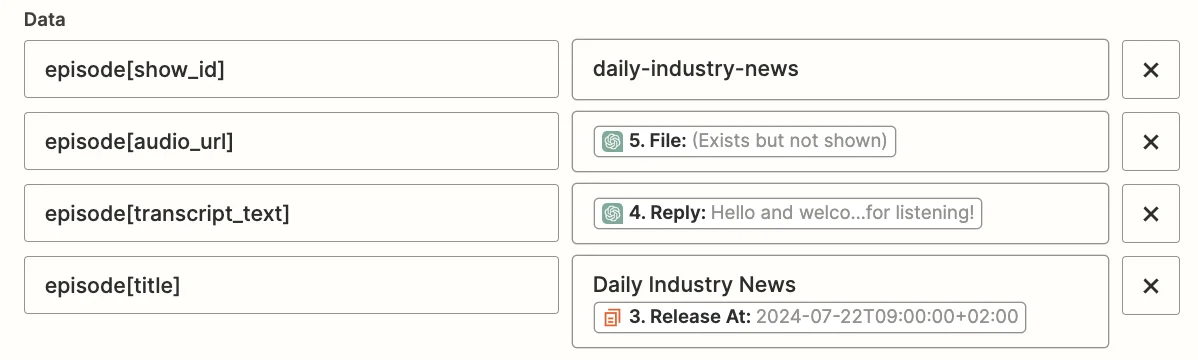
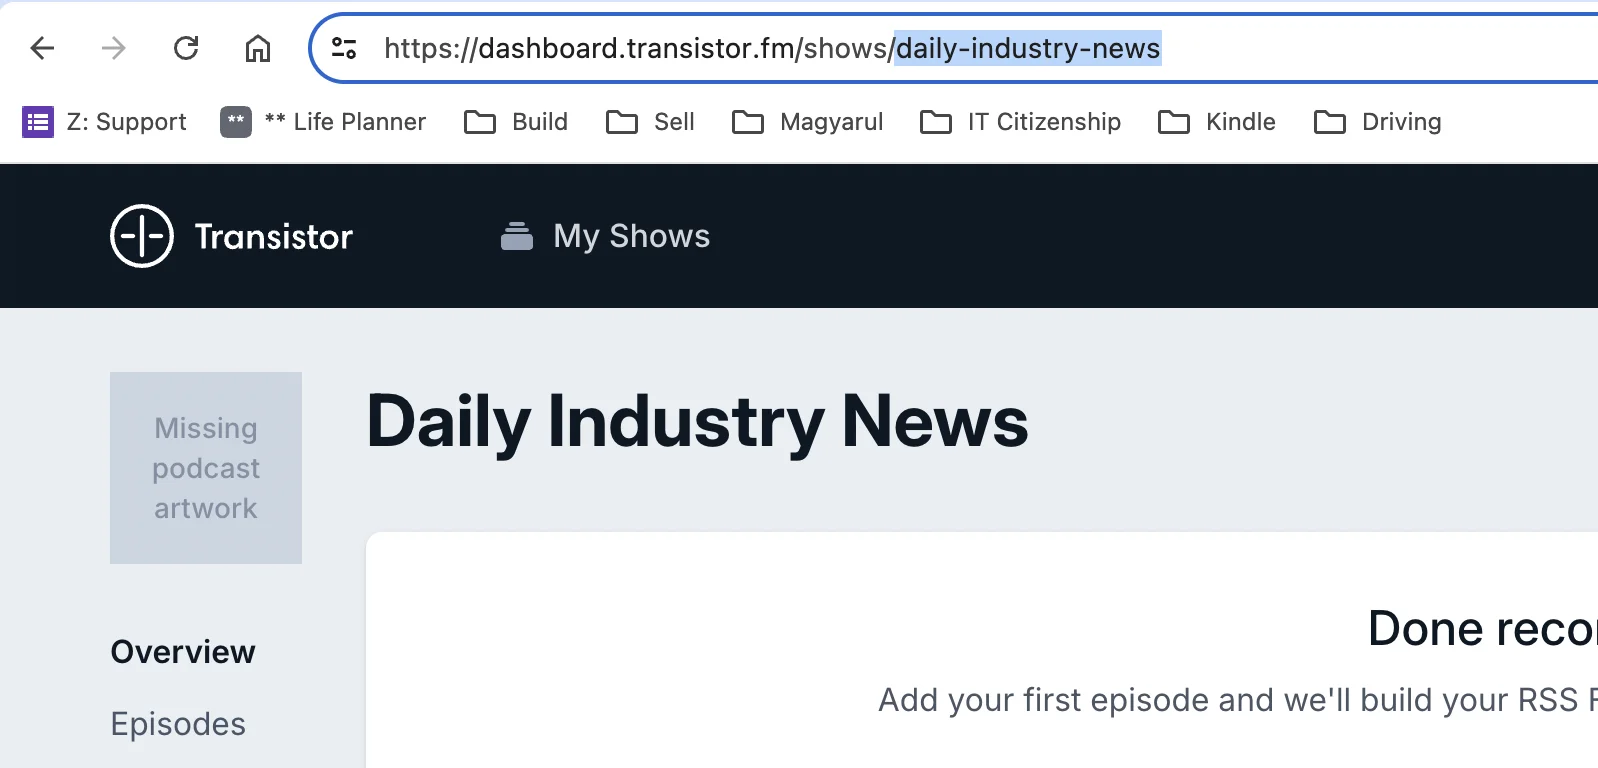
The “episode [show_id]” field should be the URL slug for the show you create - you can find that by opening the show’s dashboard in Transistor.
The “episode[audio_url]” field should map the ‘File’ value from the ChatGPT TTS step.
The “episode[transcript_text]” field should map the ‘Reply’ value from the ChatGPT podcast script step.
Finally, the “episode[title]” field should have a unique title for the episode. I used the ‘Release At’ value from the digest step as this will be different every day.
- Headers
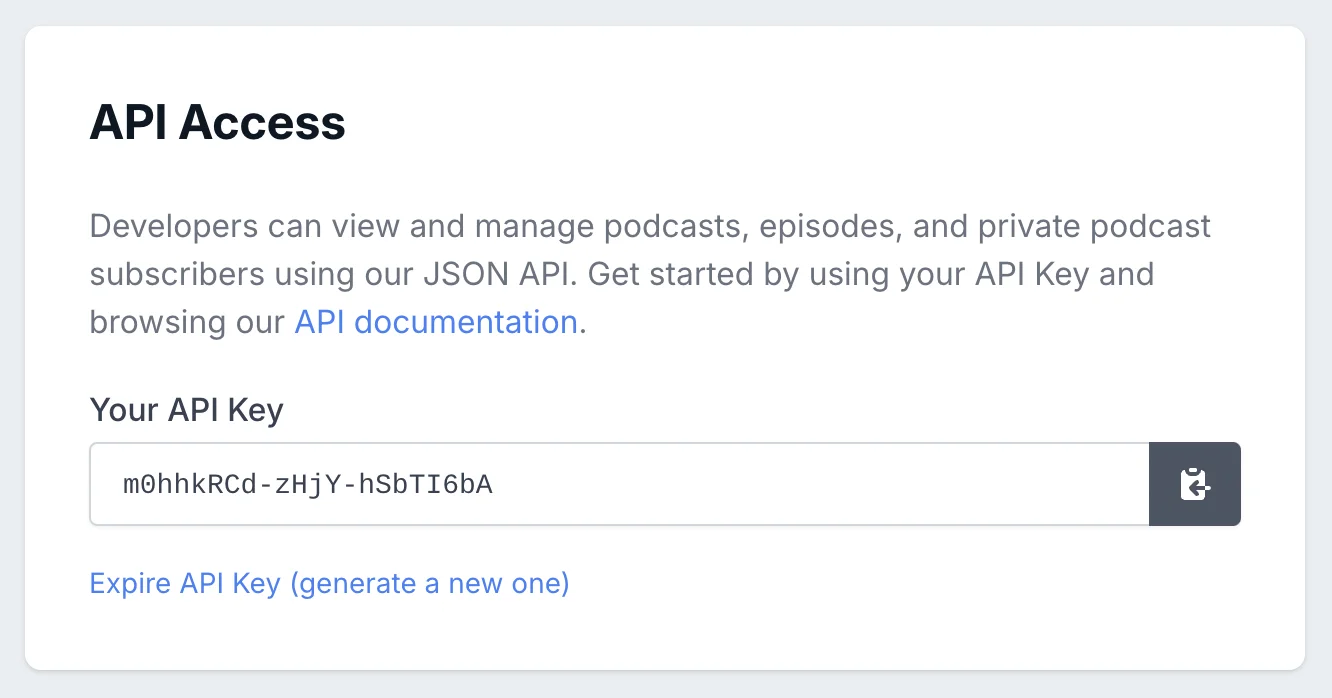
Here you need to include your Transistor API key which you’ll find at the bottom left of your account page (the one shown below has been disabled).

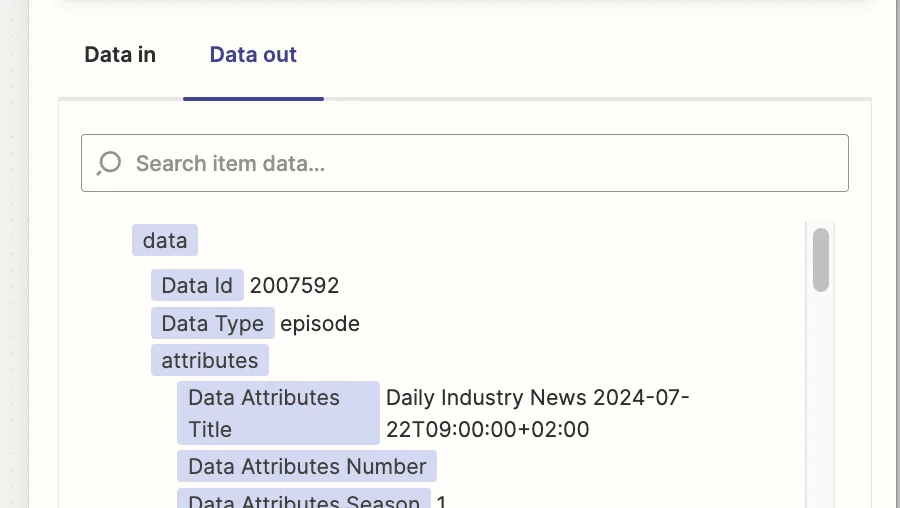
Test the step, and you’ll see an ID for the newly created podcast.

But, before you grab your headphones, there’s one last step. Newly created podcasts are set with a draft status. So we need another webhook step to publish it.
Add a new action step to your zap, with “Webhooks by Zapier” as the app and ‘Custom Request’ as the event.
The setup of this webhook looks a little different. Here are the key fields”
- Method
Set this to ‘PATCH’.

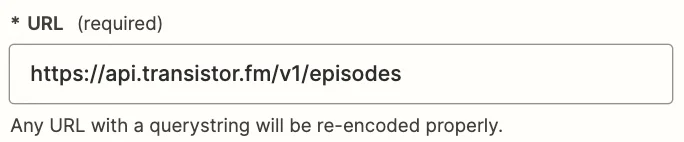
- URL
This should be set to ‘https://api.transistor.fm/v1/episodes/{id}/publish’ where {id} is the podcast ID value mapped from the previous webhook step.

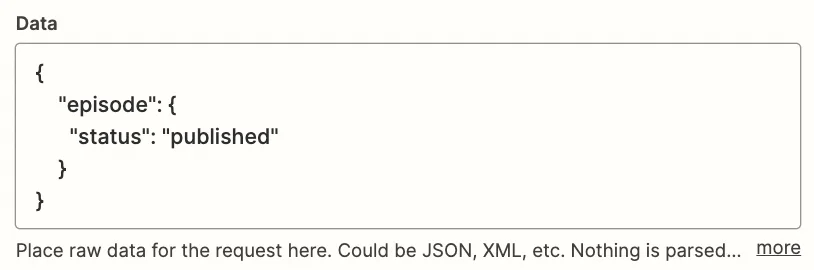
- Data
You need to include a JSON object here which will tell Transistor to set the status of the episode to published. Then it’ll be accessible to your podcast app.
Test the step, and if successful, you’ll again see the episode ID.
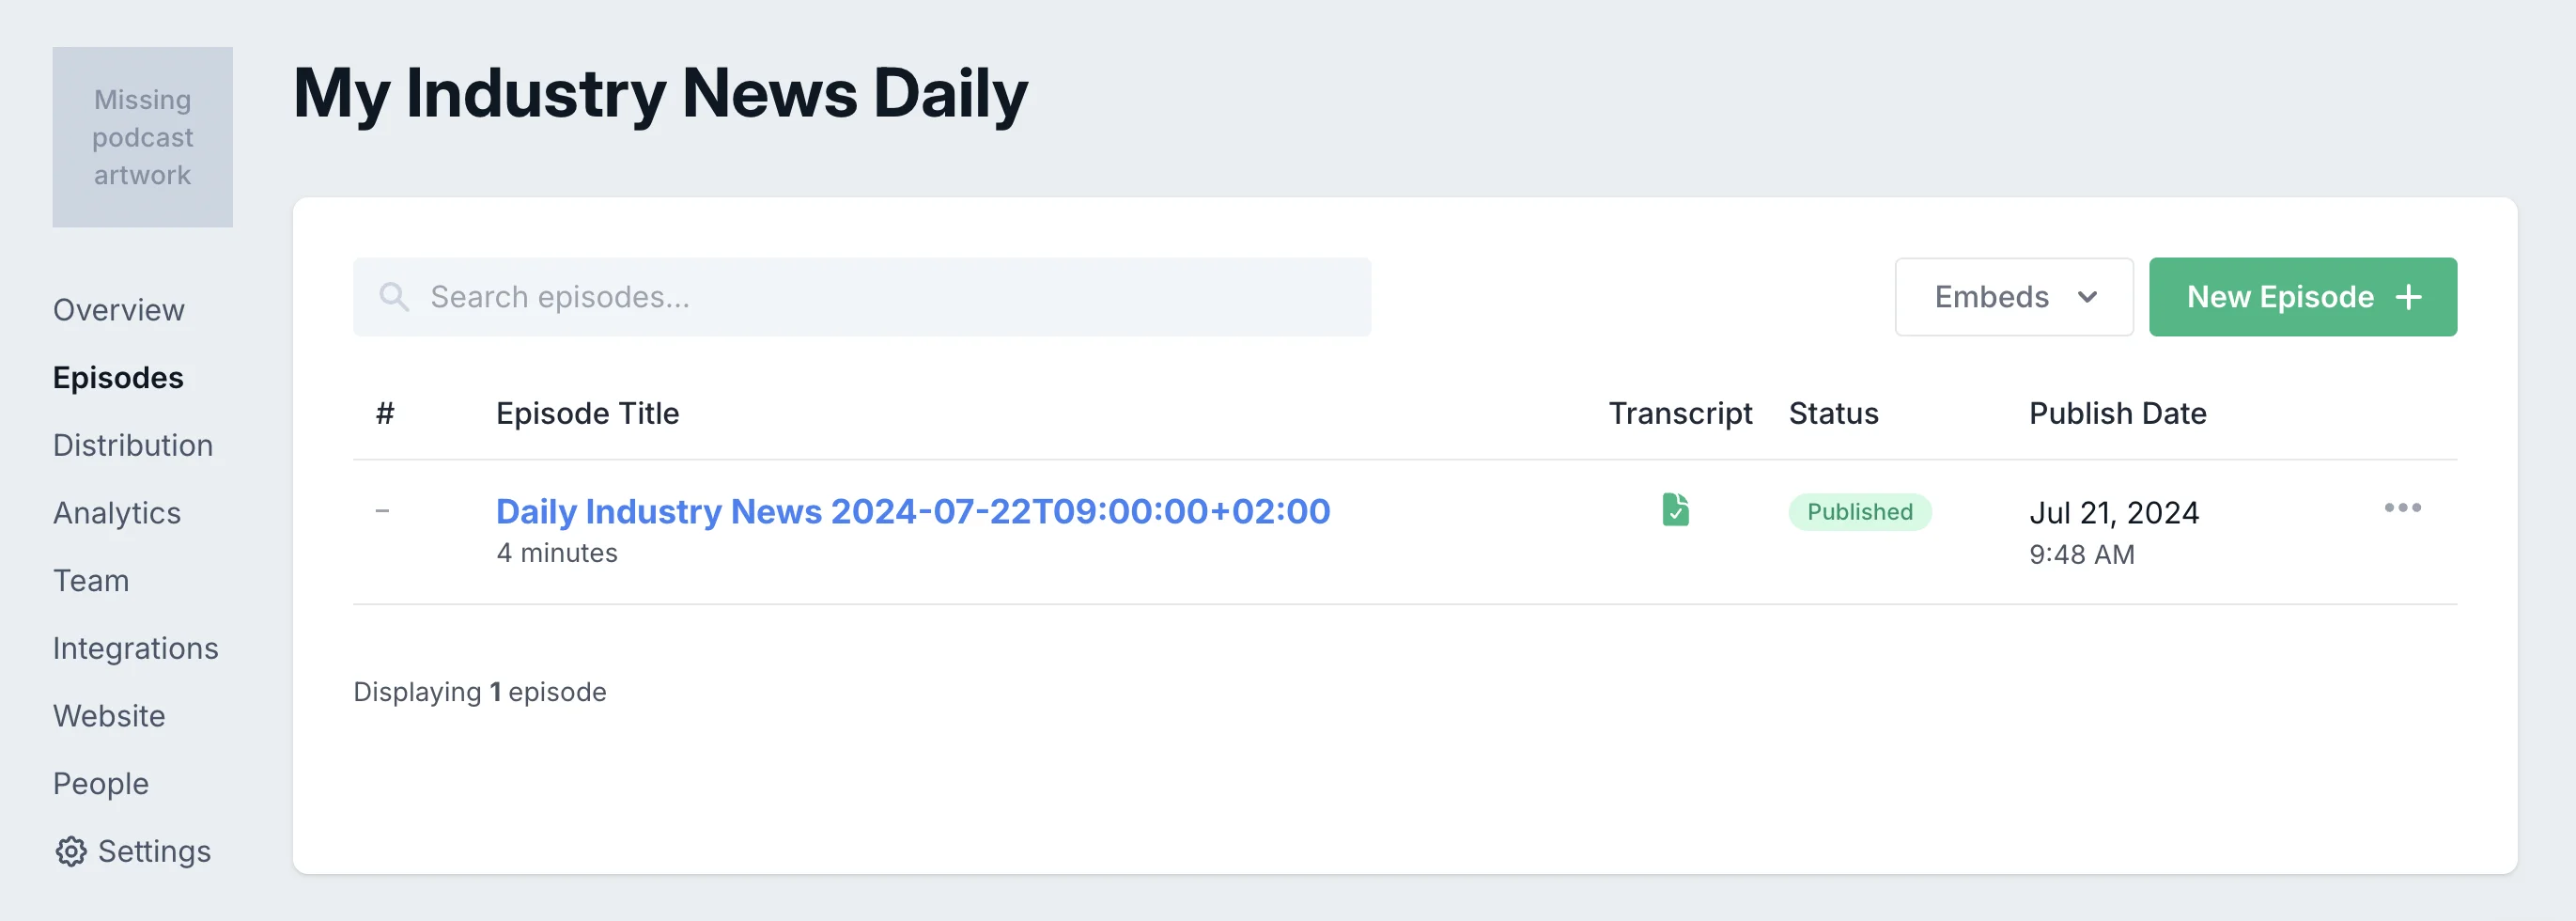
While over in Transistor you’ll see your episode ready to listen to.
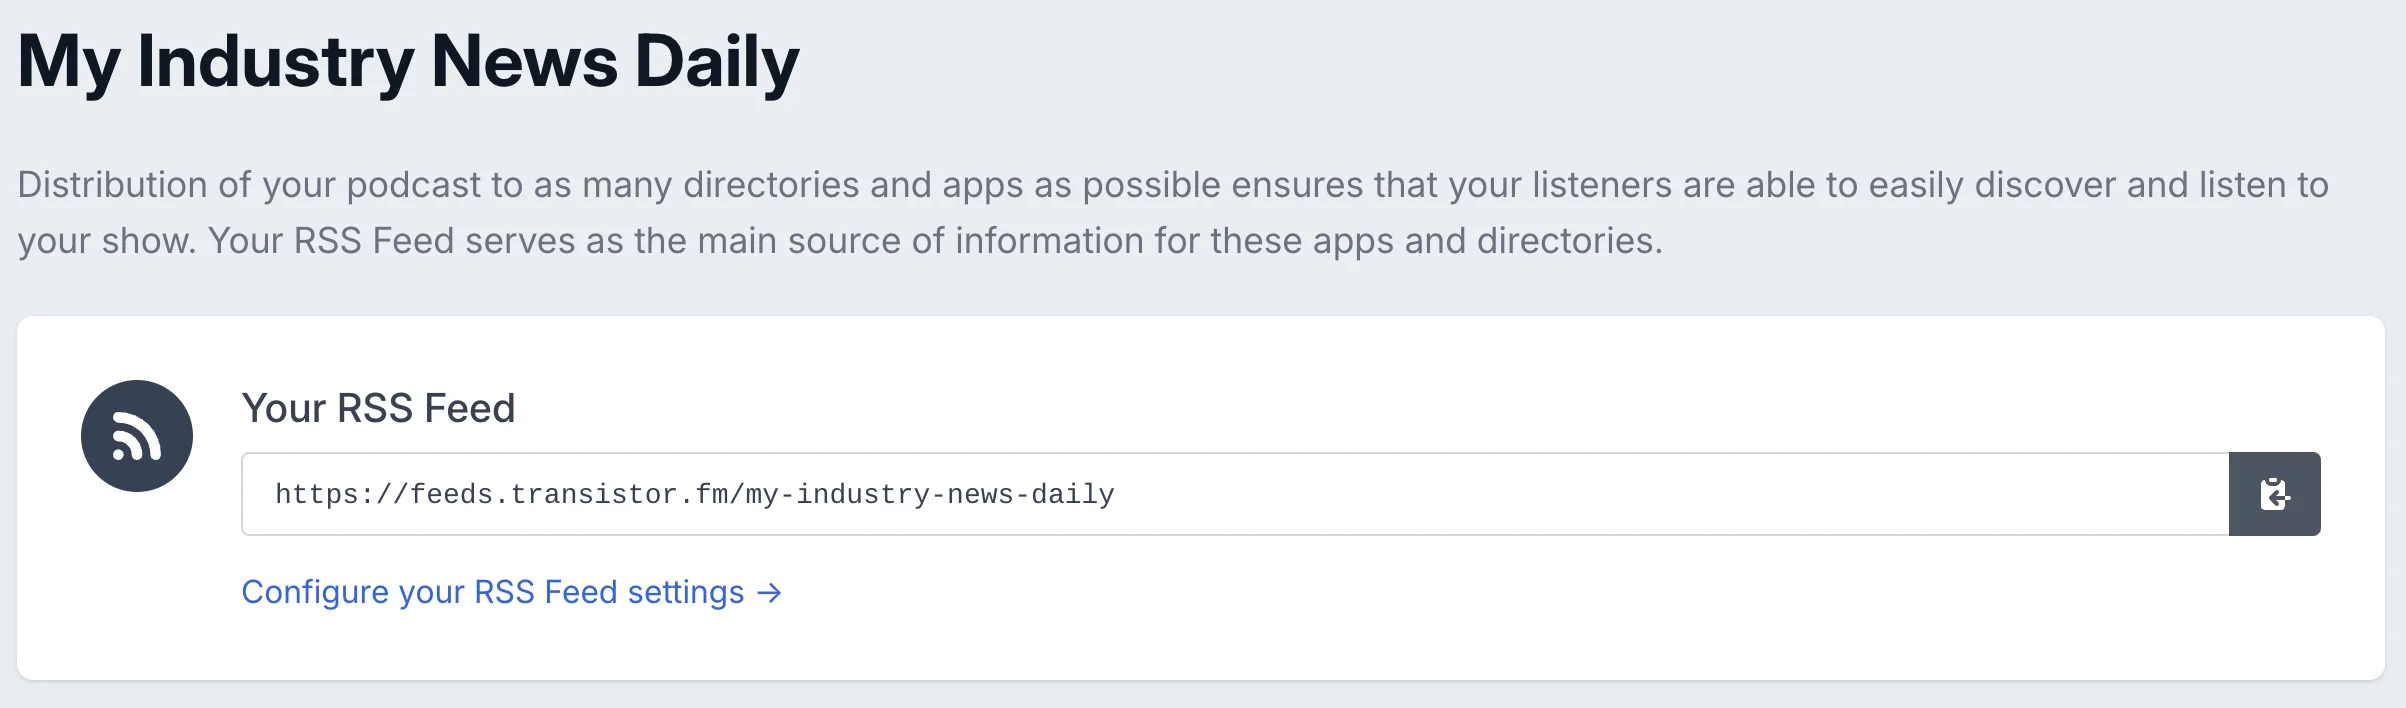
If you want to add it to your podcast app, just go to the “Distribution” tab and grab the podcast RSS URL. Happy listening!
This tutorial was created by Andrew.