Create a note-taking assistant
Learn how to set up an automated meeting note-taker that joins your meetings, creates docs with notes and recaps, and emails them to you.
2024-12-09
Welcome to the sixth and final lesson of our AI personal assistants course!
In this tutorial, we'll walk you through the process of creating a meeting note-taker with Lindy. This AI personal assistant will join your meetings, take notes, create summaries, and send you the results automatically. By the end of this tutorial, you'll have a fully functional meeting assistant that can help you stay organized and clear on meeting next steps.
Steps we’ll follow in this tutorial:
- Set up the meeting note-taker template
- Set up the event filtering condition
- Configure the meeting recording settings
- Set up document creation
- Configure message and email notifications
- Test your meeting note-taker
You’ll need:
Let’s dive in!
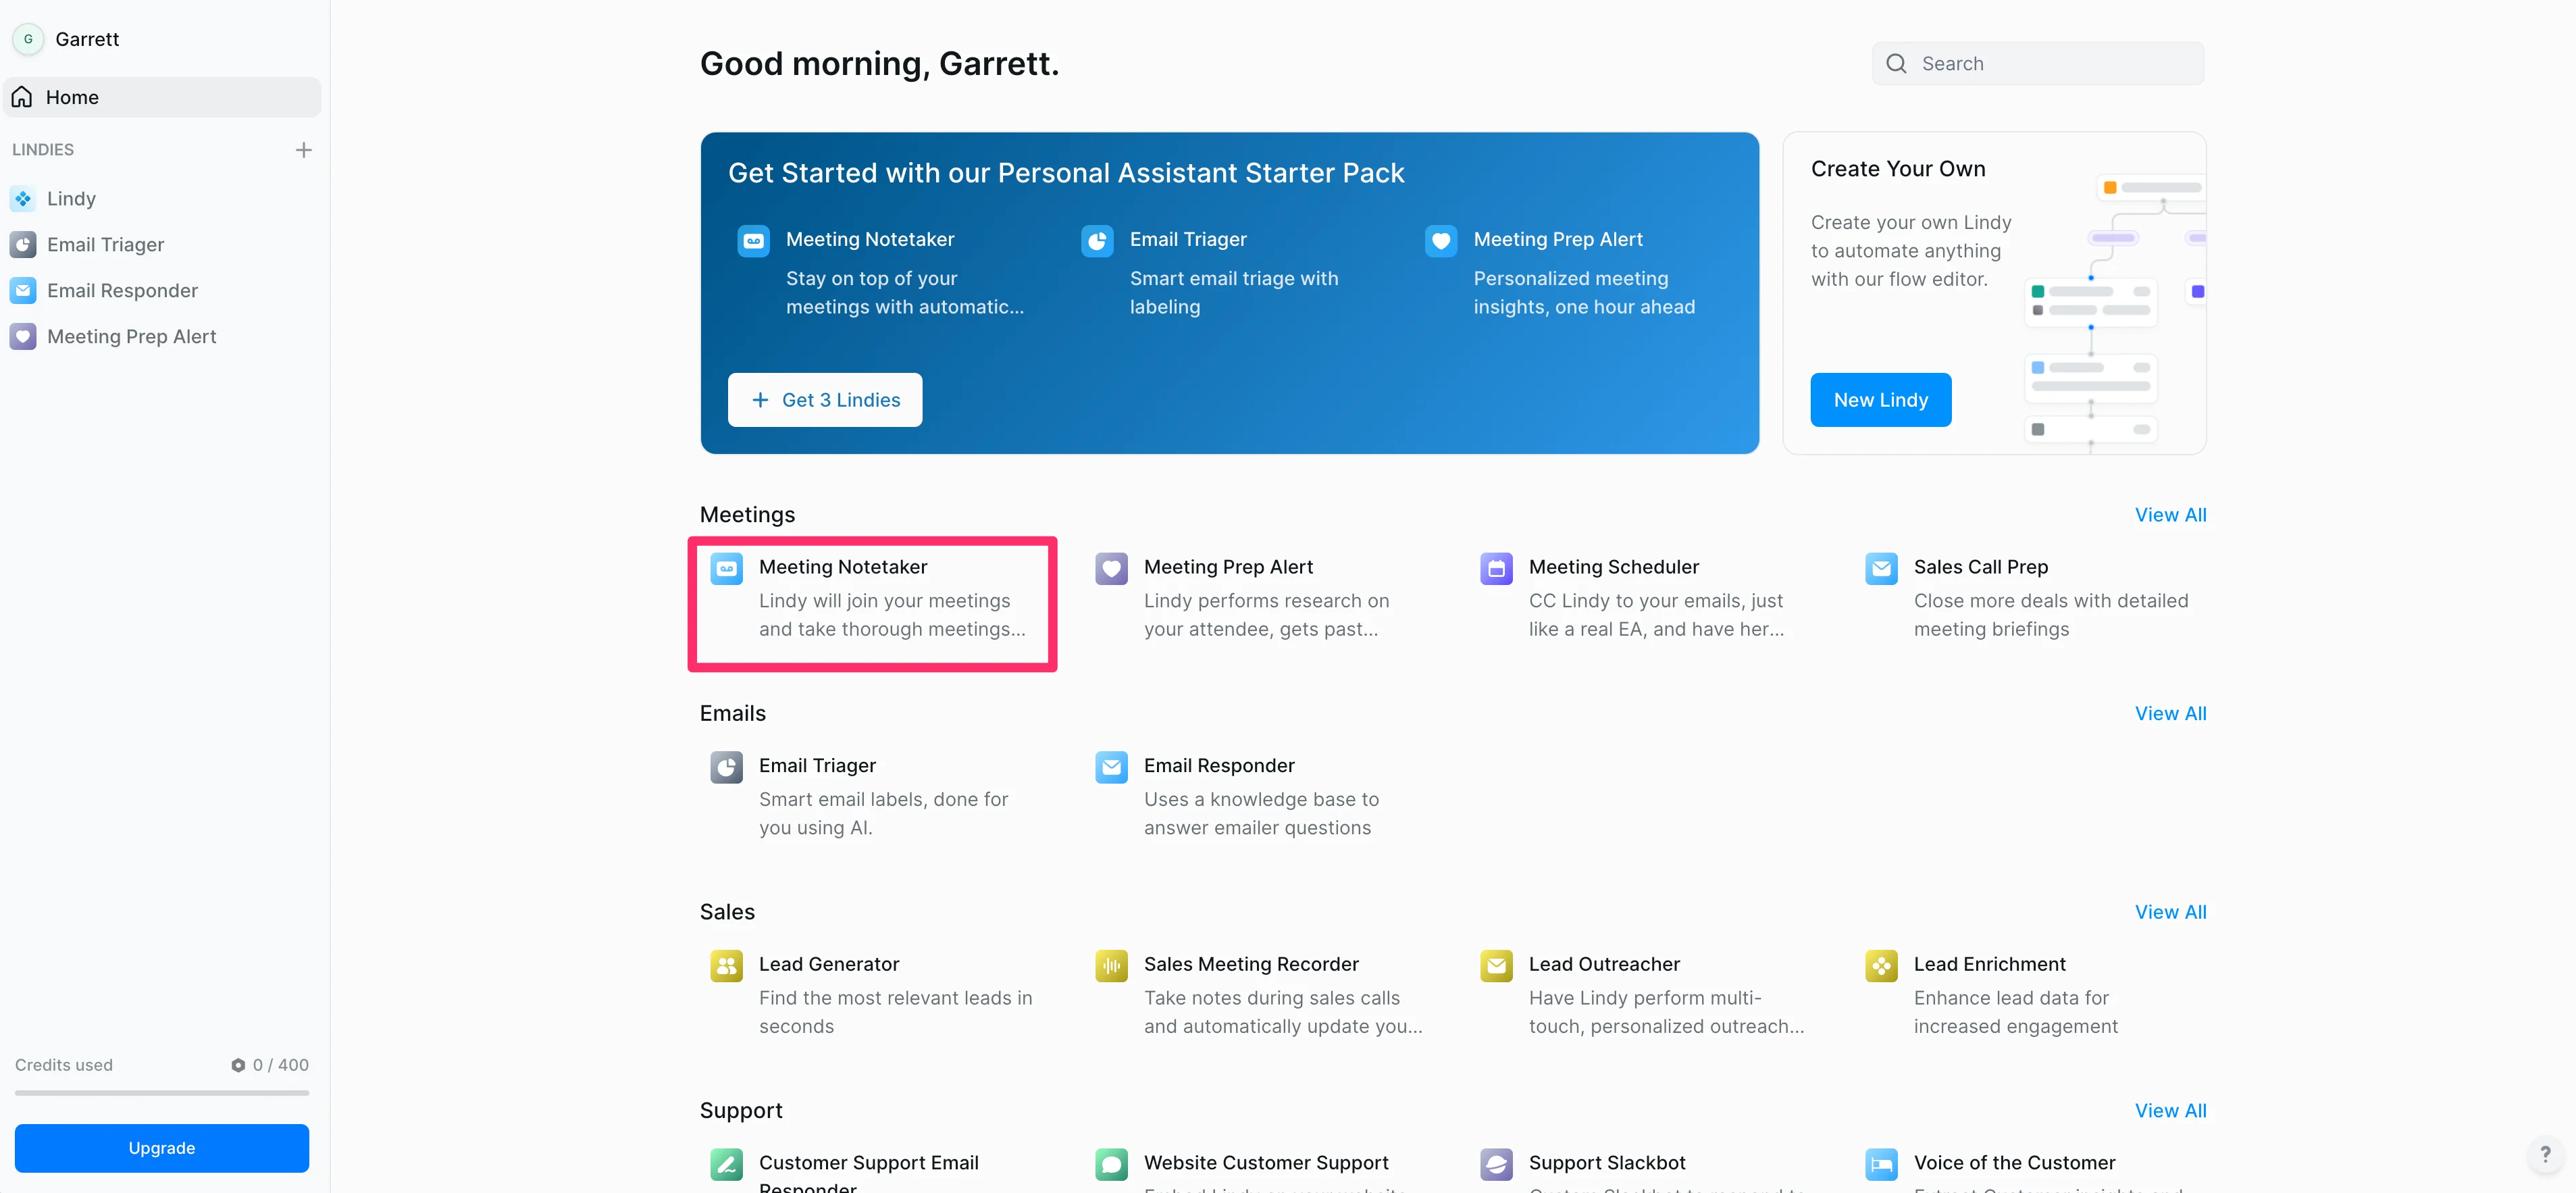
Step 1: Set up the meeting note-taker template
To begin, navigate to the Lindy marketplace and locate the “Meeting Notetaker” template. Click on it to add it to your account. This will take you to the flow editor, where you can customize each step of the process.
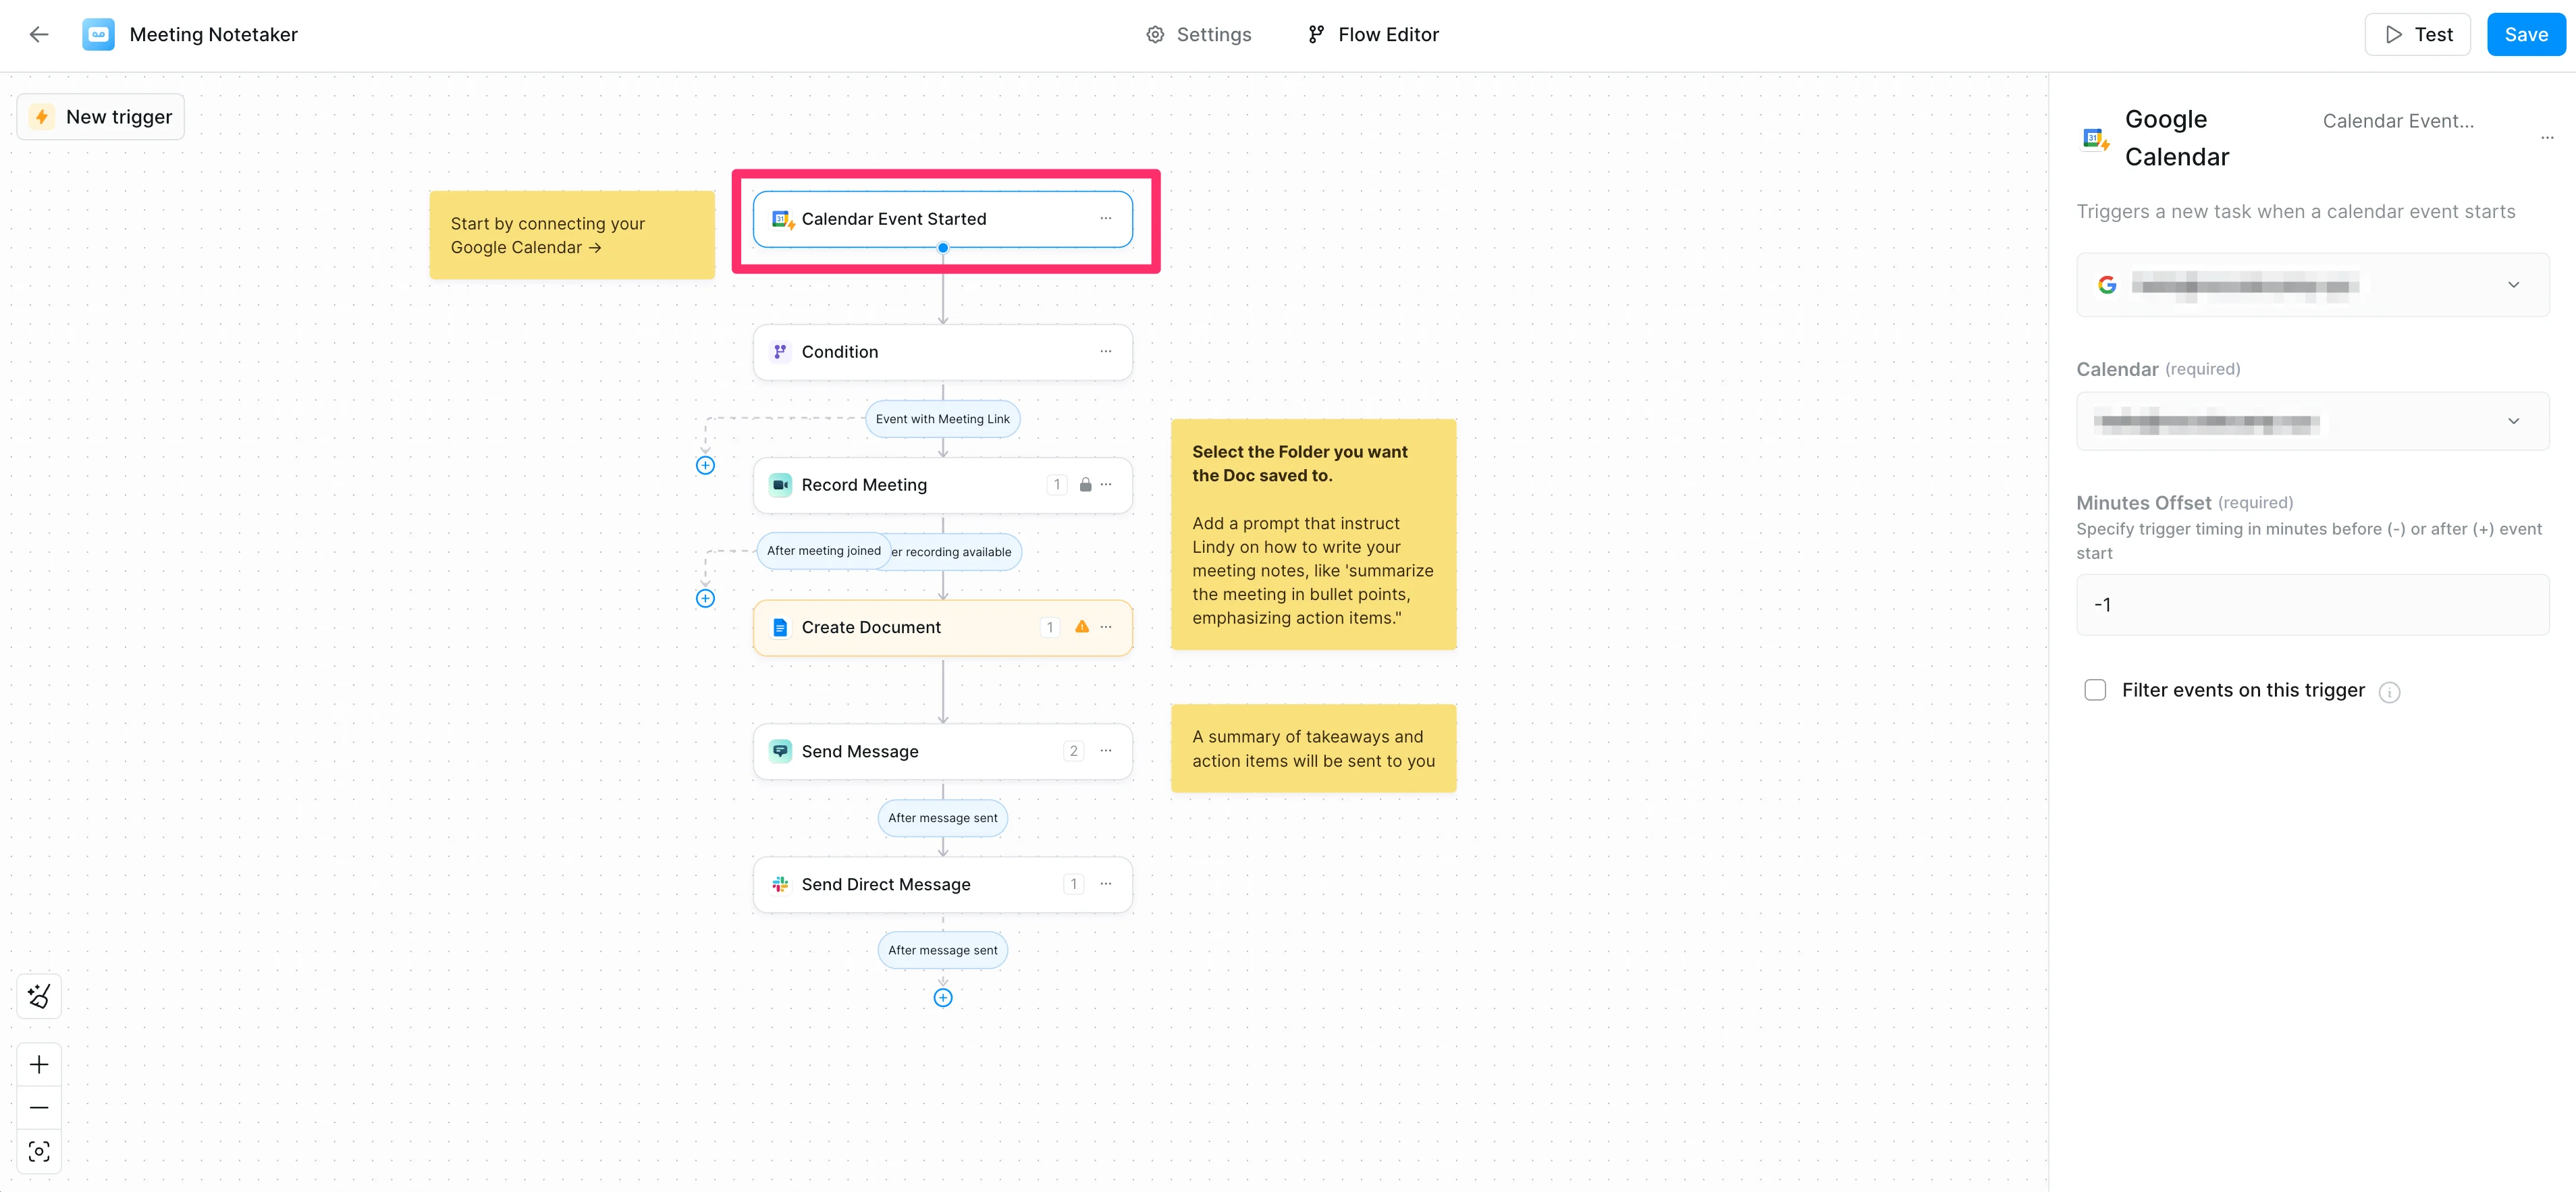
The first step in the flow editor is a Calendar Event Started trigger. This determines when Lindy will join your meetings. To configure the trigger:
- Authenticate your Google Calendar (or update to Outlook Calendar)
- Adjust the meeting offset, which determines how early Lindy will join the meeting. By default, it's set to join one minute before the meeting starts.
- Optionally, add a trigger filter to exclude certain events based on specific criteria.
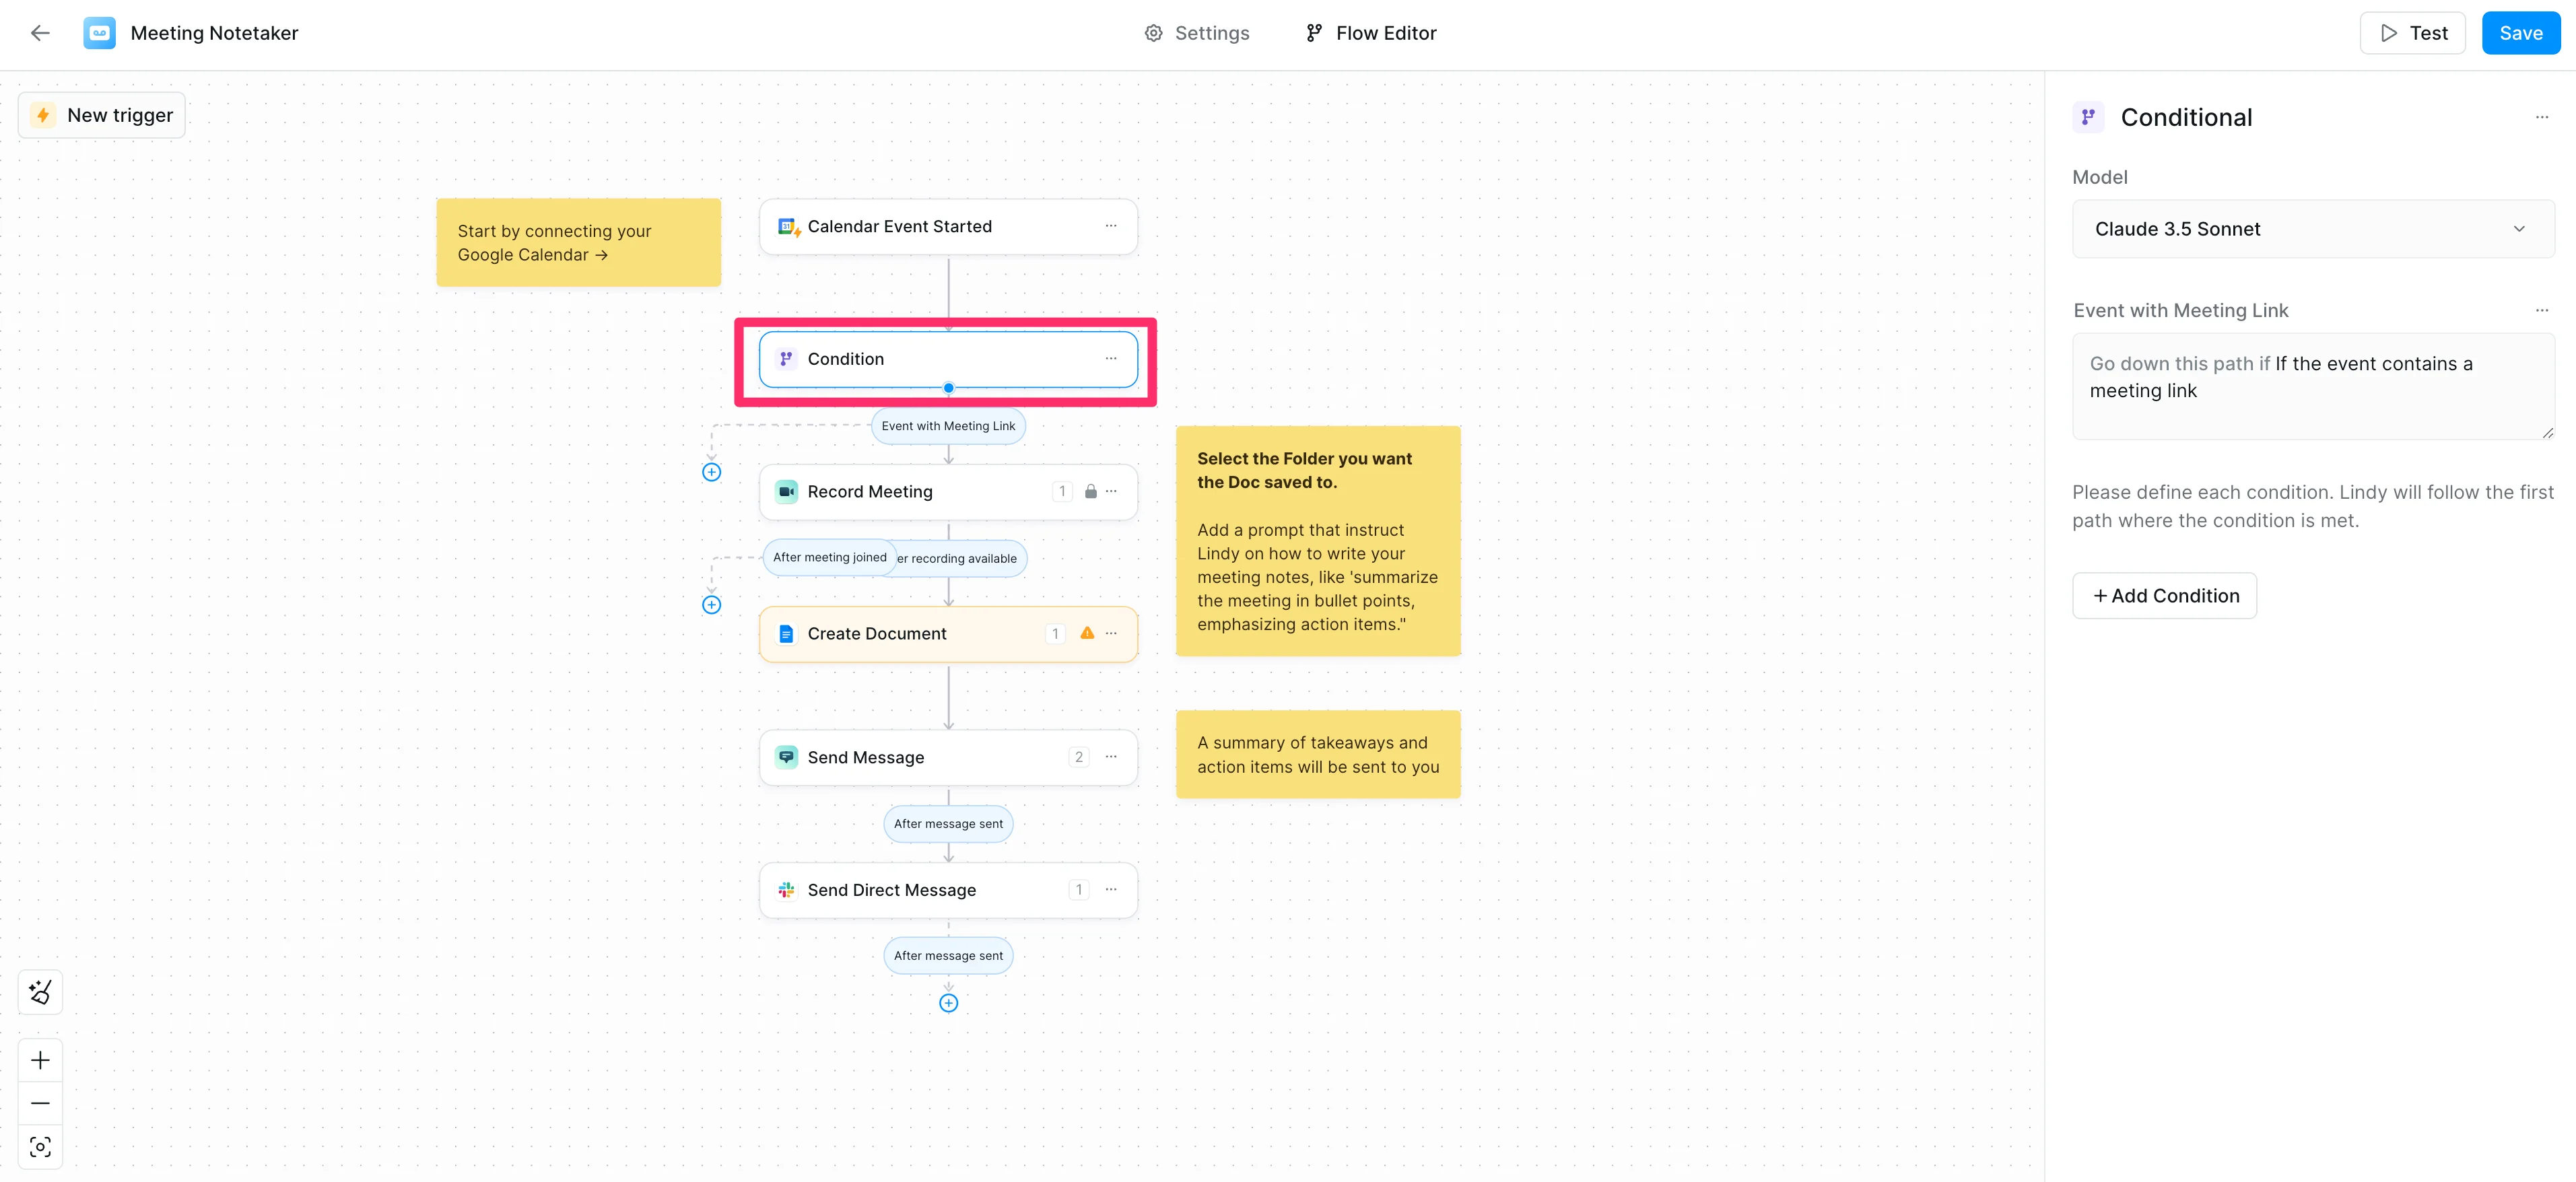
Step 2: Set up the event filtering condition
After setting up the calendar trigger, there’s an additional filtering condition to ensure Lindy only joins appropriate meetings.
By default, the Condition is set to check if the event contains a meeting link. You can customize this by adding more conditions or updating the existing condition.
Default Condition:
If the event contains a meeting link.
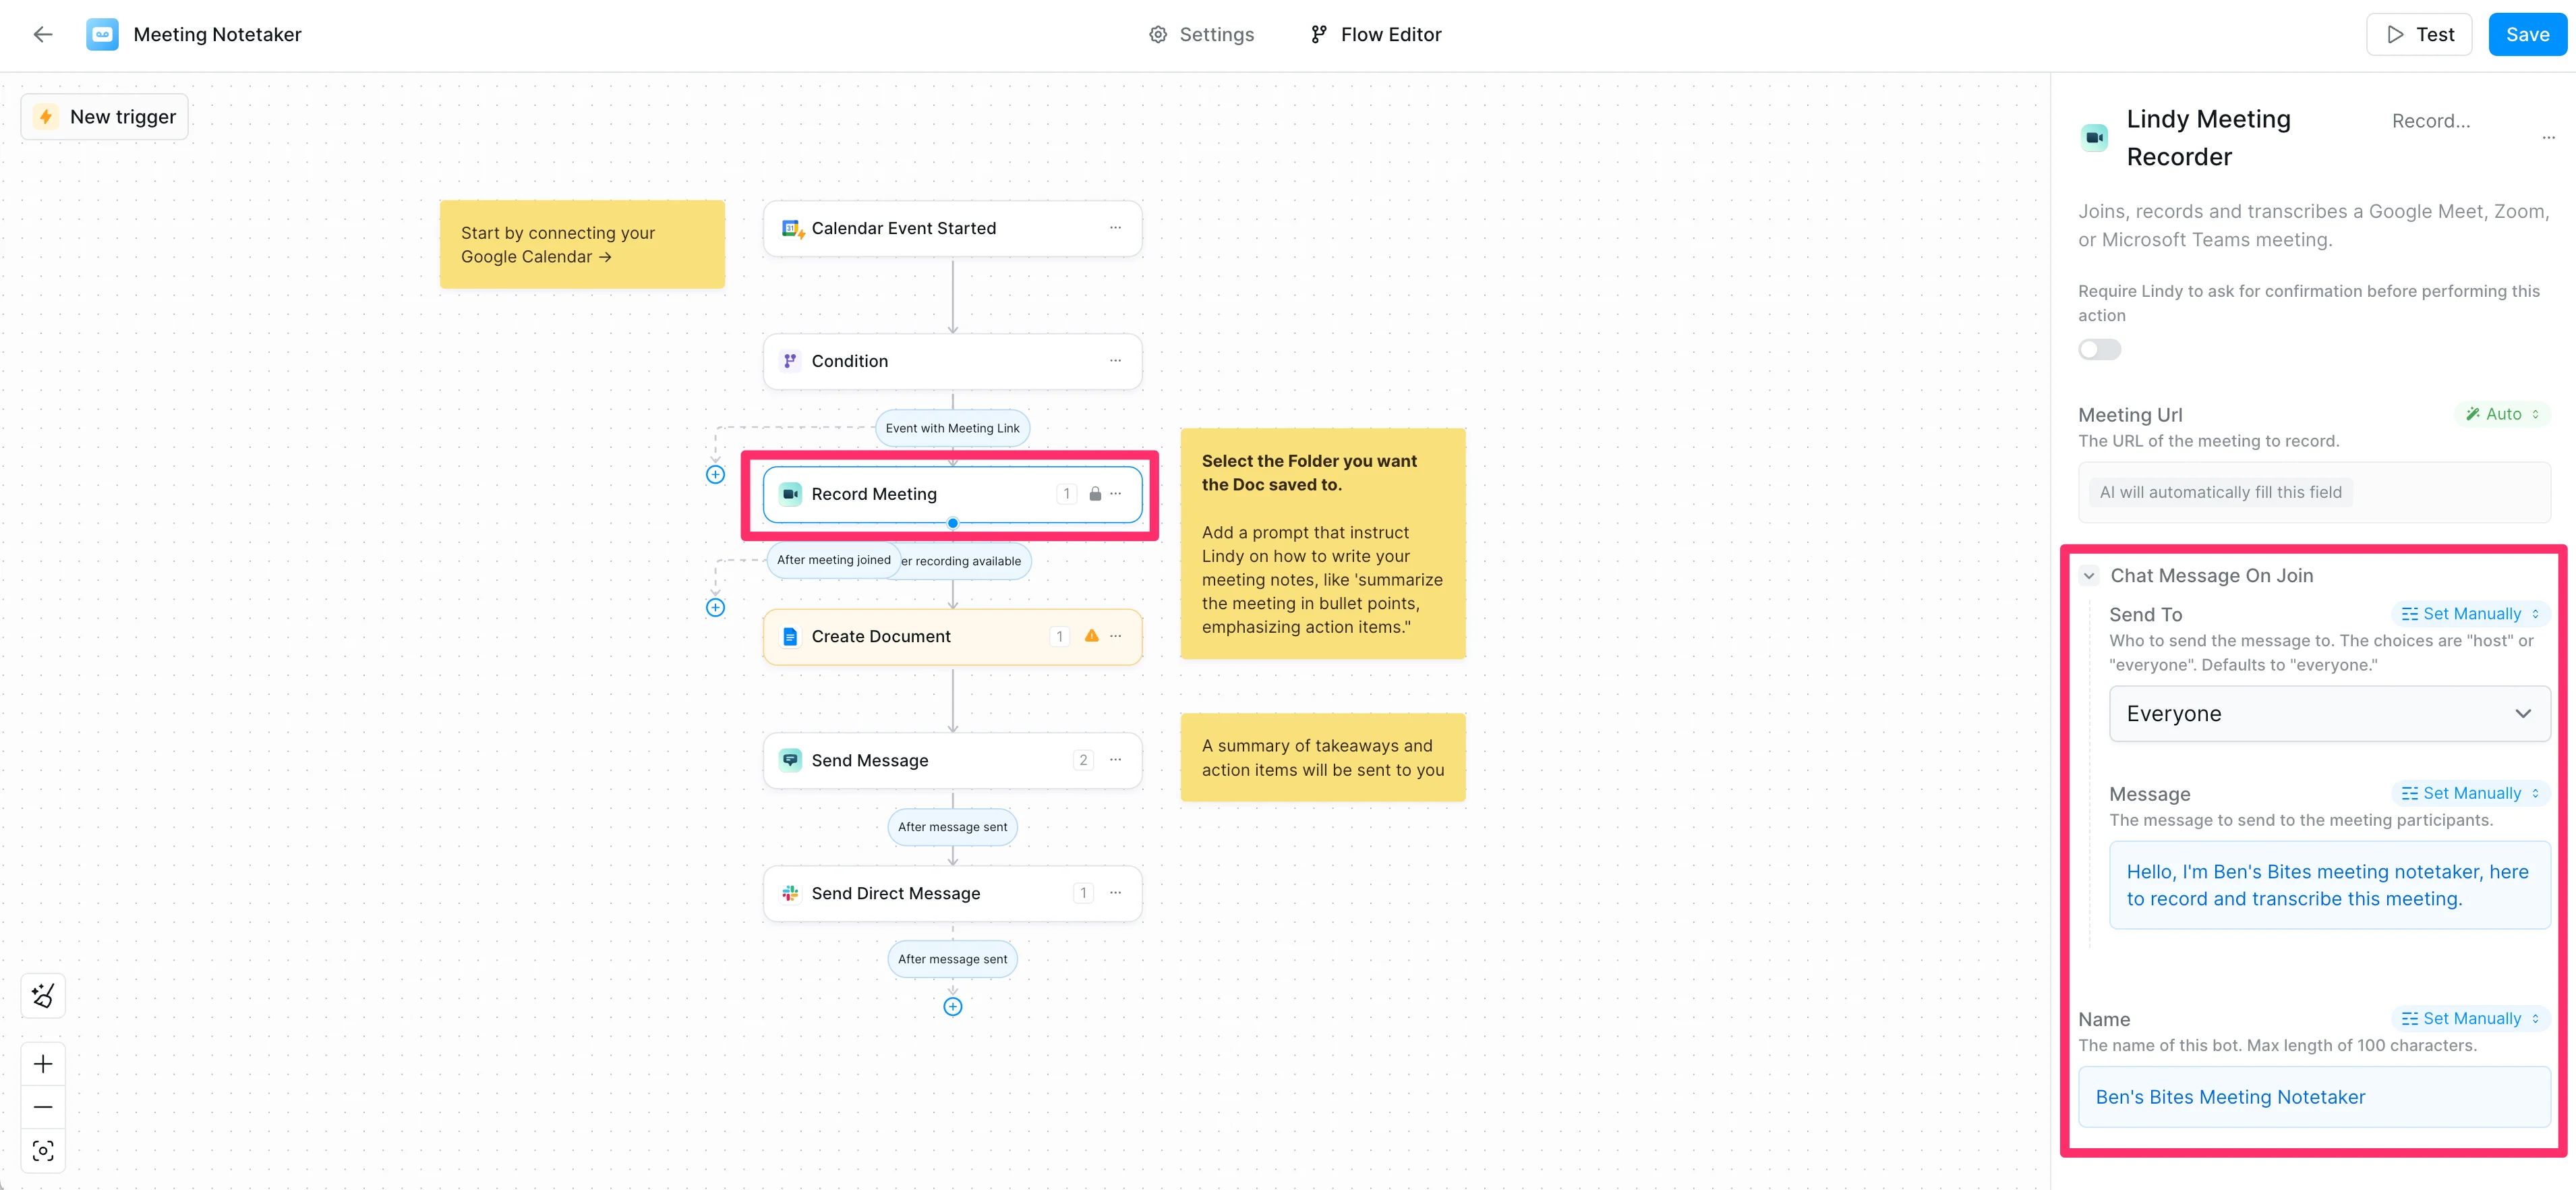
Step 3: Configure the meeting recording settings
Next, you'll set up the parameters for how Lindy will record and participate in the meeting. To configure the recording settings:
- Click the "Record Meeting" step in the workflow.
- Customize the Name of the note-taker. For example, we changed ours to "Ben's Bites Meeting Notetaker".
- Edit the message that the note-taker sends when joining the meeting.
- Specify who should receive the note-taker's introductory message. (This defaults to “Everyone”)
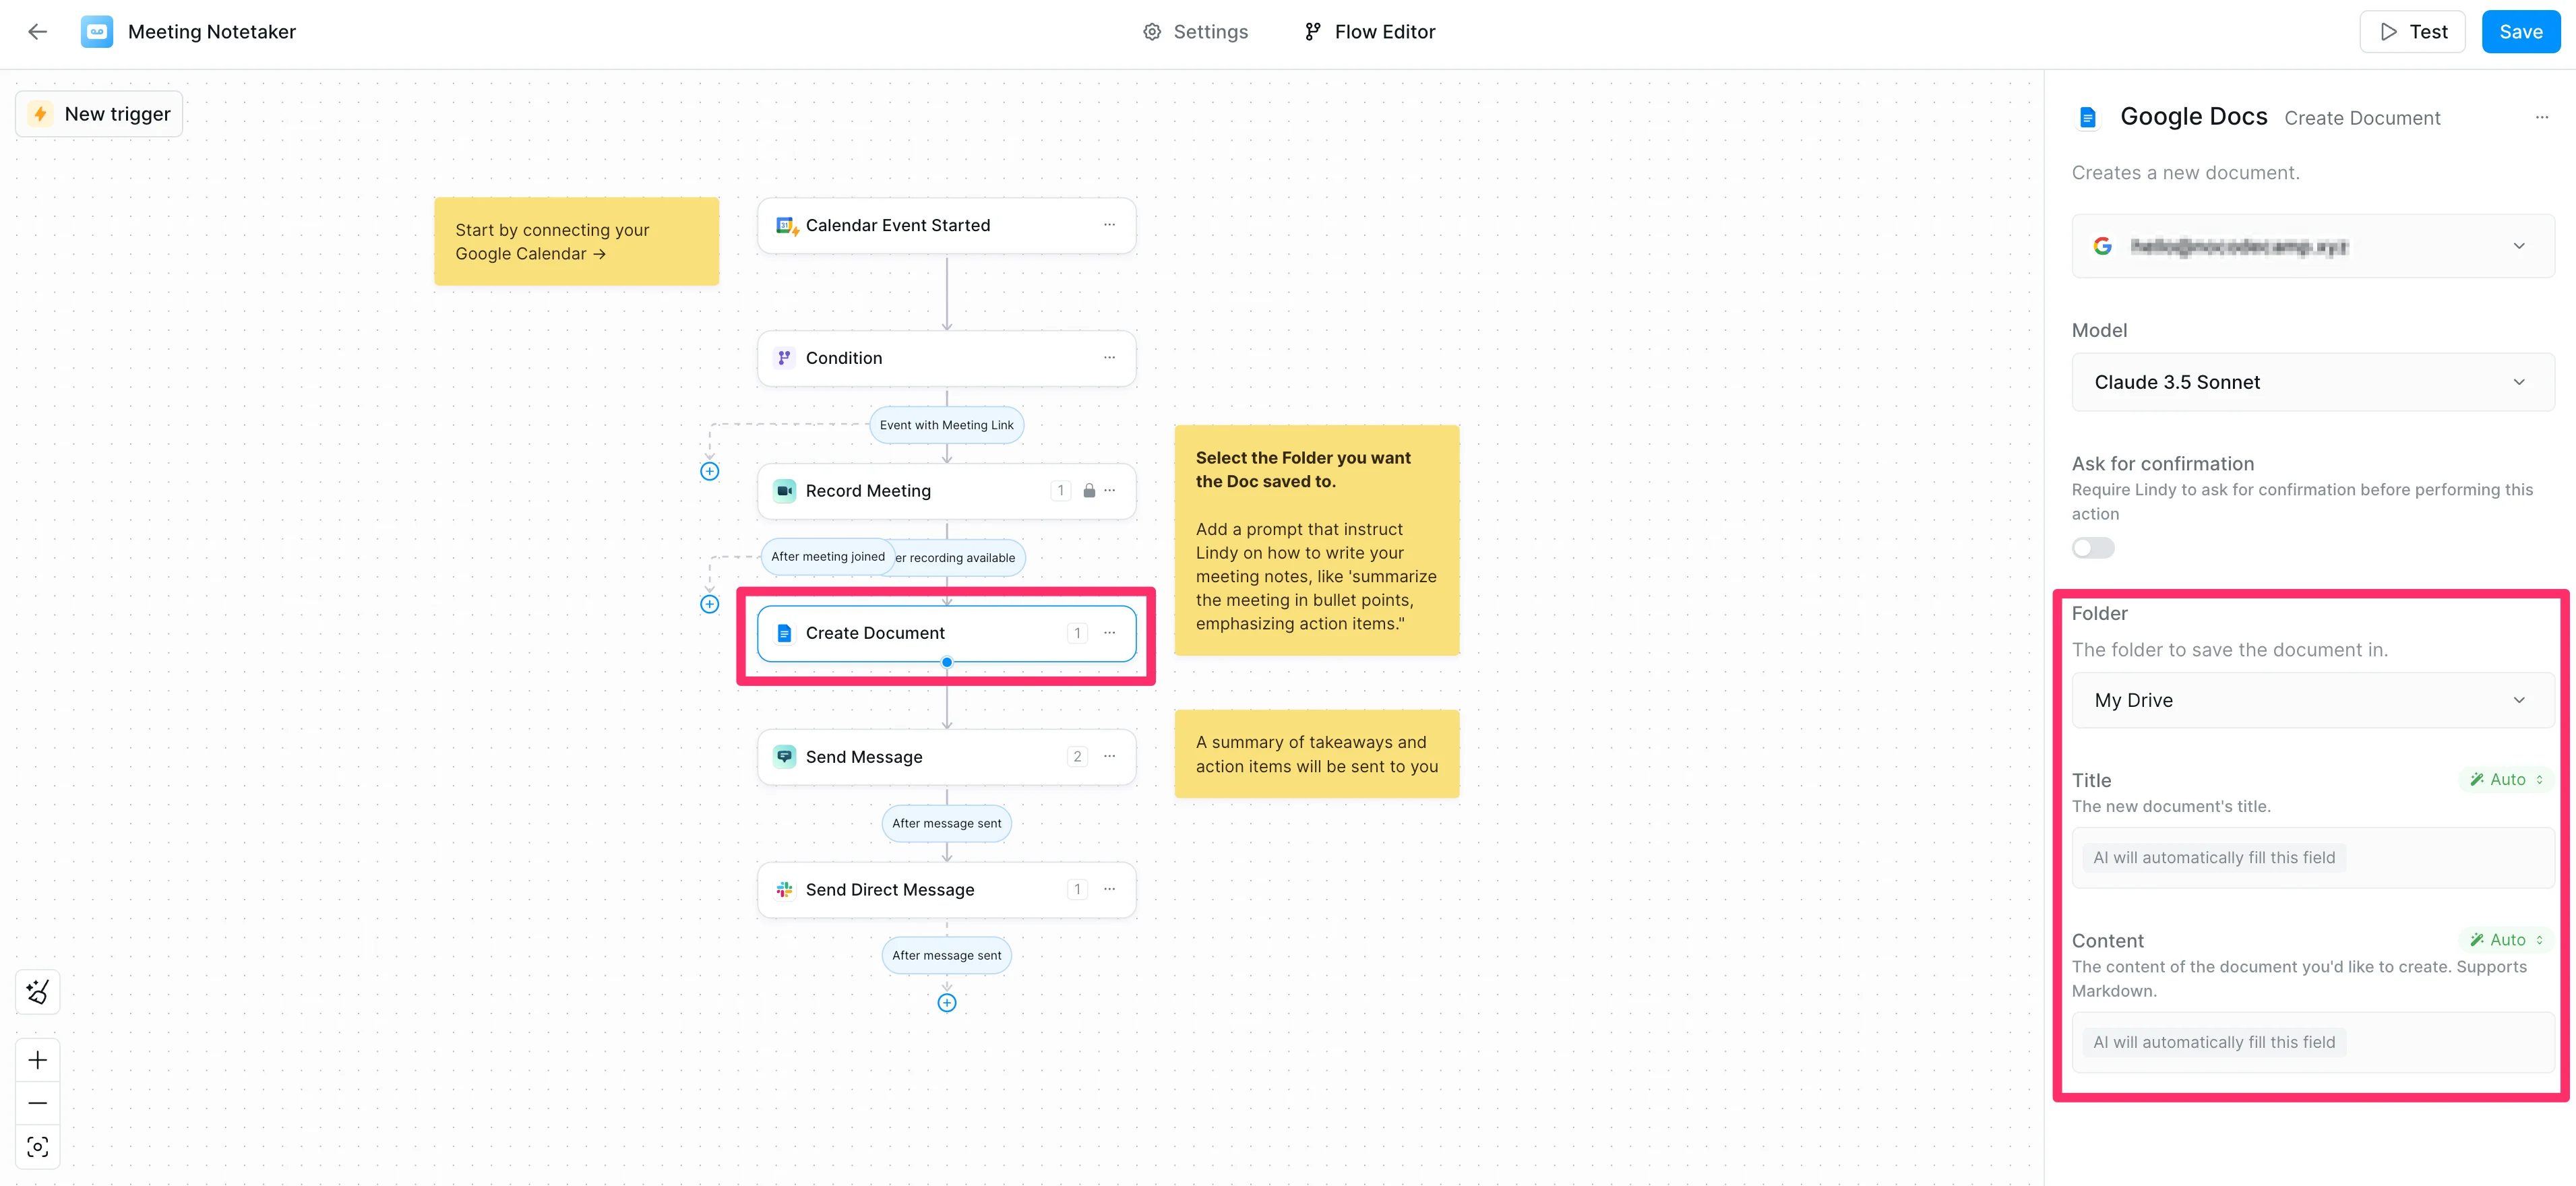
Step 4: Set up document creation
After the meeting, Lindy will create a document with notes and a recap. You'll need to specify where and how this document should be created. To set up document creation:
- Go to the "Create document" step in the workflow.
- Choose where you want the document to be saved. In this example, we're saving it to the My Drive Google Drive folder.
- Set the title and content parameters. You can leave these set to "Auto" to let Lindy determine appropriate values, or you can specify custom AI prompts or manual settings for the fields.
Sample Content Prompt:
Summarize the meeting in concise bullet points, with a section for next steps and action items.
Step 5: Configure message and email notifications
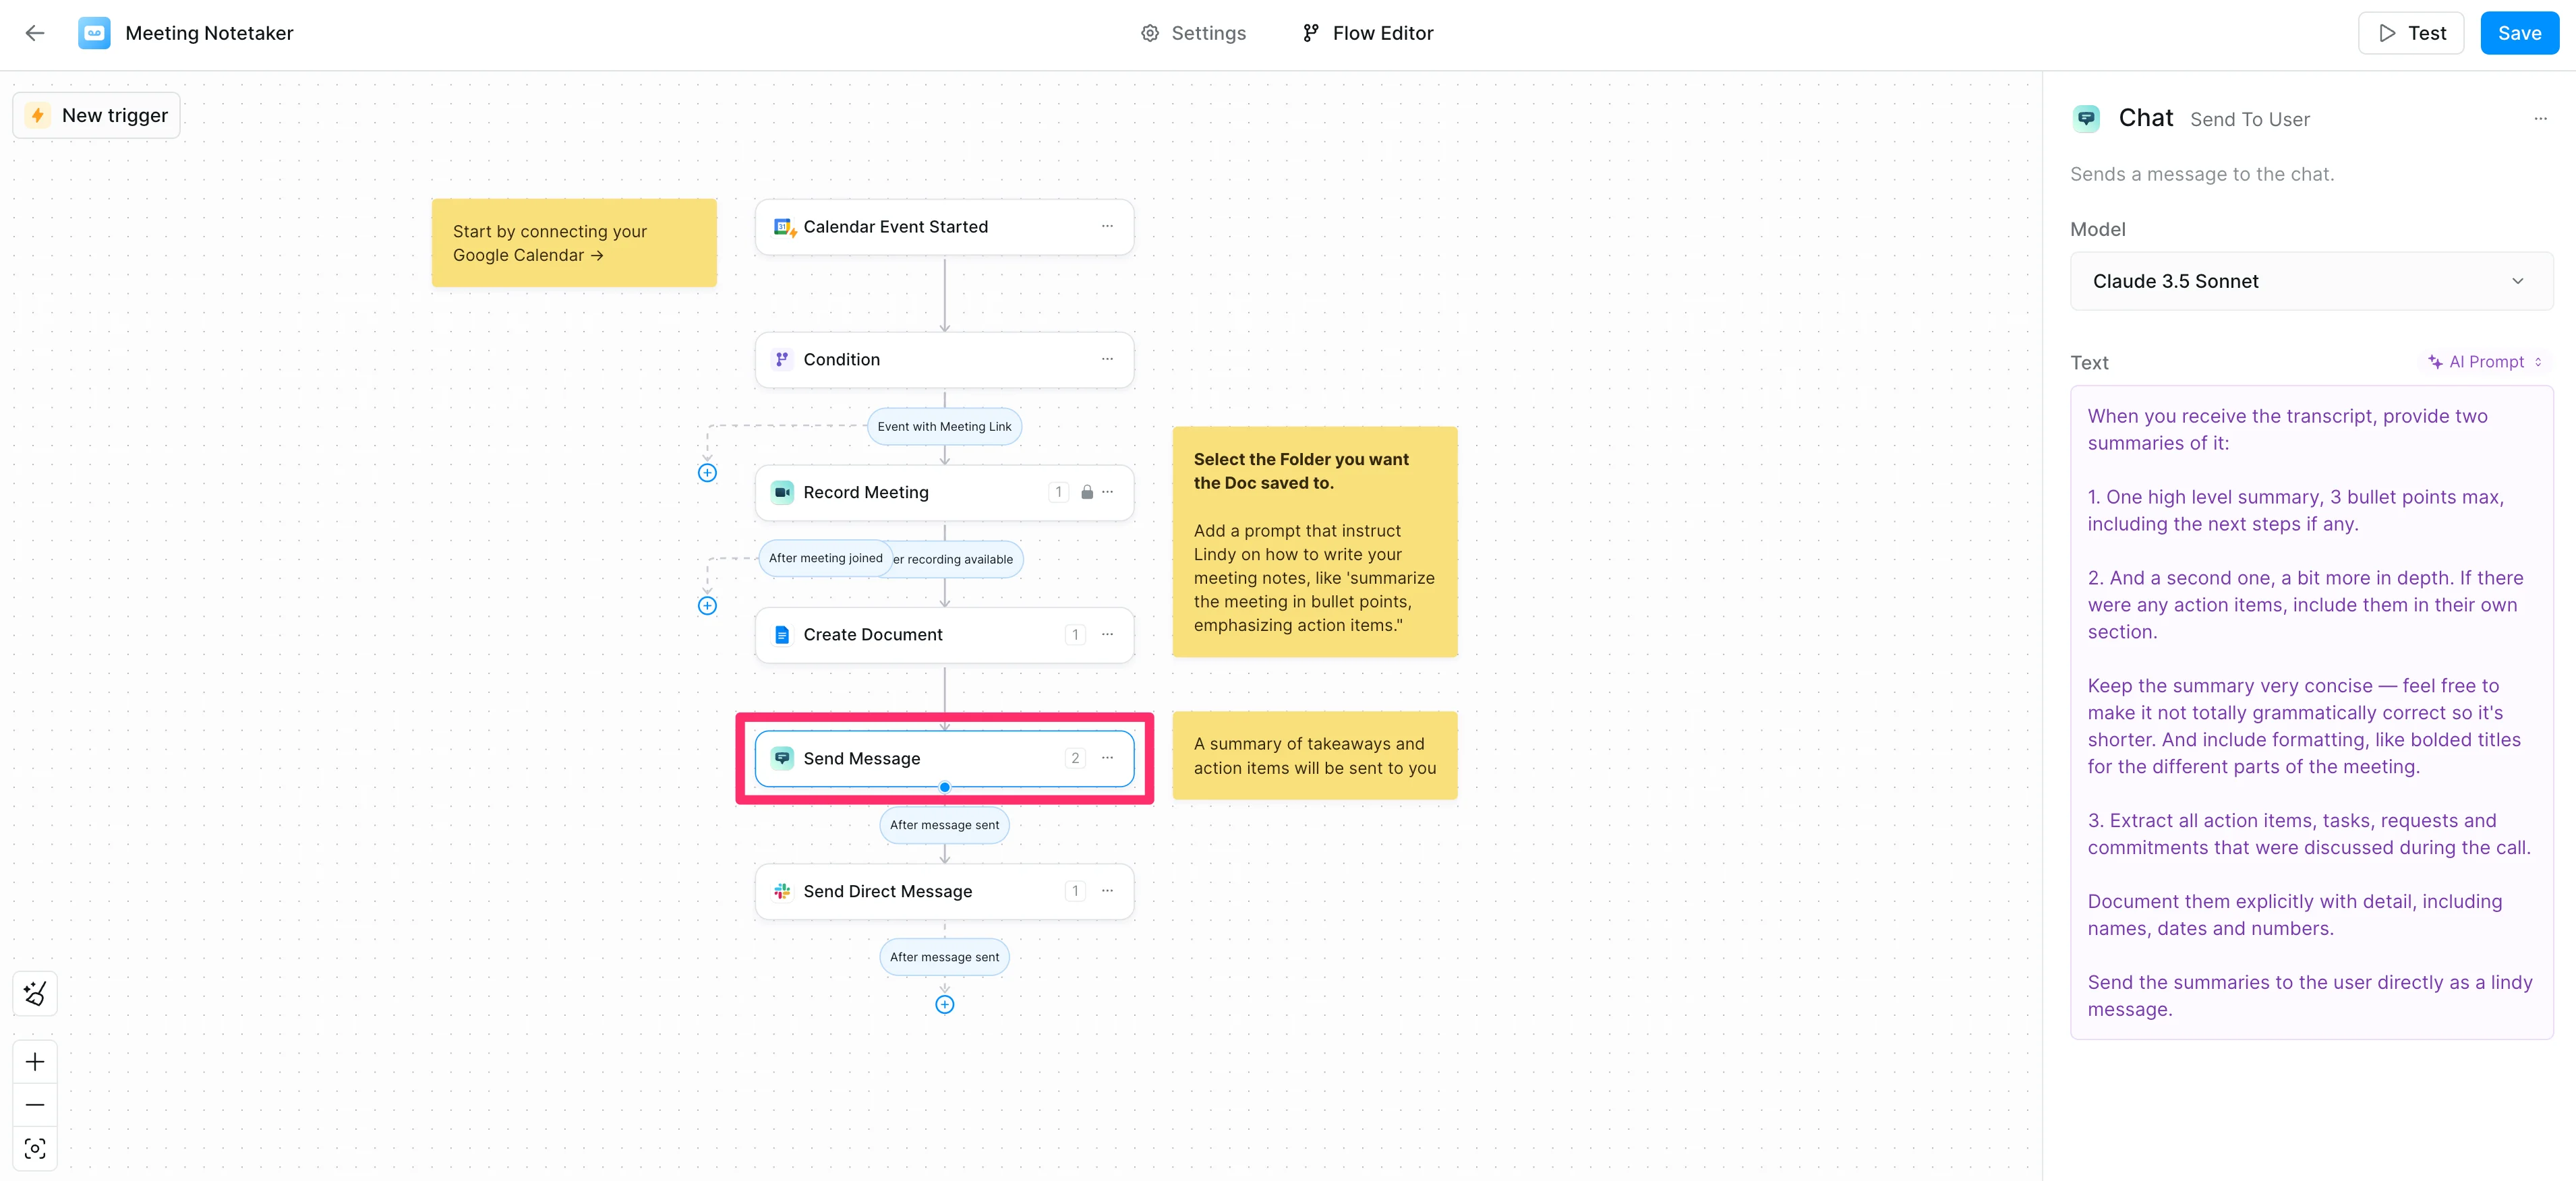
The final step is to set up how you'll receive updates about the meeting and access to the created documents. To configure the in-app Lindy notifications, click the "Send Message" step in the flow editor.
Review the default AI prompt for the message content. You can customize this to include specific information you want in your meeting summary.
Default Prompt:
When you receive the transcript, provide two summaries of it:
1. One high-level summary, 3 bullet points max, including the next steps if any.
2. And a second one, a bit more in depth. If there were any action items, include them in their own section.
Keep the summary very concise — feel free to make it not totally grammatically correct so it's shorter. And include formatting, like bolded titles for the different parts of the meeting.
3. Extract all action items, tasks, requests and commitments that were discussed during the call.
Document them explicitly with detail, including names, dates and numbers.
Send the summaries to the user directly as a lindy message.
Then, you can choose how you want to receive the message outside of the Lindy app. The default is a direct message in Slack, but you can change this to email or another service.
In this example, we’ll update this step to “Send Email” and set the To: field to “Set Manually” with our email address.
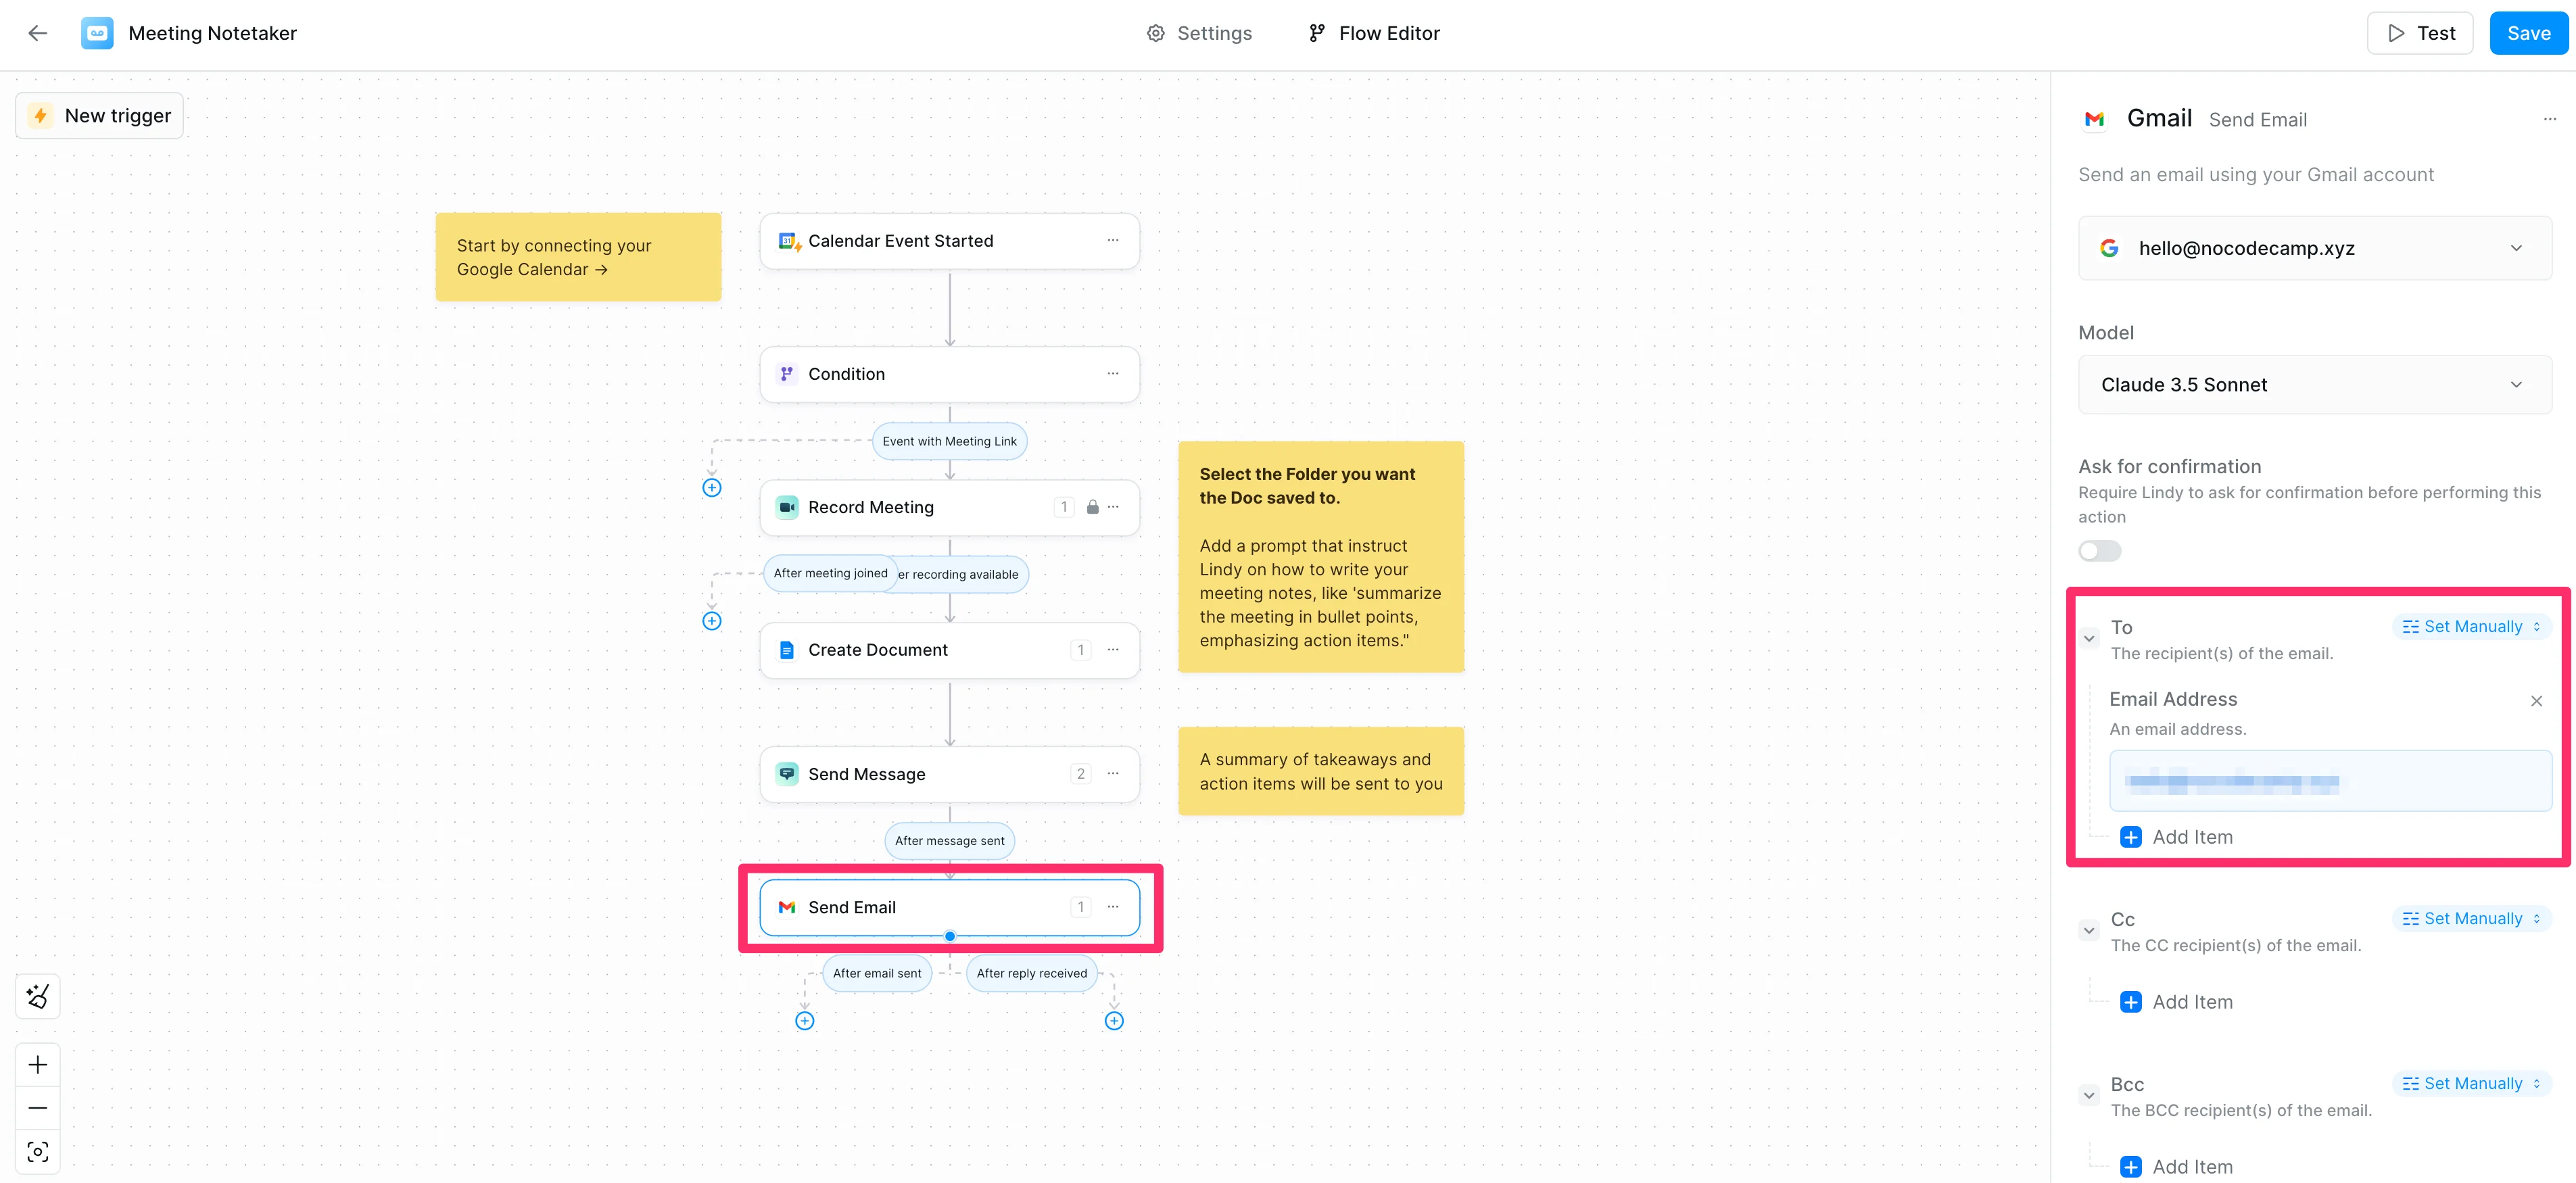
Then, we can add an AI prompt to the Body field setting to instruct Lindy to provide a meeting summary in our desired structure.
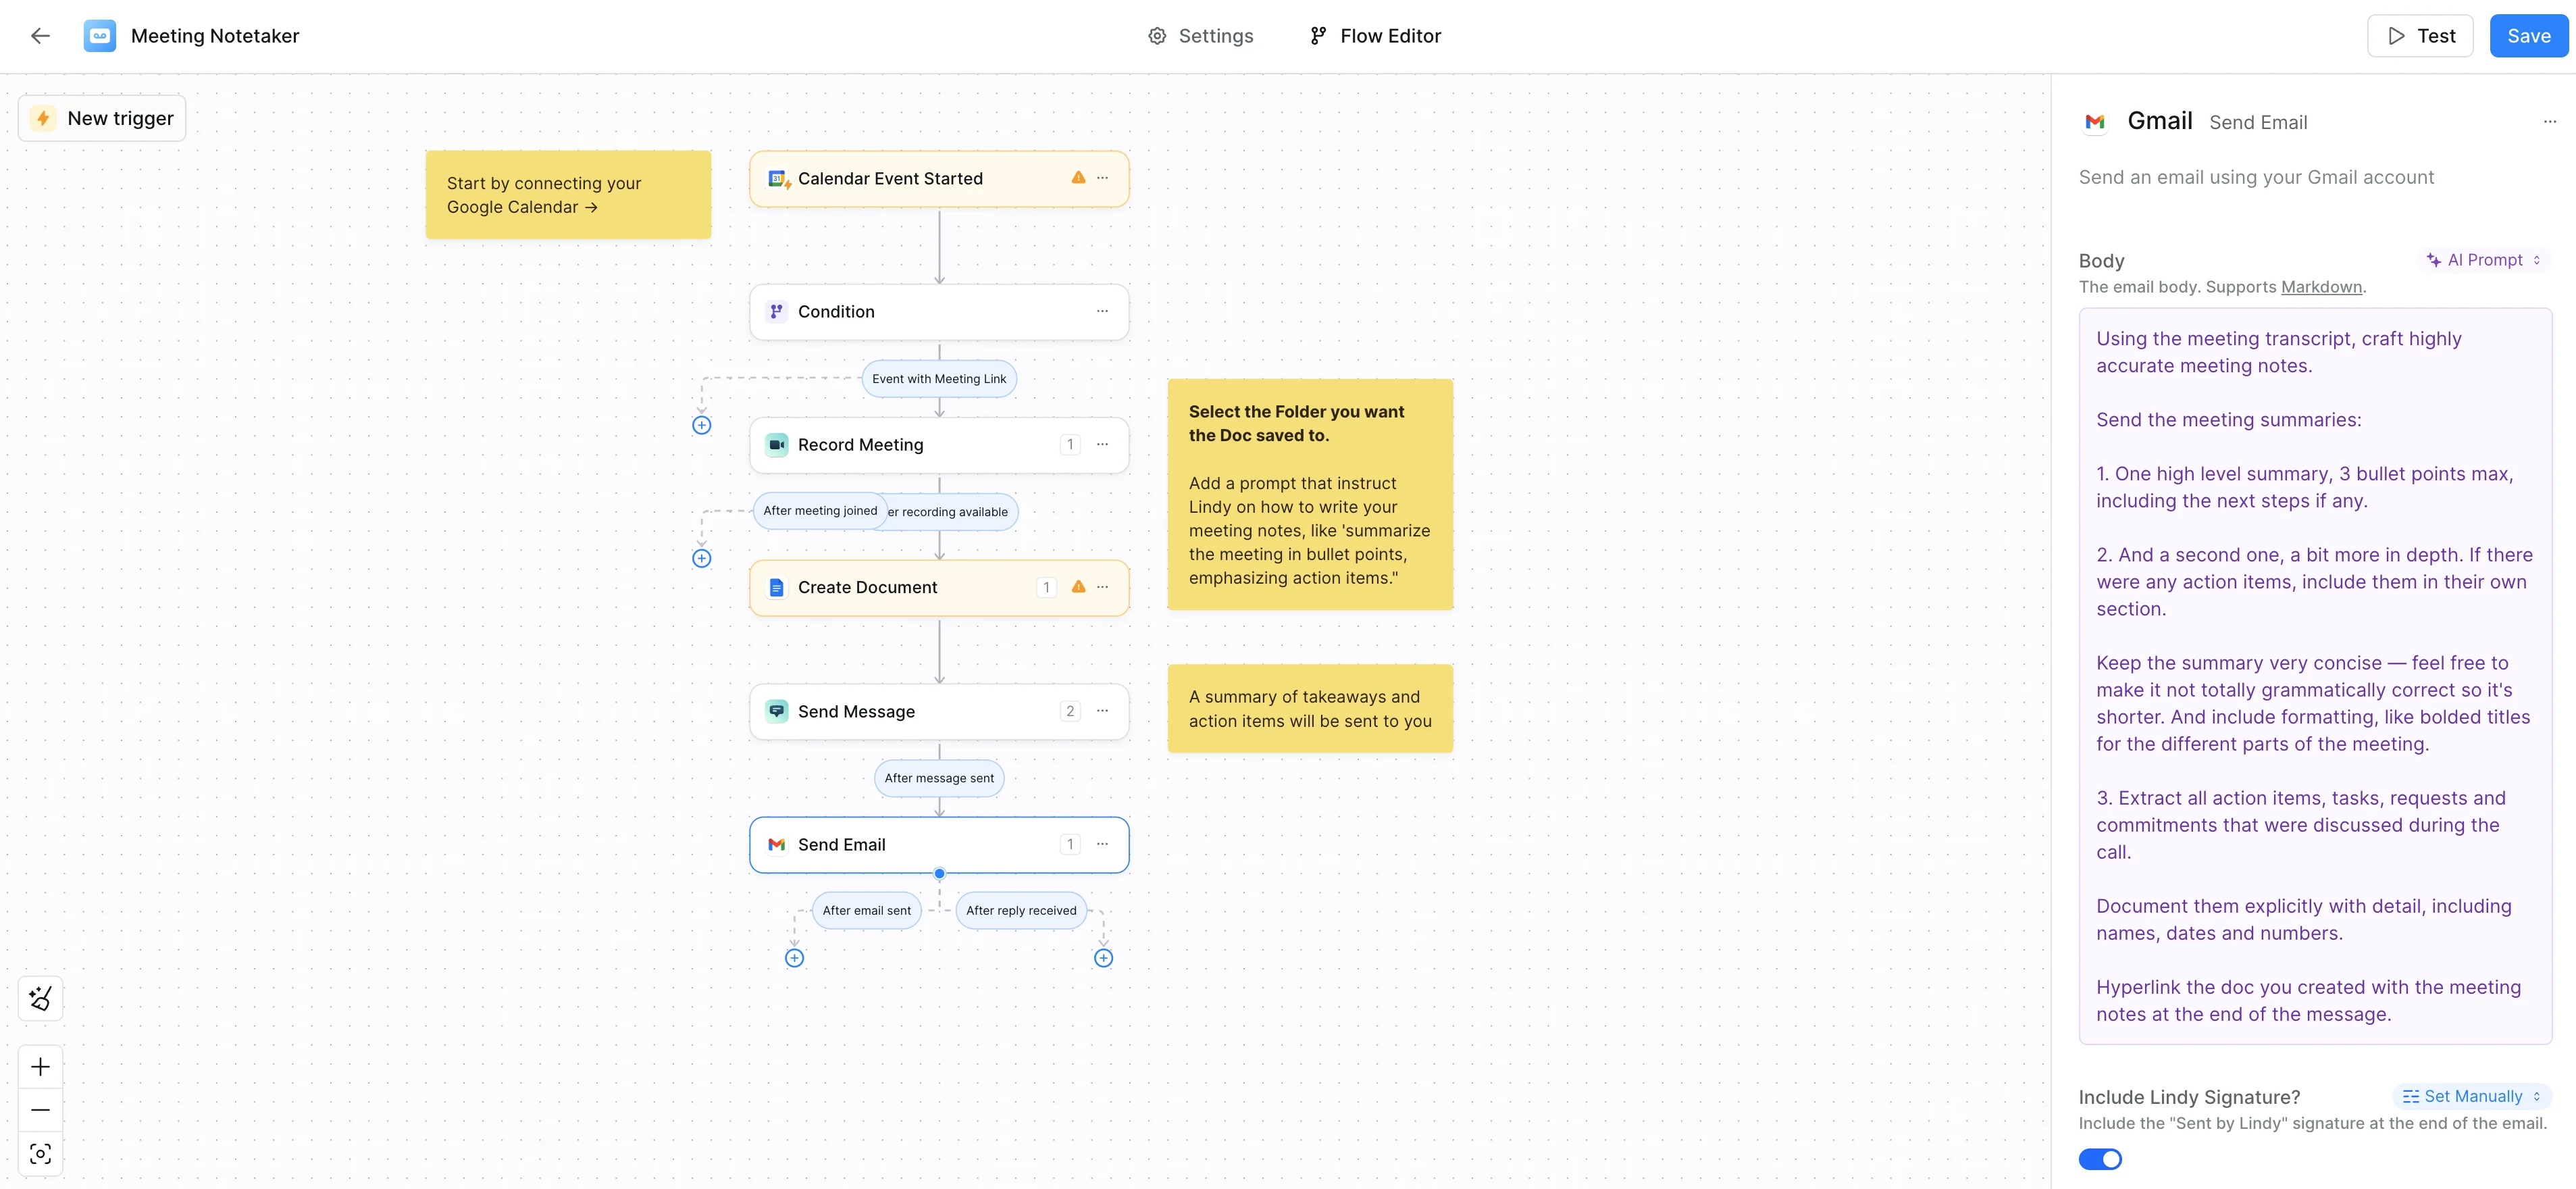
Sample Prompt:
Using the meeting transcript, craft highly accurate meeting notes.
Send the meeting summaries:
1. One high-level summary, 3 bullet points max, including the next steps if any.
2. And a second one, a bit more in-depth. If there were any action items, include them in their own section.
Keep the summary very concise — feel free to make it not totally grammatically correct so it's shorter. And include formatting, like bolded titles for the different parts of the meeting.
3. Extract all action items, tasks, requests and commitments that were discussed during the call.
Document them explicitly with detail, including names, dates and numbers.
Hyperlink the doc you created with the meeting notes at the end of the message.
Step 6: Save and test the workflow
Click the save button in the top right corner of the flow editor and then test the workflow! To test it, create a test meeting, hop on, say a few things, and check out the meeting notes that Lindy sends you for review.
And that’s it! Nice work, you’ve completed the “Create a team of AI personal assistants” course. If you’ve made it this far, you automated so much administrative work—from your inbox management to your calendaring to your note-taking. So go ahead, dip out an hour early from work, and hit the beach while Lindy manages the rest.
This tutorial was created by Garrett.