Create a recruiting AI assistant with Leap AI
Create a workflow that can quickly perform LinkedIn profile searches based on certain criteria.
2024-11-13
In this tutorial, we’ll use Leap AI’s workflow builder - one of the new upstarts in no code workflow automation space - to create a LinkedIn recruiting AI assistant.
The workflow we’ll build can ingest a set of criteria, in this case, a problem to solve and a company domain, and return relevant profiles from LinkedIn. This workflow will be especially helpful for recruiters looking to find suitable candidates, or anyone wanting to quickly perform LinkedIn profile searches based on certain criteria.
If you’re familiar with Zapier, Leap AI will be easy for you to pick up, as much of the UI/UX design patterns are the same.
Steps we’ll follow in this tutorial:
- Create a workflow and define your inputs
- Add AI generation step
- Add LinkedIn search steps
- Define the output format
- Test your recruiting assistant
Step 1: Create a workflow and define your inputs
To get started, go to Leap AI’s website and create a free account. You’ll have enough credits with their free account to build and test the workflow for this tutorial.
.webp)
Once you’ve created an account, you’ll land on Leap AI’s dashboard. We’ll get started by creating our own Workflow from scratch. To do this, click on the Workflows tab in the left-side navigation and click the “New Workflow” button in the top right corner.
.webp)
When you click the “New Workflow” button, you’ll be taken to the Leap AI workflow builder. If you’ve used Zapier before, this page will look familiar. The triggers and steps for the workflow are on the left side of the page and the step editor is on the right side of the page.
To get started, we’ll click the existing Input trigger and add an input. To do this, click the Input step in the visual workflow builder and then click the “Add Input” button on the right-side panel.
.webp)
For this workflow, we’re going to have the input be the problems you are looking to solve for your company and a Company Domain you’re interested in recruiting from. To start, we’ll add one input called “Problem to Solve”. We’ll set the input to a Long Text field and set the field as Required.
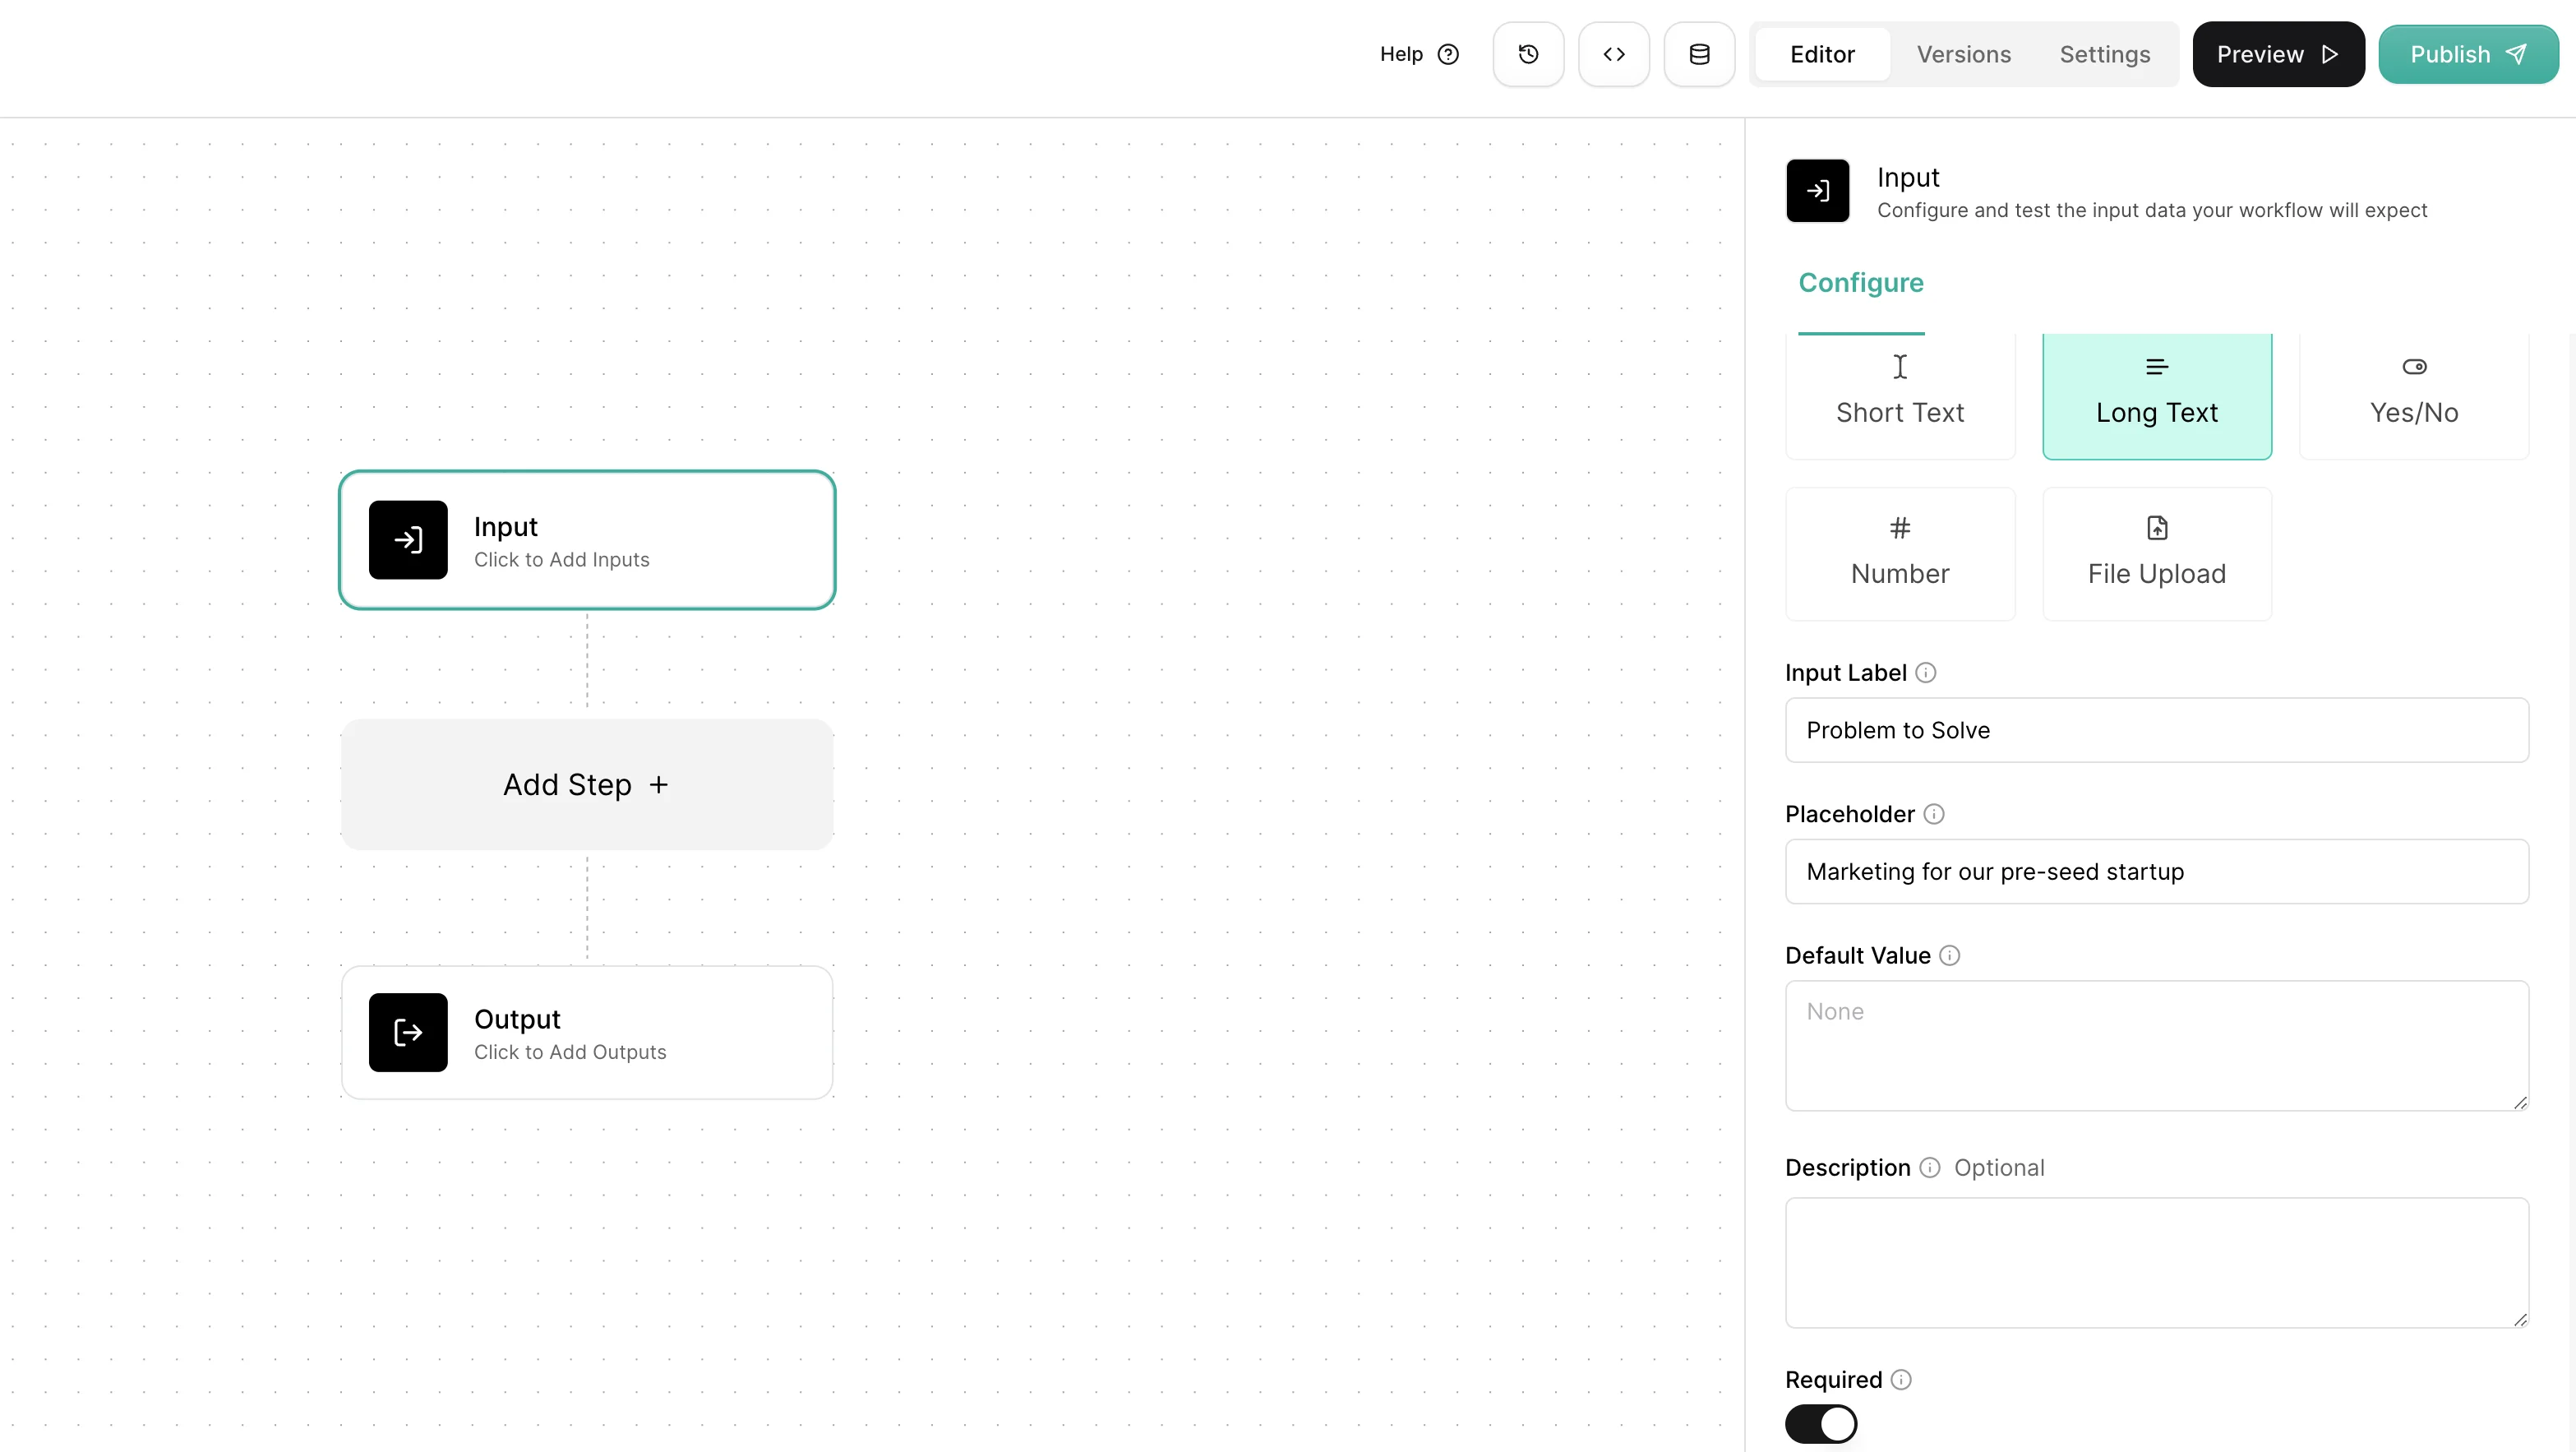
Once you’ve added your input, you’ll see it listed in the right-side panel of the Input step.
.webp)
We’re also going to add a “Company Domain” input. This is required for the LinkedIn search step. Do the same process as your previous Input field but with the below Input settings.
.webp)
To test this Input step, click the Test tab in the step editor side panel, enter a problem to solve and company domain, and click the “Test” button.
.webp)
Step 2: Add an AI generation step
Now that our Input is added, we can add our AI generation step. We will take the problem to solve and transform it into the best-fitting job title to solve it. To do this, click the “Add Step” button under the Input step.
.webp)
A pop-up window will appear with various tools you can add to your step. Click the “Text” option in the left-side navigation and click on “OpenAI GPT”.
.webp)
Within the step editor, we’re going to add step instructions to have GPT-4o transform our problem to solve into a job title. Make sure to click into the Instructions box and select your “Problem to Solve” input from Step 1 within your prompt.
Sample instructions:
Output the best-fitting job title to solve this company problem: {{problem_to_solve}}
Only output one job title. Nothing else.
.webp)
To test this Input step, click the Test tab in the step editor side panel and click the “Test” button. A single job title should output, in our case, “Growth Marketer”.
.webp)
Step 3: Add LinkedIn search steps
Now that we have a job title, we can add our LinkedIn search steps. We’ll need to add two of these. One to find the company profile and another to find employee profiles that match our job title. To do this, add another step by clicking the “+” button below the OpenAI GPT step.
.webp)
In the pop-up window, you’ll see all of the various actions you can add to your workflow. Search for “LinkedIn” in the “All” tab and select the Get LinkedIn Company by Domain action.
.webp)
Set the Company Domain value as the Company Domain variable from our Input step.
.webp)
Test this step. You should get a response with the company’s LinkedIn profile information. The most important data we’ll need for the next step is the Company ID.
.webp)
Now, that we have the Company LinkedIn ID, we can add another step by clicking the “+” button in the workflow under our current LinkedIn step. In the pop-up window, search again for LinkedIn in the All tab, but this time, select the Search LinkedIn Employees action.
In the Search LinkedIn step in your workflow, you’ll notice a list of role keywords and excluded keywords. Delete all of these from both lists and in the Title Keywords, add the output from Step 1 - OpenAI GPT as the input. In the Company ID field, set this to the Company ID value from the previous LinkedIn step. Leave the rest of the fields blank.
Your step should look like the one below once this is complete.
.webp)
Click the Test tab in the right side panel and click the “Test” button. This will take the output from your OpenAI GPT step and send it through a LinkedIn search.
.webp)
Step 4: Define the output format
In the last step of this workflow, we need to define the output format. To do this, click on the existing Output step in the workflow builder. We’re going to create three output values: LinkedIn URL, Name, and About. Click the “Add Output” button to add your first output.
We will set our first Output as the LinkedIn URL in Markdown format. For the Markdown Value, search for “LinkedIn URL” in the Step 3 output.
.webp)
Repeat this step for the other output variables you want. If you follow our example, your output should look like the below.
.webp)
You can make sure you’re getting the output you want by clicking on the “Preview” tab of this output step and reviewing the results.
.webp)
Step 5: Test your recruiting assistant
Our recruiting AI assistant workflow is complete! Now, we can test it. To do this, click the “Publish” button in the top right corner of the workflow builder page. We’re going to run it in the Leap AI Dashboard. To do this, click the “Run In Dashboard” button in the resulting pop-up window.
.webp)
You can run your workflow in three different ways in the Leap AI dashboard: a single run, a bulk run, or via a scheduler. To perform a single run, click the Single Run tab. You’ll see a UI where you can enter your input variables and run the workflow.
.webp)
For a bulk run, you can upload a CSV of input variables and run them all at once. Leap AI provides a CSV template you can use for formatting purposes.
.webp)
And that’s it! You’ve got a recruiting AI assistant now that you can feed problems to solve and get back potential candidates.
This tutorial was created by Garrett.