Create a simple AI-enhanced website scraper
Use Zapier and Airtable to create a simple web scraping tool that uses AI to extract specific information.
2024-11-13
Web scraping used to be a complex task, especially when you want to extract a particular data from a page, and especially when done at scale.
With advancements in AI, it can now read and interpret websites just like a human, quickly and accurately extracting the information you need. To show how this works, we'll create a simple web scraper using Airtable and Zapier.
In this tutorial, you will learn how to:
- Set up an Airtable to manage the scraping
- Build a zap to scrape content from a website with PhantomJSCloud
- Use the OpenAI API to extract the required information from the webpage content
- Add the parsed information back to Airtable
You’ll need:
- Airtable account
- Zapier paid account
- PhantomJSCloud account
- An OpenAI Platform account and at least $10 of credit. Note: this is separate from their ChatGPT app
Let’s see how it’s done.
Step 1: Set up an Airtable to manage the scraping
For this tutorial, we’re going to run the process from an Airtable. However, you could easily use Notion, a CRM app or even Google Sheets.
Go to Airtable and click to create a new Airtable base from scratch.
You can then customise it to your needs, but at a minimum, you need the following columns:
- URL - The URL of the website you want to scrape.
- Status - Create one dropdown option here called “Go”. Switching a record to this status will be used to trigger the automation.
- Query - A prompt to tell the AI exactly what information you want to parse.
- Parsed Information - We’ll get Zapier to put the AI response here.
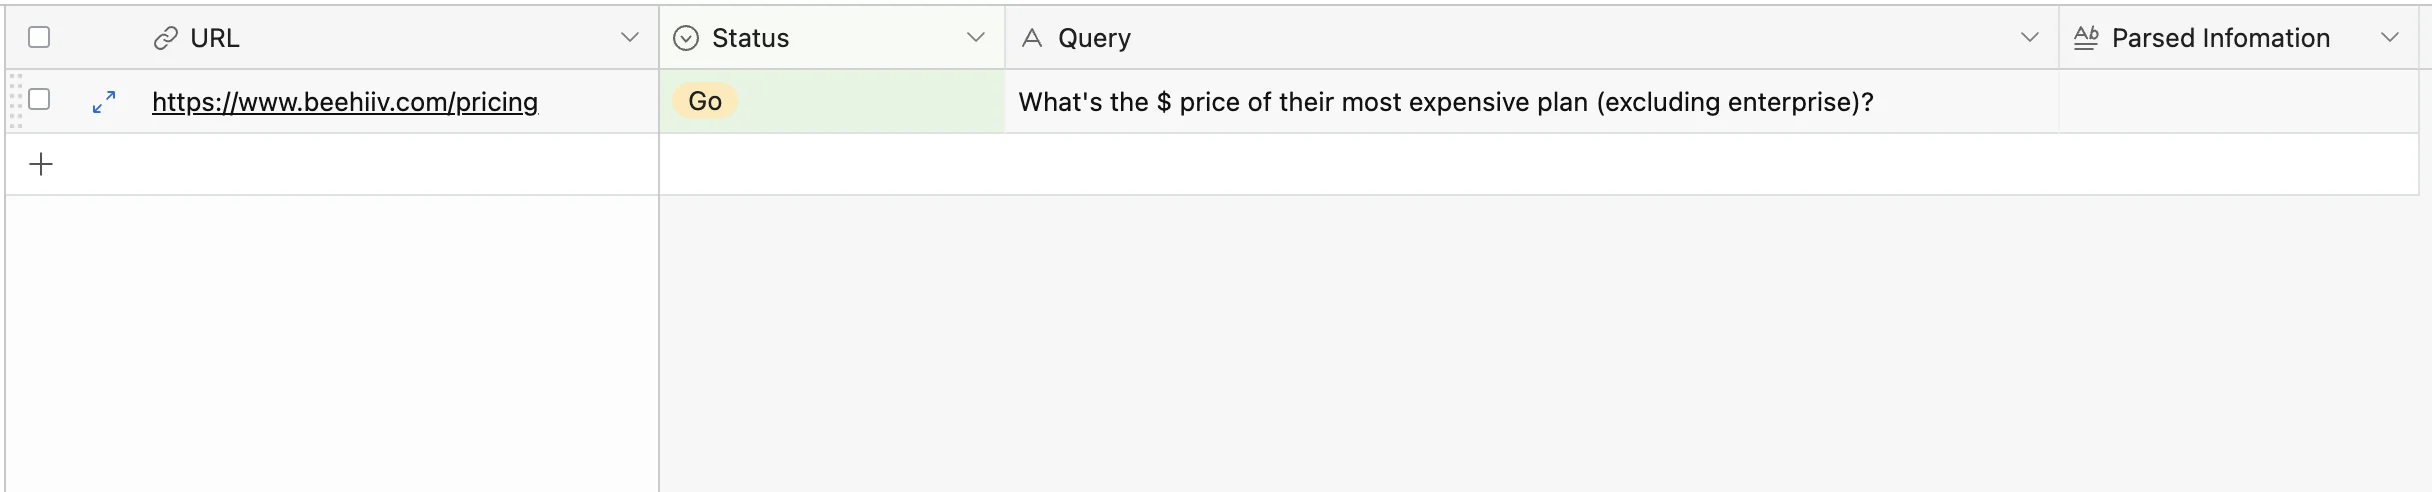
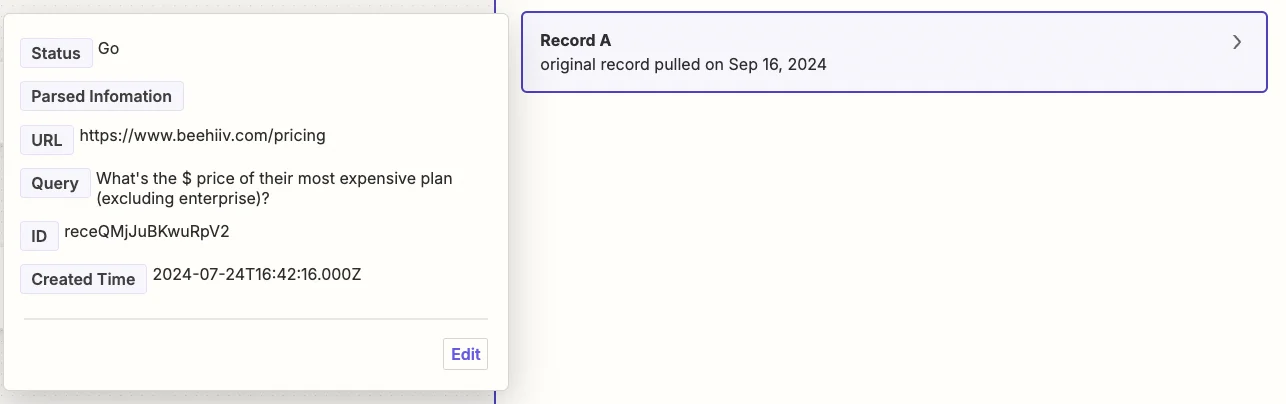
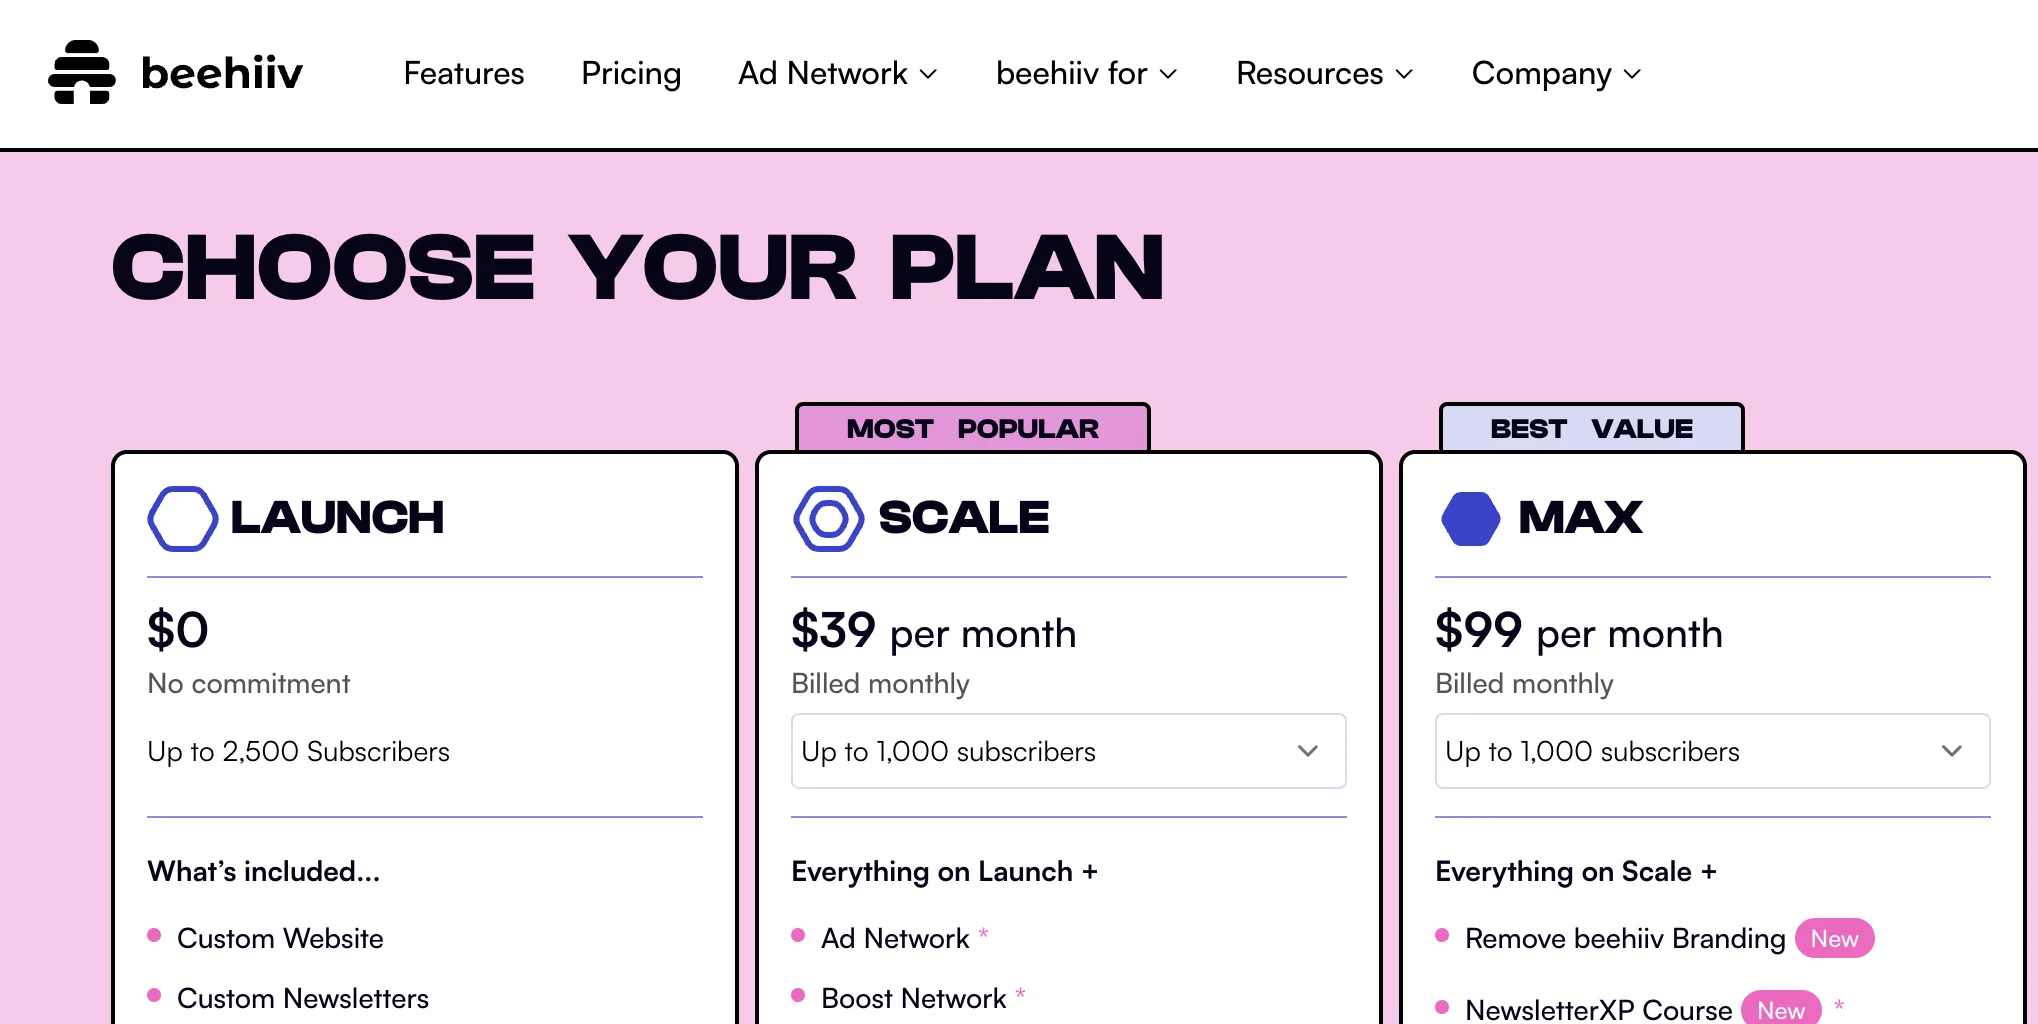
The link I’ve included is the pricing page for Beehiiv. The question we will ask AI is “What's the $ price of their most expensive plan (excluding enterprise)?”
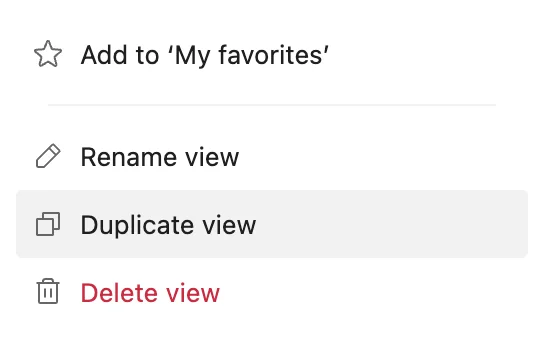
Next, under the “View” tab you should rename the current view to ‘All’, then right-click and select “Duplicate view”, and call the new view ‘Go’.
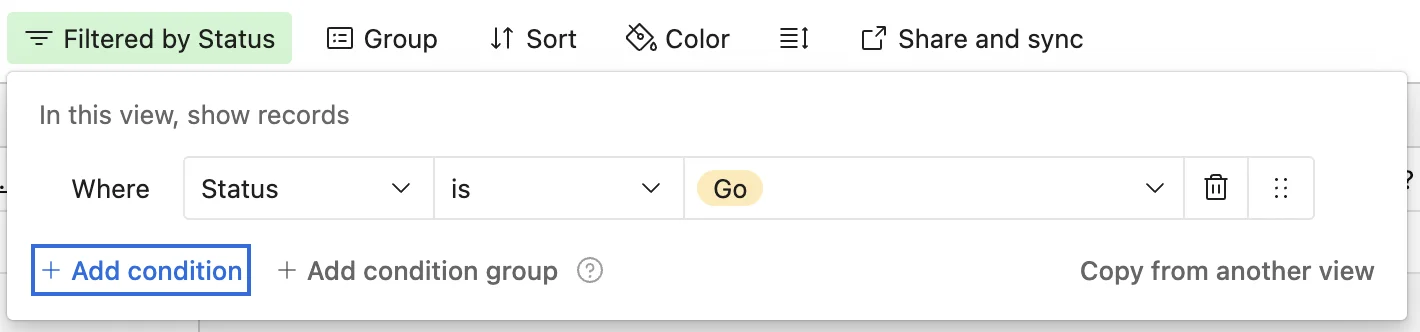
Then apply a filter to this new view to only show records where ‘Status’ is ‘Go.
Step 2: Build a zap to scrape content from a website with PhantomJSCloud
Now we have our Airtable and an example scraping task ready, we need a Zapier workflow to make it work.
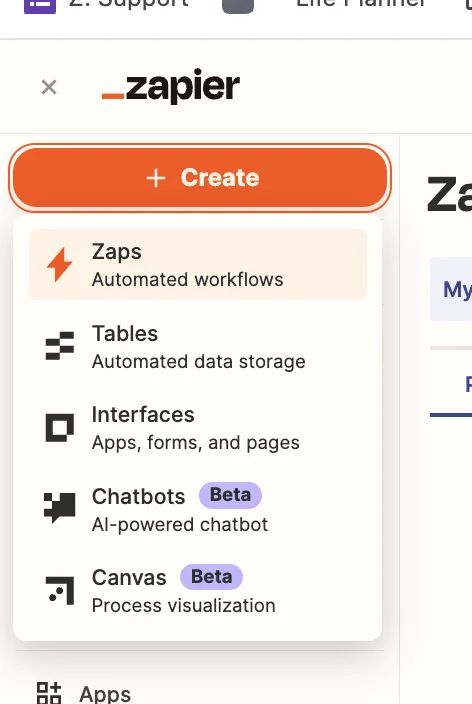
Head over to Zapier, then in the dashboard, in the top left, click the big orange “Create” button and select ‘Zaps’.
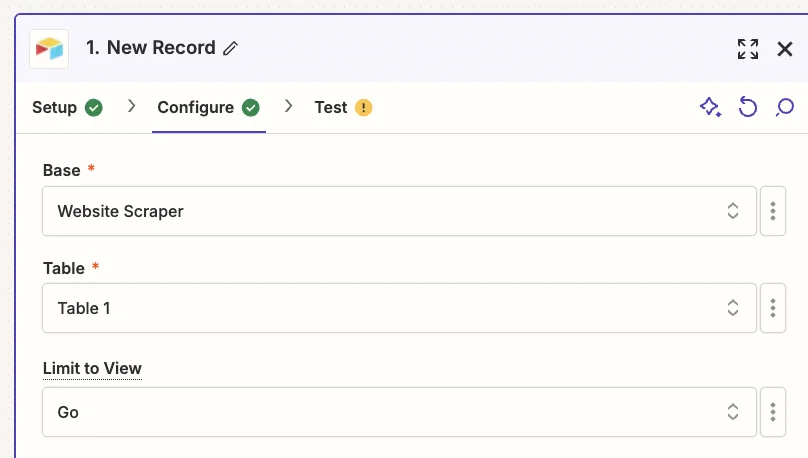
Inside the zap editor, click on the box that says “Trigger” and select/search for ‘Airtable’ as the app. Then select ‘New Record’ as the trigger event.
Configure the step by selecting the base, table and view you just created in Airtable.
Records will only appear in this view when you change the status field to “Go”. Make sure you only do that once you’ve filled in the other columns which Zapier will need.
Test the zap step and you’ll see your example record pulled through.
Now we need to parse content from the website.
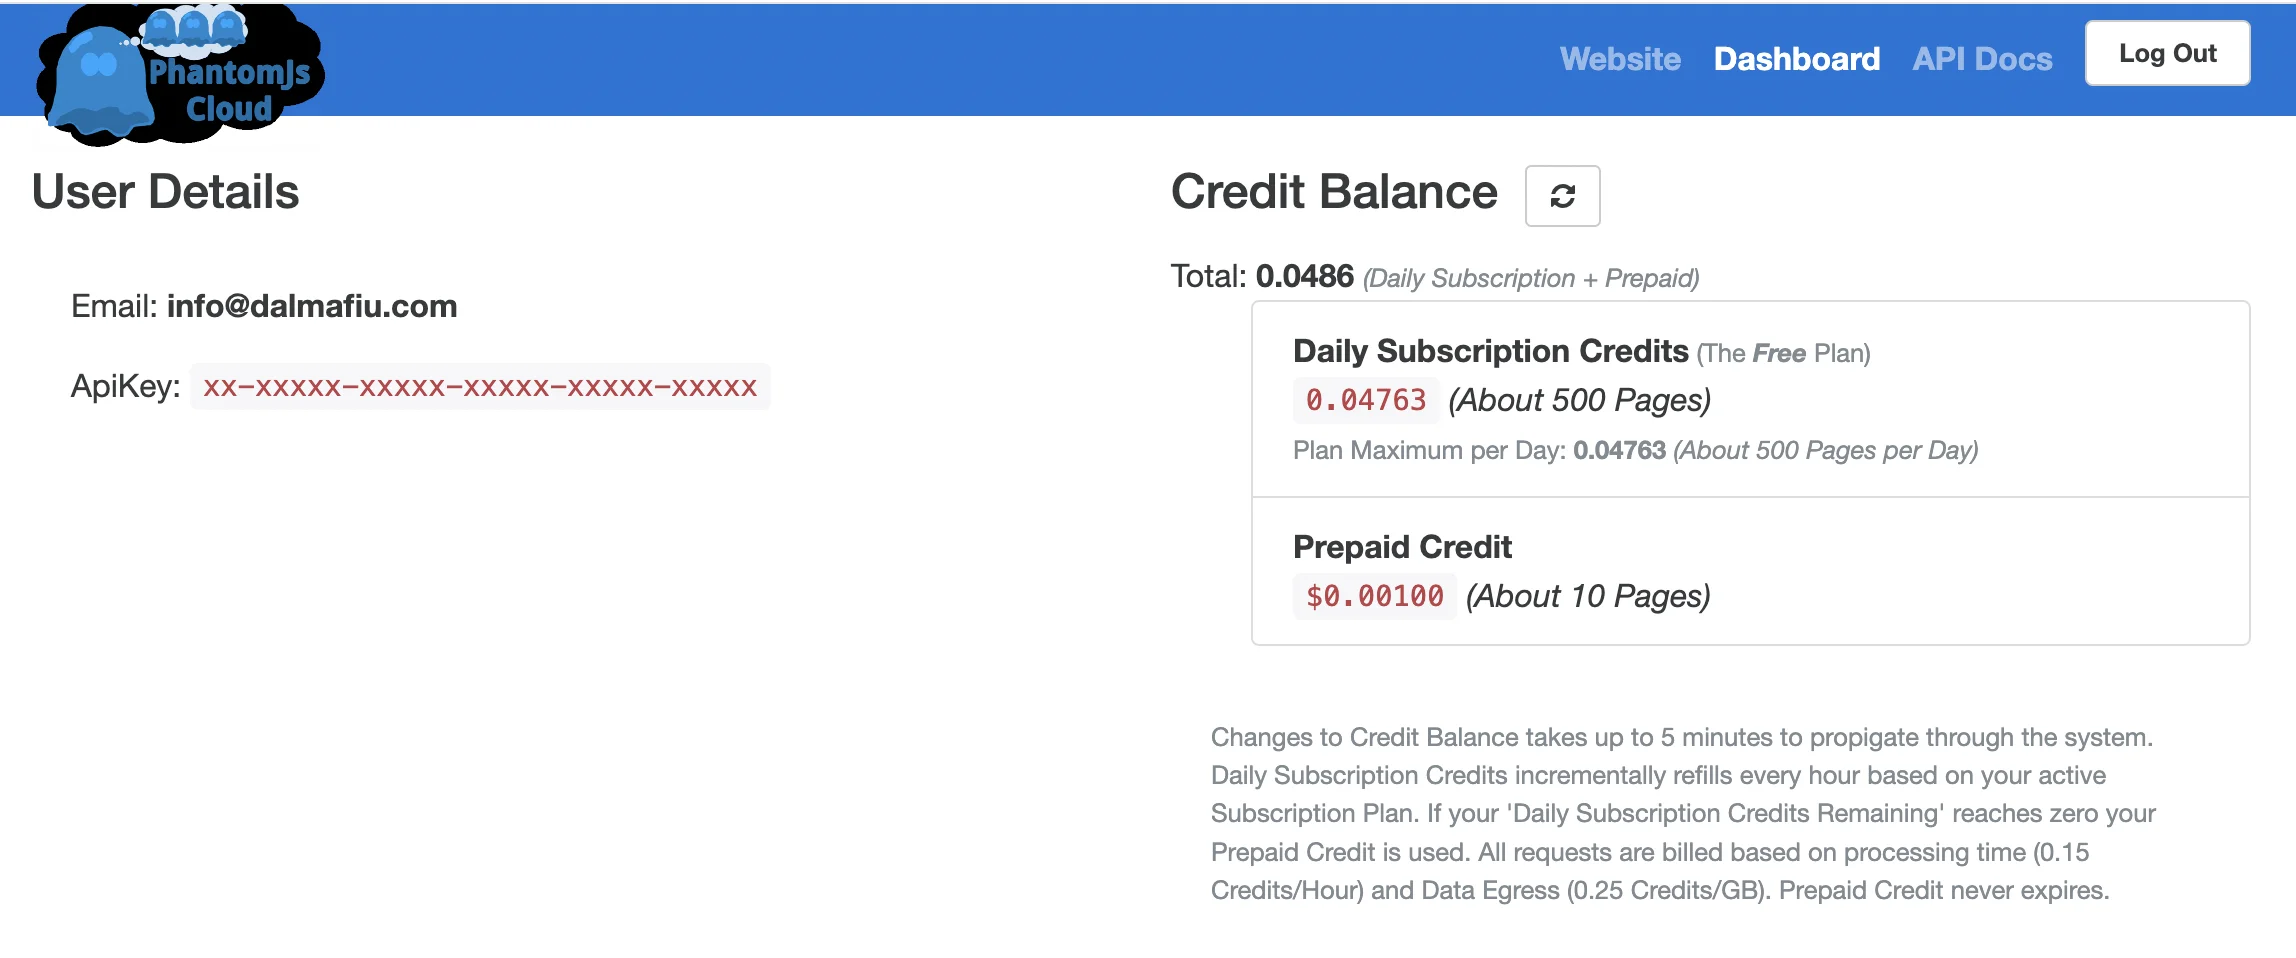
To do this, we’re going to use a tool called PhantomJsCloud. Go ahead, sign up, and on the dashboard you’ll see your API key which we’ll need in the next part. The free plan allows you to parse around 500 pages per day.
PhantomJsCloud doesn’t have a Zapier integration, so instead we’re going to use a webhook step inside Zapier to send and receive data from the API.
In the zap editor, click the “Action” box. Then search for "Webhook by Zapier" and select ‘Custom Request’ as the action event.
When configuring the step, these are the important fields.
- Method
Select ‘POST’.
- URL
Input
‘https://phantomjscloud.com/api/browser/v2/XX/’
(replacing the string between the last two slashes with your API key).
- Data
Input the following code, replacing {{1.URL}} with a mapping of the ‘Link’ value from the trigger step.
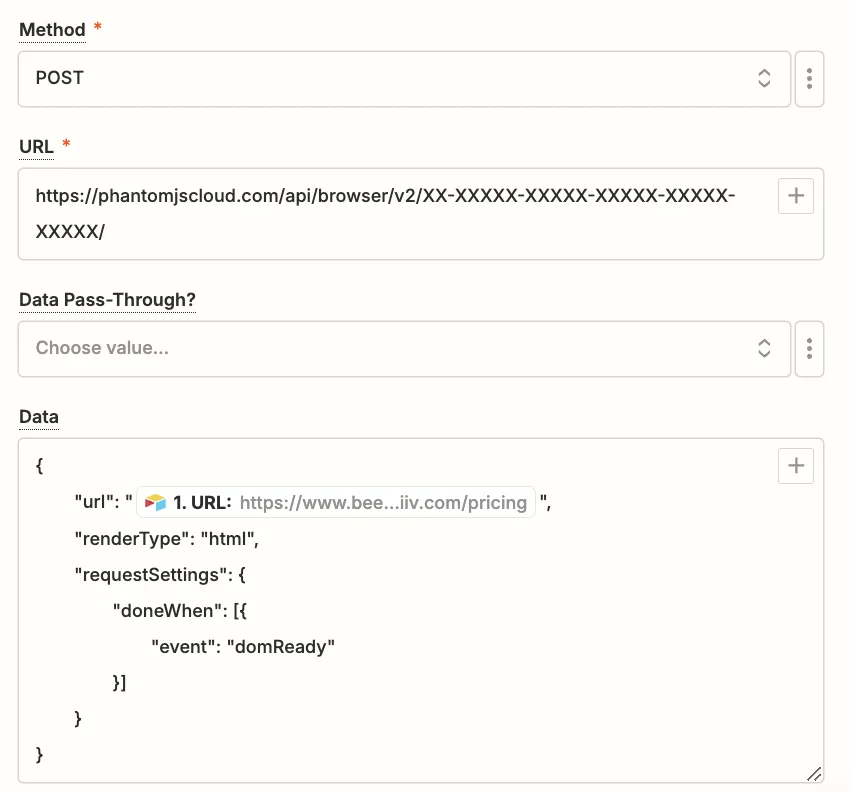
Test the step, and after a few seconds, you should see the text from the website.

Step 3: Use the OpenAI API to extract the required information from the webpage content
With the raw content parsed from the website, we’re now ready to have AI find and summarise the specific information we need.
Add a new action step to your zap, with “ChatGPT” as the app and ‘Conversation’ as the action event.
When configuring the step, these are the important fields.
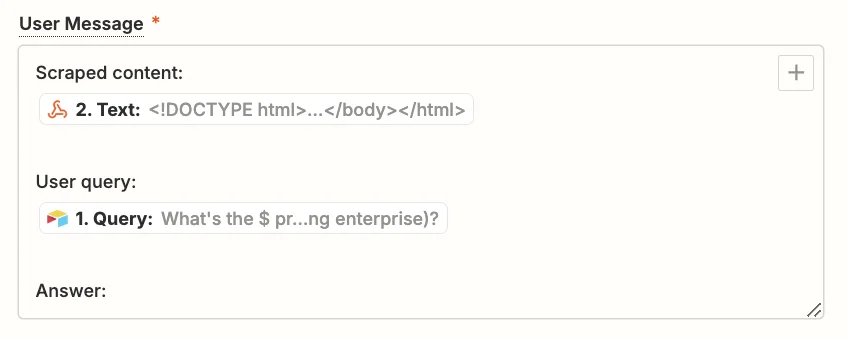
- User message
Use the following text and map the “Text” value from the webhook step and the “Query” value from the trigger step.
Scraped content: {{2.Text}}
User query: {{1.Query}}
Answer:
- Model
Select the “gpt-4o-mini” model, OpenAI’s cheapest and quickest model.

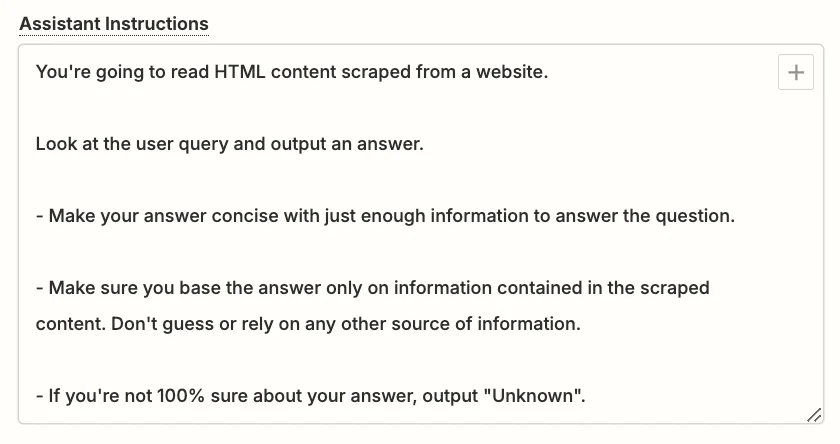
- Assistant Instructions
You can experiment here to get exactly what you want, but this prompt should work well.
You're going to read HTML content scraped from a website.
Look at the user query and output an answer.
Make your answer concise with just enough information to answer the question.
- Make sure you base the answer only on information contained in the scraped content.
- Don't guess or rely on any other source of information.
- If you're not 100% sure about your answer, output "Unknown".
- Max Tokens
This sets the maximum output length. Anything about 1,000 should be suitable.
.webp)
Go ahead and test the step, then scroll down towards the end in the “Data out” tab, you’ll see the response generated by ChatGPT.
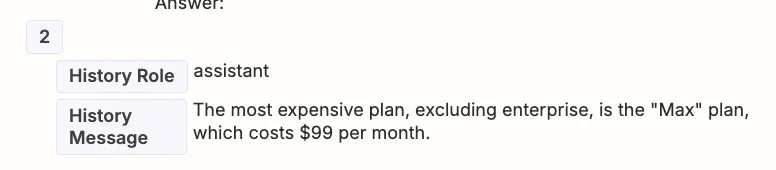
A quick check on their website shows us this is correct.
Step 4: Add the parsed information back to Airtable
The last part of the process is to add the AI output back to the Airtable record.
Add a new step to your zap with “Airtable” as the app and ‘Update Record’ as the action event.
Select the same base and table as you did in the trigger and for the “Record” field, map the ‘ID’ value from the trigger step.

Then in the “Parsed Information” field map the ‘Reply’ value from the ChatGPT step.

Test the zap, head back to Airtable, and you’ll see the response added.

This tutorial was created by Andrew.