Create an FAQ Bot with Zapier
Create a FAQ bot for employees or customers with Zapier AI chatbots.
2024-11-13
The problem:
Building a FAQ chatbot can seem like a daunting task.
You might not know how to connect a knowledge source like an FAQ document to a chatbot and establish a maintainable process for updating the FAQ data and pushing it to a chatbot’s knowledge source.
The solution:
Zapier chatbots and tables.
With Zapier's chatbot and tables offering, building an FAQ bot becomes significantly more manageable. Zapier chatbots allow you to seamlessly automate responses to common queries, saving you time and ensuring consistent communication with your customers or employees.
In this tutorial, we will:
- Create a Zapier chatbot and set the chatbot directive
- Create a FAQ Zapier table and link it to your chatbot
- Test and share the chatbot
You’ll need:
- Premium Zapier Chatbot account
Let’s dive in.
Step 1: Create a Zapier chatbot and set the chatbot directive
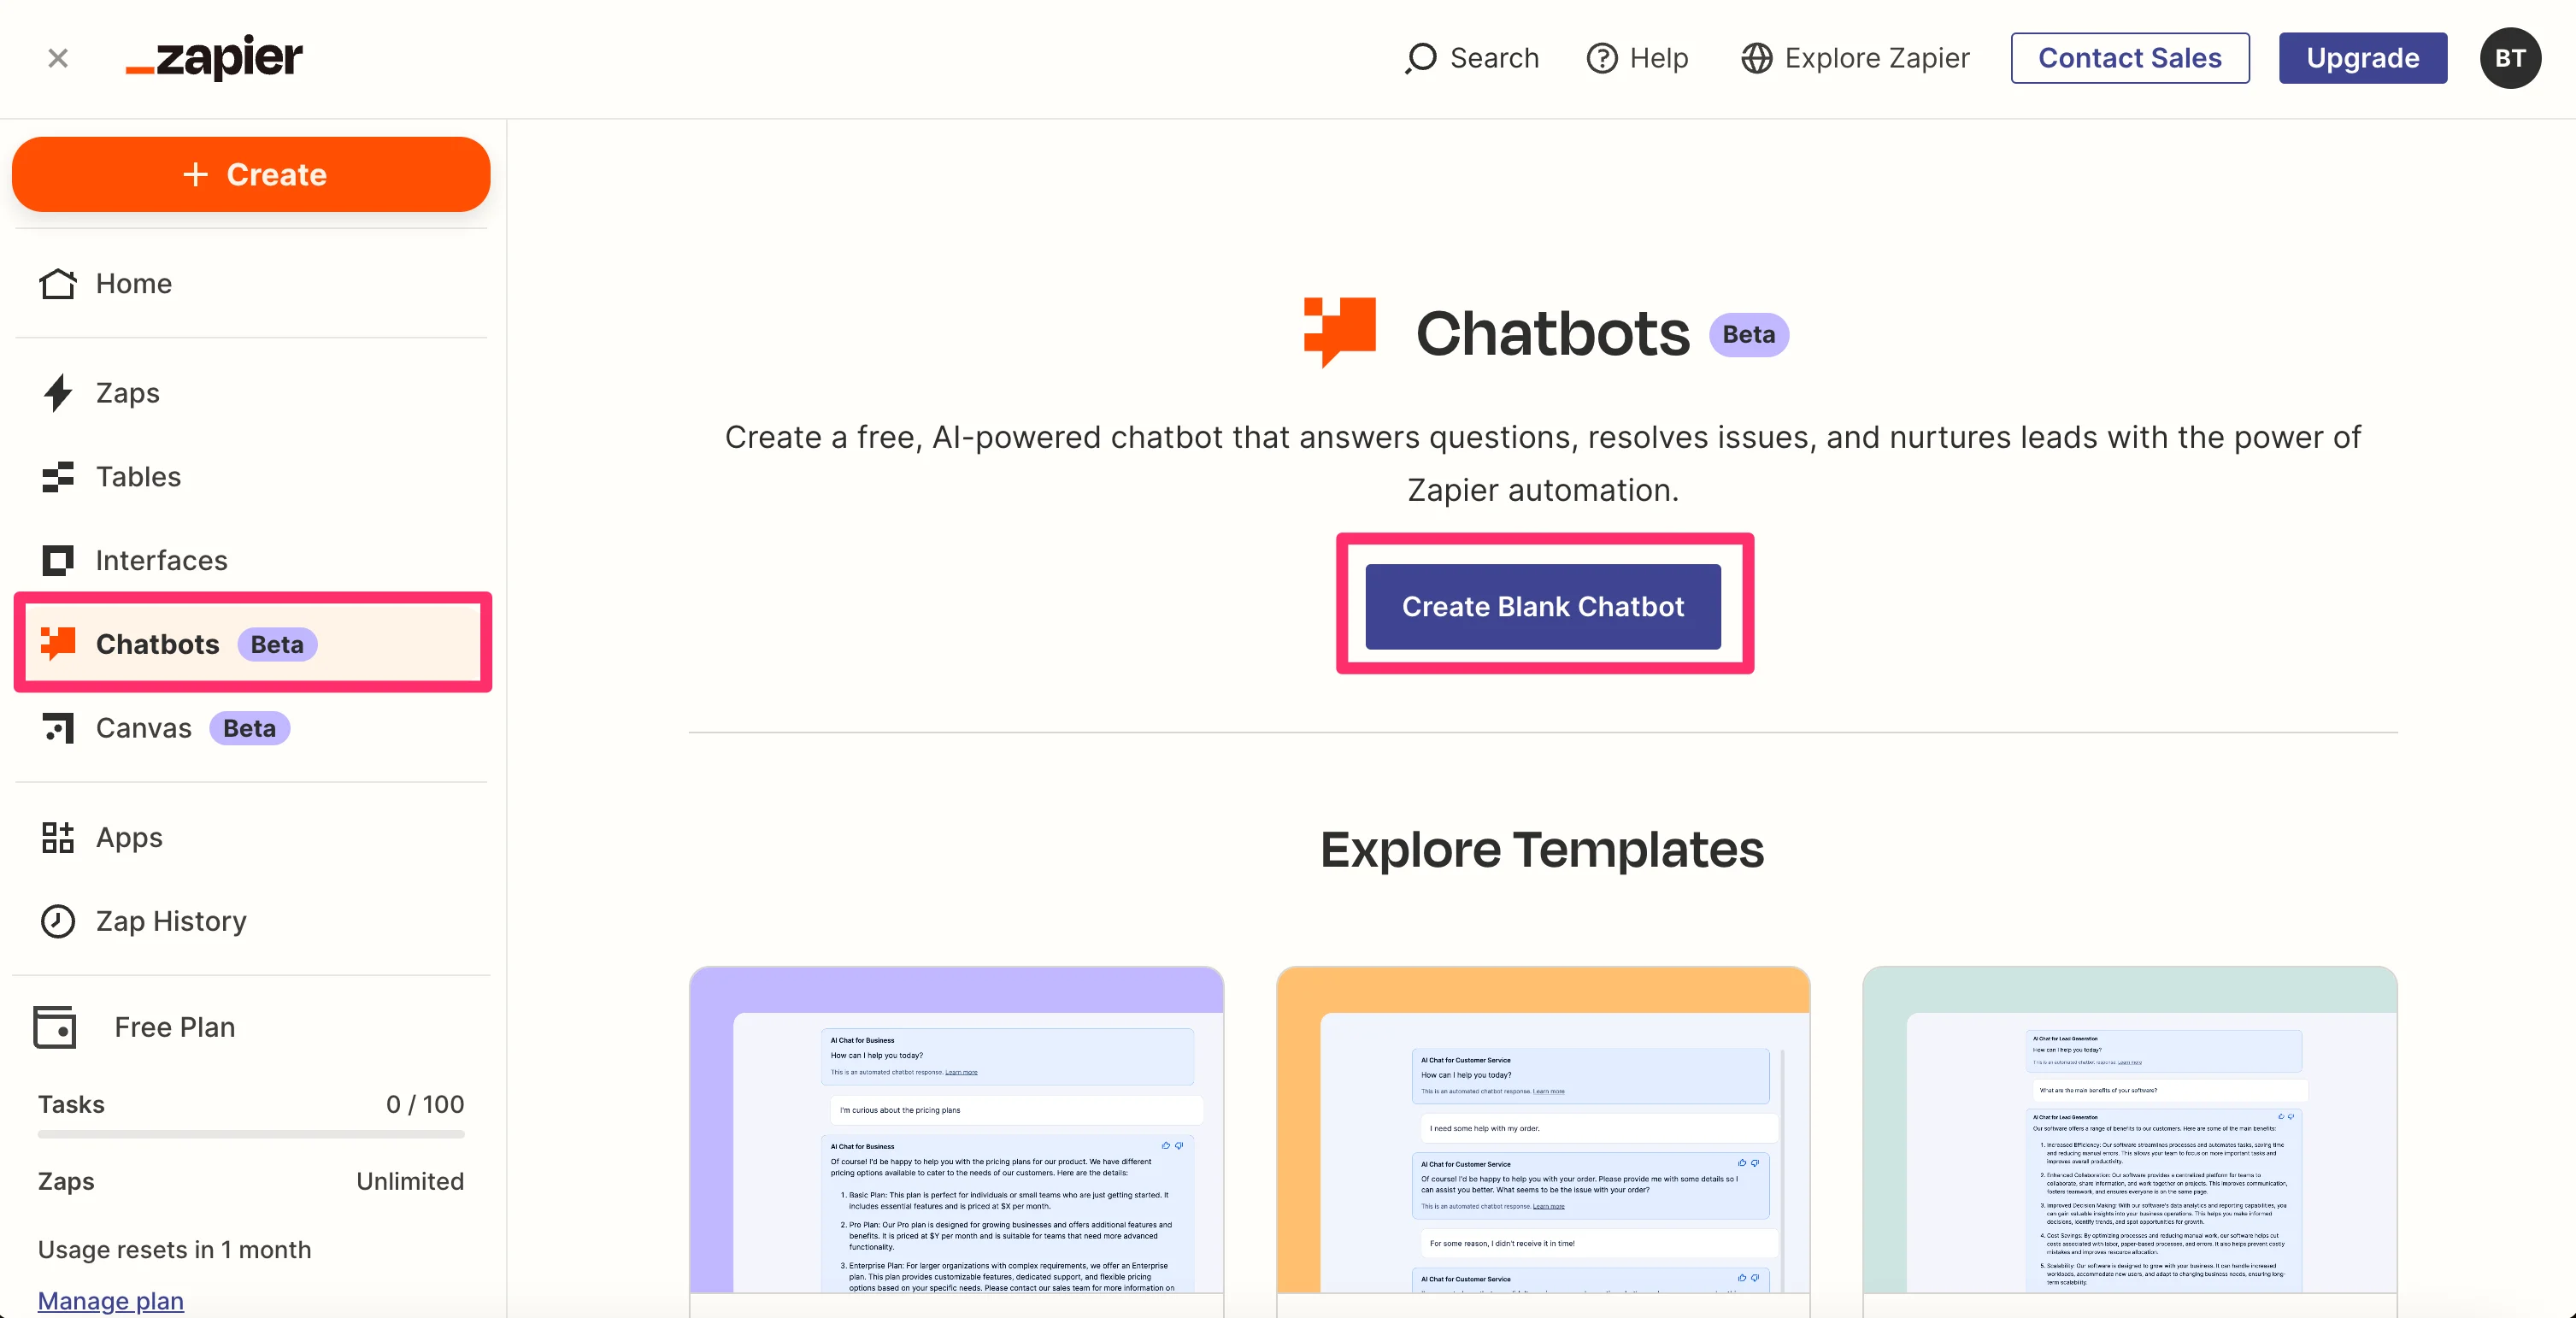
In your Zapier account, navigate to the Chatbots section from the side menu. Click on "Create Blank Chatbot" to start building your chatbot from scratch. Alternatively, you can use one of Zapier's pre-built templates as a starting point.
Then, name your chatbot.
.webp)
Once your chatbot is created, you’ll land on the chatbot settings screen. In the Instructions tab, you can define the chatbot's Directive, which serves as the instructions the bot will follow without requiring user input. This is where you'll provide the context and purpose of the chatbot. Click the “Pop Out” button to update this information.
.webp)
We’re going to add a Directive that provides a role to the chatbot, where it should reference its knowledge, and how it should respond to employee queries.
Sample prompt:
You are an AI-powered HR assistant for a company. Your task is to answer employee questions based on the provided FAQ and direct employees to the appropriate department if you cannot answer their question.
Use the FAQ knowledge source to answer questions.
When answering employee questions, follow these guidelines:
1. Carefully read the employee's question and search for relevant information in the FAQ.
2. If you find an answer in the FAQ, provide it to the employee in a clear and concise manner.
3. If the question is not directly addressed in the FAQ, but you can infer an answer based on the information provided, do so cautiously and mention that your answer is based on available information.
4. If you cannot answer the question using the FAQ:
a. Apologize for not having the specific information.
b. Suggest the most appropriate department that the employee should contact for further assistance.
c. Explain briefly why you think that department would be the best to handle their query.
5. Always maintain a professional and helpful tone in your responses.
6. Do not make up information or provide answers that are not supported by the FAQ or your role as an HR assistant.
Format your response as follows:
1. Begin with a brief greeting.
2. Provide your answer or department referral.
3. End with a polite closing remark.
.webp)
Step 3: Create a FAQ Zapier table and link it to your chatbot
With our chatbot Directive set, we can now create a knowledge source to store our FAQ data. We’re going to use Zapier Tables to do this.
To create a blank Zapier Table, navigate to the Tables tab from the Zapier dashboard and click the “Start blank” button.
.webp)
Then, name your table and give it a description.
.webp)
Once your table is created, you’ll be taken to the table editing page. Update the table to have two columns: “Questions” and “Answers.” To do this, you can click on the column headers, edit the default fields’ settings, and delete the fields you don’t need.
.webp)
Once we have our two columns, we’ll then drop our questions and answers data into the table. The result should look like the below table.
.webp)
Now that our FAQ table is created, we can link it to our chatbot as a knowledge source. To do this, navigate back to your chatbot, and on the Instructions tab, scroll down to the Knowledge sources section and click the “Table” button.
.webp)
In the knowledge source pop-up window, search and select your FAQ table and add it as a source.
.webp)
If you update your knowledge source in the future, you can come back to this screen and click the “Sync” button to make sure your chatbot is updated with the latest data from your Zapier table.
.webp)
Step 4: Test and share the chatbot
That’s it for the setup! Now we can test the bot. To do this, start asking questions in the preview window on the right side of the page to test the accuracy and response quality.
.webp)
When you’re happy with your chatbot, you can deploy it by clicking on the “Share” button in the top right corner of the page.
.webp)
You can share the public URL, embed it on another website, or add your chatbot to a Zapier Interface.
.webp)
This tutorial was created by Garrett.