Create interactive boards for internal processes
Learn how to turn team process docs into visual guides in minutes using WebSim AI.
2024-12-08
In our previous tutorials, we explored the basics of WebSim AI and learned how to create simple web applications. Now, let's dive into a practical use case that showcases how WebSim AI can solve real challenges in team environments.
In this tutorial, I’ll show you how to take any text-based process and turn it into a visual guide that your team will actually use.
Every team struggles with making complex processes clear and accessible. Text documents get ignored, flowcharts become confusing, and team members end up asking the same questions repeatedly. WebSim AI can help transform this experience by turning written procedures into interactive visualizations that make complex workflows clear and engaging.
In this tutorial, you will learn how to:
- Convert written processes into engaging visual guides
- Create interactive, step-by-step workflow diagrams
- Add helpful details and resources to each step
- Customize visualizations for your team's needs
- Share your process guides effectively
You'll need:
- A WebSim AI account (free plan works great)
- Your process is written out in any format
- Zero design skills or technical expertise—WebSim handles this for you!
Let’s dive in.
Step 1: Prepare your process documentation
Before starting to create the visualized workflow, choose one specific process that your team frequently uses. This could be your content approval process, customer support workflow, or another key procedure. Once you've picked your focus process, gather all existing documentation you have for it. This step is important for creating an effective visualization that truly serves your team's needs.
Your process documentation should capture:
- The sequence of steps in your workflow
- Who handles each part of the process
- Any important decision points
- Key handoffs between team members
- Required approvals or reviews
Don't worry about special formatting - just gather your actual process information in whatever format you have it. This could be existing procedure documents, team guides, or even informal documentation. The key is having the essential information ready. WebSim AI can convert those natural descriptions and transform them into structured visualizations.
For example, if you're documenting a content approval process, you might have information about draft creation, review cycles, and final publishing steps. Or for a customer support workflow, you could include ticket handling procedures, escalation criteria, and resolution guidelines.
Step 2: Create the visualization board
Now, let’s use these gathered process documents to be converted into a visual representation that makes workflow navigation intuitive and engaging.
Head over to WebSim AI and use this prompt:
Create a process visualization board for "[Your Process Name]" using a flowchart layout. Include these steps:[Paste your process text here]Design specifications:
1. Professional cards for each step
2. Clear directional arrows between steps
3. Status labels at key transitions
4. White background with a subtle grid
Each step should display:
1. Step number and title
2. Brief description
3. Responsible team member or role
Ensure a clean, professional, and easily understandable design.
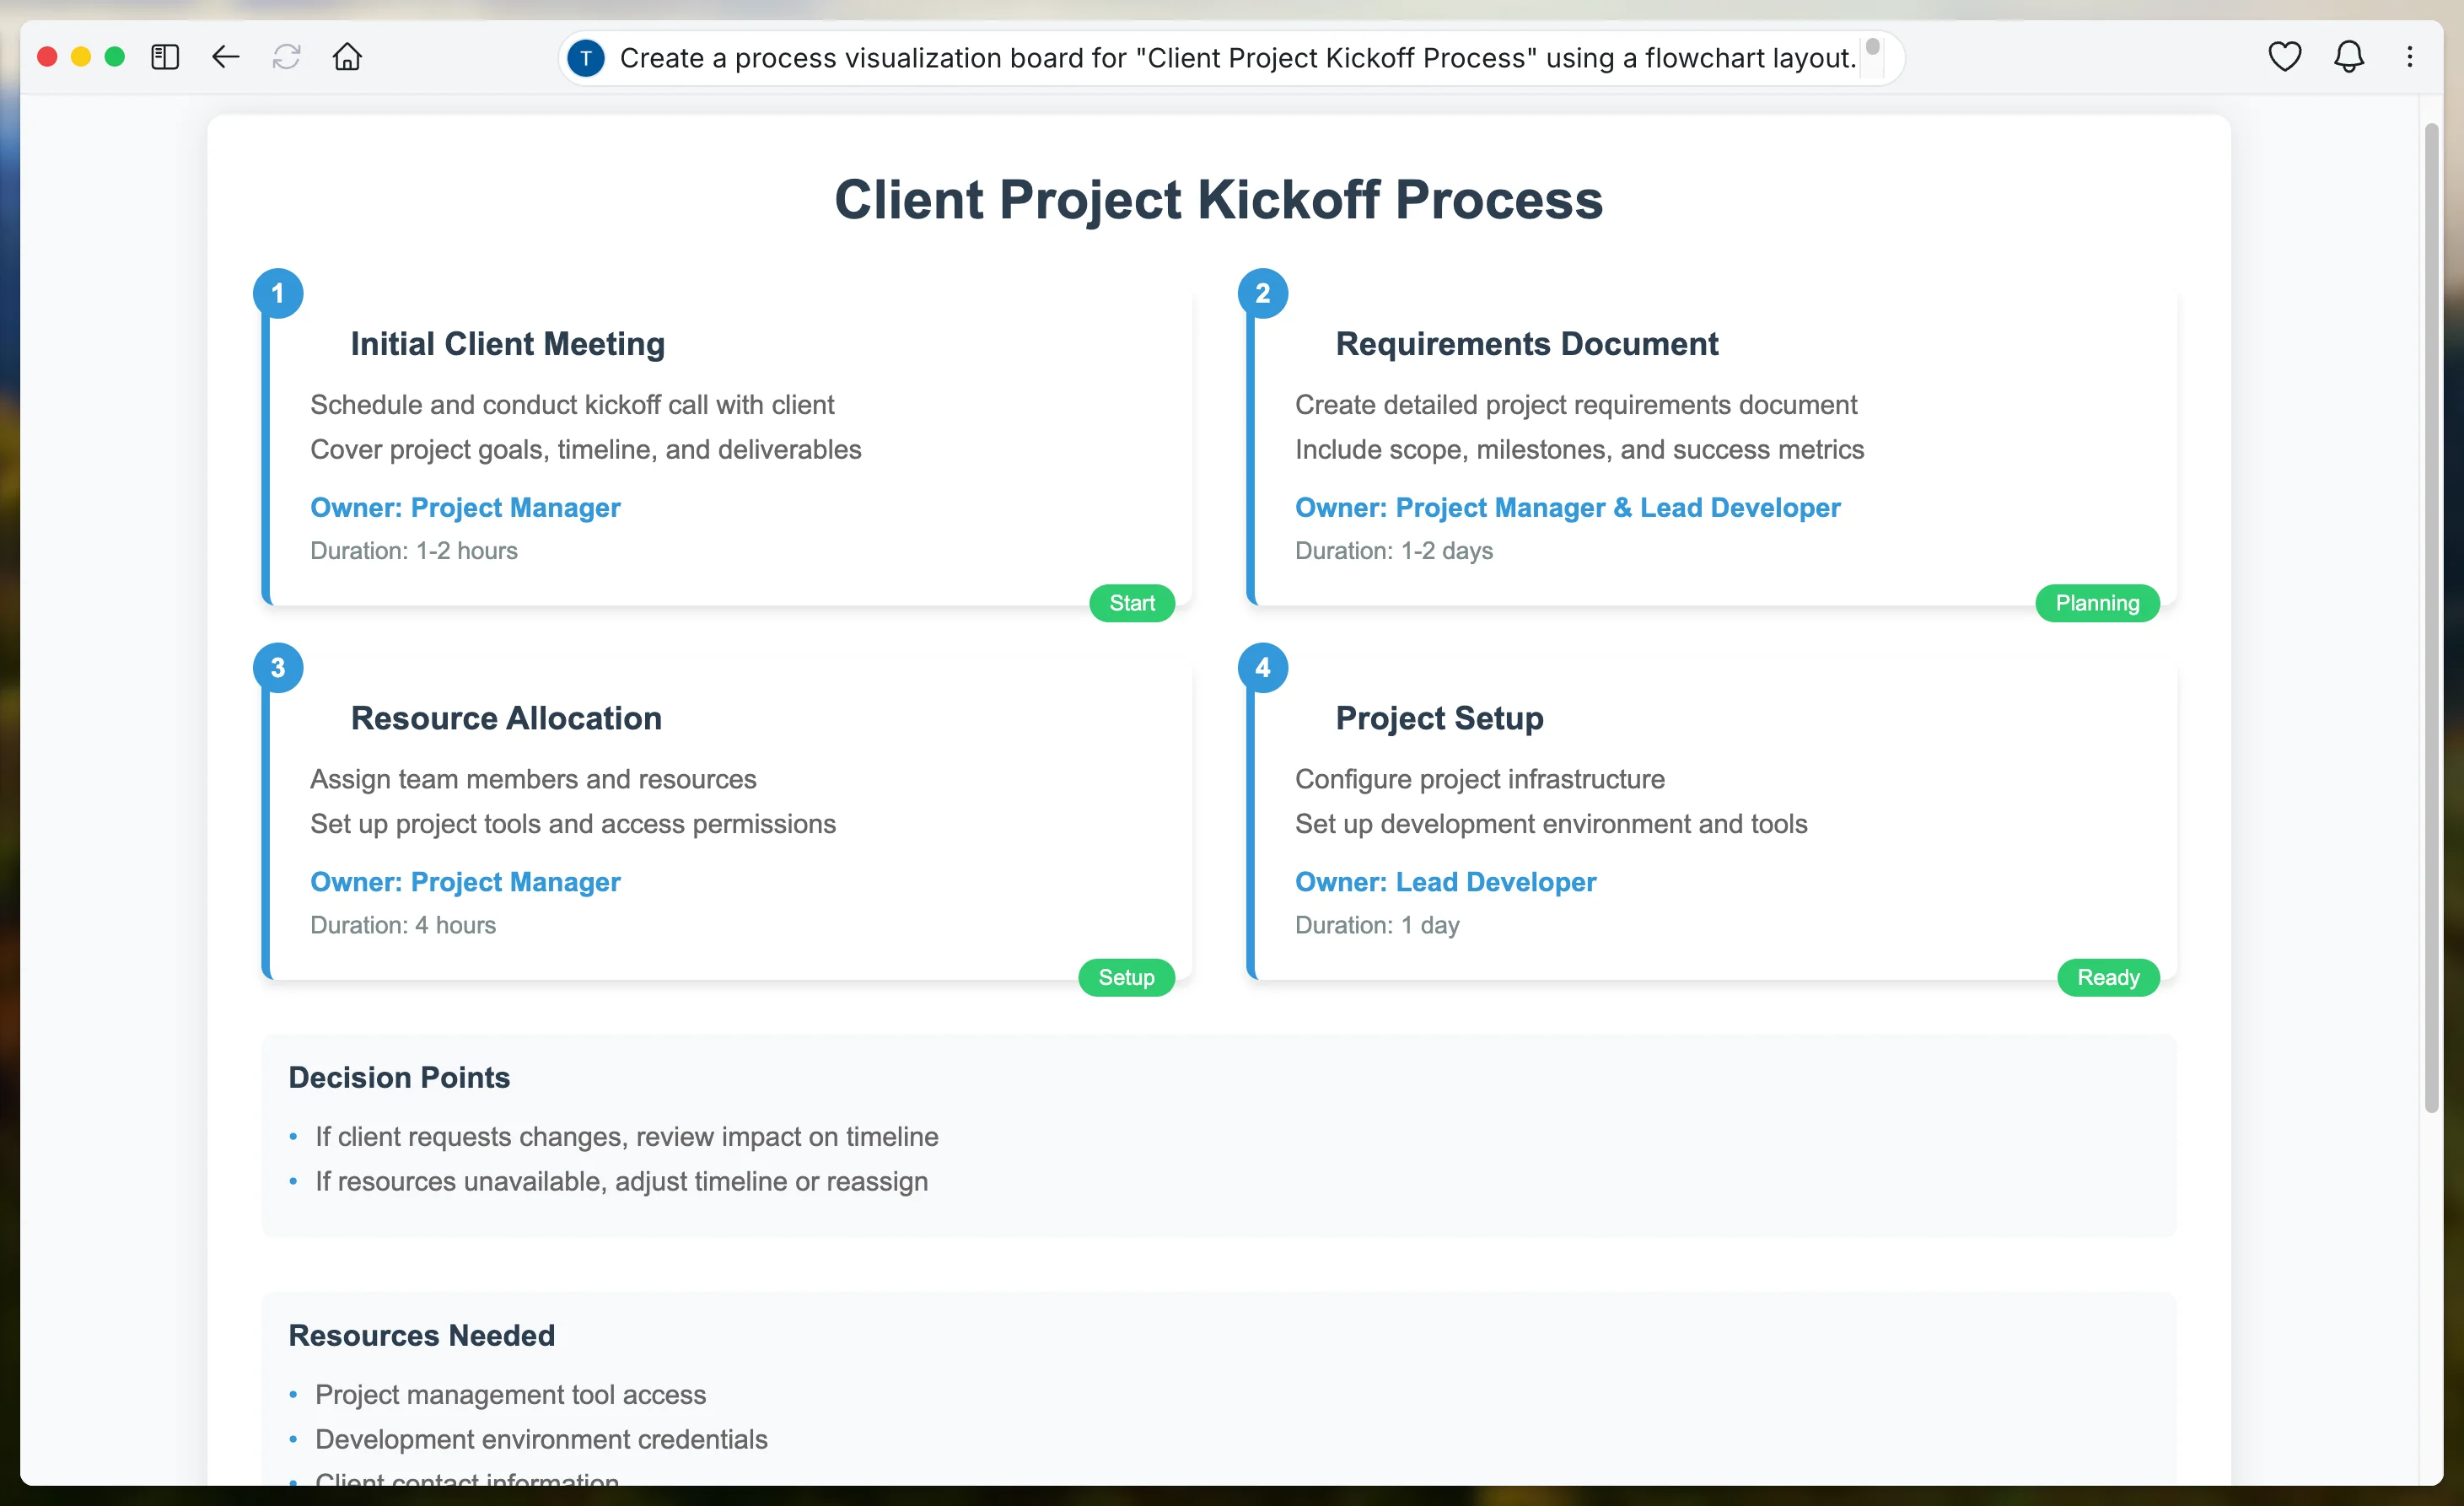
This prompt helps WebSim AI grasp your process's structure and content. The visualization organizes steps logically, allowing team members to quickly understand the overall picture.
Step 3: Enhance step details
With our basic visualization in place, let's make each step more informative and actionable. This is where we transform basic process cards into comprehensive guides that help team members understand exactly what they need to do.
Prompt WebSim AI with:
Enhance the process visualization by adding detailed information to each step.
For each step, include:
1. Full description from documentation
2. Required actions or deliverables
3. Owner or role responsible
Style guidelines:
1. Expandable cards on click for full details
2. Clear, legible typography
3. Visual indicators for step types (e.g., decision, action, review)
Maintain a clean and user-friendly interface while providing comprehensive information.
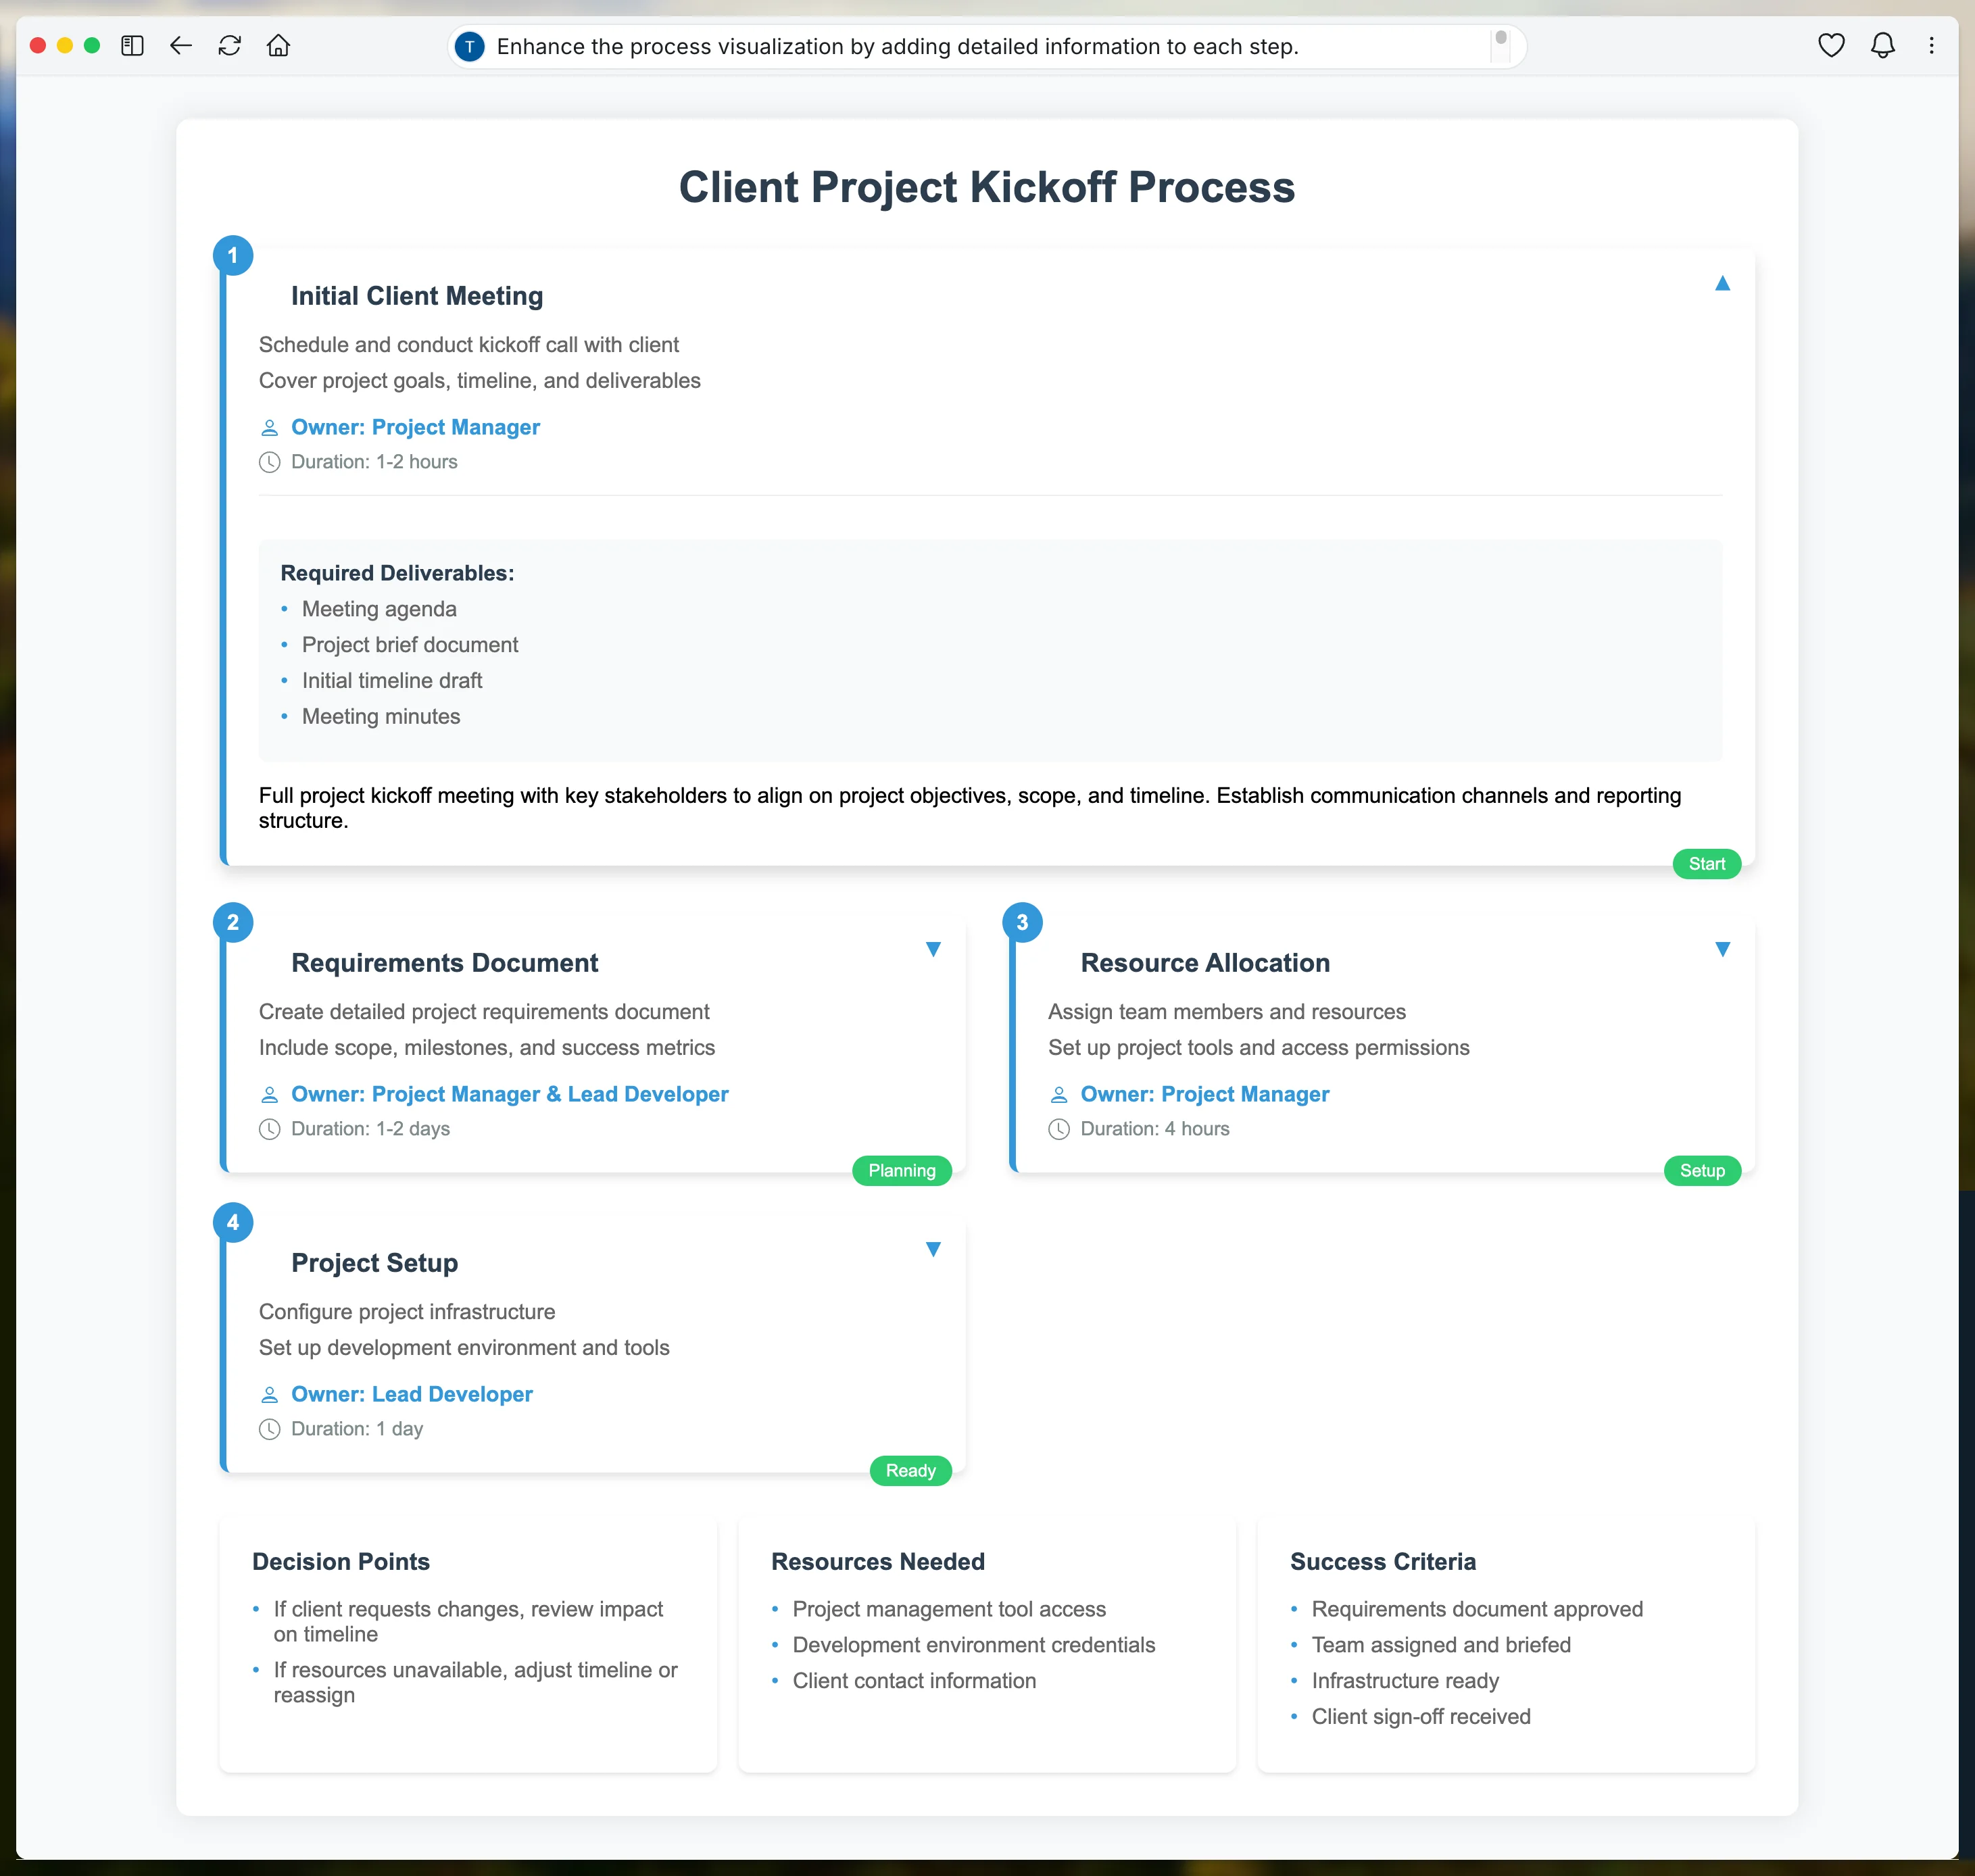
Each card now contains the specific information team members need to complete their tasks effectively. The expandable design keeps the visualization clean while making all necessary details easily accessible.
Step 4: Improve presentation
To ensure our visualization is not only functional but also visually appealing, enhancing the overall UI and presentation is essential. This step focuses on refining the aesthetics to make the board more engaging and easier to navigate for team members.
Input the following prompt to enhance the UI and presentation:
Improve the overall UI and presentation of the process visualization board.
Enhancements to include:
1. Apply a cohesive color scheme that aligns with the team's branding
2. Use consistent typography and font sizes for readability
3. Add icons or visual elements to represent different step types
4. Incorporate spacing and alignment for a balanced layout
5. Implement hover effects or tooltips for additional interactivity
Ensure the visualization is visually appealing, easy to navigate, and enhances user engagement.
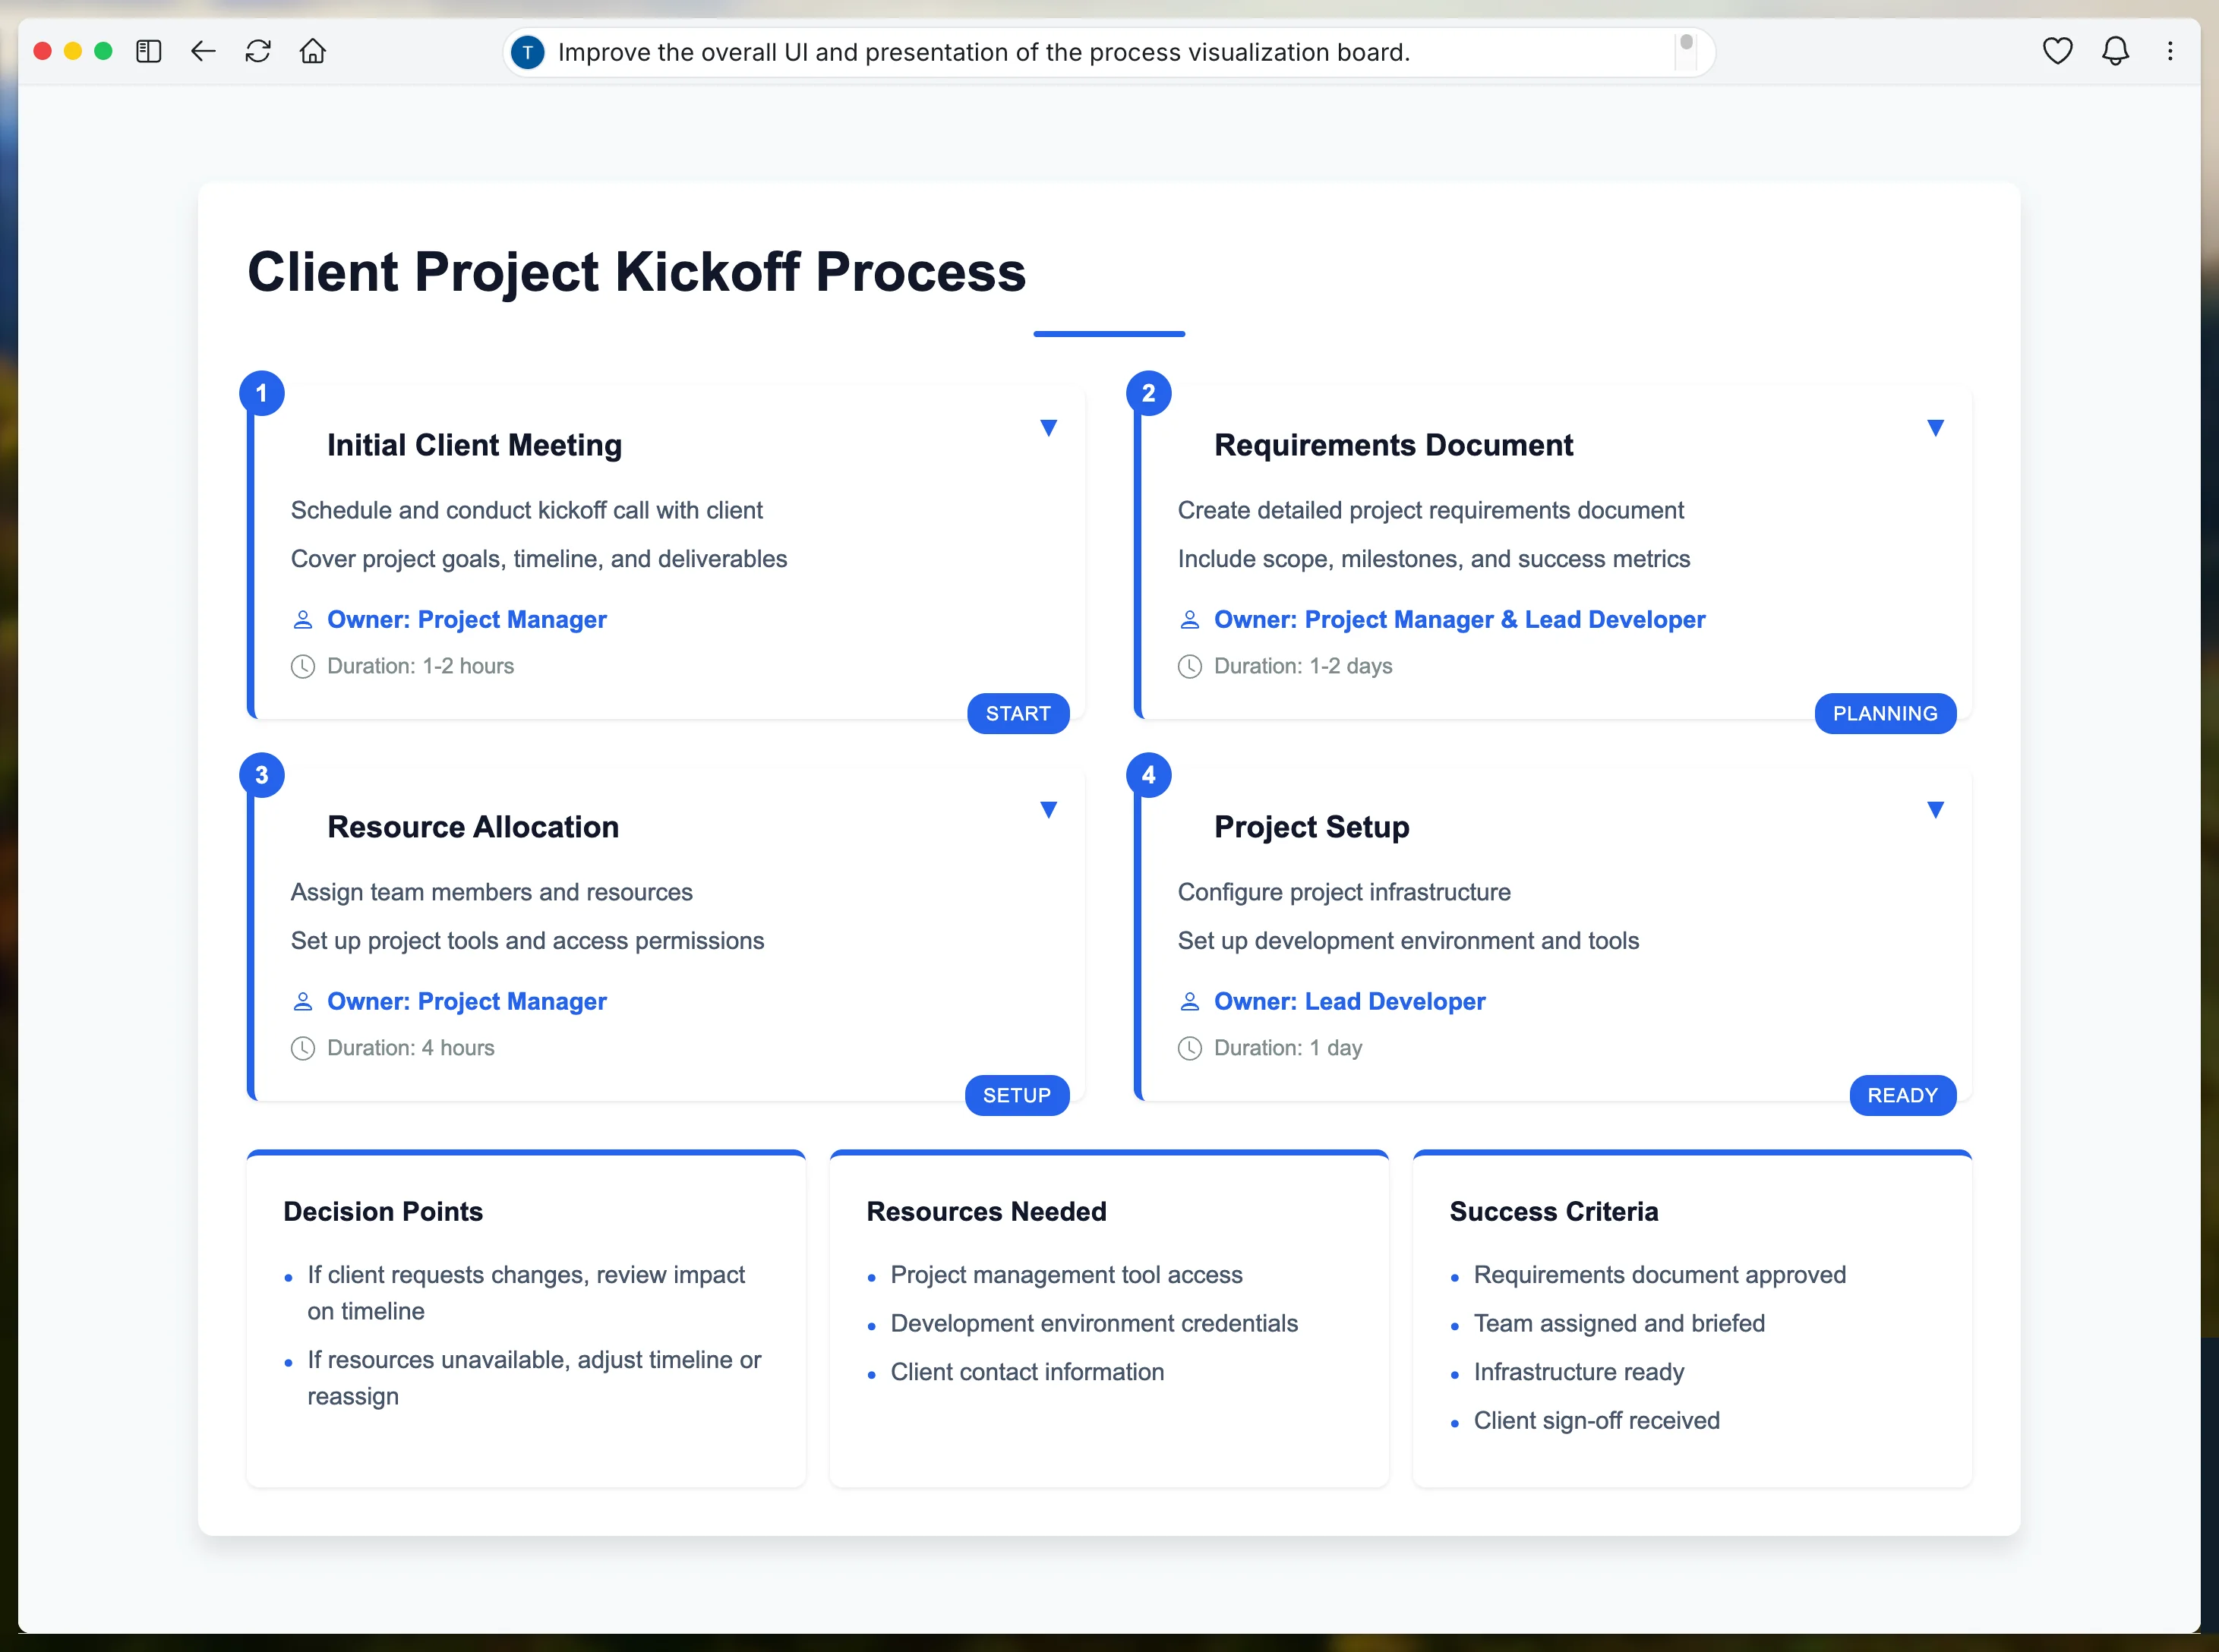
These enhancements will make your visualization board more attractive and user-friendly.
Using your process visualization
Your interactive process visualization is now ready for your team to use. Here's how to make the most of it:
- Share the board with your team members
- Show them how to:
- Navigate through the process steps
- Access detailed information in each step
- Follow the workflow connections
- Understand status indicators and transitions
- Gather feedback and make adjustments as needed
Remember, this visualization should make your process easier to understand and follow. Keep testing with your team and gathering feedback to ensure it serves their needs effectively.
Beyond single process visualization
This tutorial focused on creating a clear visualization for a specific process, but you can also create other valuable internal tools with Websim AI. Teams can use WebSim AI to:
- Create comprehensive process libraries with multiple workflows
- Design interactive training materials
- Build decision-making guides
- Develop project management dashboards
- Generate standard operating procedures
Whether you're visualizing a single crucial process or building a complete process management system, the same principles of clear organization and intuitive design apply.
Remember, WebSim AI is a versatile tool that can be used to meet your team's unique needs. You can use it to quickly test various tools, documents, visualizations, and resources essential for your team. Feel free to experiment with different methods and tailor the visualizations to align with your team's workflow.
This tutorial was created by Tanmay.