Deploy an email responder assistant
Learn how to set up an automated email responder that can search a knowledge base and draft intelligent replies to your inbox.
2024-12-09
Welcome to the third lesson of our AI personal assistants course!
In this tutorial, we'll walk you through the process of creating an email responder assistant using Lindy. This assistant will evaluate incoming messages, search a specified knowledge base for relevant information, and create draft responses directly in your inbox for your review before sending.
Steps we’ll follow in this tutorial:
- Set up the Email Responder flow
- Connect and configure the email trigger
- Set up conditions for responding
- Connect a knowledge base
- Configure the response settings
- Save and test the workflow
Let’s get to it!
Step 1: Set up the Email Responder flow
To begin, navigate to the Lindy marketplace and click on the Email Responder flow template.
.webp)
This will open a pre-configured flow with several steps: Email Received trigger, Condition steps, Search Knowledge Base step, and a Send Reply email action.
.webp)
Step 2: Connect and configure the email trigger
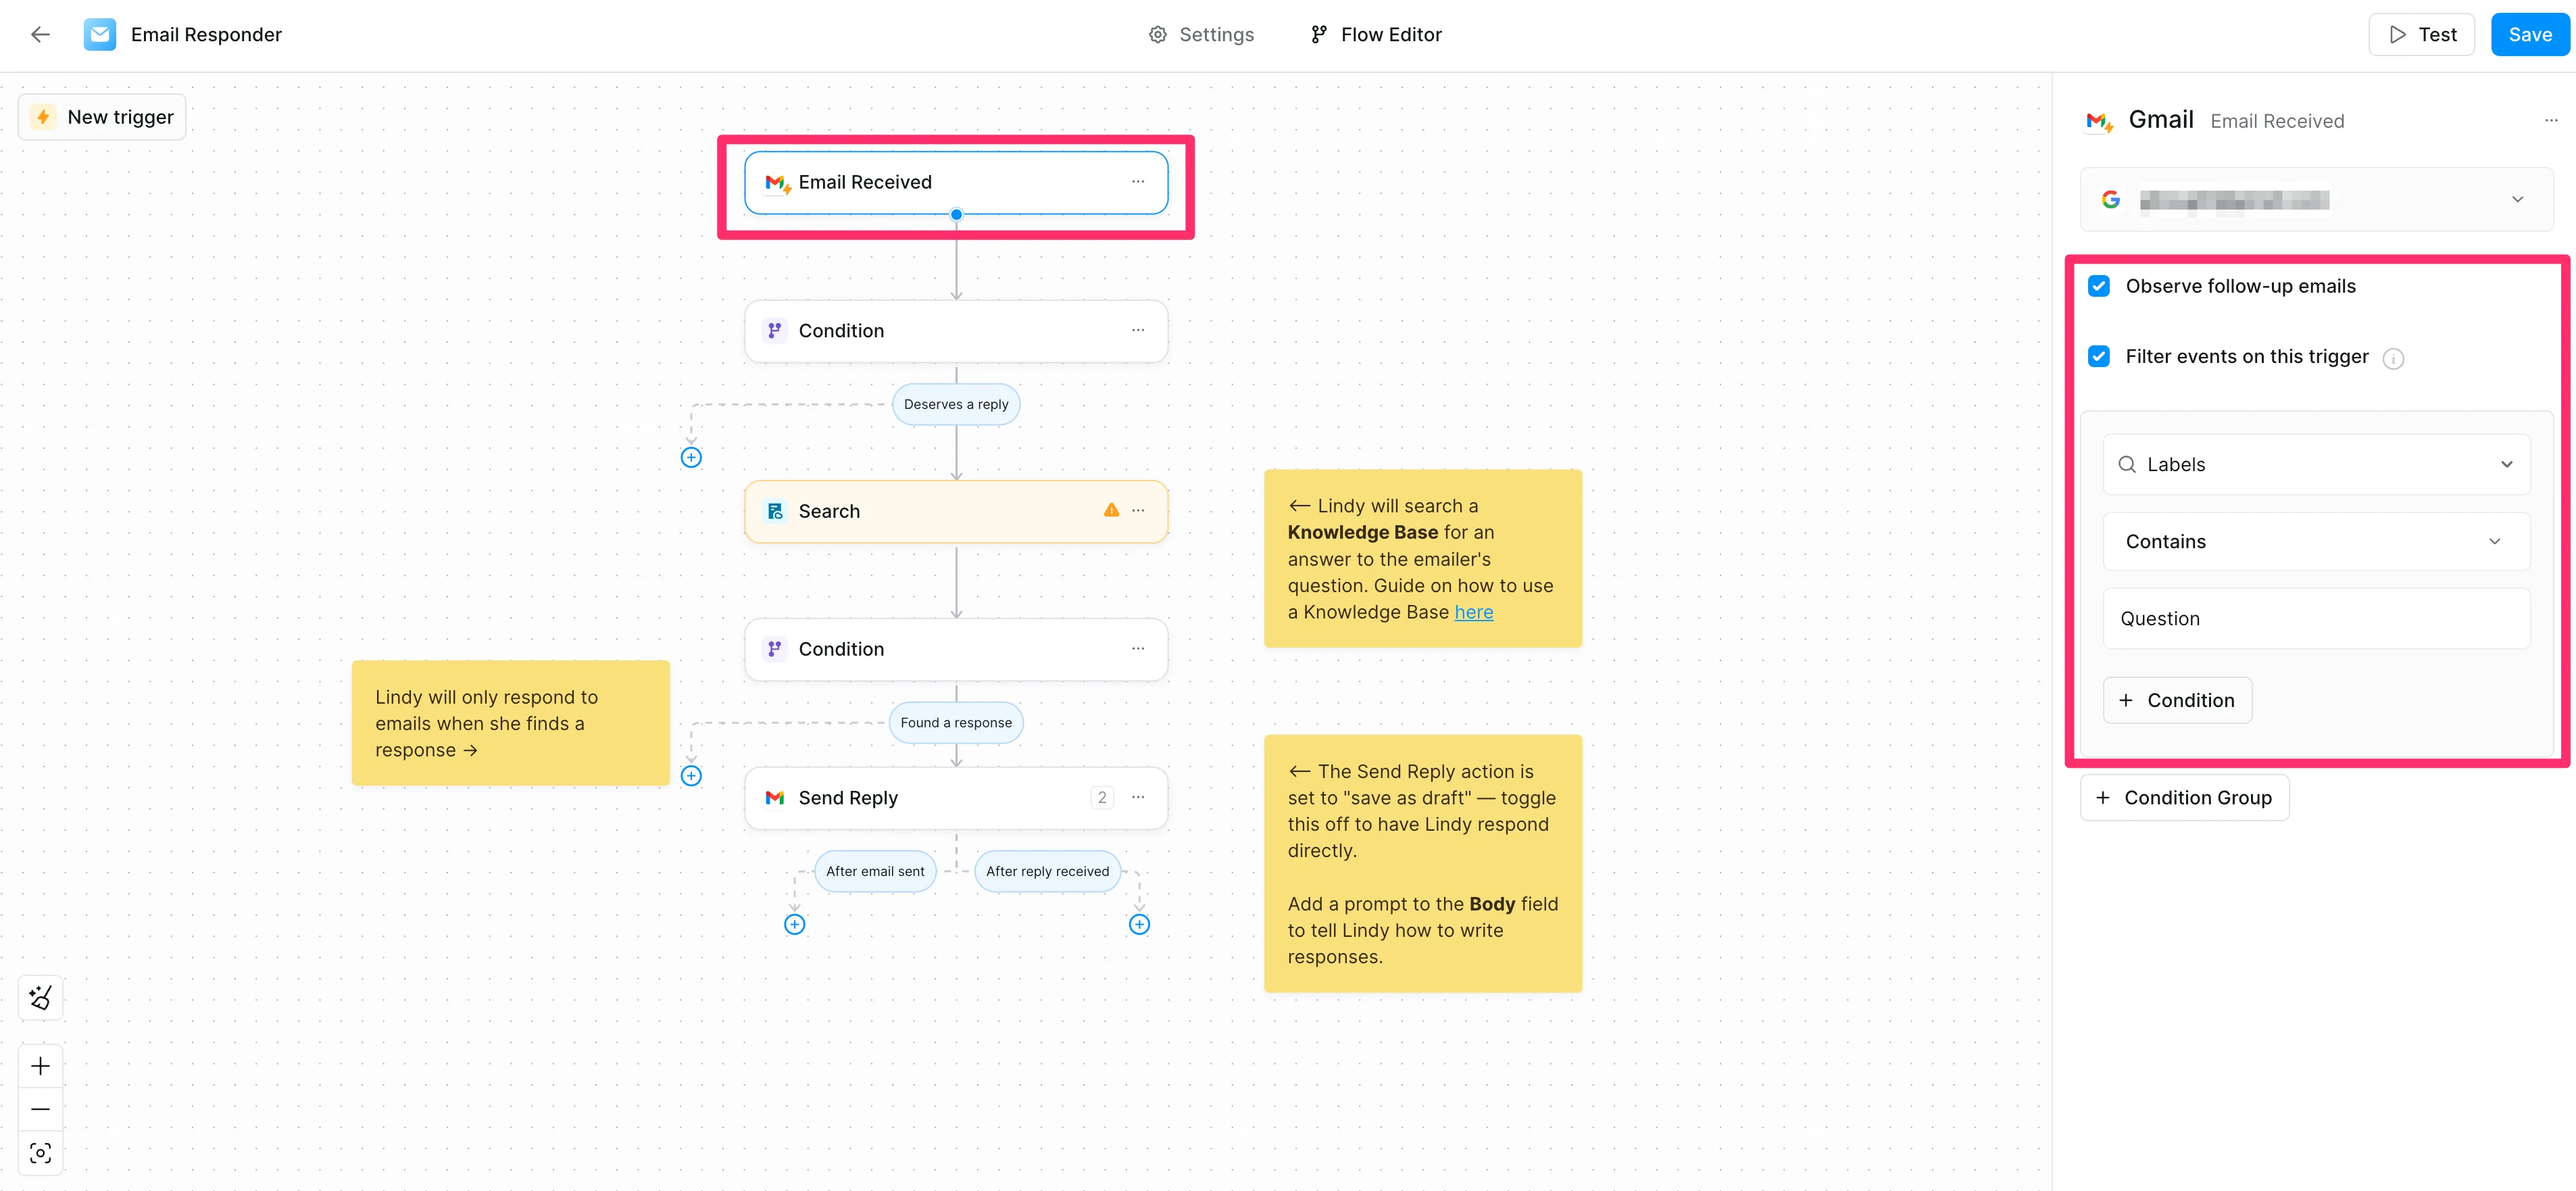
The first step is to connect your email inbox to the flow. To do this, click on the Email Received trigger and authenticate your Gmail (or Outlook) account.
.webp)
After connecting your inbox, you'll need to set up some trigger filters. Check the “Observe follow-up emails” box to observe follow-up emails within a thread. You can also set up filtering based on a variety of criteria. We’re going to filter for emails that contain the "Question" label (which the Lindy in our previous lesson applied.)
Step 3: Set up conditions for responding
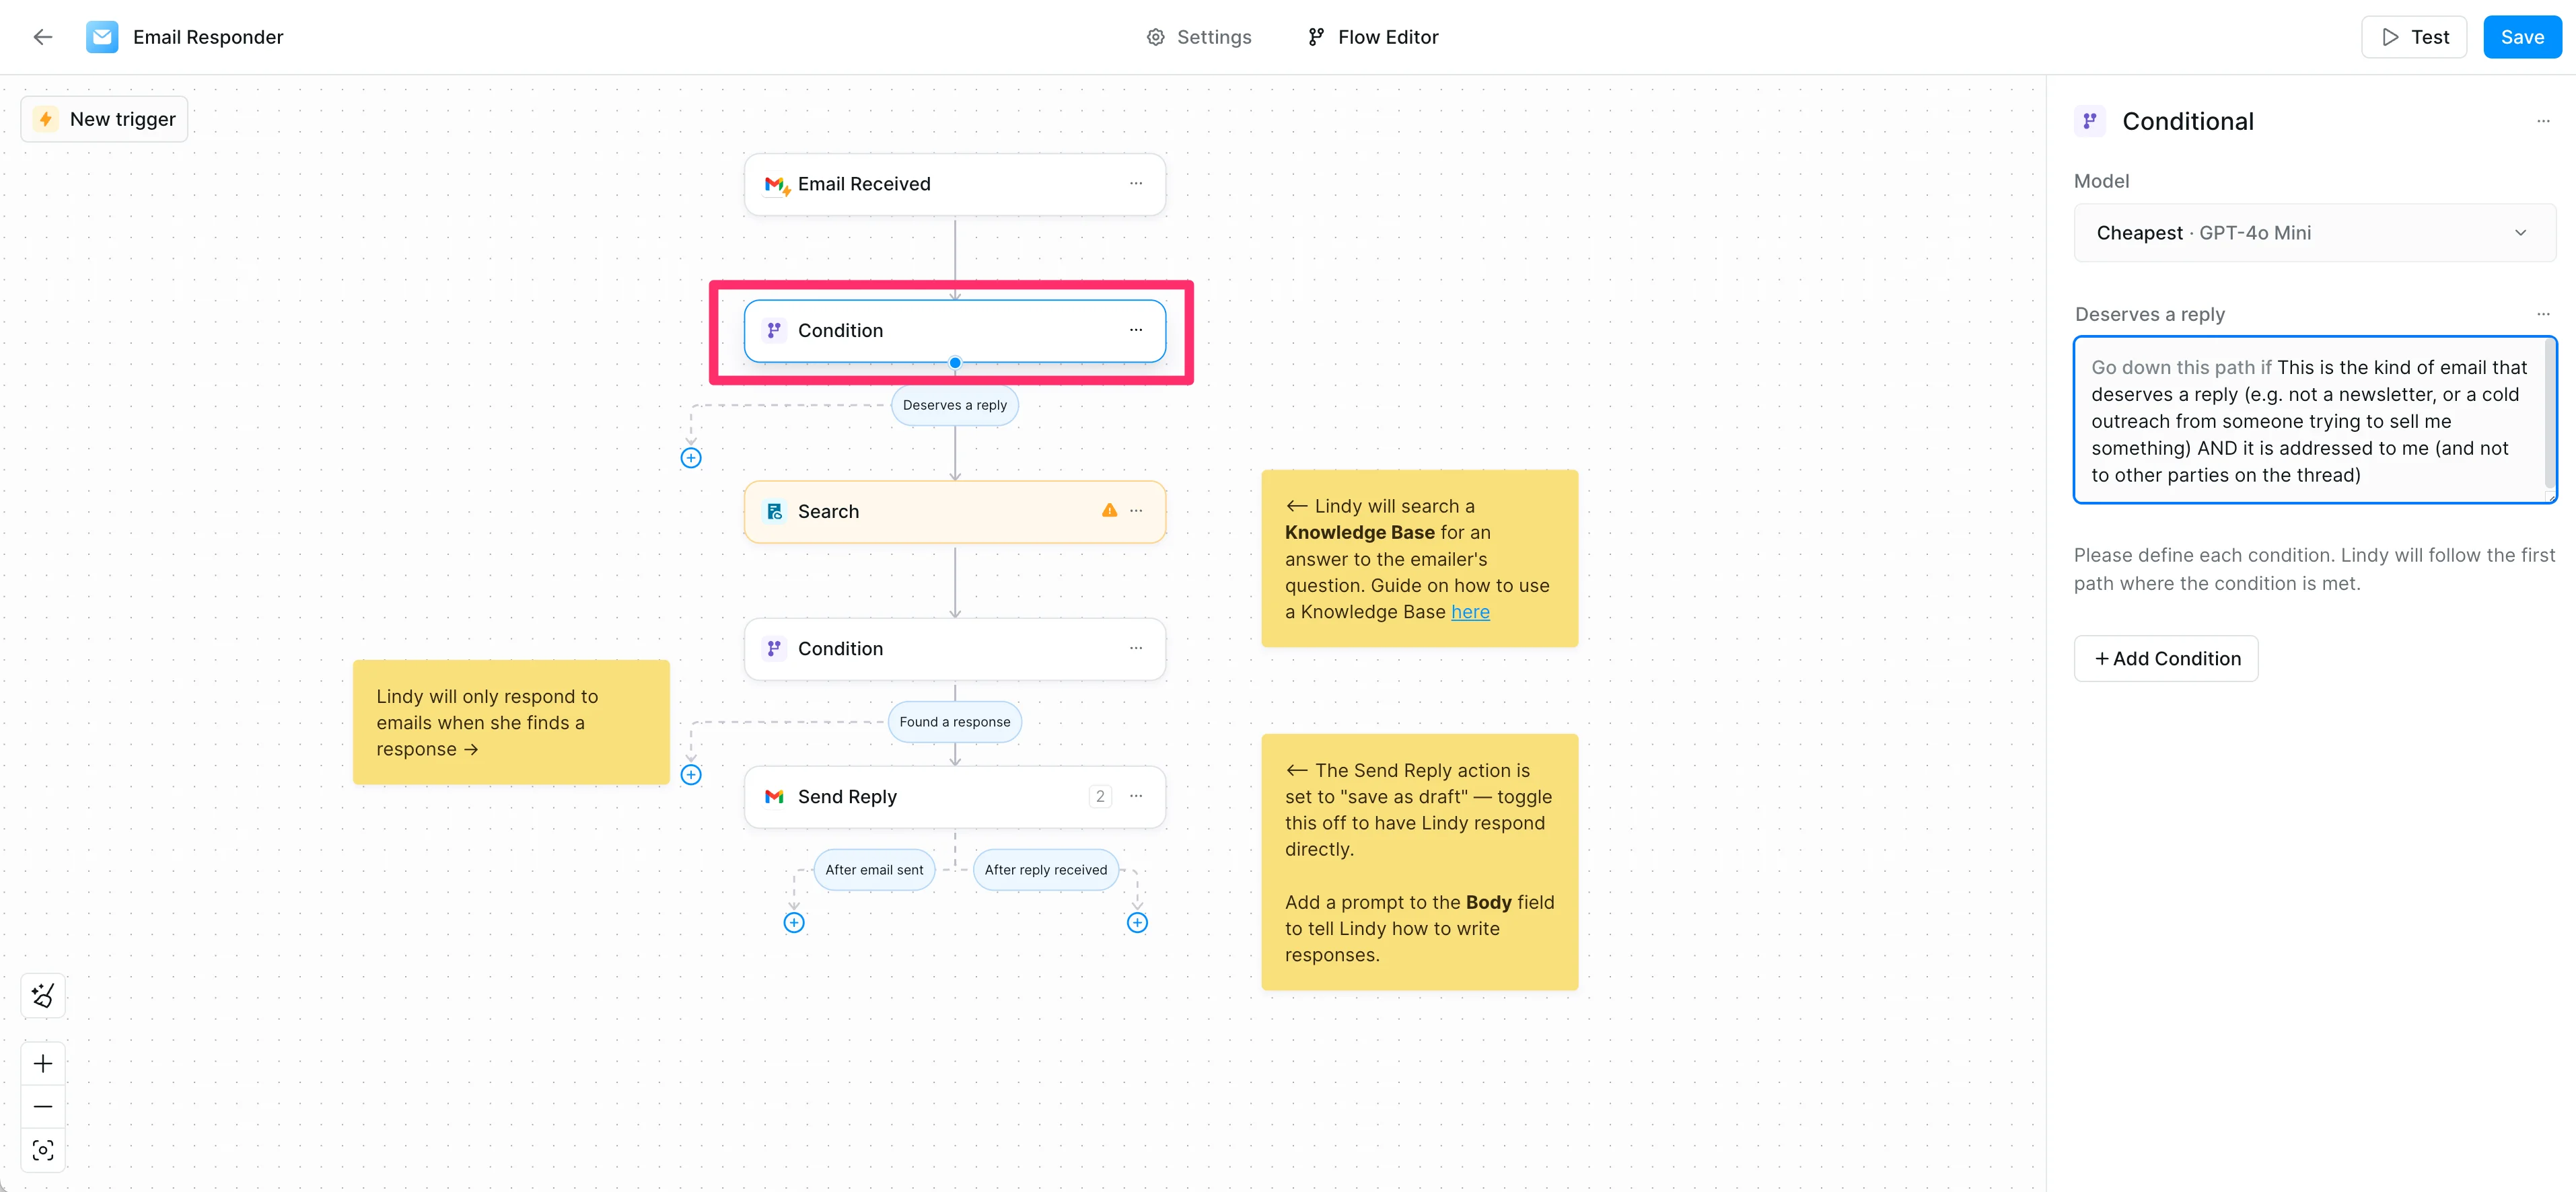
Next, we'll configure the conditions under which Lindy should respond. To do this, click on the first Condition step and review or update the default condition.
Default Condition:
This is the kind of email that deserves a reply (e.g. not a newsletter, or a cold outreach from someone trying to sell me something) AND it is addressed to me (and not to other parties on the thread)
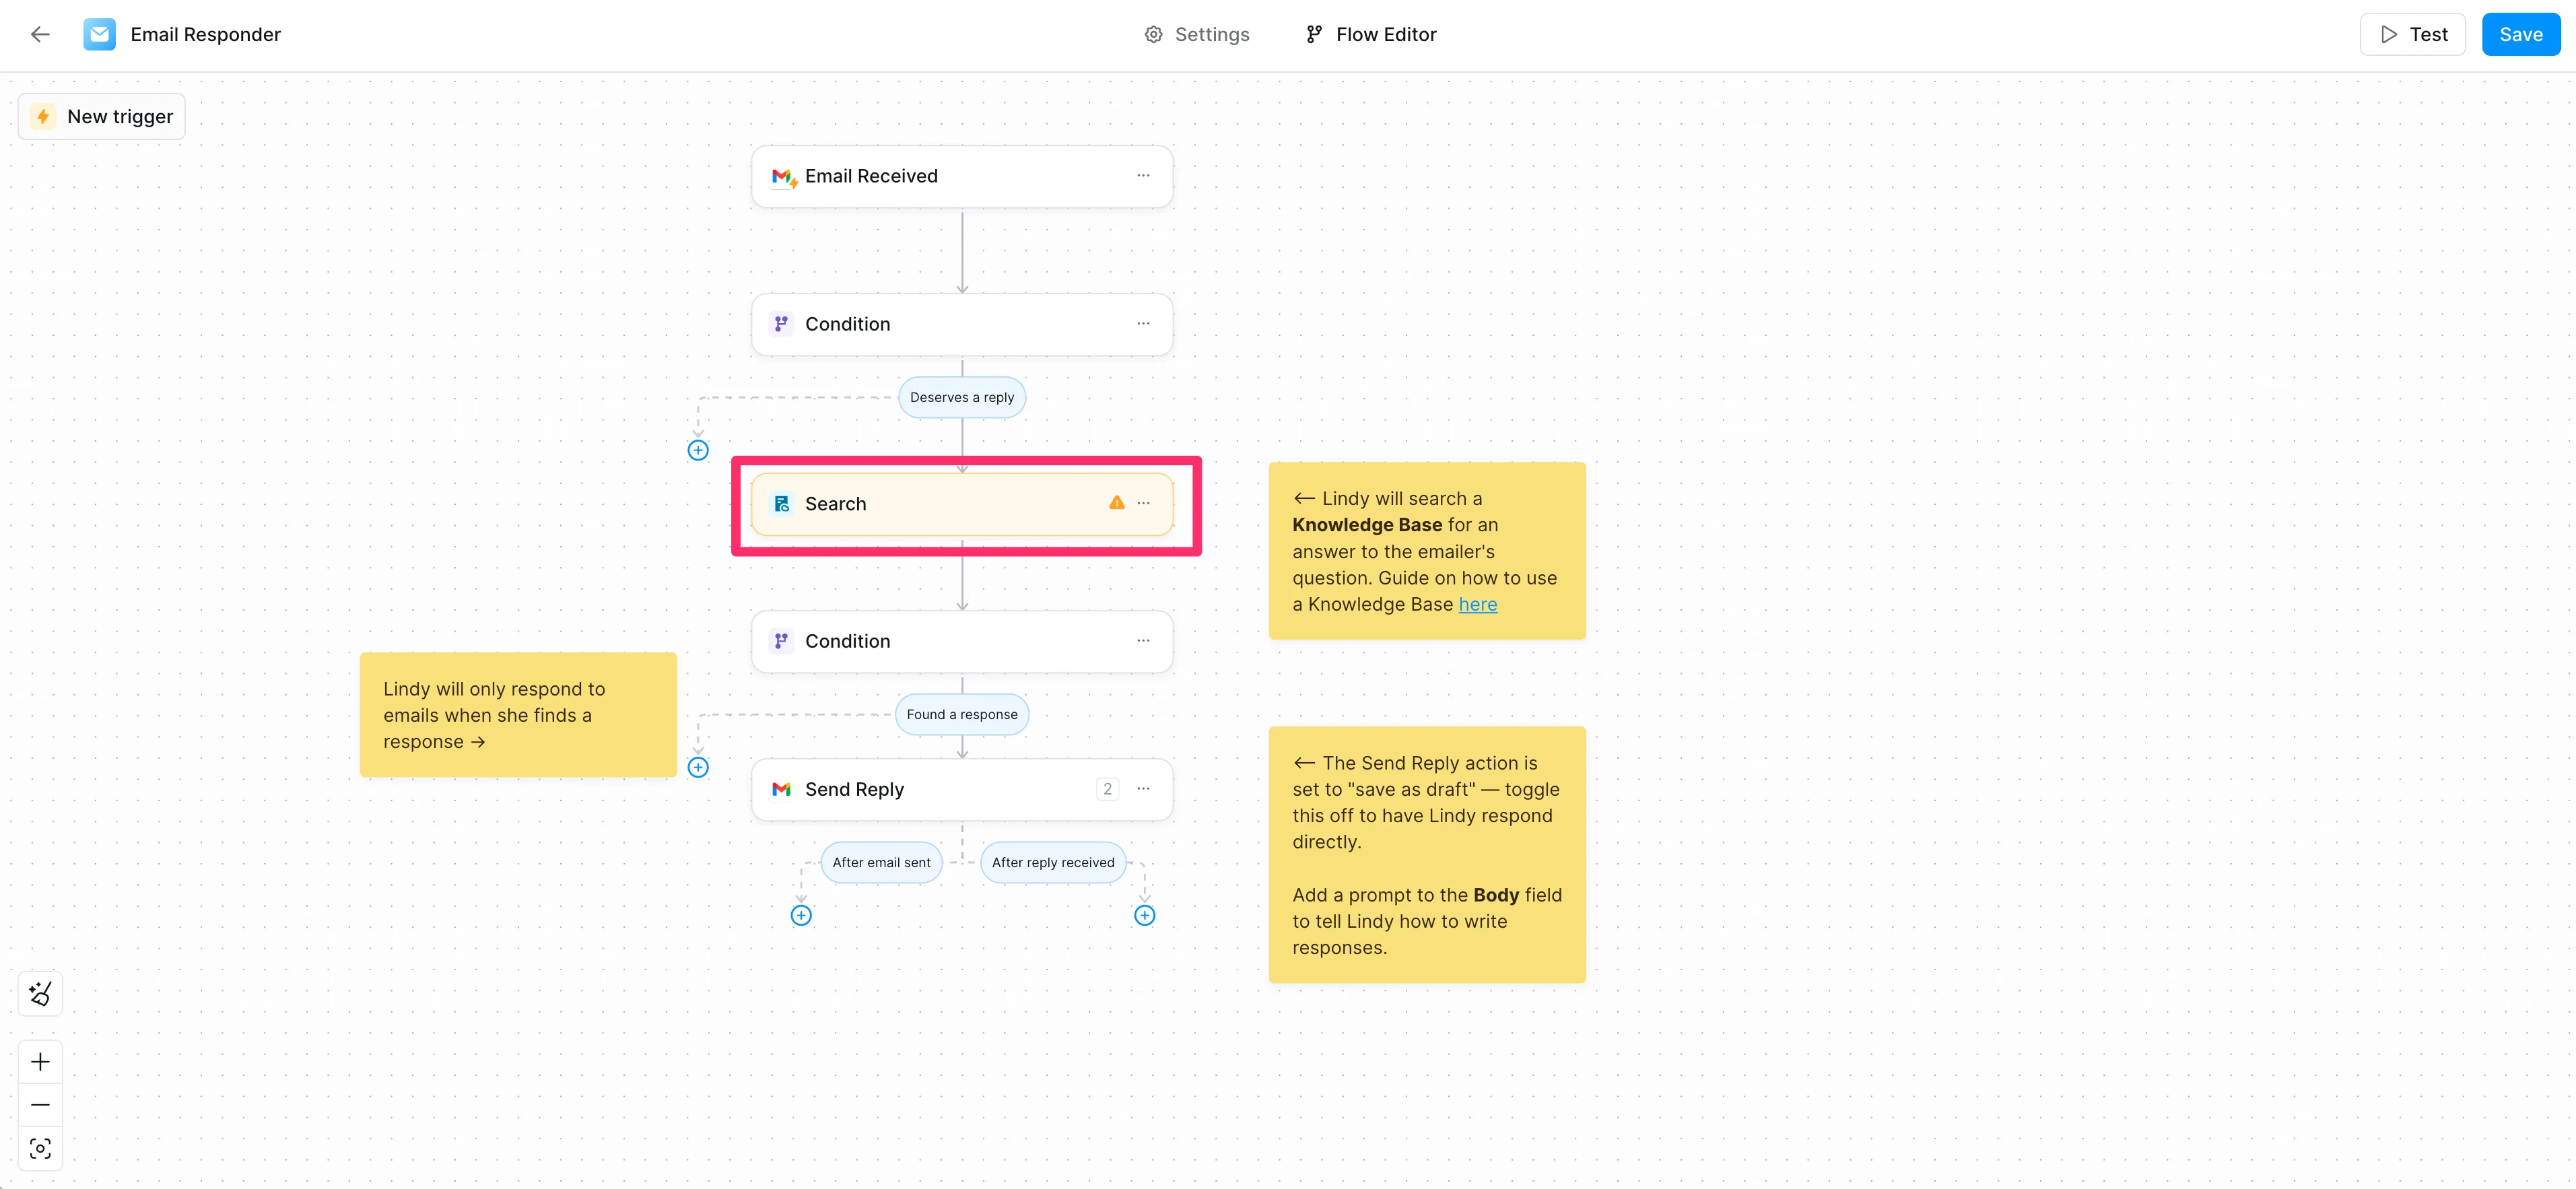
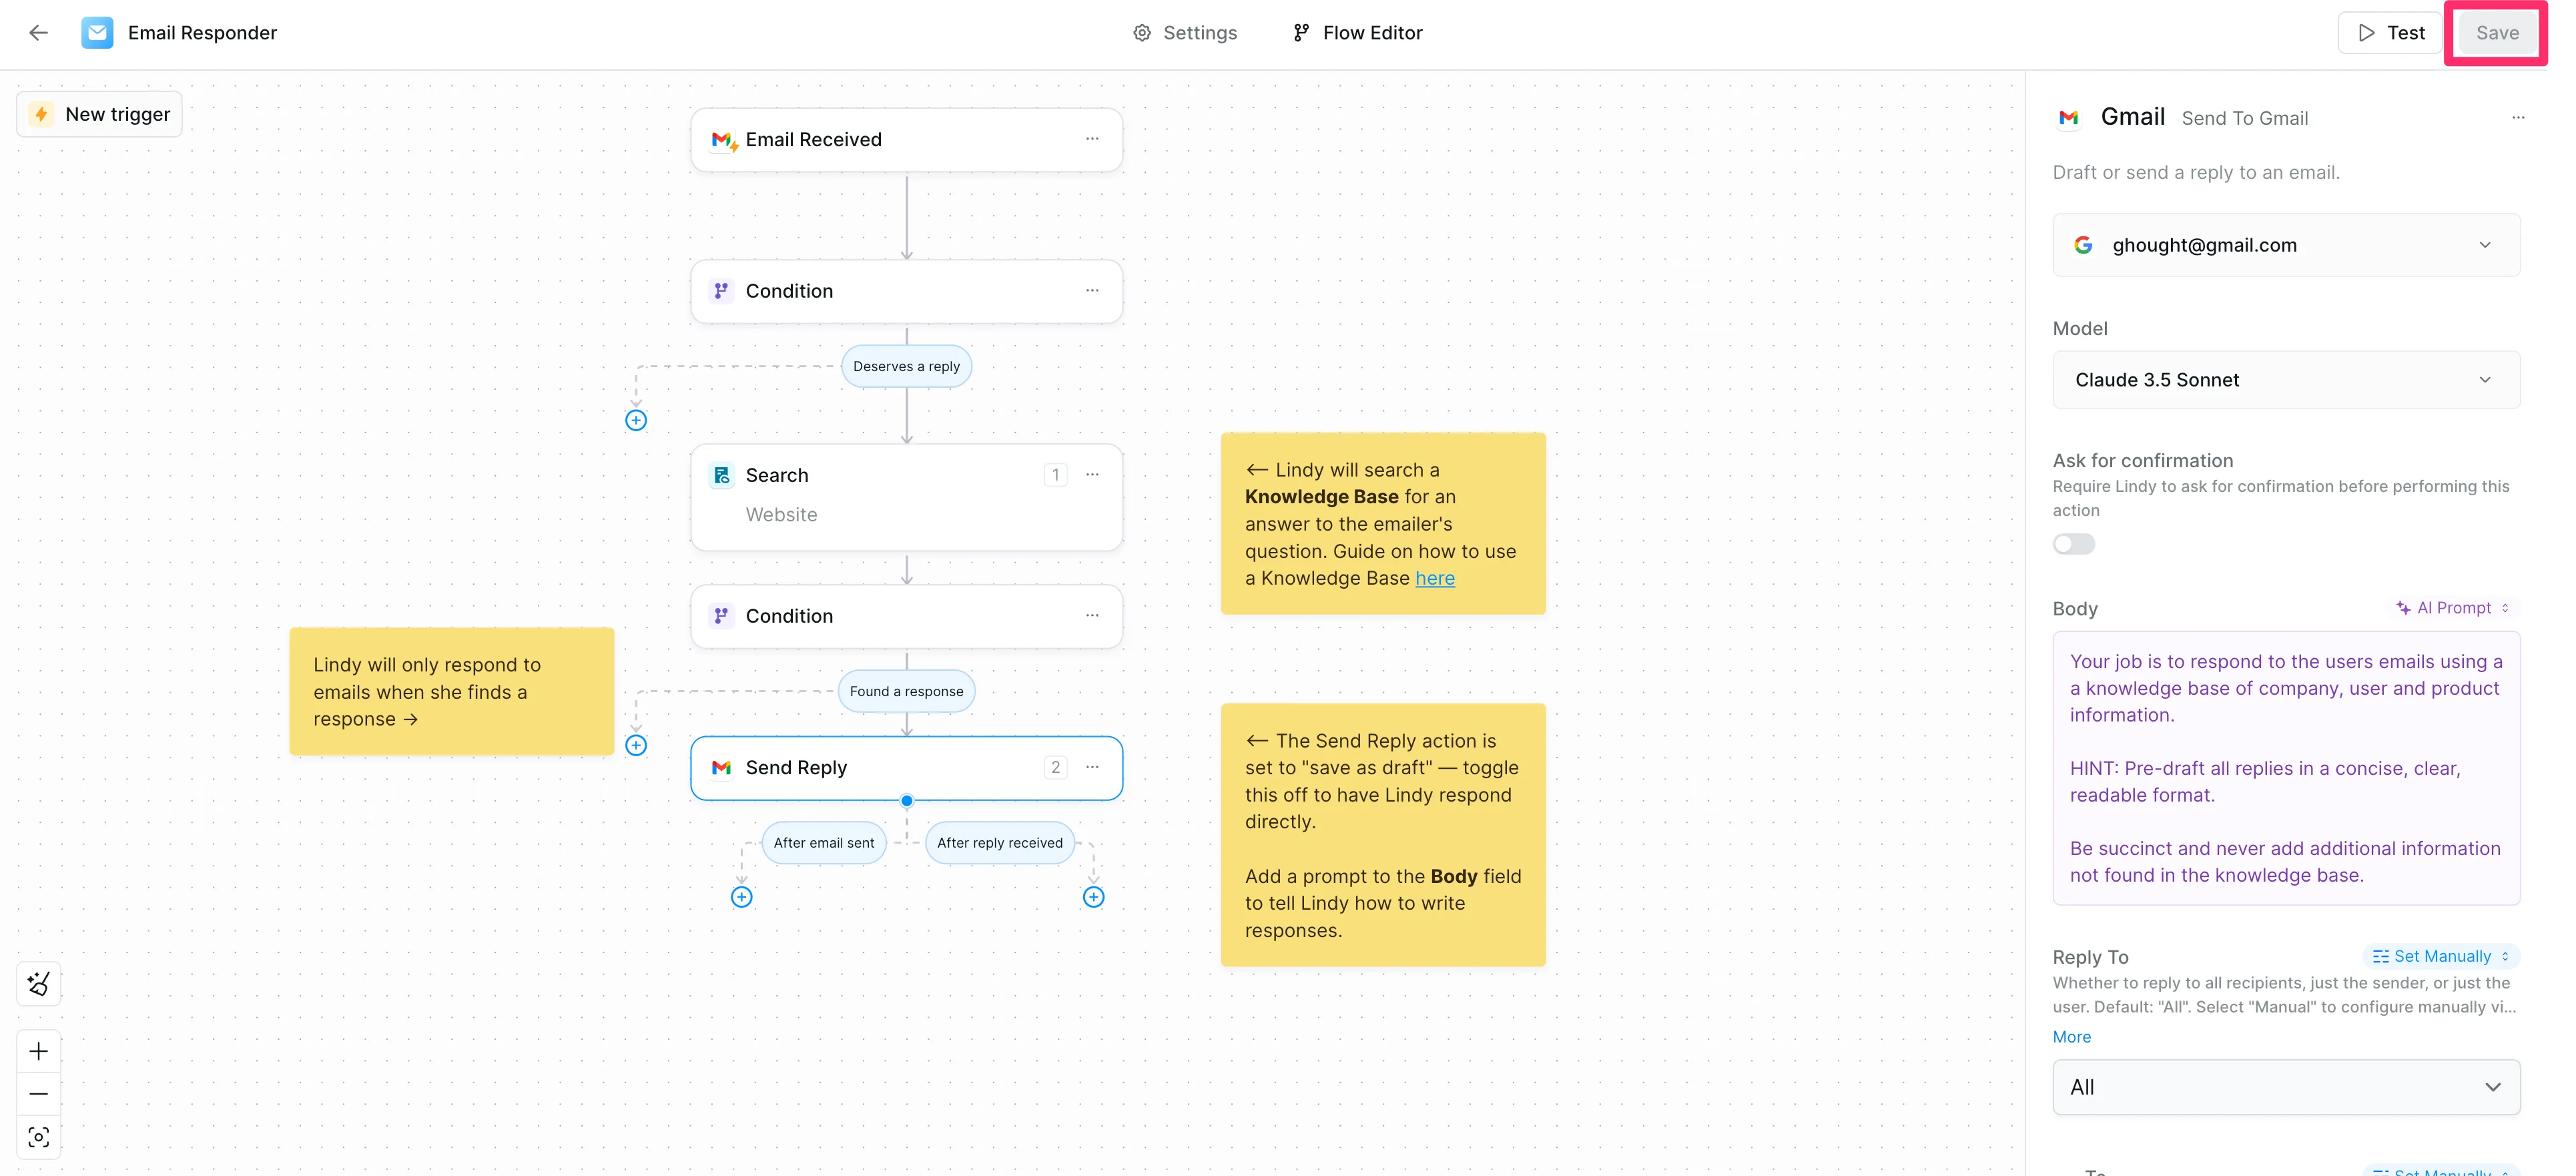
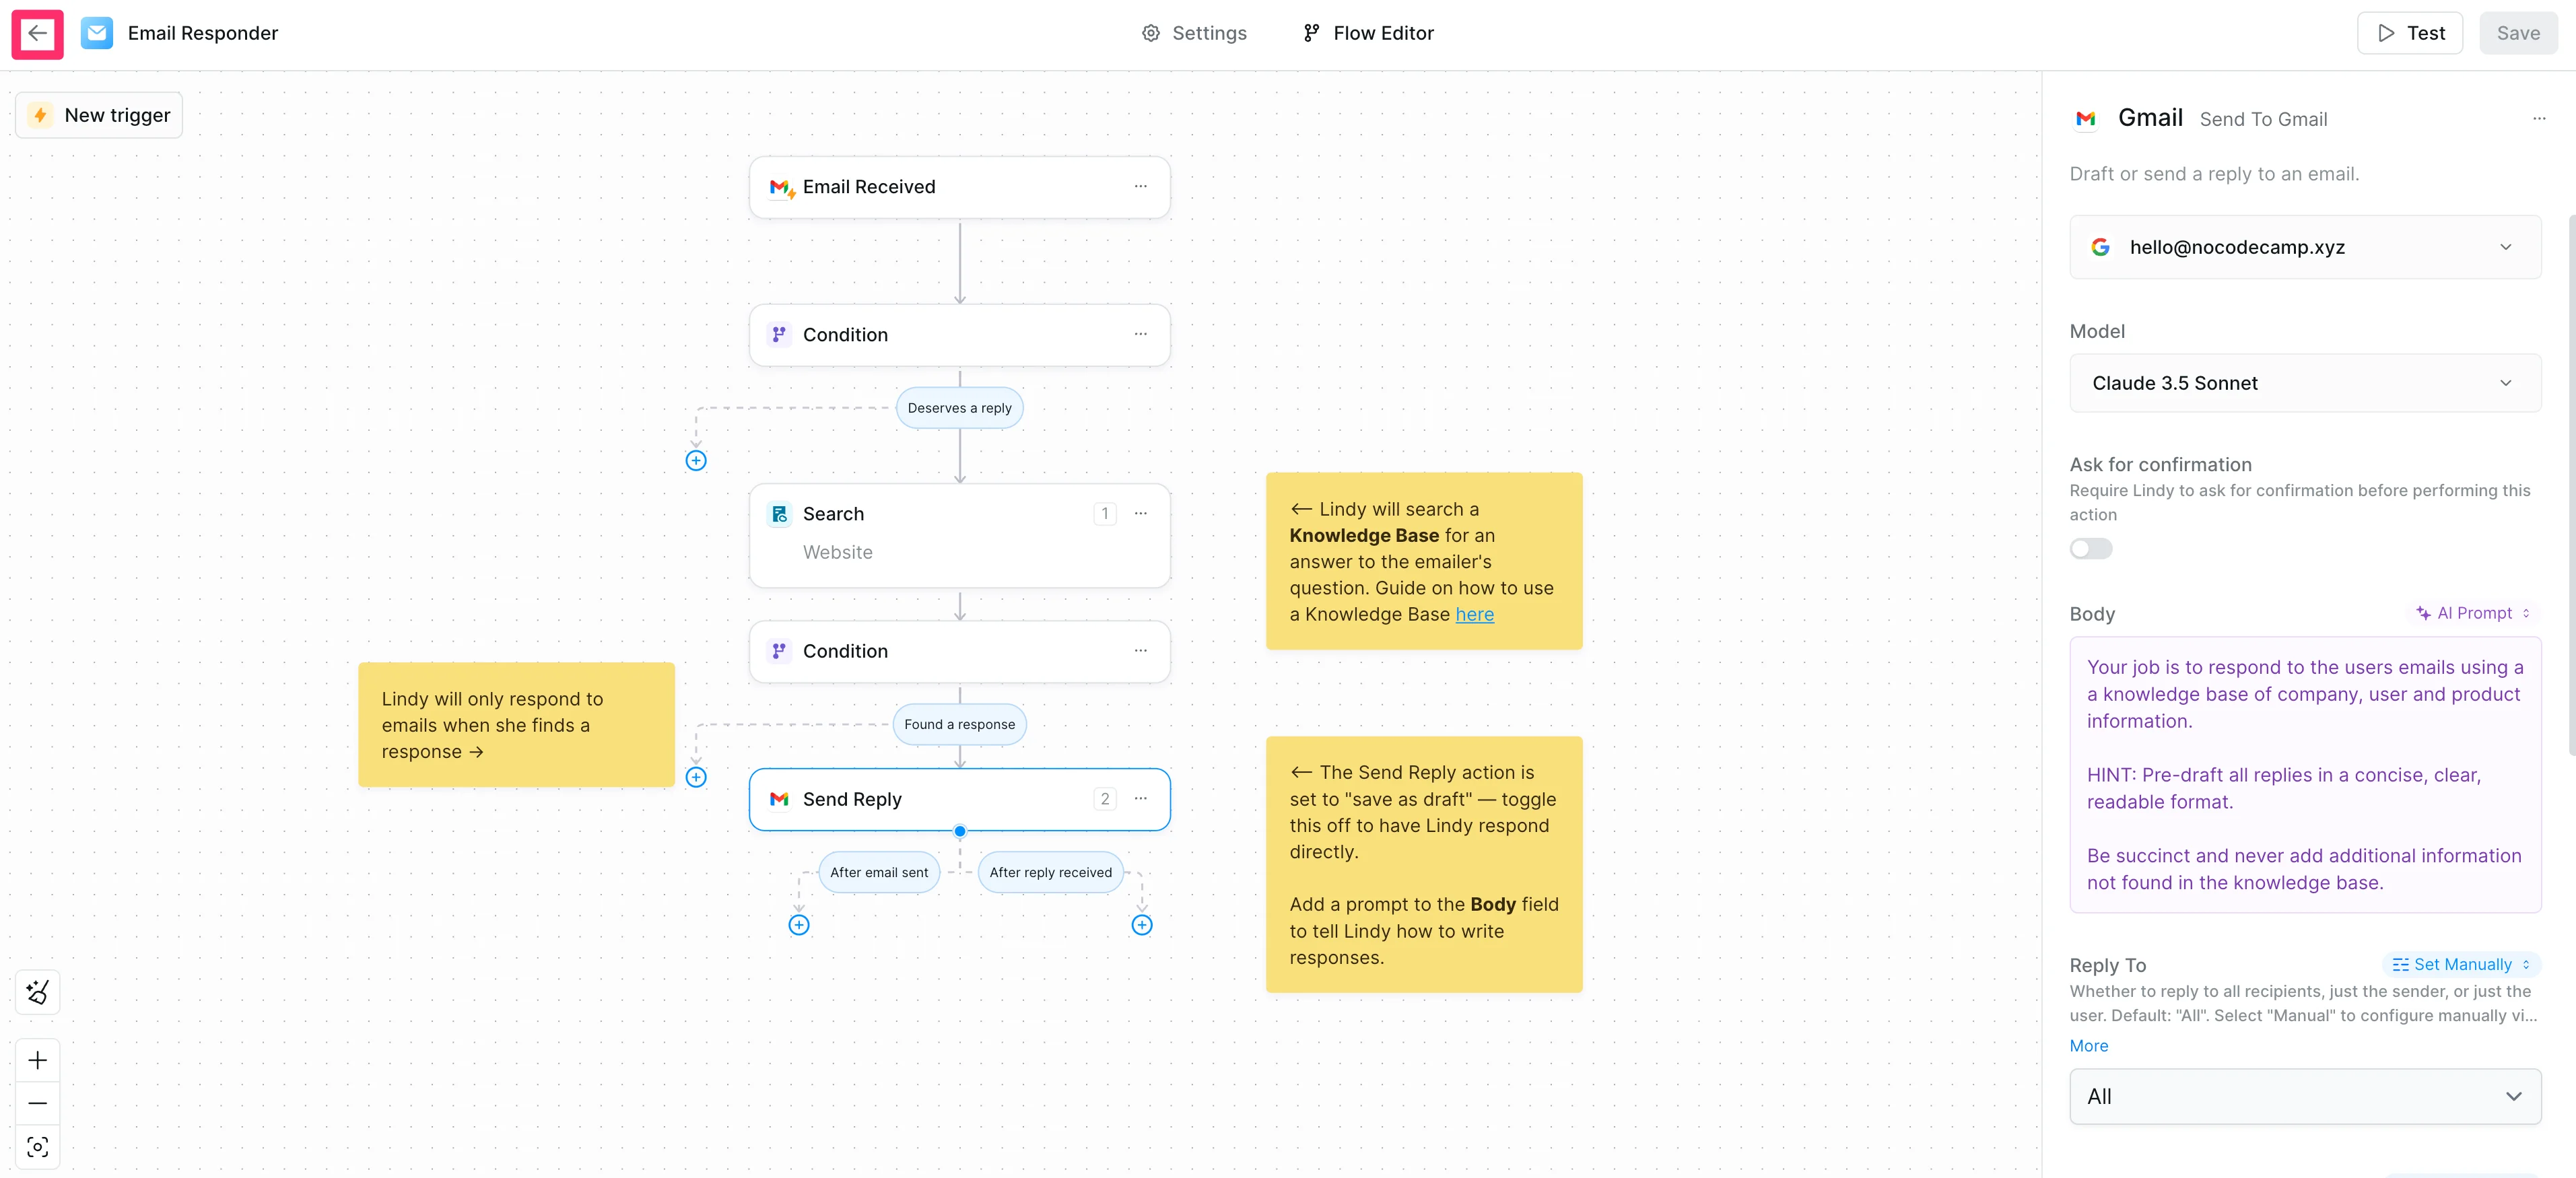
Step 4: Connect a knowledge base
Now we'll connect a knowledge base(s) that Lindy will draw from to draft responses. This is powerful, enabling Lindy to have access to your website, Notion databases, and more—ensuring responses are accurate and always up-to-date. To do this, click on the “Search” step.
Then, choose the type of knowledge base you want to connect (files, text, Notion, Google Drive, etc.). For this example, we'll connect a website.
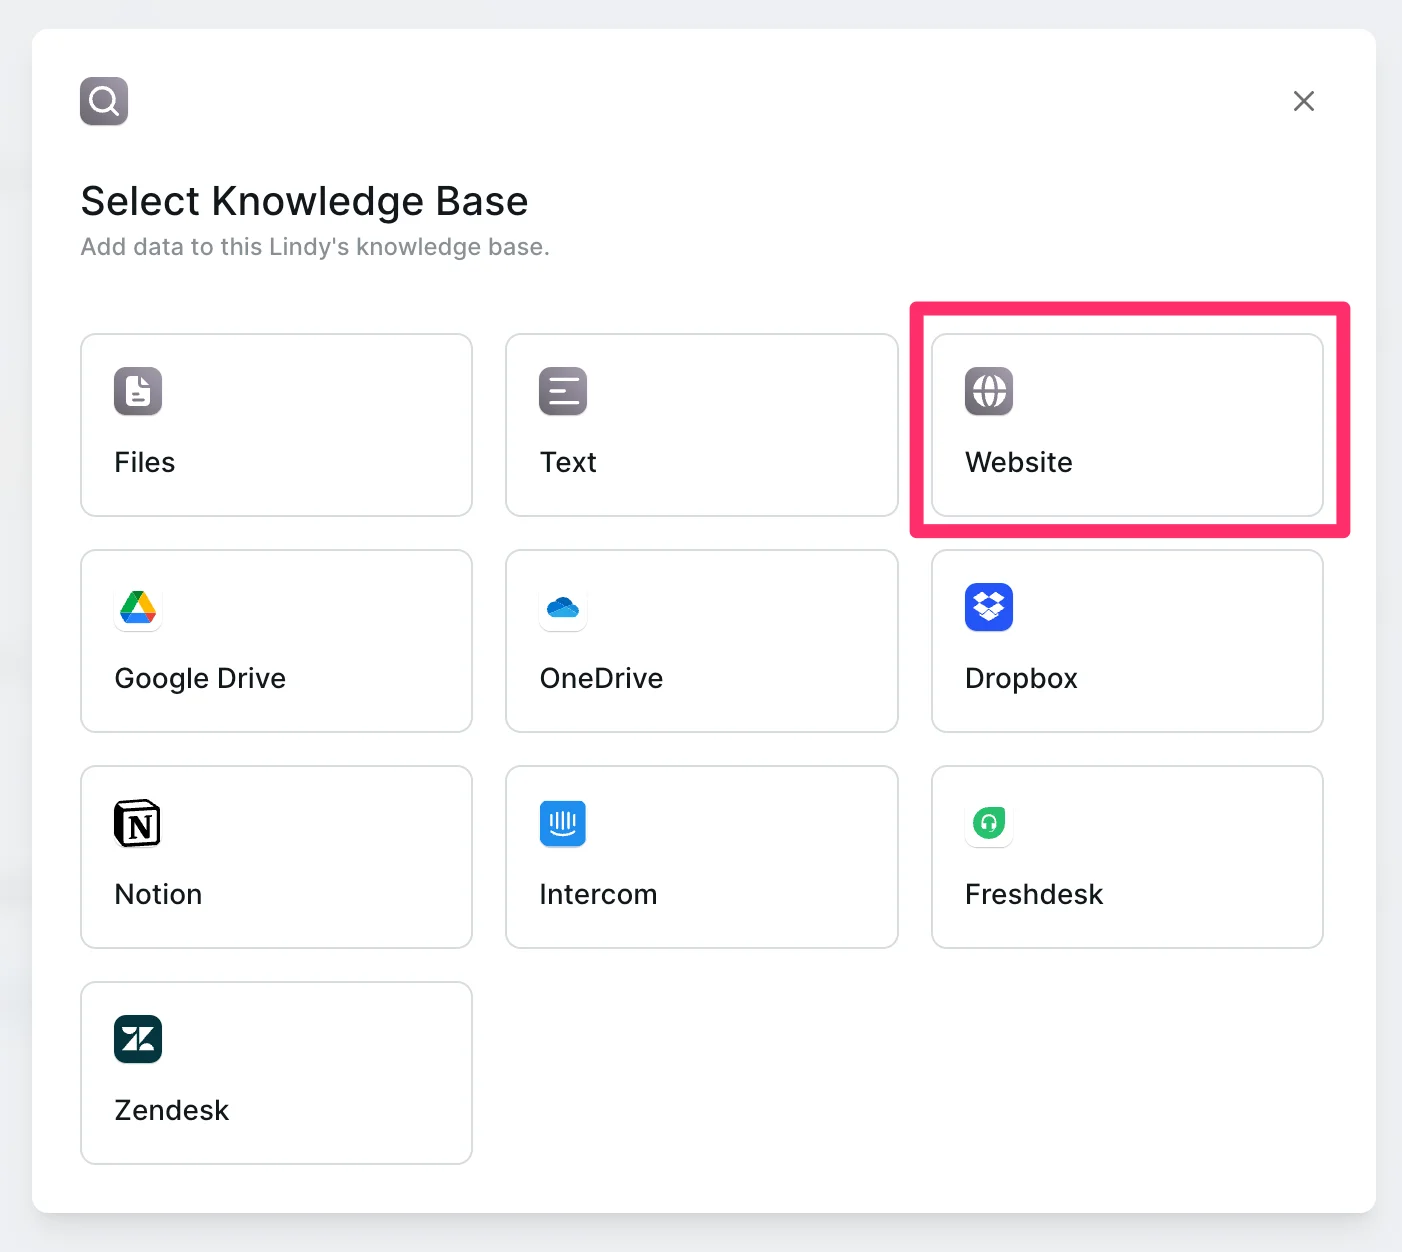
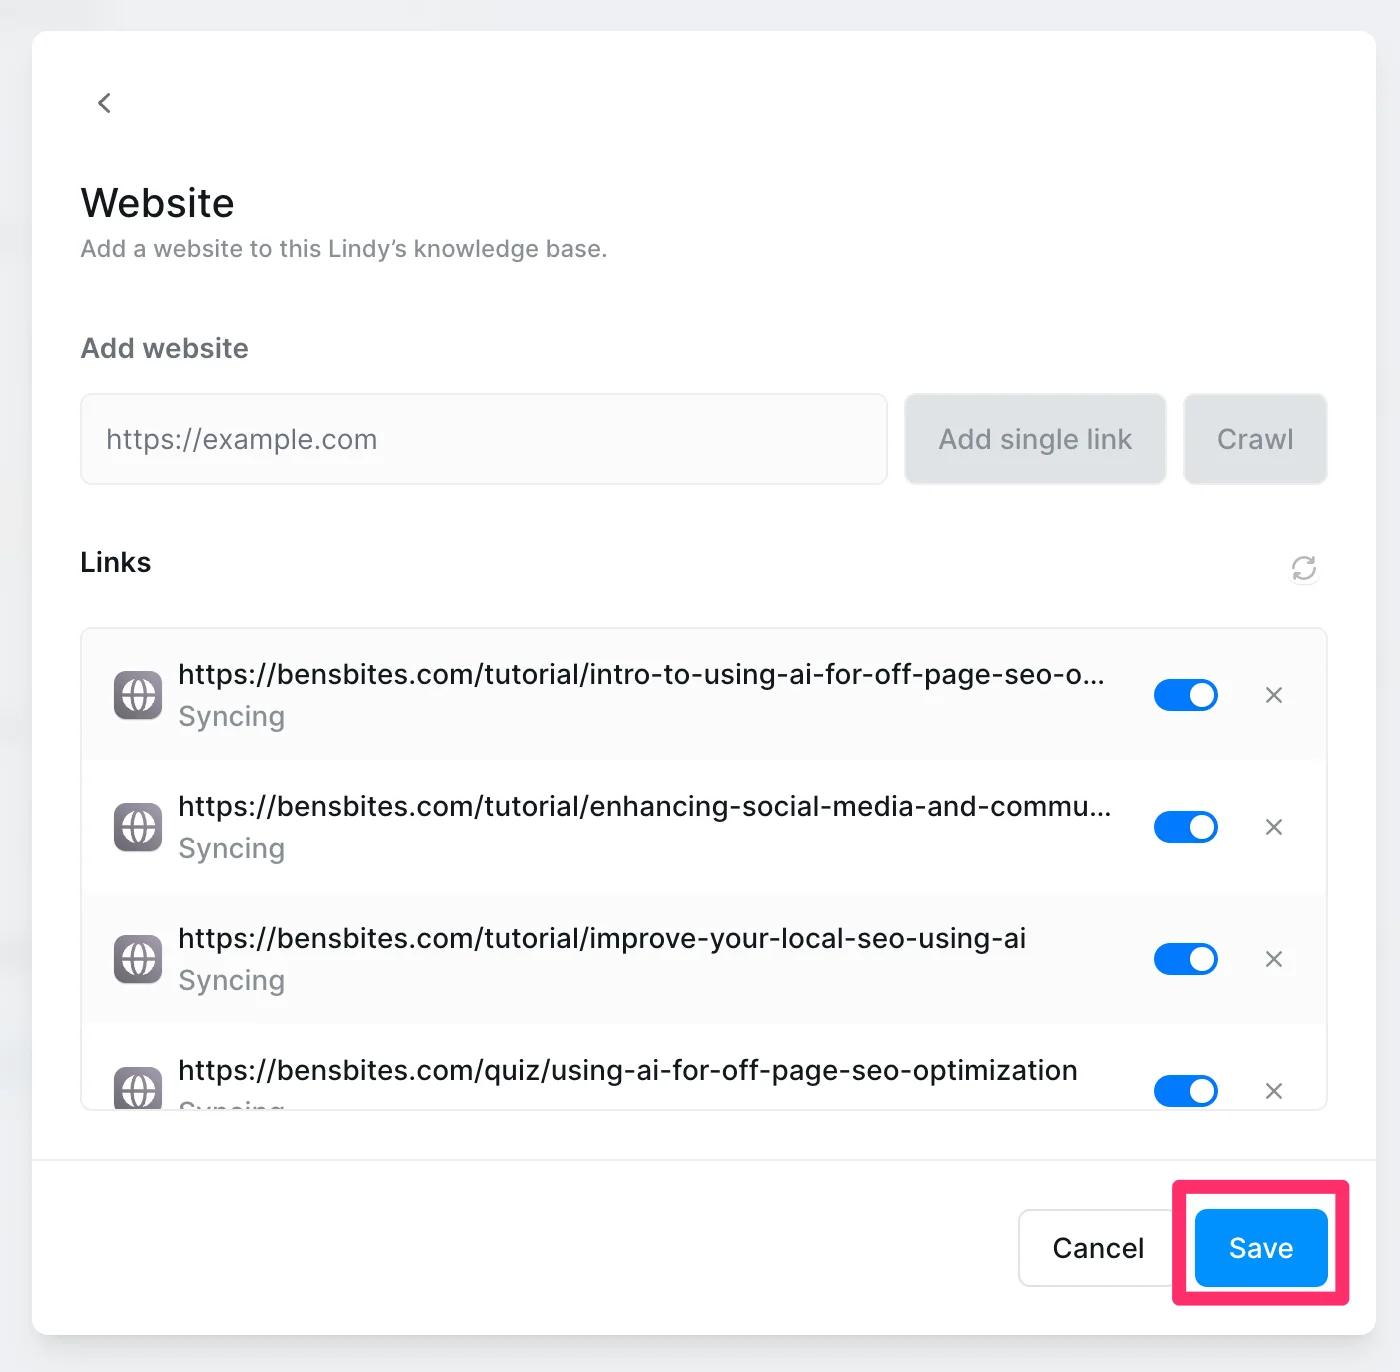
We’ll enter the URL of the website we want to serve as our knowledge base. We’ll use the Ben’s Bites website for this example. We’ll click the “Crawl” button to have Lindy index all pages on the site.
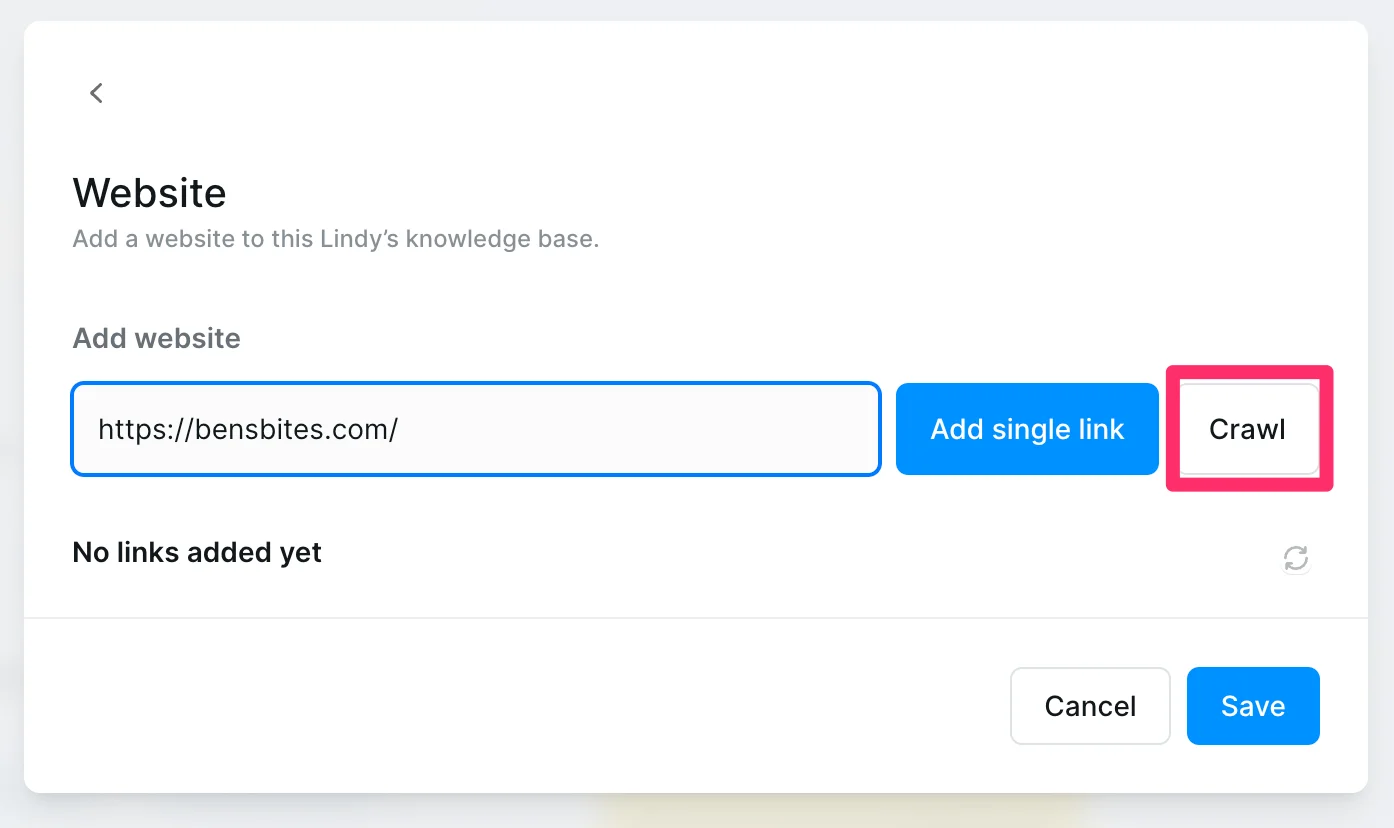
Then, we’ll click the “Save” button to add the knowledge base.
Step 5: Configure the response settings
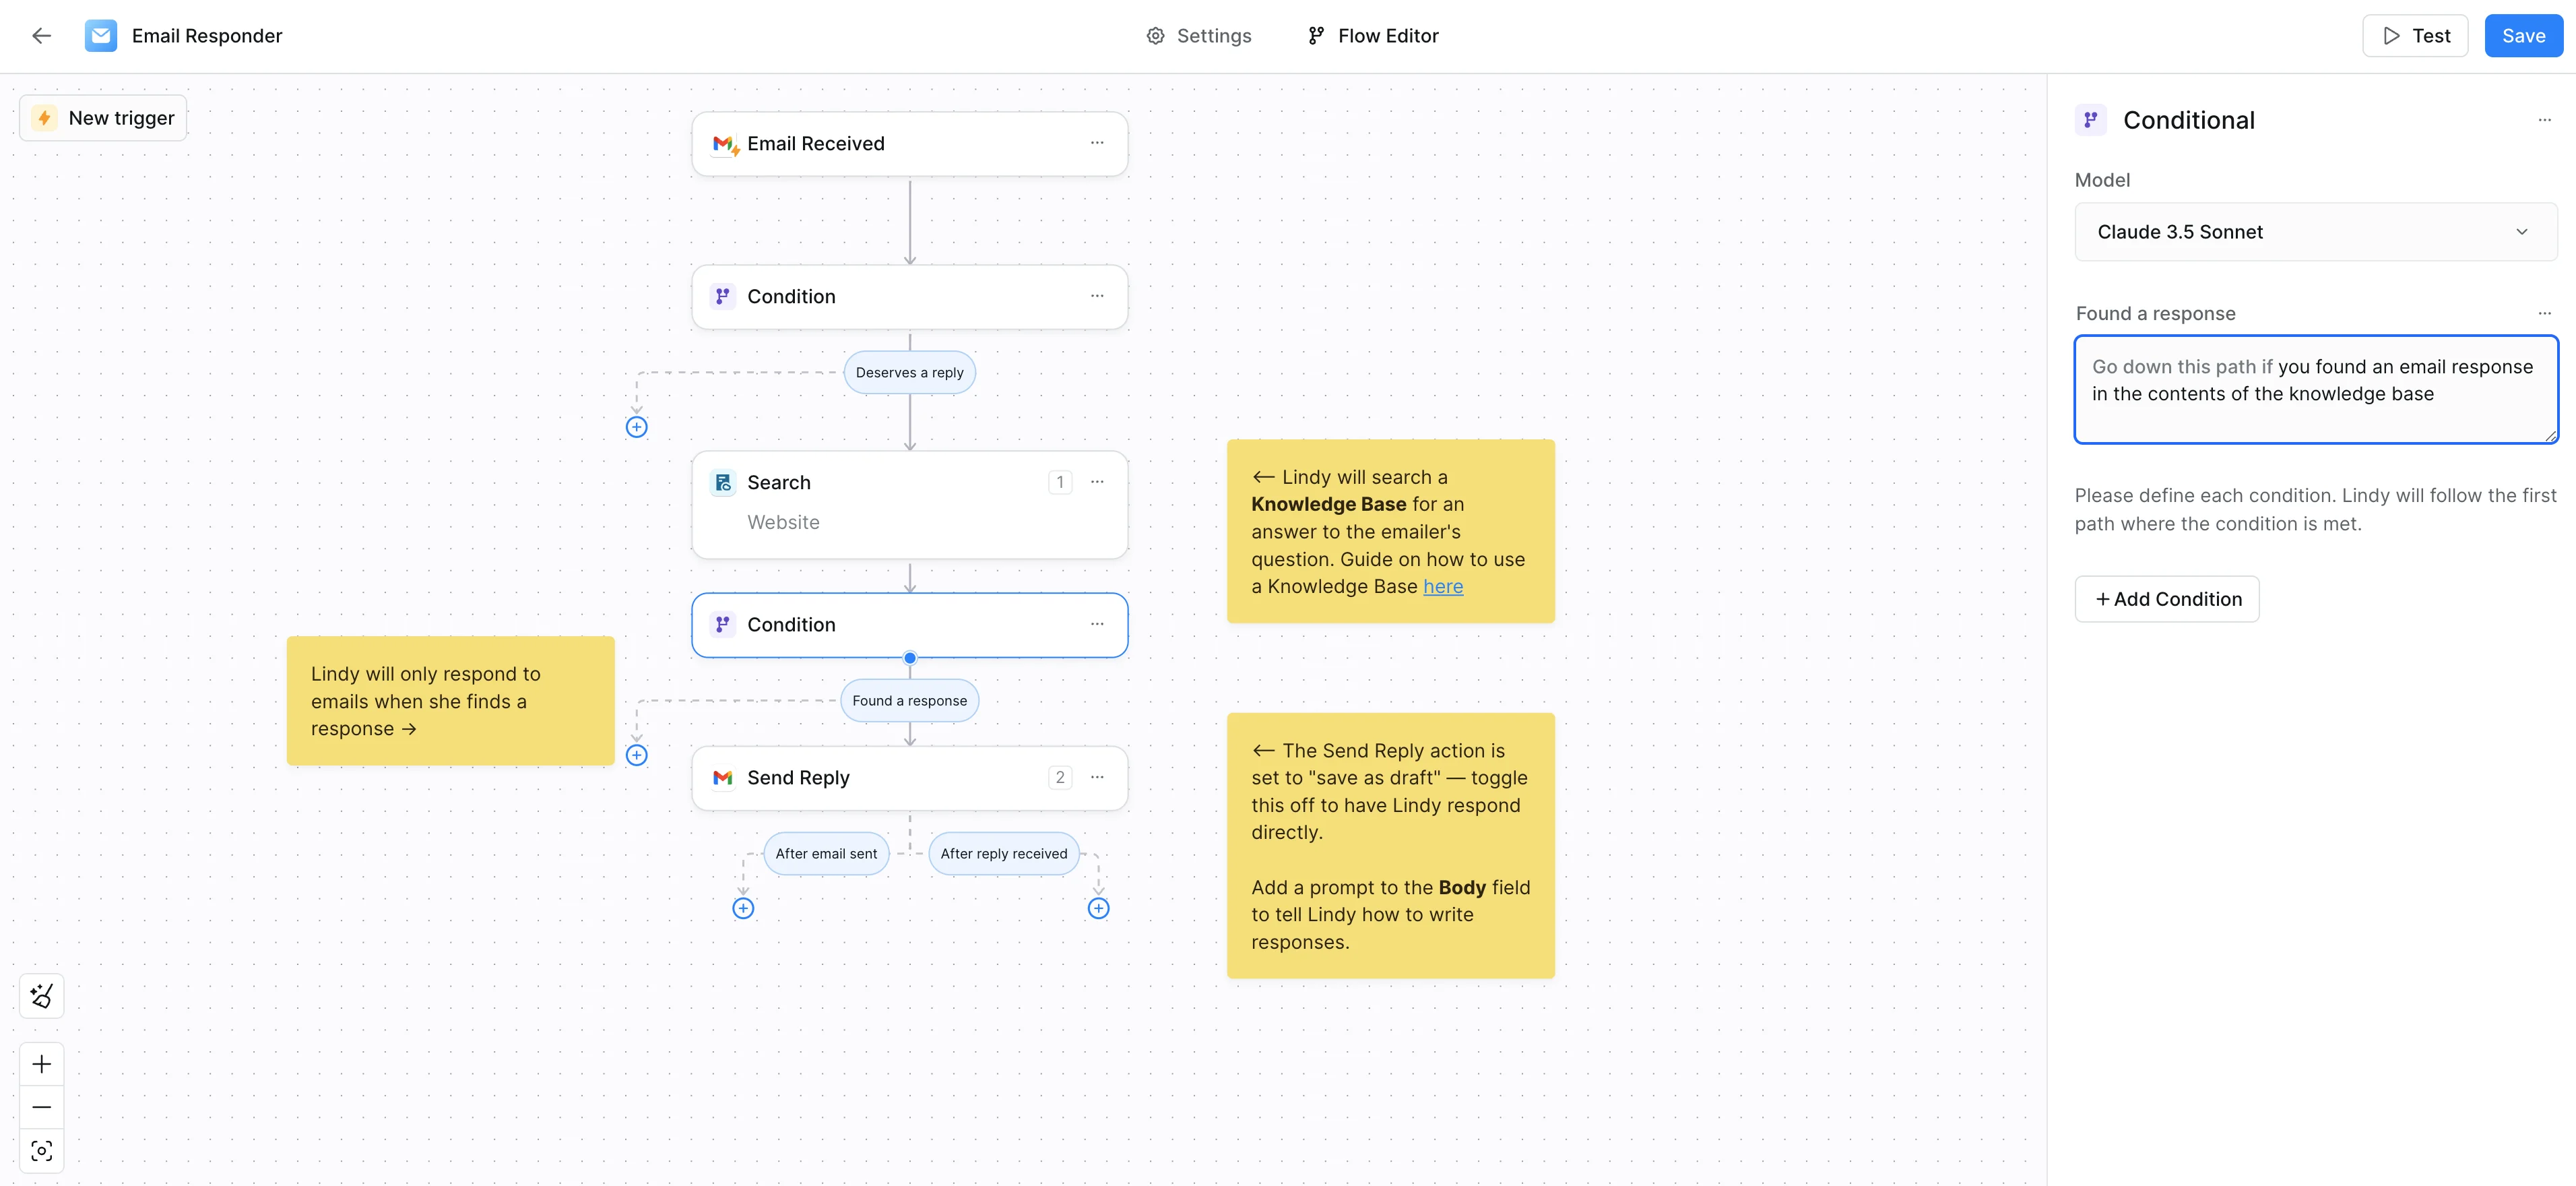
Before Lindy can start drafting responses, we need to set up a final condition to ensure Lindy only responds if an answer to the email is found in the knowledge base. To do this, click the second Condition step and review or update the conditional statement.
Default Condition:
You found an email response in the contents of the knowledge base
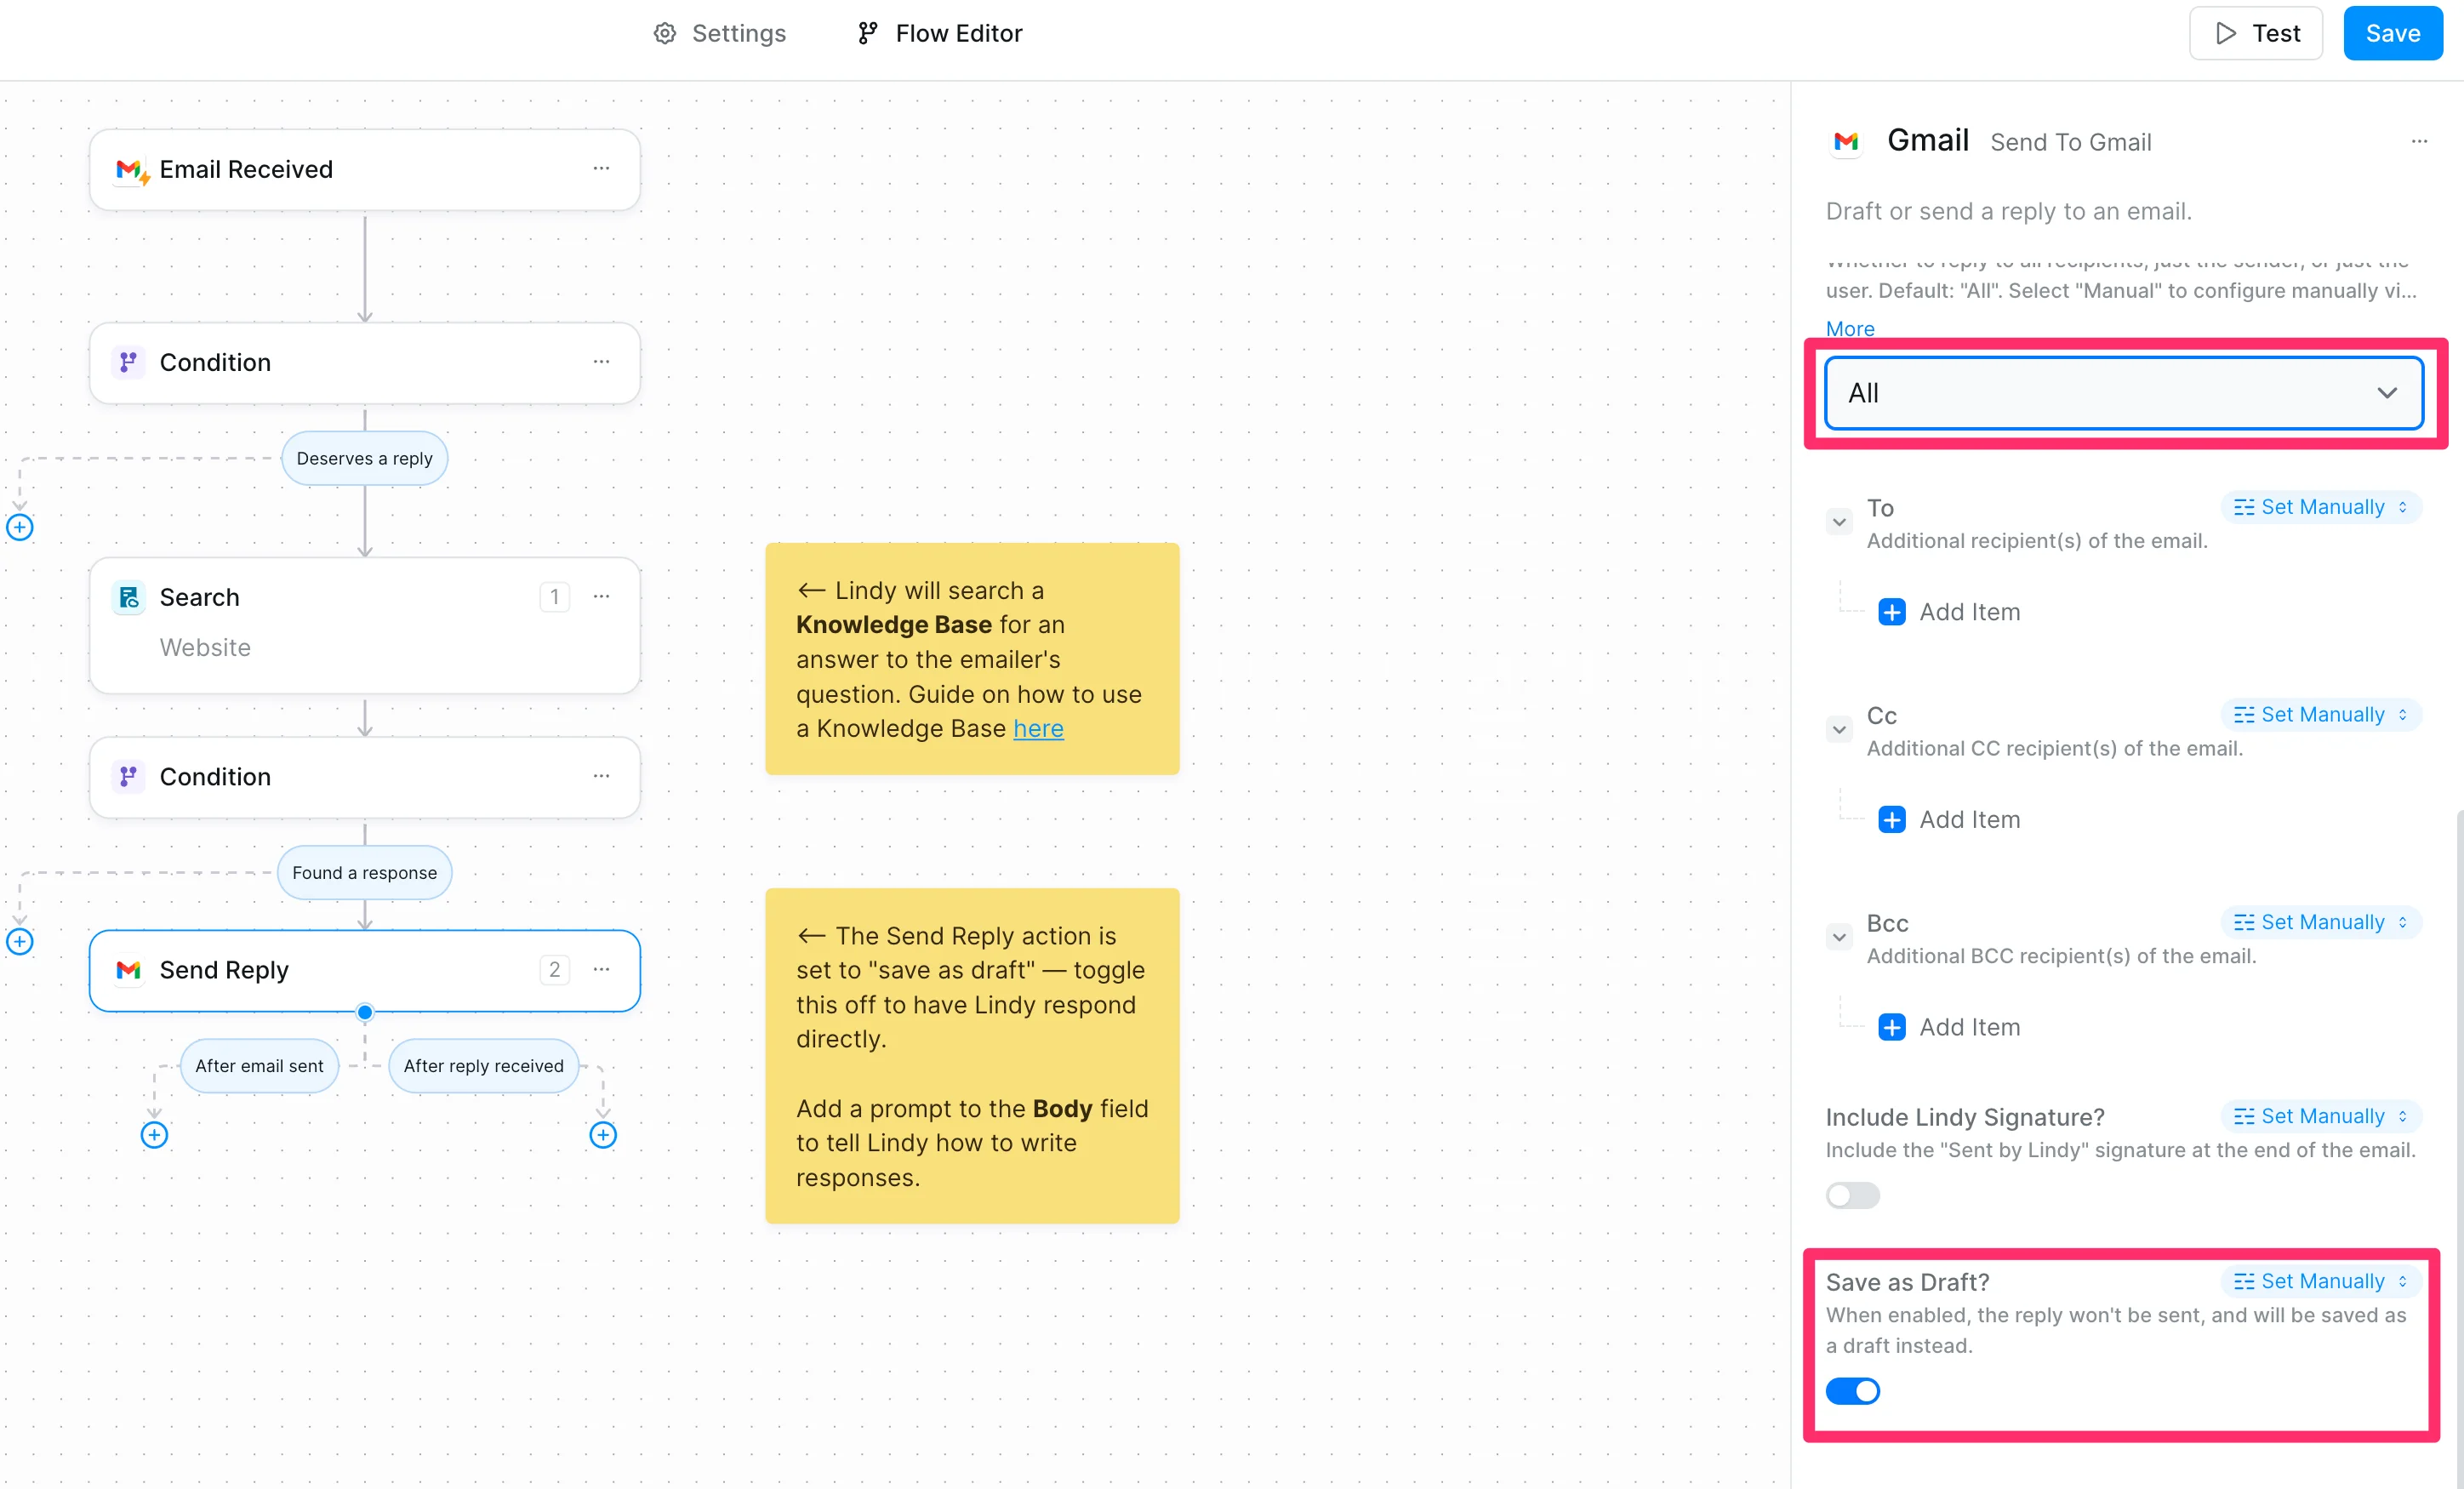
Next, we’ll finalize the final step of the flow—sending an email response. To do this, click on the “Send Reply” step and make sure your email is connected. From there, we can add an AI prompt to the Body section of the email.
Default Prompt:
Your job is to respond to the users emails using a a knowledge base of company, user and product information.HINT: Pre-draft all replies in a concise, clear, readable format.Be succinct and never add additional information not found in the knowledge base.

We can additionally define who Lindy should reply to (this setting defaults to “All” — i.e. everyone on the email thread) and set whether we want Lindy to save the response as a draft or not. We’ll enable the “Save as Draft” setting so that we can check the email draft in our inbox before sending it.
Step 6: Save and test the workflow
With all settings in place, it's time to test the workflow. Click the Save button in the top right corner to save the flow.
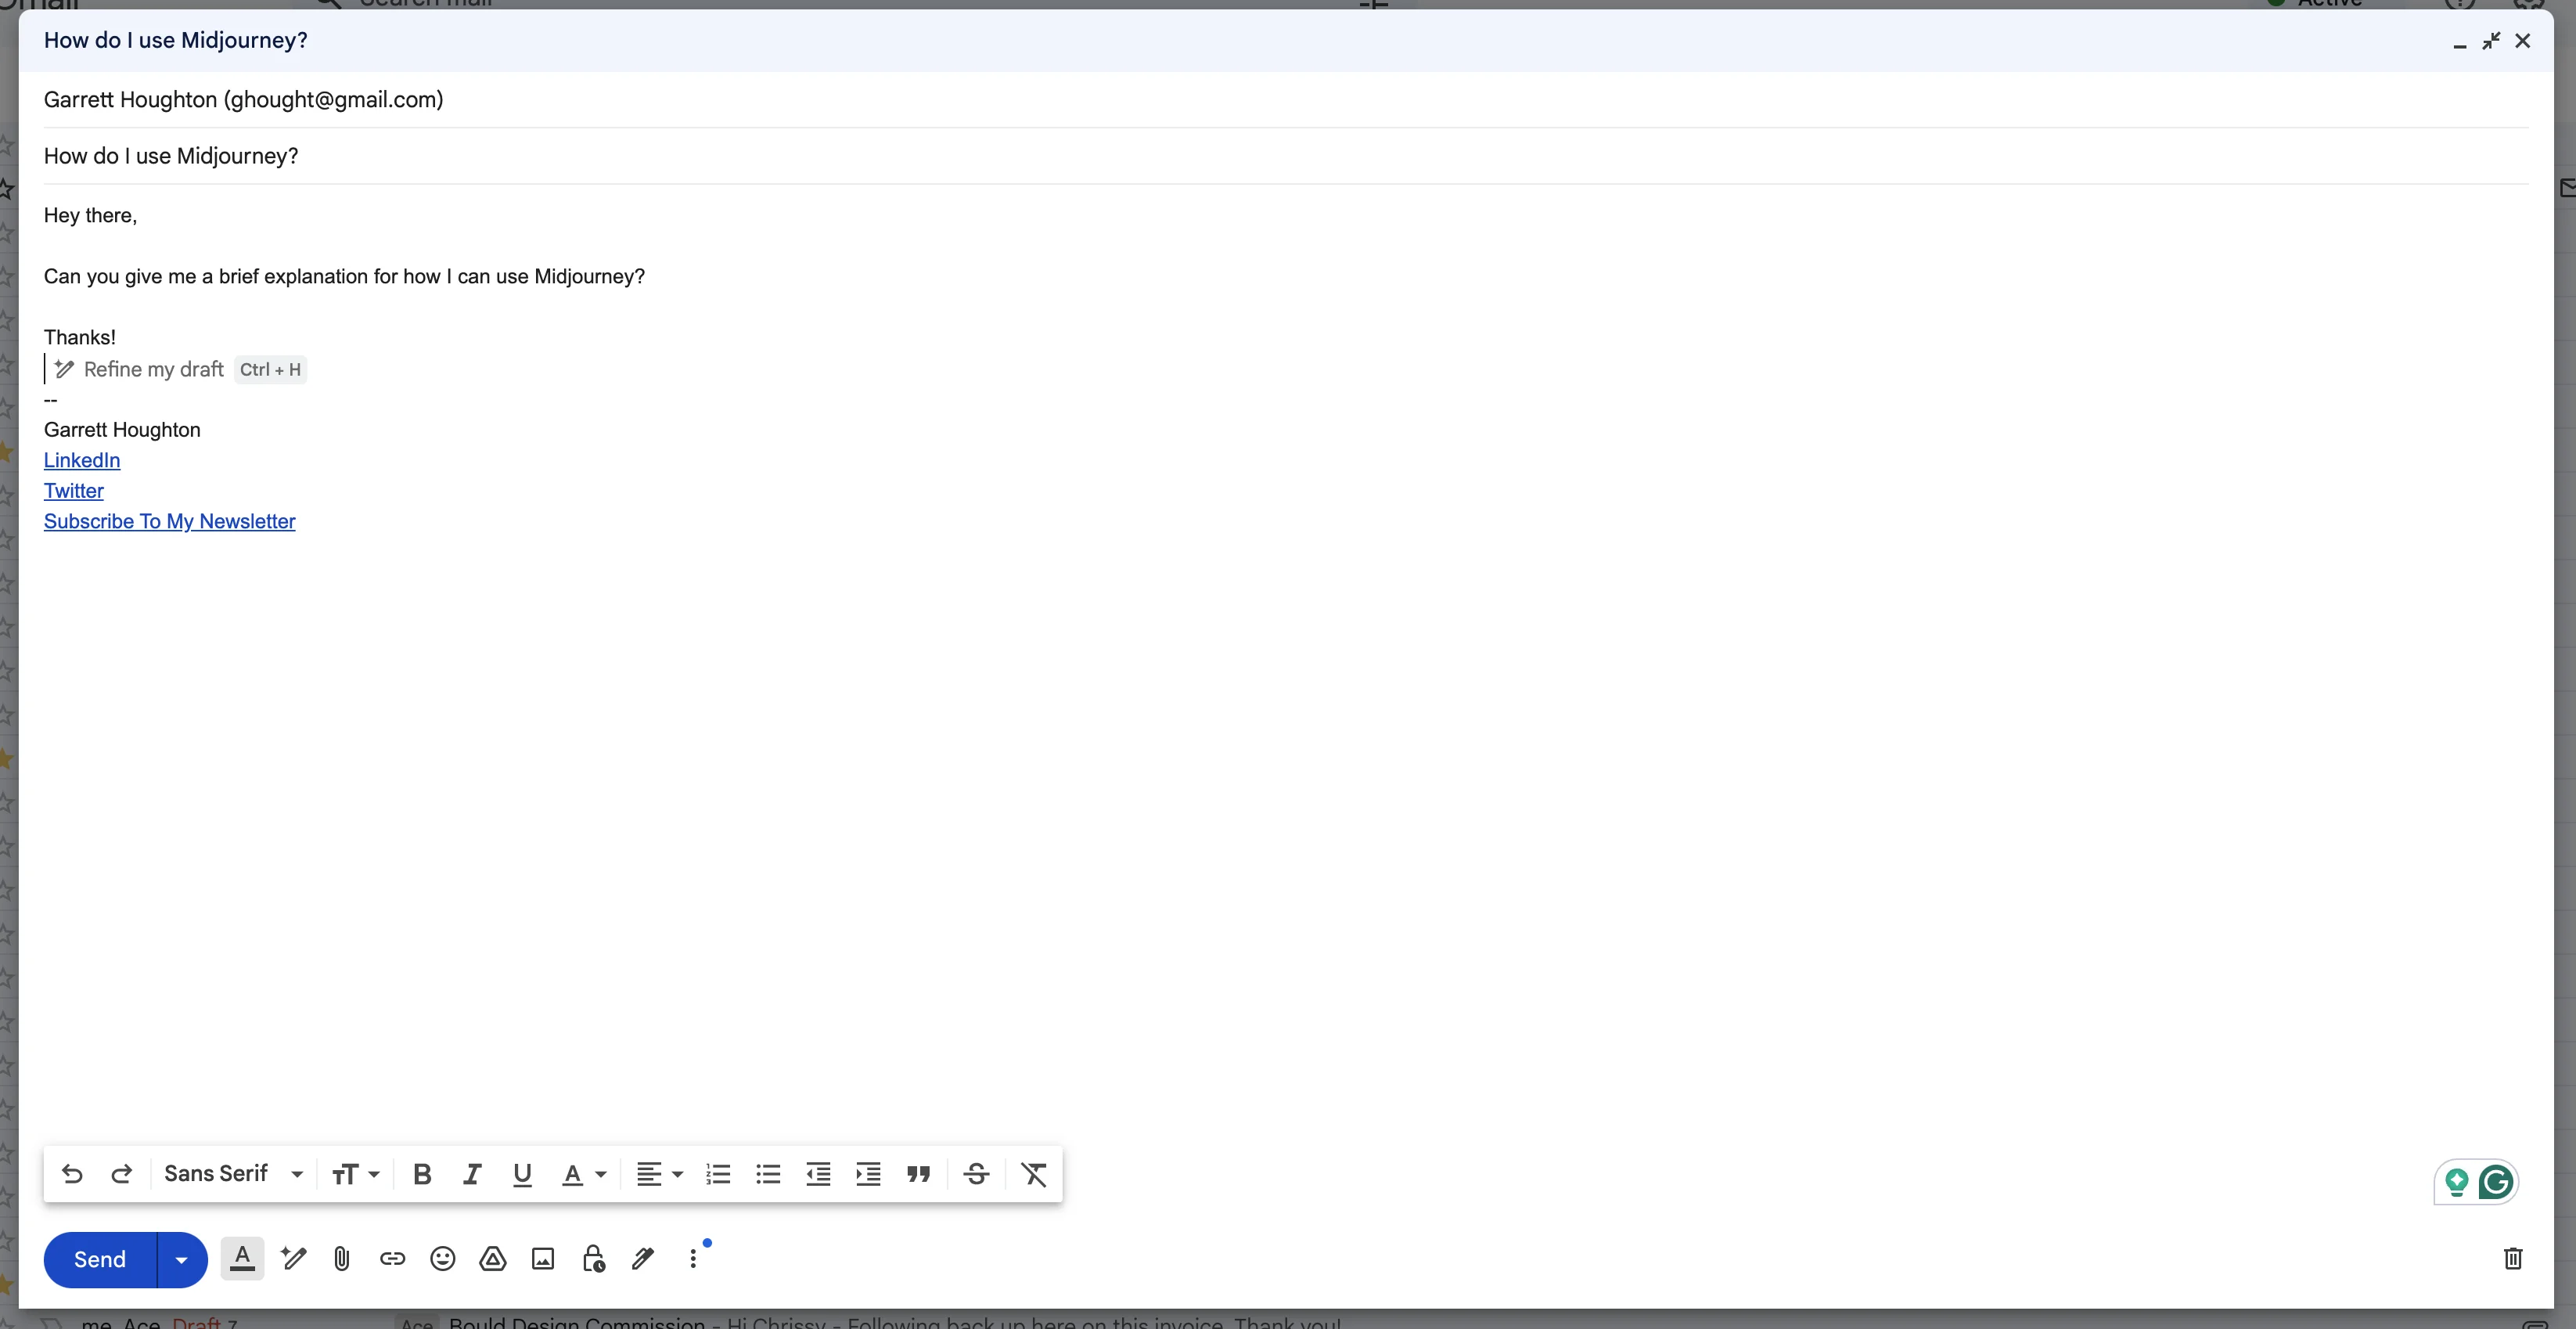
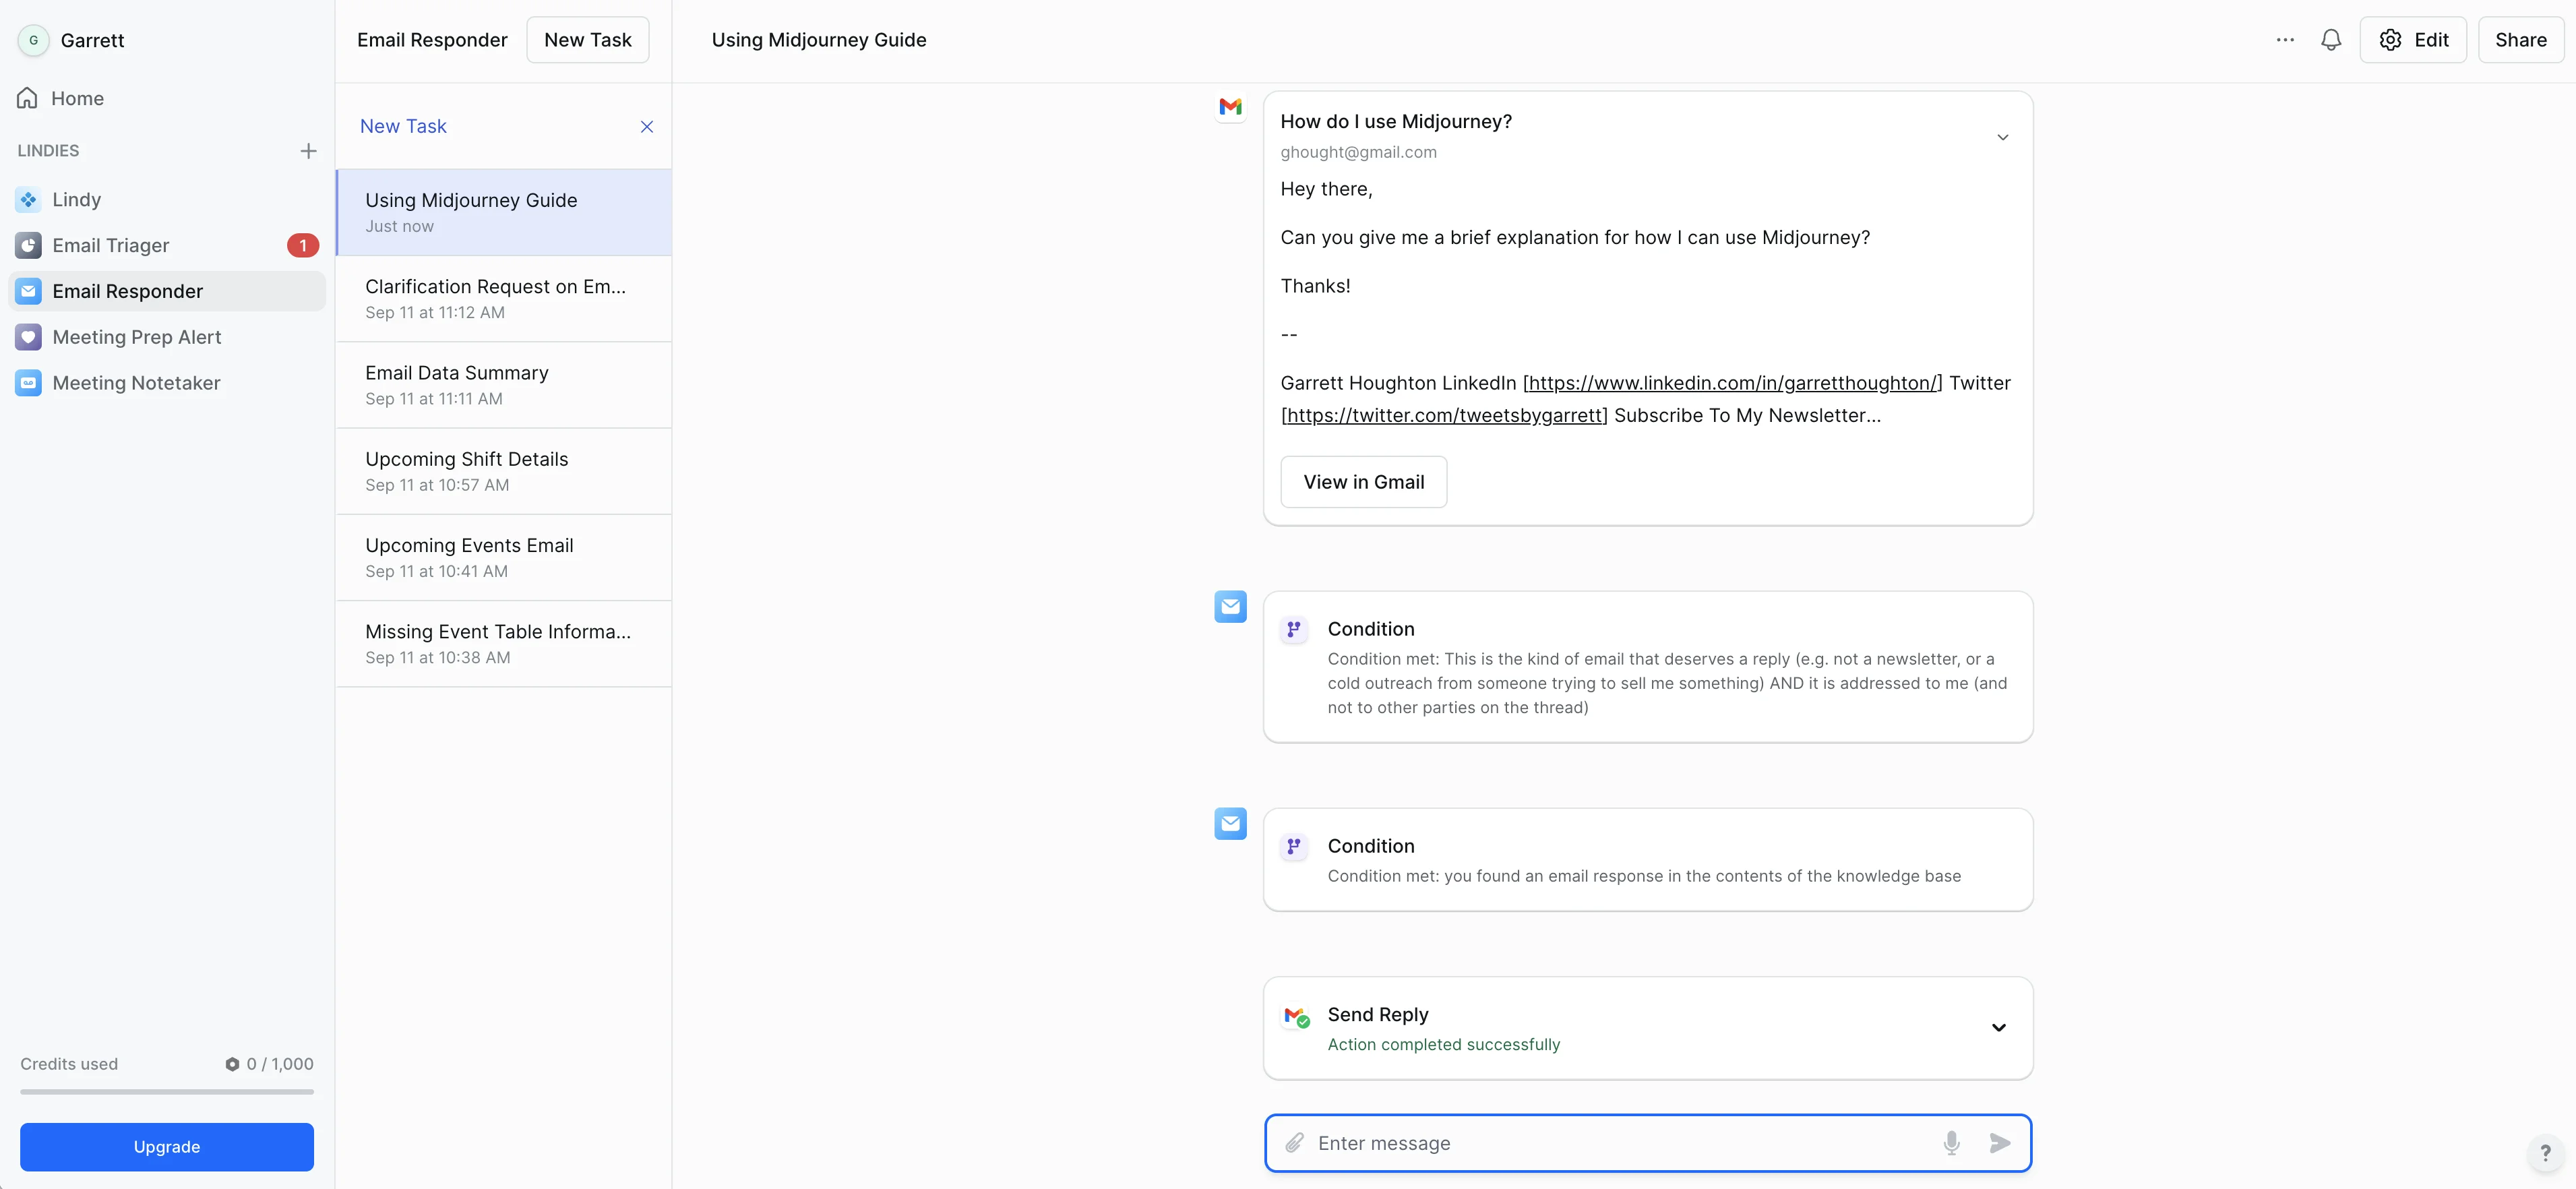
We’ll send a test email to our inbox with a question related to our knowledge base. In this case, a question about how to use Midjourney.
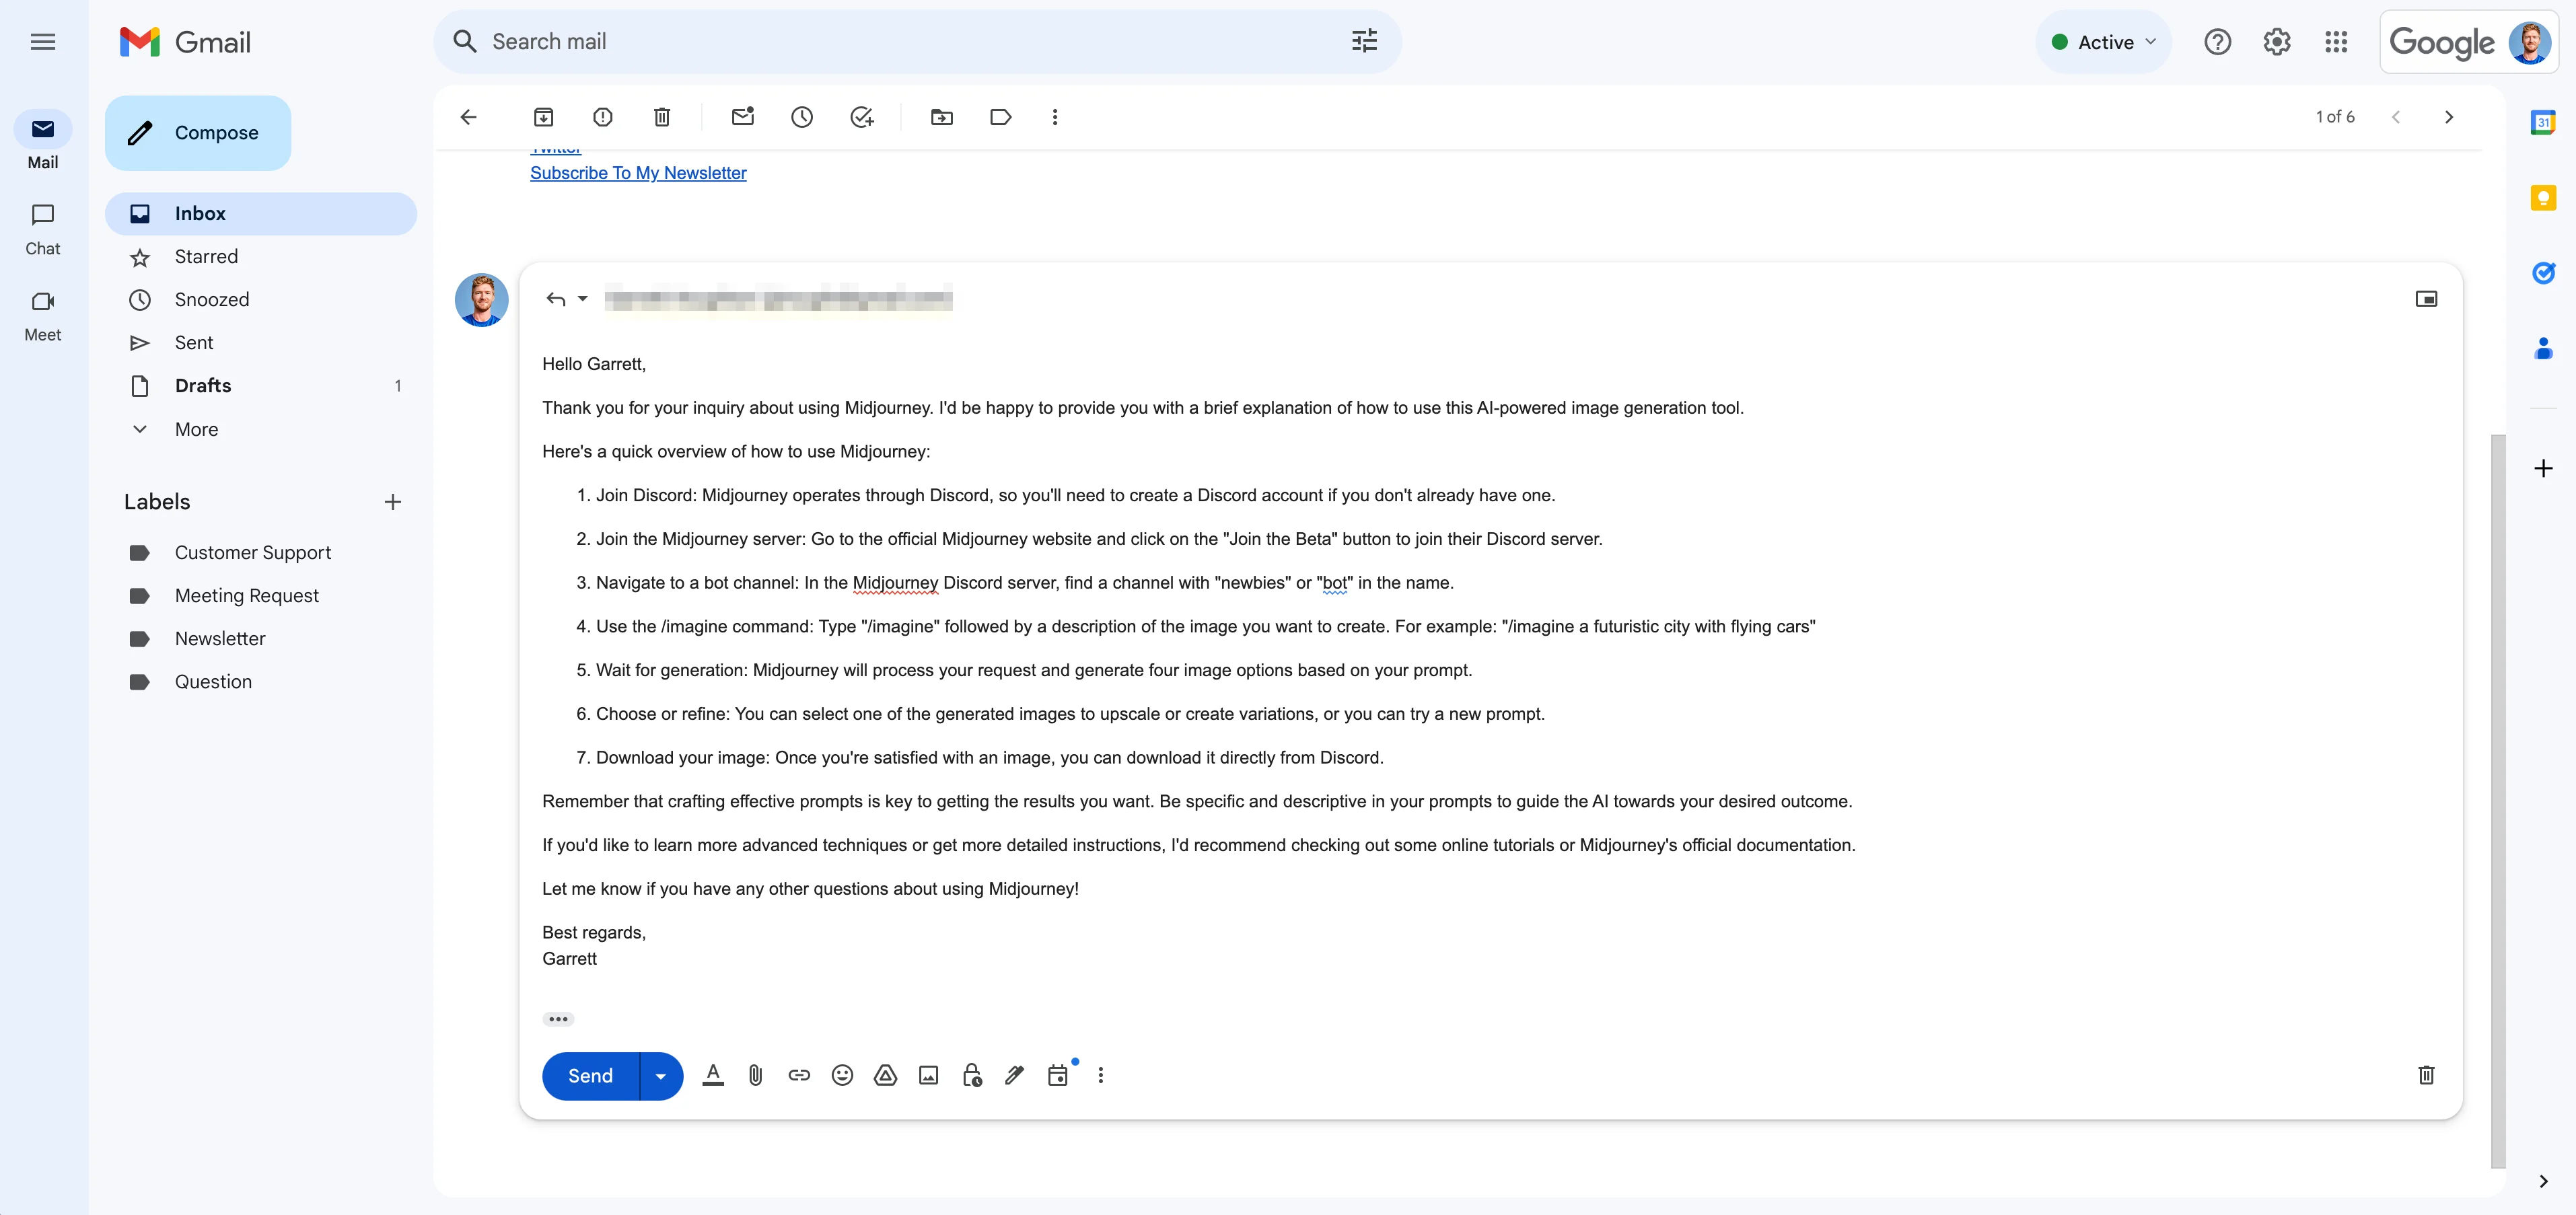
Lindy will then respond with an email draft after a few seconds.
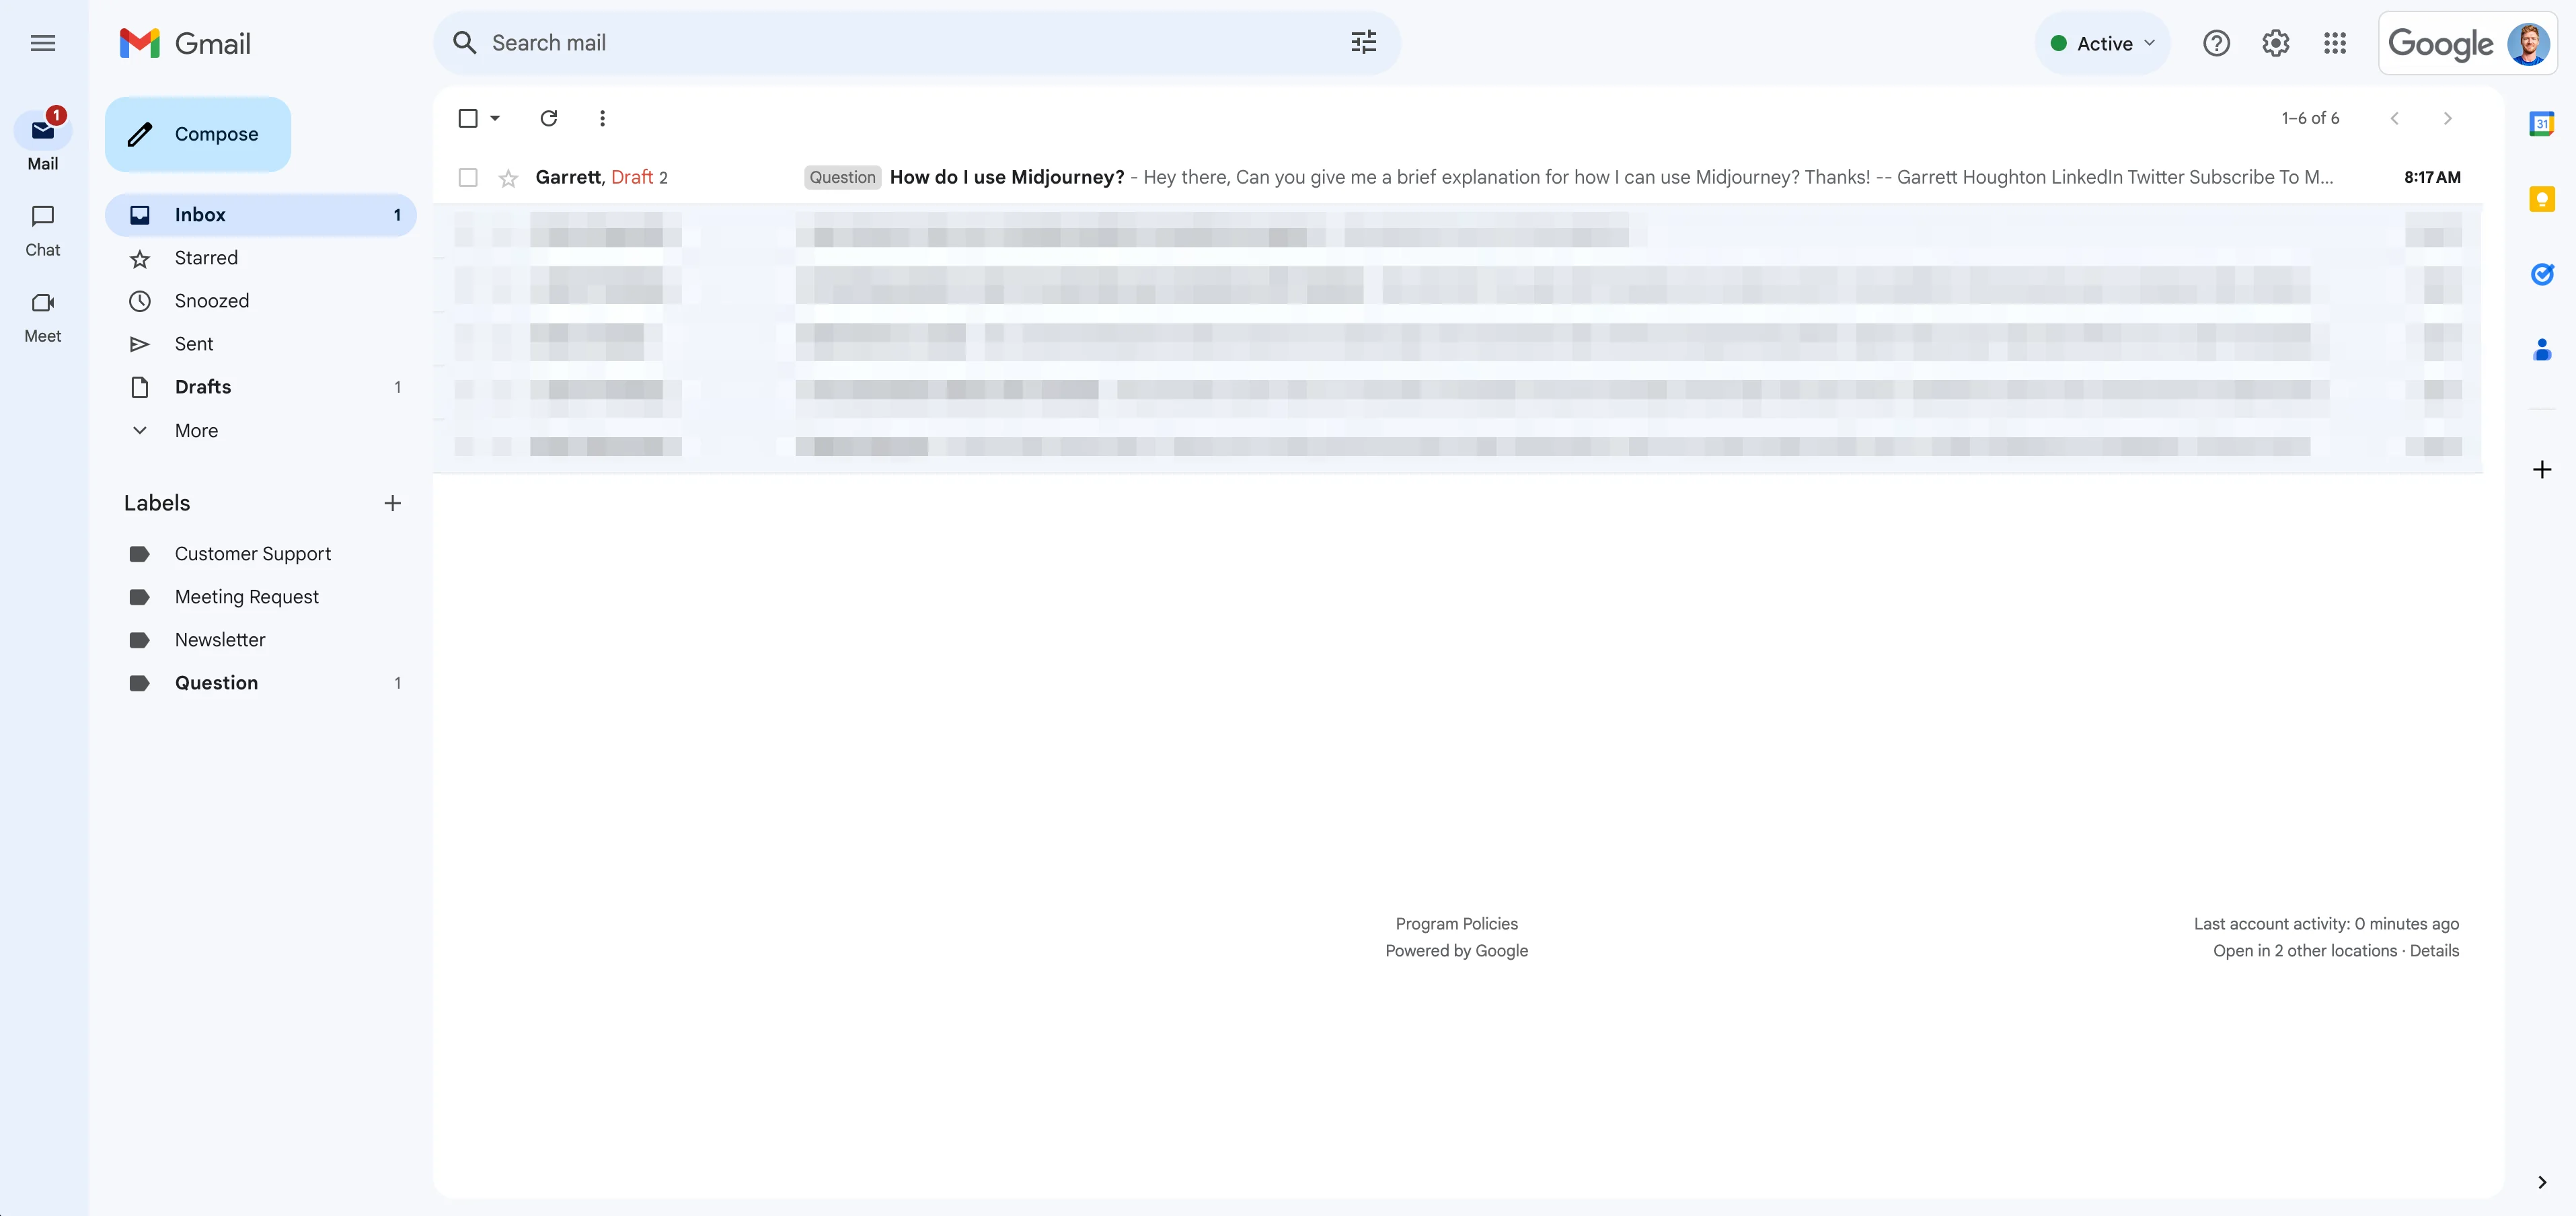
You can review the draft and make any necessary edits before sending it.
Finally, we can head back into the Lindy app and click the back button on the Flow Editor to check out the audit trail.
In the task section of the Lindy, you’ll see the initial email, the outcomes of the conditions, and the final draft reply from Lindy. This is great for reviewing any edits you want to make to your flow.
And that's it! You've successfully set up an email responder assistant with Lindy. This automated system will help you manage incoming questions by providing draft responses based on your knowledge base(s), saving you time while ensuring personalized and accurate replies.
In the next lesson, we’ll move from automating email responses to automating meeting scheduling with Lindy.
This tutorial was created by Garrett.