Deploying your tools, best practices, and advanced tips with Claude Artifacts and Projects
Learn Claude Artifacts best practices and how to deploy your Claude mini apps to the web.
2024-12-06
Welcome to the last tutorial in the Building Mini Apps with Claude course. If you’ve made it this far, you’ve built an interactive dashboard app, a new hire onboarding bot, and a decision-making tool.
In this lesson, we’re going to walk through some advanced tips, best practices, and the next steps you can take with your mini apps.
Steps we’ll follow in this tutorial:
- Automating your custom instruction prompts
- Best practices with Artifacts
- Deploying your tools to the web
Generating custom instruction prompts
You might’ve noticed that our sample custom instructions in the previous tutorials were extremely detailed and robust. We didn’t create these alone. We used Anthropic’s prompt generator tool to help us craft these. We’ll show you how you can do the same for your own custom instructions.
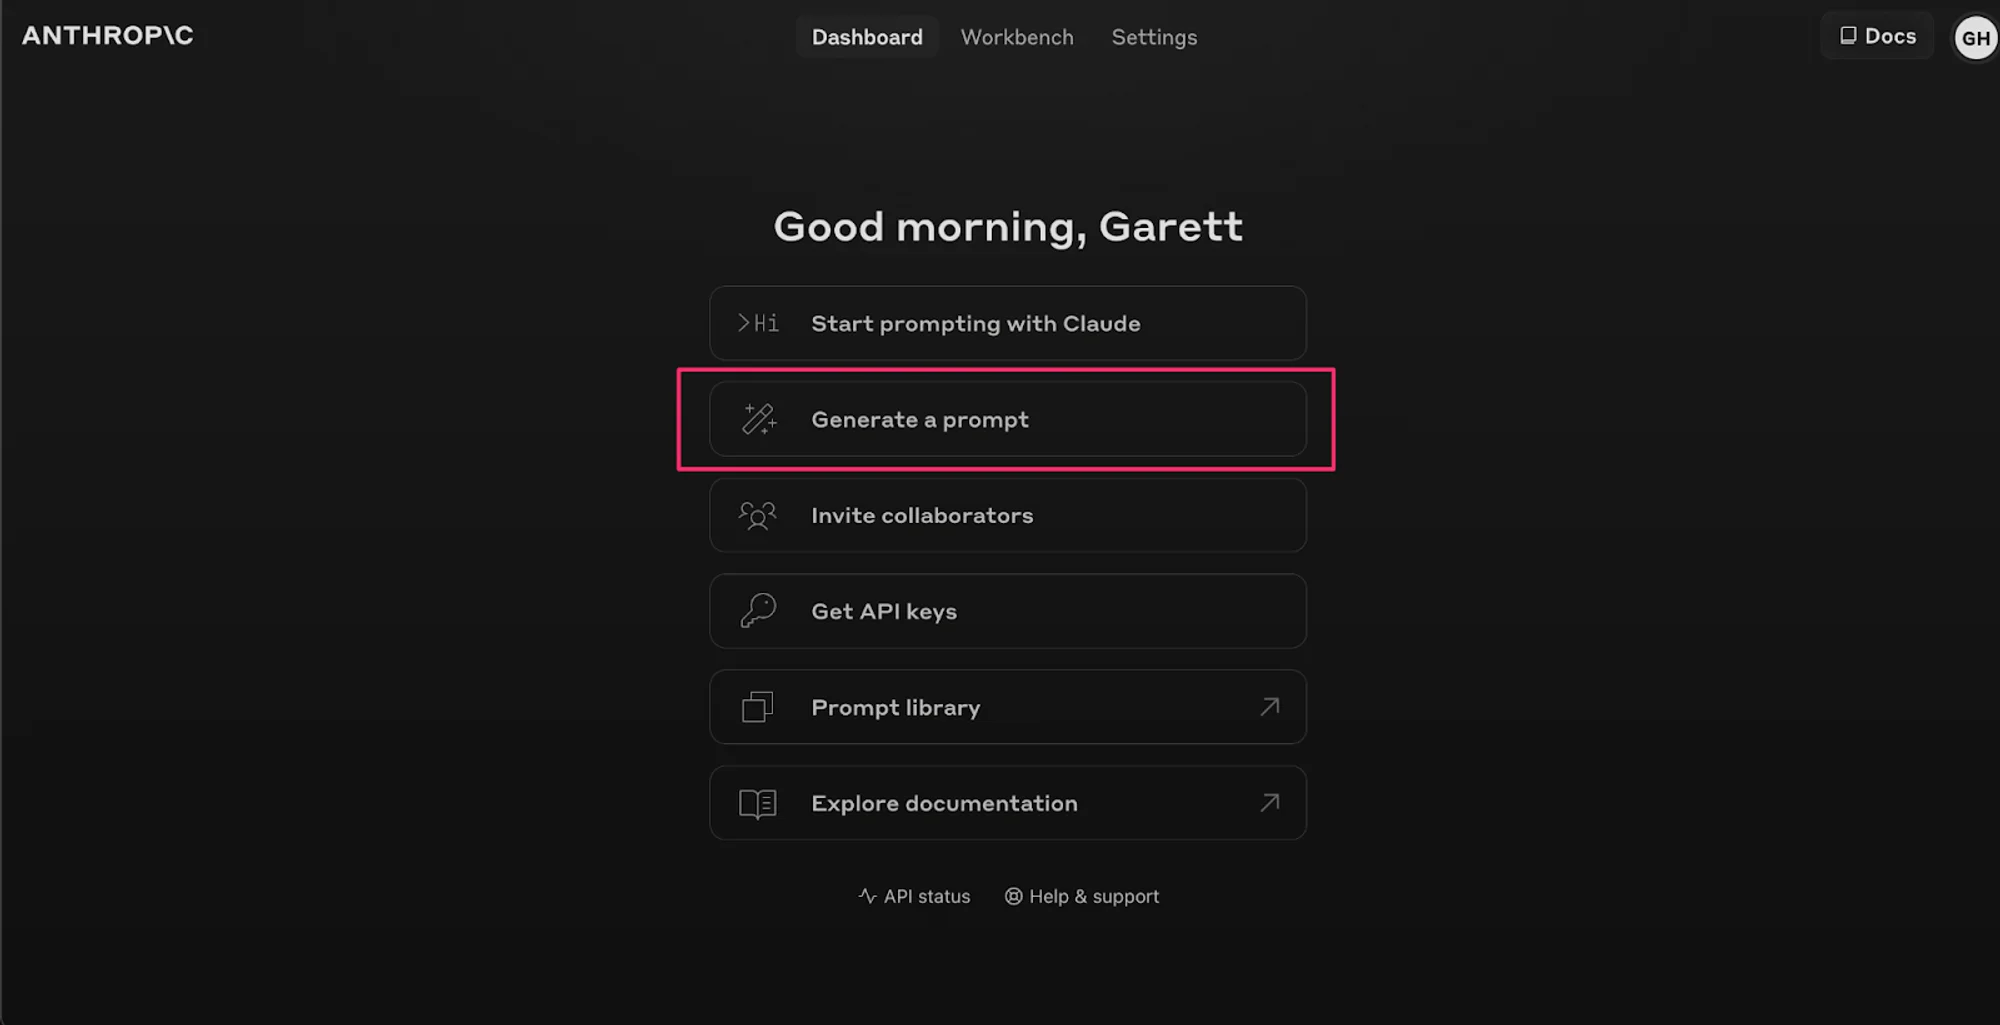
To do this, navigate to Anthropic’s developer console and click on the “Generate a prompt” button.
For this example, we are going to have Anthropic write us a prompt for generating emails that match a certain style/tone/structure and include data from a relevant list we provide. You can imagine using this for an Email Writing Claude Project.
Sample instruction:
Write me an email that matches the tone/style/structure of a provided example and incorporates the content of a provided list of items.
.webp)
Once you click the “Generate Prompt” button, Anthropic will output a prompt like the one below.
Sample prompt output:
You are tasked with writing an email that matches the tone, style, and structure of a provided example while incorporating content from a given list of items. Follow these steps carefully:
1. First, carefully read and analyze the following example email:
<example_email>
{{EXAMPLE_EMAIL}}
</example_email>
2. Now, review the list of content items that need to be incorporated into your new email:
<content_list>
{{CONTENT_LIST}}
</content_list>
3. Analyze the example email, paying close attention to: a) Tone: Is it formal, casual, friendly, or professional? b) Style: Note the language use, sentence structure, and any unique phrases or expressions. c) Structure: Observe the organization, including greeting, body paragraphs, and closing.
4. Write a new email that incorporates all the items from the content list while adhering to the following guidelines: a) Maintain the same overall tone as the example email. b) Mimic the writing style, including similar sentence structures and language choices. c) Follow the same structural organization as the example email. d) Ensure all content items are seamlessly integrated into the email body.
5. As you write, constantly refer back to the example email to ensure consistency in tone, style, and structure. Make adjustments as necessary to maintain this consistency while effectively communicating the new content.
6. Once you have completed writing the email, review it to ensure all content items have been included and the email matches the example in tone, style, and structure.
7. Output your final email within <email> tags. Do not include any explanations or comments outside of these tags.
Remember, your goal is to create an email that seems as if it could have been written by the same person who wrote the example email, while effectively communicating the new content provided in the list.
.webp)
You can now copy/paste this prompt as a custom instruction for a Claude Project, and use this prompt-generating tool as part of your workflow moving forward to create highly detailed custom instructions.
Best practices with Artifacts
Now that you have a solid workflow for automating custom instructions, let’s take a look at some Artifacts best practices:
- Use Project Knowledge For Greater Context: By training Claude to understand the context of your data better via Project knowledge, you can create tools that provide more relevant and actionable insights.
- Implement Conditional Logic: Enhance your Artifacts with conditional logic to make them more responsive and interactive. This allows your tools to adapt to different scenarios and user inputs, providing more tailored outputs. For instance, for interactive dashboards, you can request specific interactive filters and components.
- Have Low Expectations For Using External APIs: We found ****connecting Claude Artifacts to external APIs to be cumbersome and generally ineffective. This includes trying to do things like fetching real-time data and integrating with third-party services. You’ll note that all of the mini-apps we built did not use external APIs for this reason.
- Integrate Artifacts With Claude Projects: Combining Artifacts with Claude Projects enables the most comprehensive, shareable AI tools. Projects allow you to document and share your artifacts with team members, facilitating collaboration and knowledge sharing.
Keep these in mind as you’re developing your Claude Artifacts and Projects. Lastly, we’ll take a look at how to bring your Artifacts out of Claude and onto the broader web.
Deploying your tools to the web
Finally, you can take your code from Claude and deploy it on Replit (or a similar hosting service) to host it on the web and provide access to people outside of your Claude team.
To do this, create a free Replit account if you don’t already have one, navigate to the home page, and click the “Create Repl” button.
.webp)
From there, select a code Template and give your project a name. Click the “Create Repl” button to create your project.
Once your Repl is created, go back to Claude, copy the code from your Artifact, and paste it into the corresponding file in Replit (i.e. copy the HTML and paste it into the ‘index.html’ file, copy the CSS and paste it into the ‘style.css’ file, etc.). You will want to delete any existing sample code in the Replit files.
After you’ve pasted in your code, click the “Run” button at the top of the page, and like magic, your Artifact should run in Replit, shareable to anyone on the web.
And that’s it! You’ve brought your Claude Artifact out of Claude and onto the web. You can add more code and features to your app in Replit to extend it even further.
Congrats! You’ve completed our Building Mini Apps with Claude course. Pat yourself on the back, you’re now a relative expert on working with the most advanced features of Claude.
This tutorial was created by Garrett.