Generate 3D graphic models
Learn how to generate 3D graphic models from images with 3D AI Studio.
2024-11-13
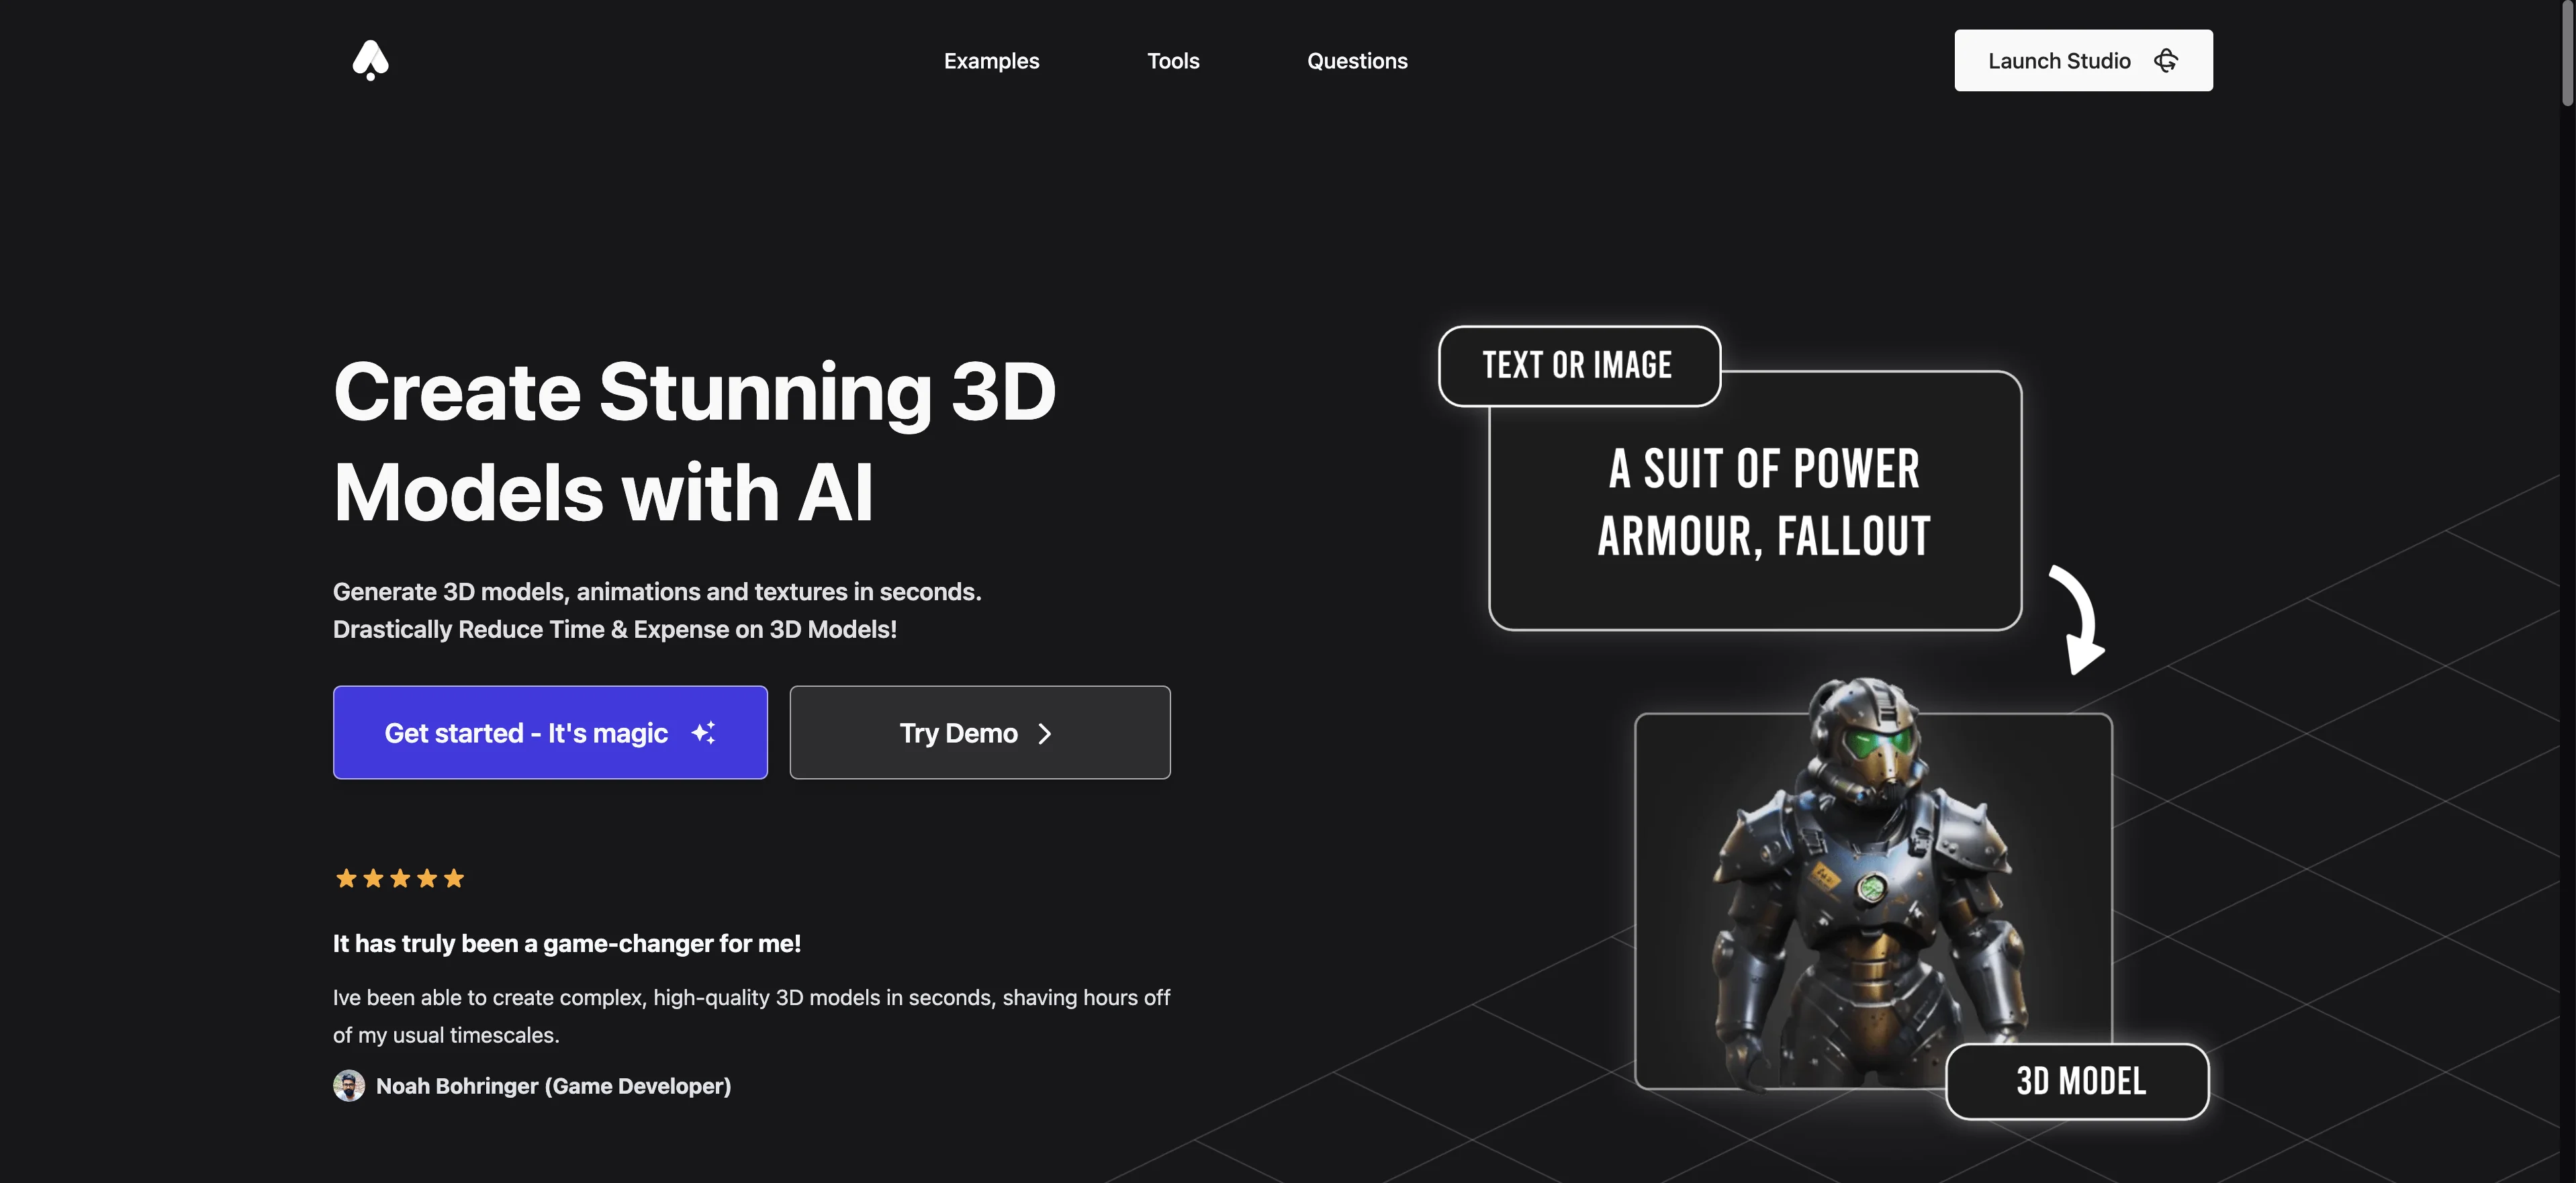
For creative teams, generating 3D objects and models is often a time-consuming and expensive process. This just got a whole lot easier with tools like 3D AI Studio, where you can go from text or image to 3D graphic, and further refine the 3D graphic with simple button clicks, text prompts, and settings.
In this tutorial, we’ll go from a prompt to an image of a flower, and then turn that image into a 3D model. Finally, we’ll refine the 3D graphic and export it for a future project. Creating 3D graphics has never been more approachable.
Steps we’ll follow in this tutorial:
- Generate and upload an image
- Generate a 3D model from an image
- Refine the 3D model
- Export the 3D model
Step 1: Generate and upload an image
To get started, navigate to 3D AI Studio and launch the studio for free.
We’re going to create an image from a text prompt to start, which we’ll use in an ensuing step to generate a 3D model. We’re going to create an image of a flower. Put your prompt in the top right text box and click “Generate Image”.
Sample prompt:
A delicately wilting rose, the petals fading into soft pastel hues while still holding a fragile beauty. The slender stem bends slightly under the weight of the flower, nestled in a charmingly weathered clay pot. This exquisite photograph captures the contrast between the flower's fading charm and the rustic elegance of the container, creating a bittersweet visual narrative. The image is rich in detail, showcasing the intricacies of the rose's texture and the organic imperfections of the pot. Each element is meticulously composed, evoking a sense of tranquility and nostalgia for fleeting moments of natural beauty.
.webp)
Once the image is generated, you can click the “Download and use in Image to 3D” to use this image as your 3D model input.
.webp)
Step 2: Generate a 3D model from an image
Now that our image is generated, go to the “Img to 3D” tab to upload your image and generate a 3D model for it. To do this, click the “Browse File” button to upload your image.
.webp)
Then the “Generate 3D Model” button at the bottom of the page.
.webp)
In less than a minute, a 3D model of your image should be generated and appear in the center window of the screen!
.webp)
Step 3: Refine the 3D model
You can refine the 3D model (which is similar to upscaling in image generation) by clicking the “Refine” button at the bottom of the page.
.webp)
You can find your refined 3D model in your home dashboard once complete. It will have the “Refined” tag above it.
.webp)
Step 4: Export the 3D model
Finally, with the 3D model refined, you can take a closer look at it by clicking the “Eye” icon on the 3D model in your homepage.
.webp)
A pop-up window will appear with your refined 3D model. You can click and drag to get a 360 view of it.
.webp)
Finally, you can download your 3D model from the home dashboard as a GLB file to use for your art, gaming, or creative project by clicking the “Download” button.
.webp)
This tutorial was created by Garrett.