How to build a full-stack web app with AI
Build a full-stack web app in under an hour with AI, and without coding.
2024-12-12
There’s long been Internet chatter about how “anyone can build a web app.” Often, I’ve rolled my eyes at this statement as someone who’s tried and failed to learn how to code many times. But with the recent advances in AI chat-based web app builders, this promise looks to finally be true for anyone with an idea and minimal persistence.
Many tools on the market enable AI software agent workflows for non-developers (including v0, Replit, Bolt), but our current favorite tool is Lovable, which we’ll be using in this tutorial. Why? It has an incredible user experience, integration with Supabase as a database, and automatic error handling. It also creates some of the best-looking user interfaces.
In this tutorial, we’ll create a simple to-do list app with a Kanban layout—think of this as the “hello world” project of building full-stack web apps with an AI software engineer.
Steps we’ll follow to create a to-do list web app:
- Use a prompt to generate the user interface
- Set up Supabase for the database
- Sync Supbase to your user interface
- Edit the UI/UX with prompts
- Publish and deploy the app
Tools:
- Lovable (Free to test; $20/month for higher prompt limits)
- Supabase (Free account)
Let’s make an app!
Use a prompt to generate the user interface
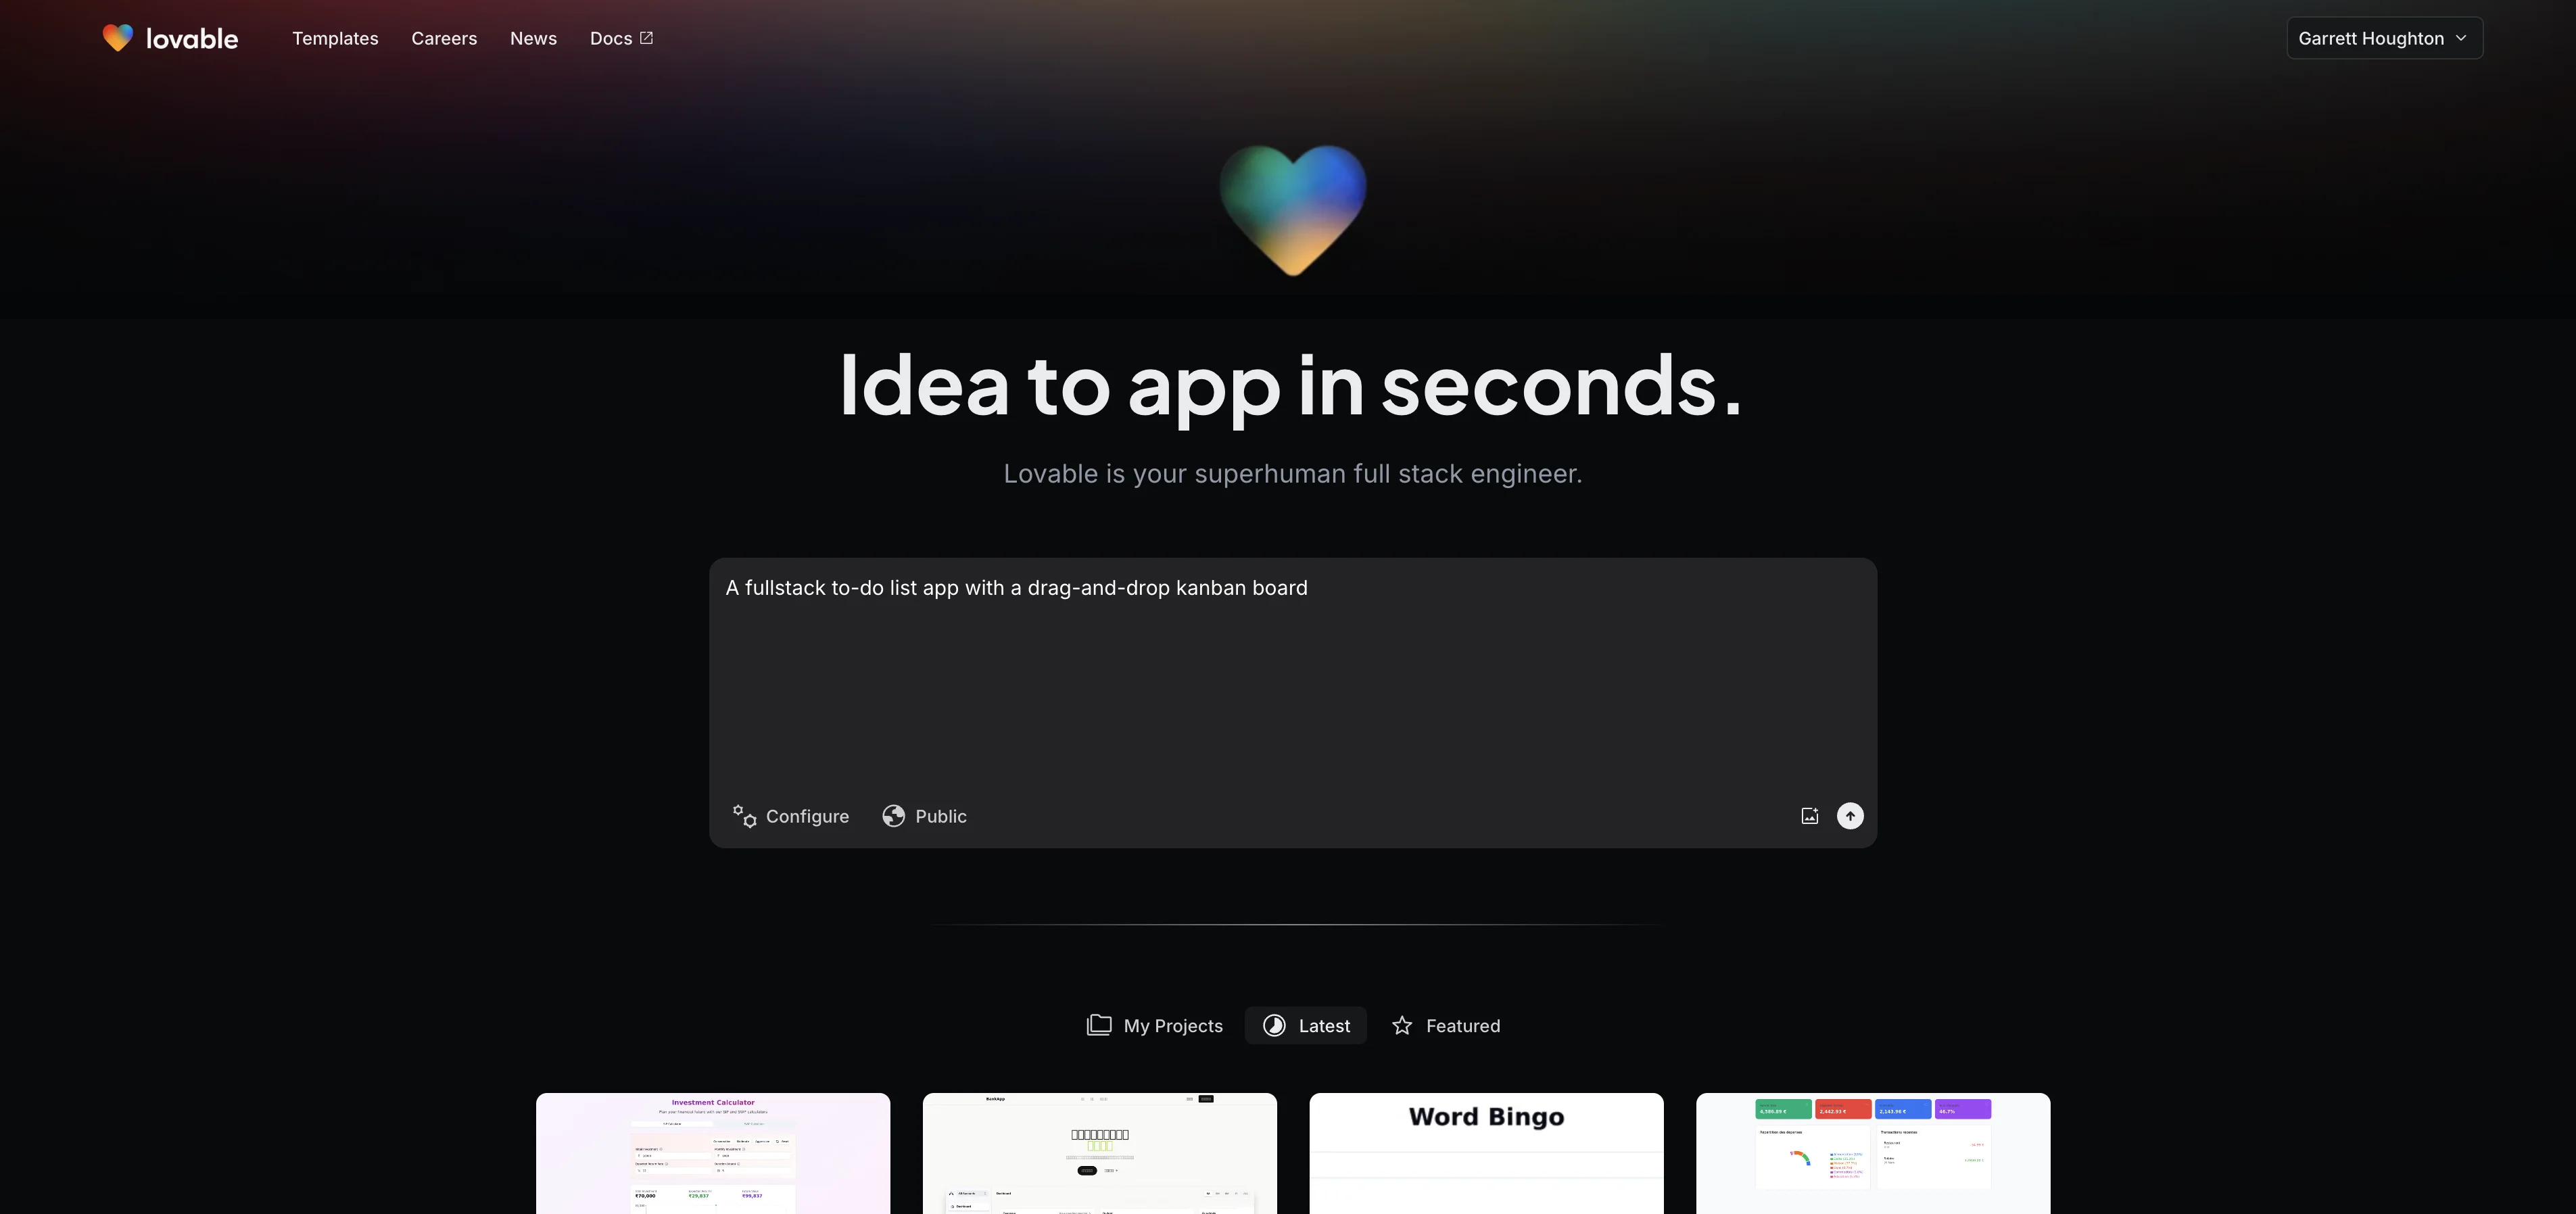
To get started, navigate to the Lovable site.

Enter a simple prompt to describe your app. You can make this much more detailed to define specific features, design inspiration, and other specifics—but we find it helpful to start simple and then refine the application as part of the editing process.
Sample Prompt:
A fullstack to-do list app with a drag-and-drop Kanban board.
This will take you to the Lovable project page where Lovable will describe what it’s building in the left-side chat window with the code appearing in the right-side preview pane.
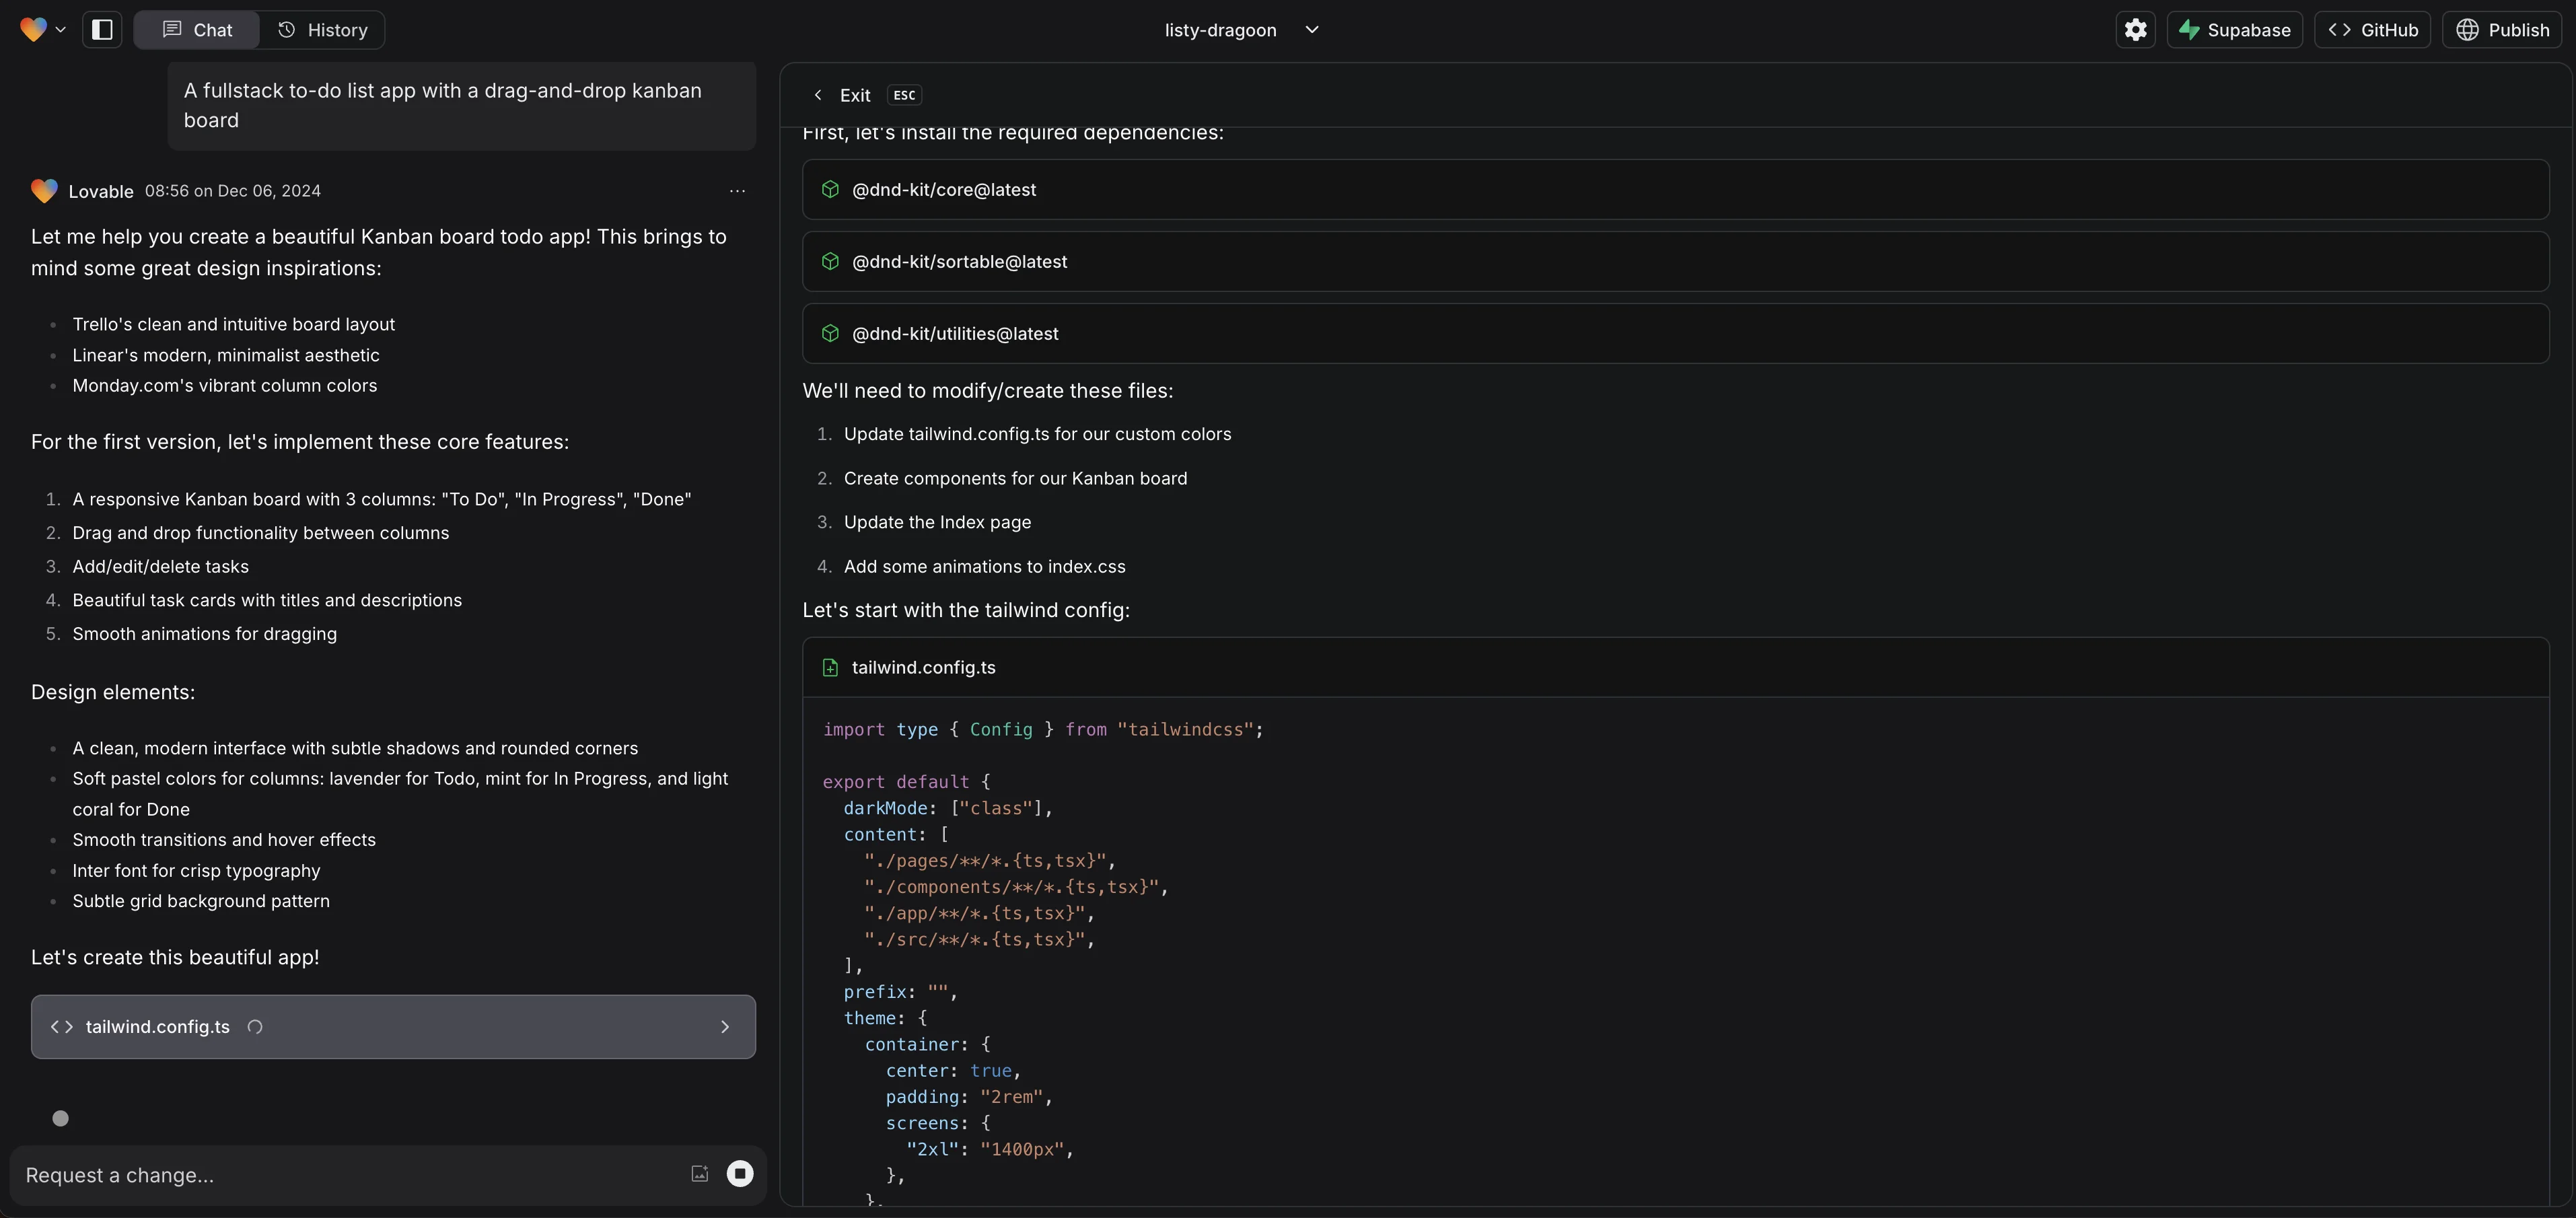
After the initial build is complete, you’ll be able to see and interact with the application in the preview window. Feel free to test the app experience at this point.

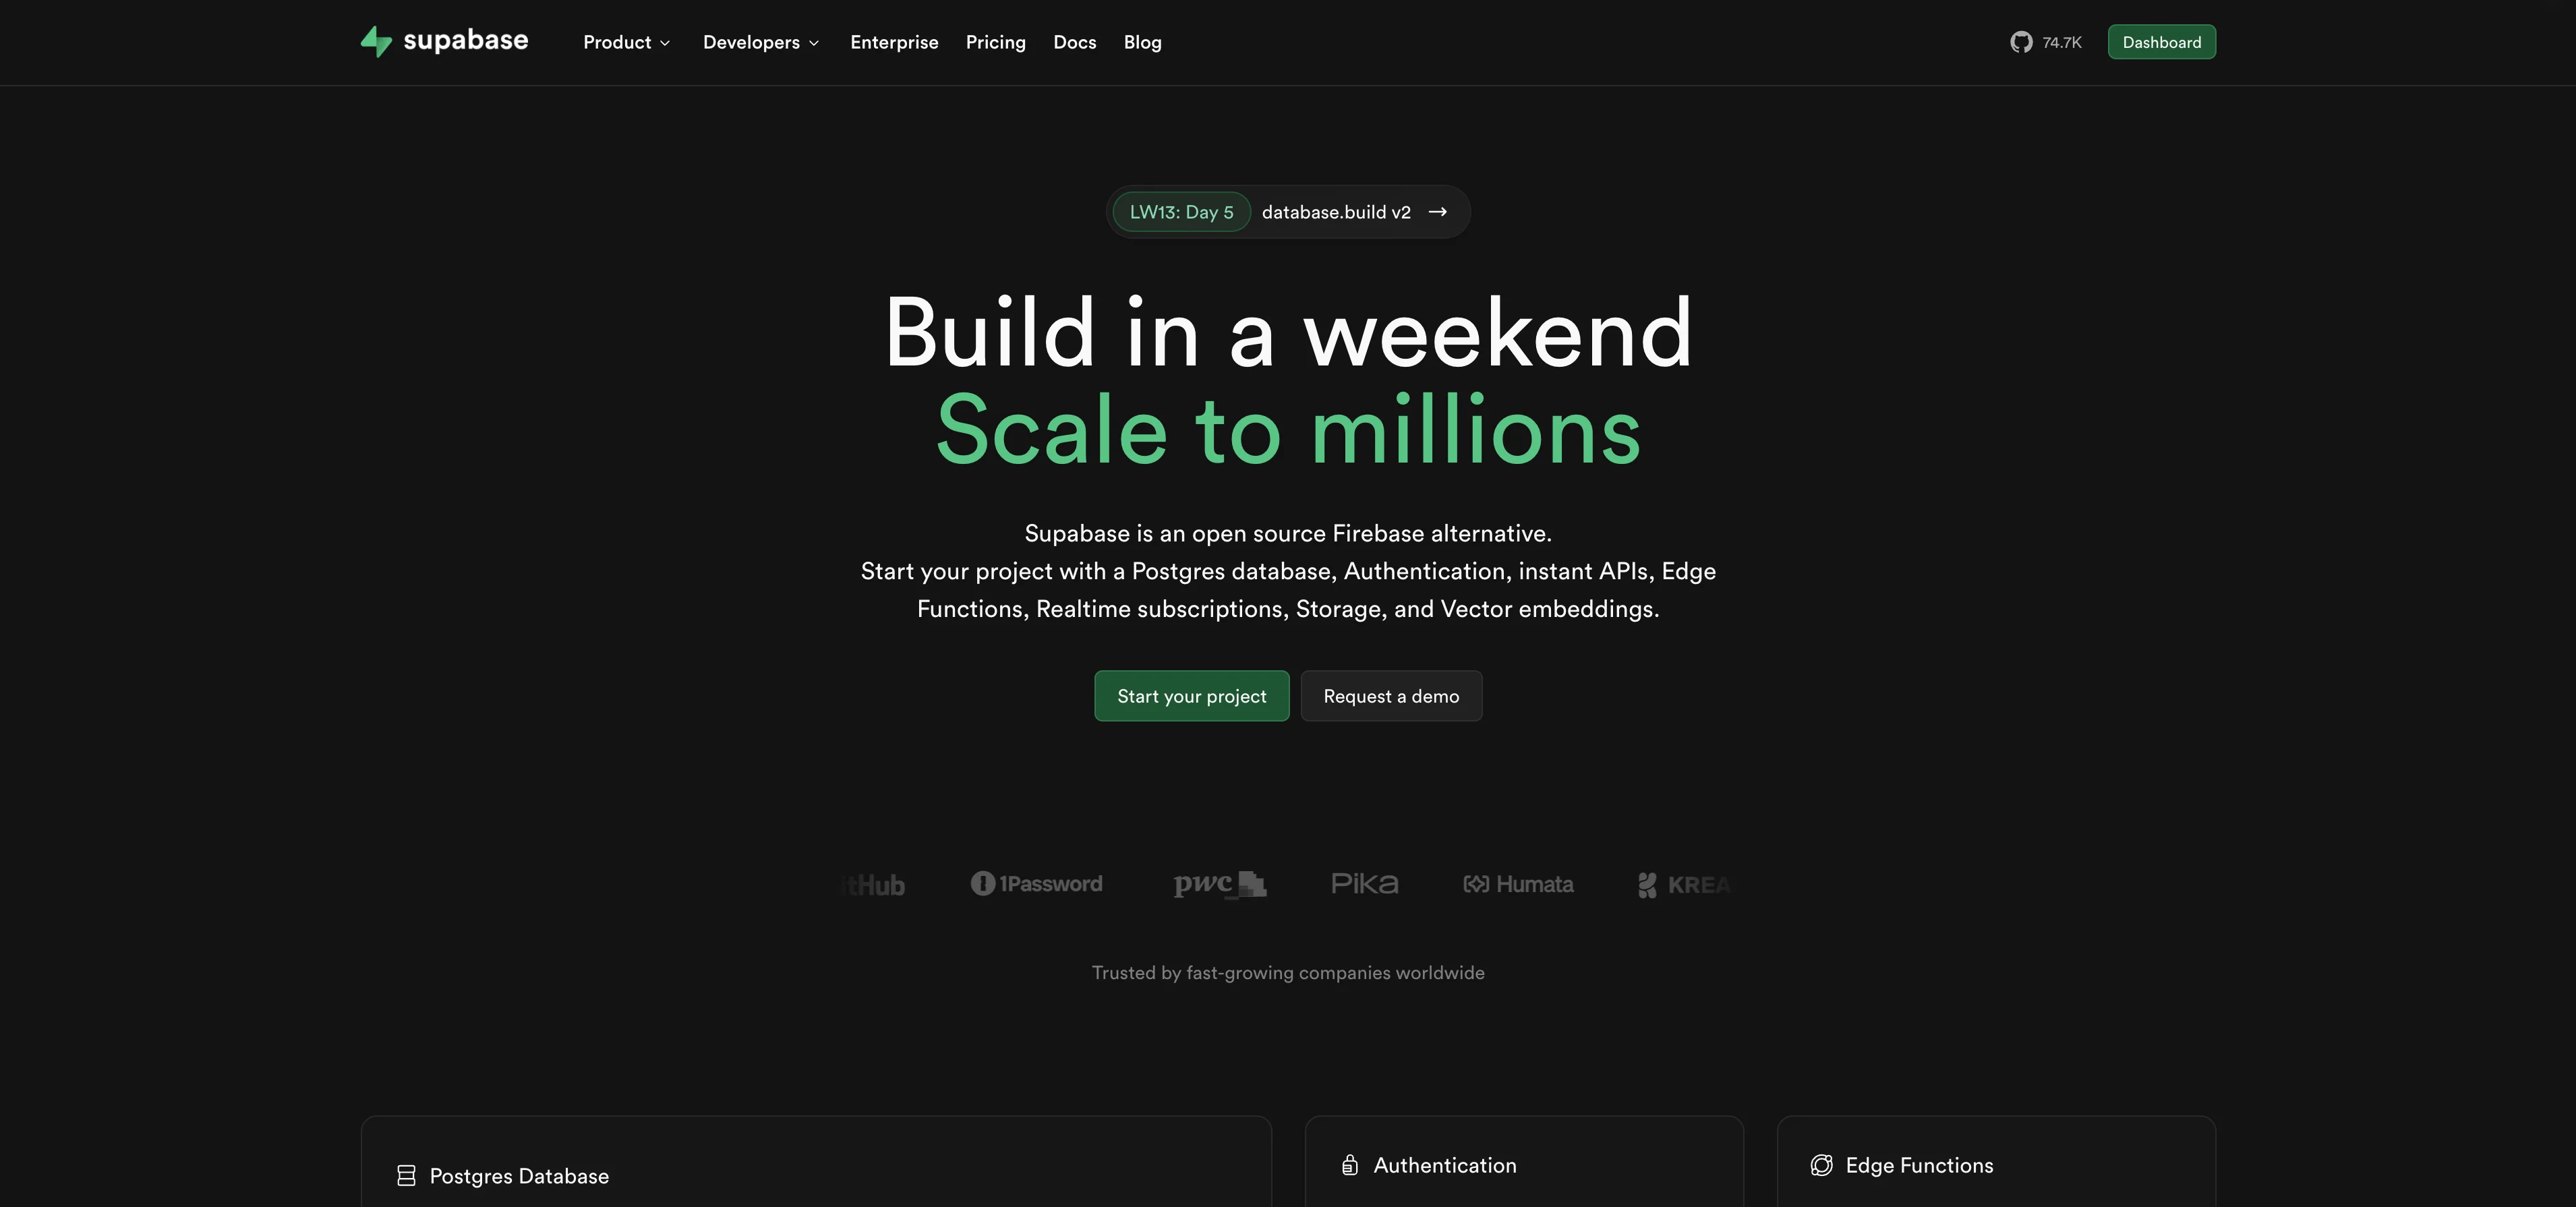
Set up Supabase for the database
Now that our v1 user interface is built, we can create our database to store our to-do list data. For this, we’ll use Supabase, which has a direct integration with Lovable. To do this, create a Supabase account.
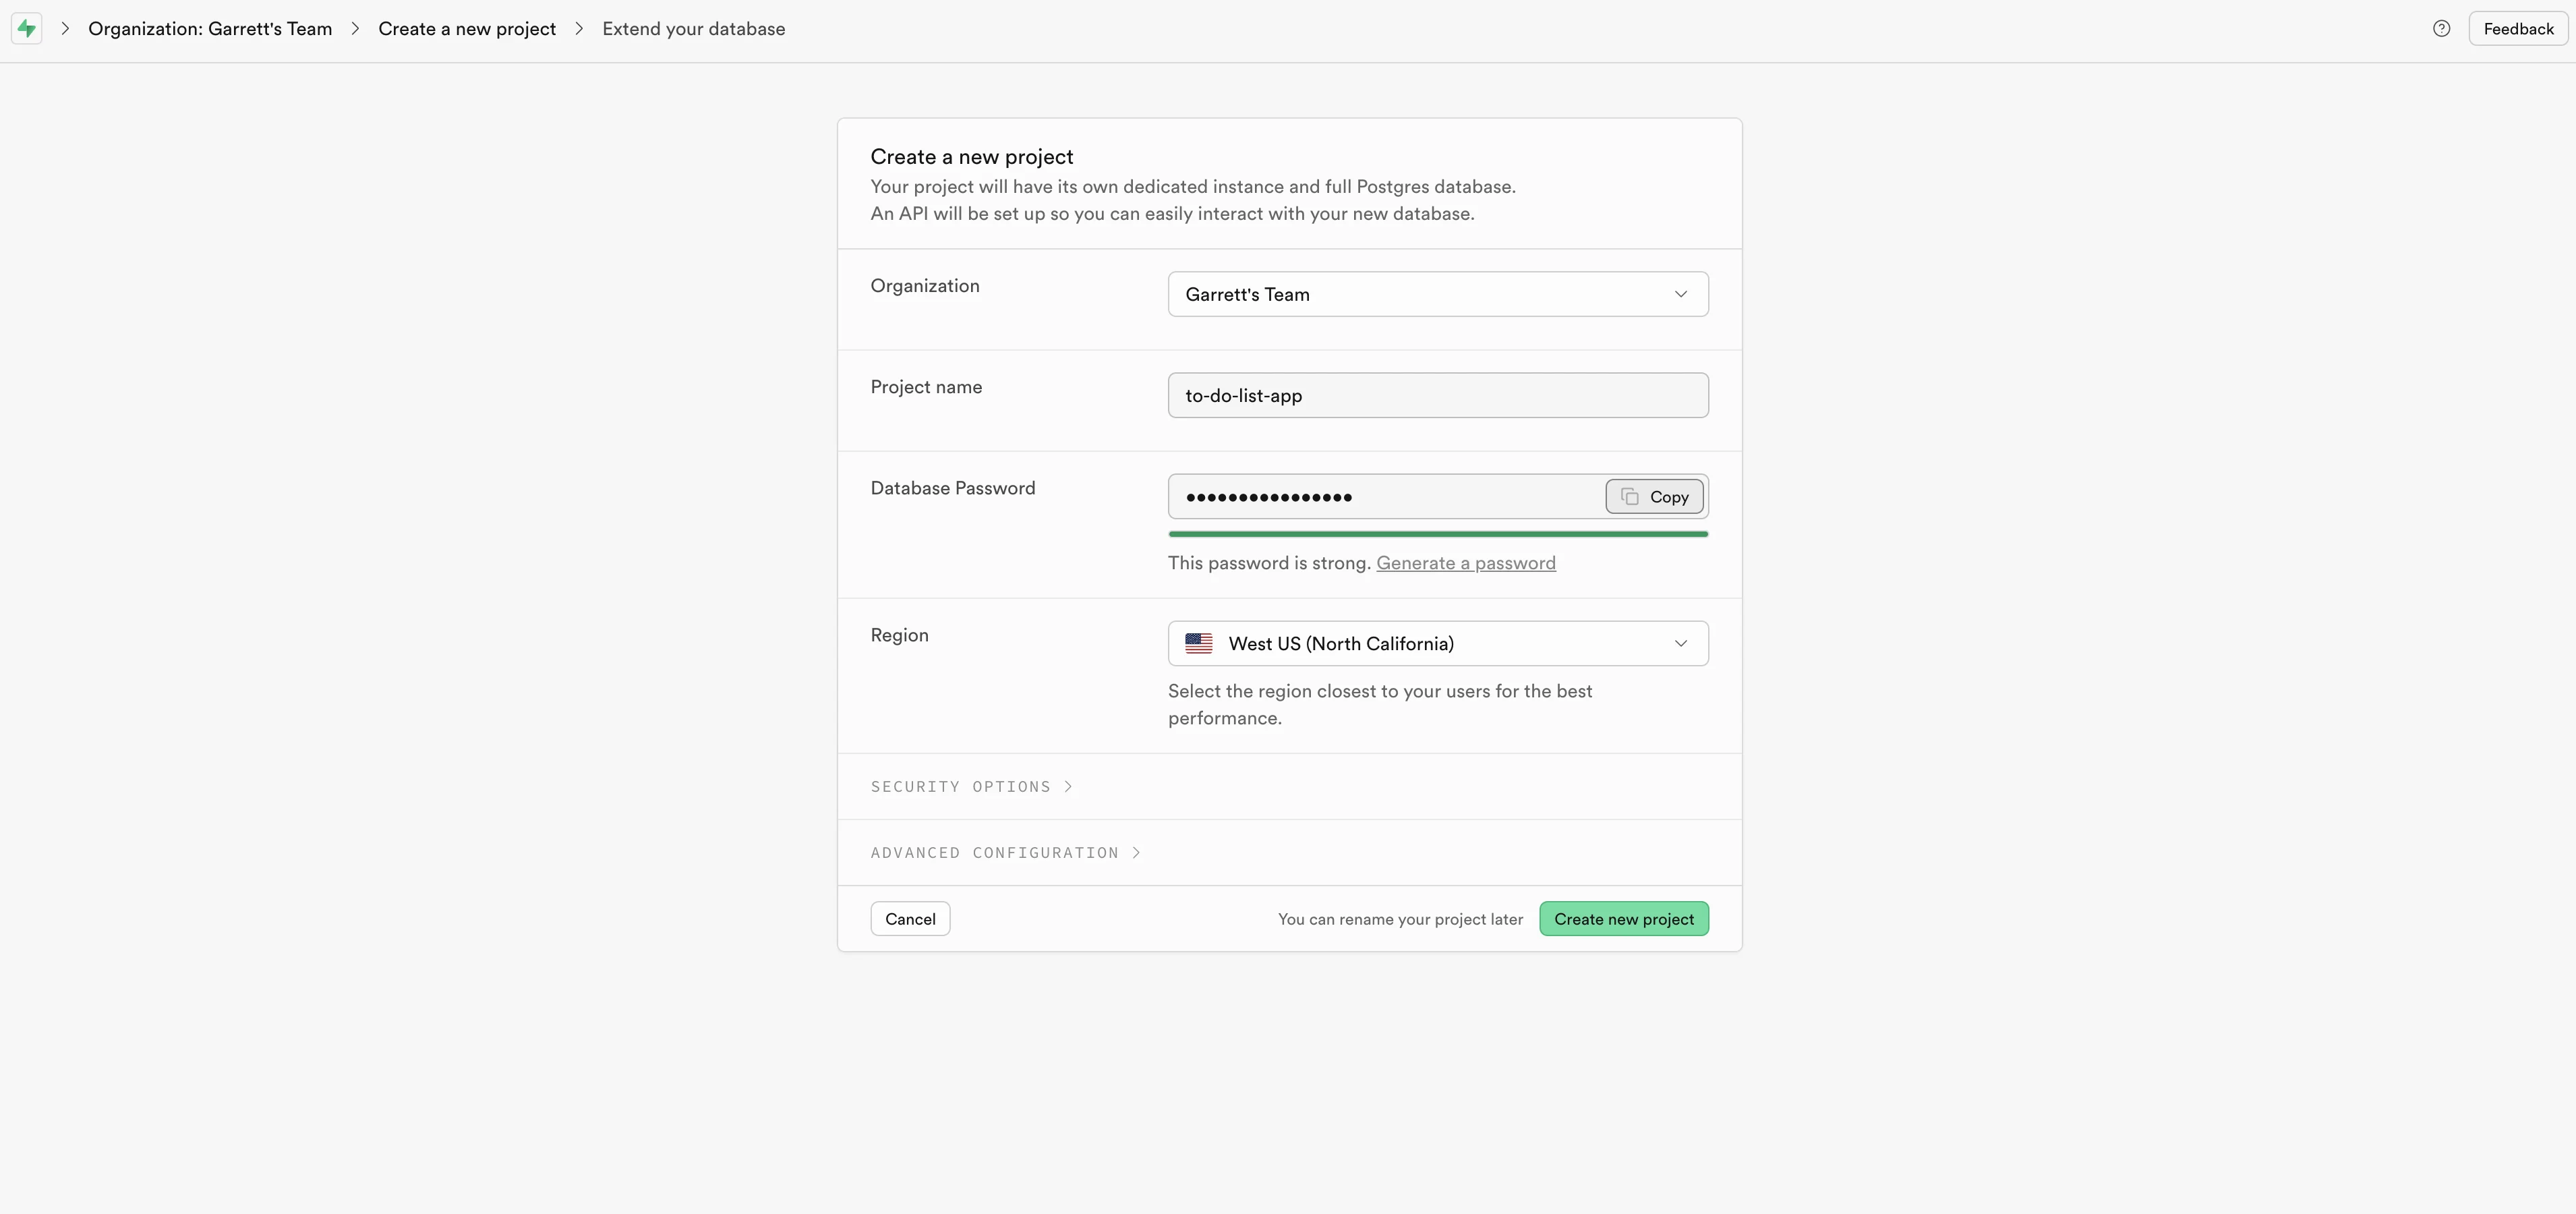
Then, when you get to your Supabase dashboard, create a new project by clicking the “New project” button.
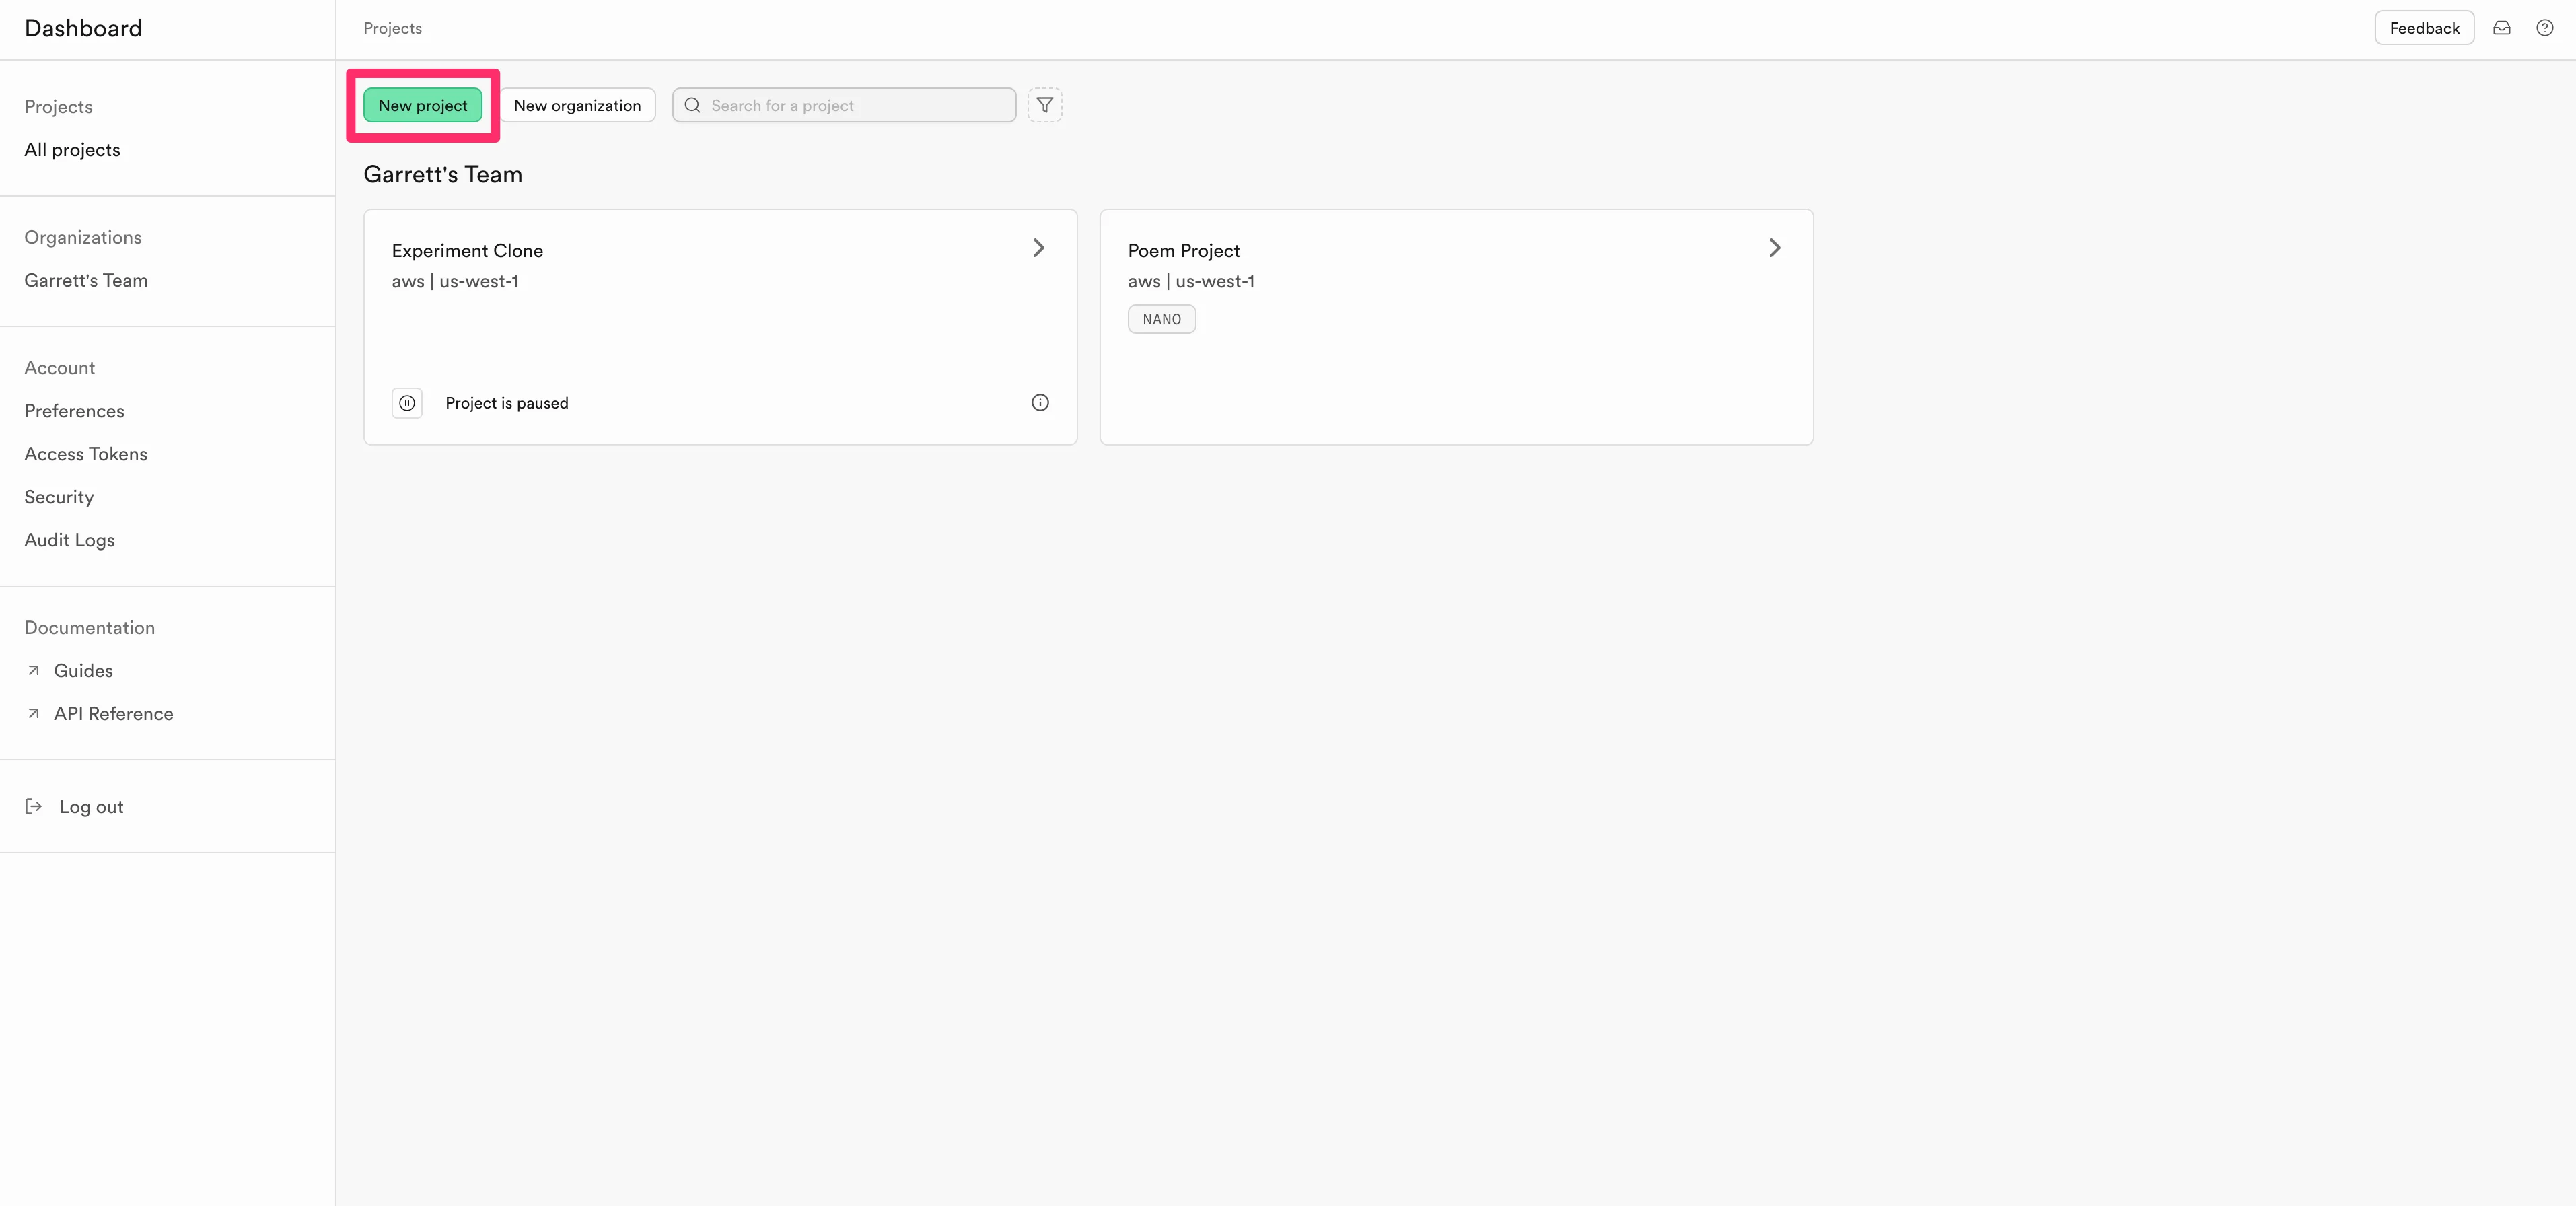
Name your project, generate a database password (save it somewhere safe), and click the “Create new project” button.
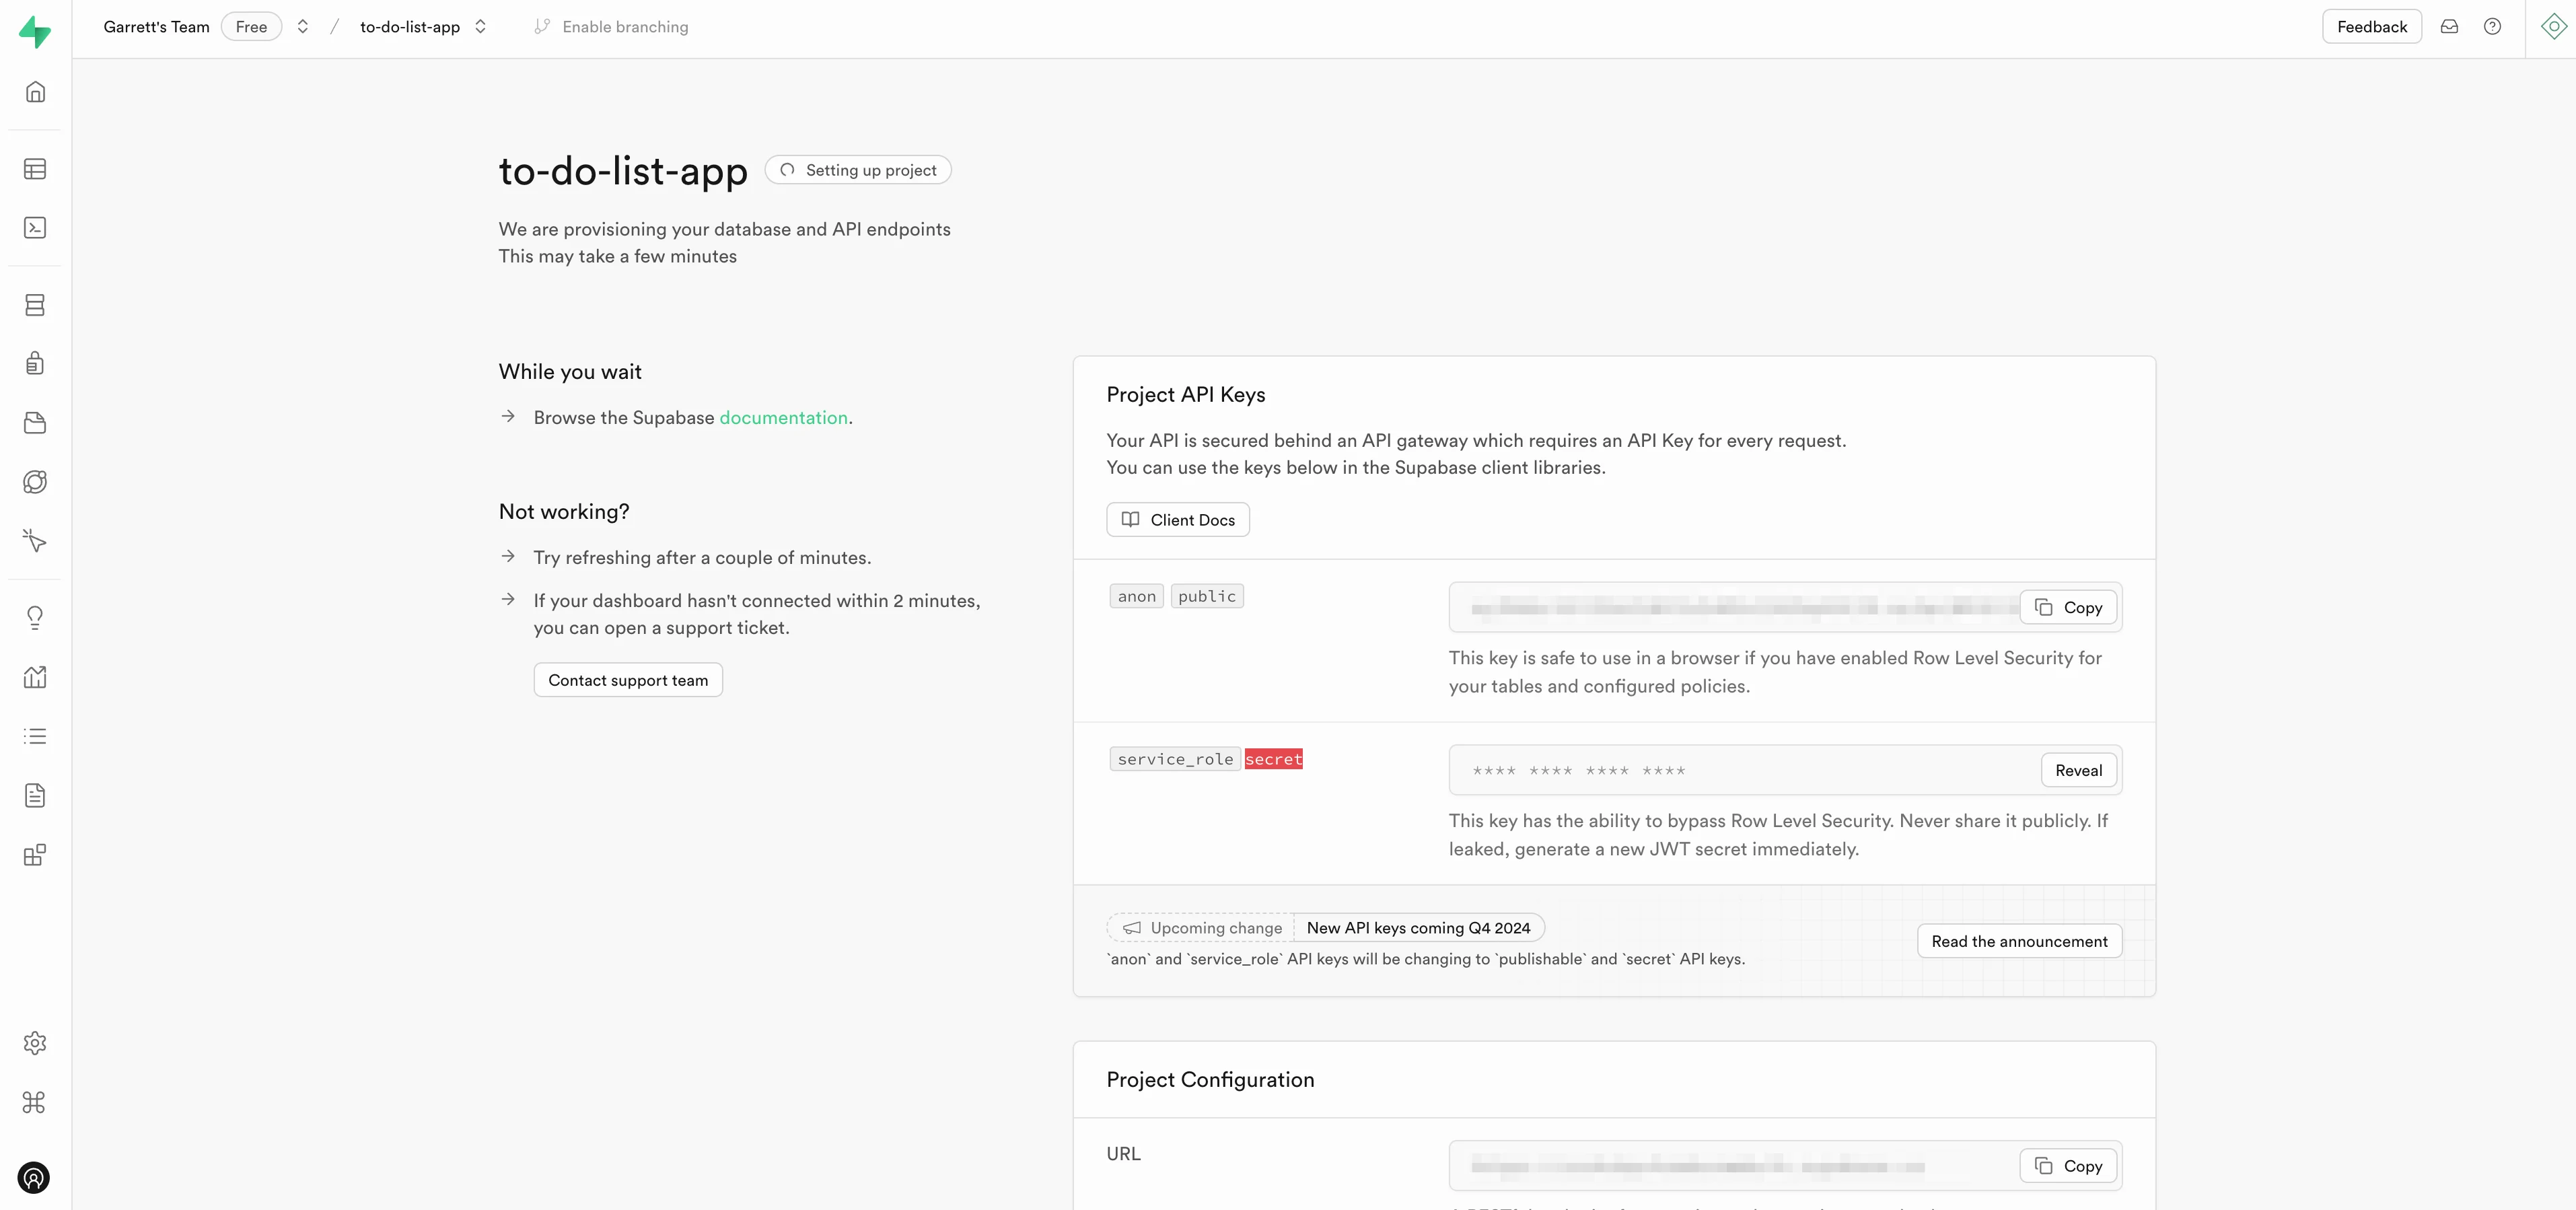
That’s pretty much all we need to do in Supabase!
It’ll take a few minutes for the project to be built. While we wait, we’ll head back to Lovable to sync our Supabase project and have Lovable build all the database tables for us.
Sync Supabase to your user interface
To sync Supabase to Lovable, back in your Lovable project, click the “Supabase” button in the top right corner of the screen. Select your team, and then click the “Connect” button next to your new Supabase project.
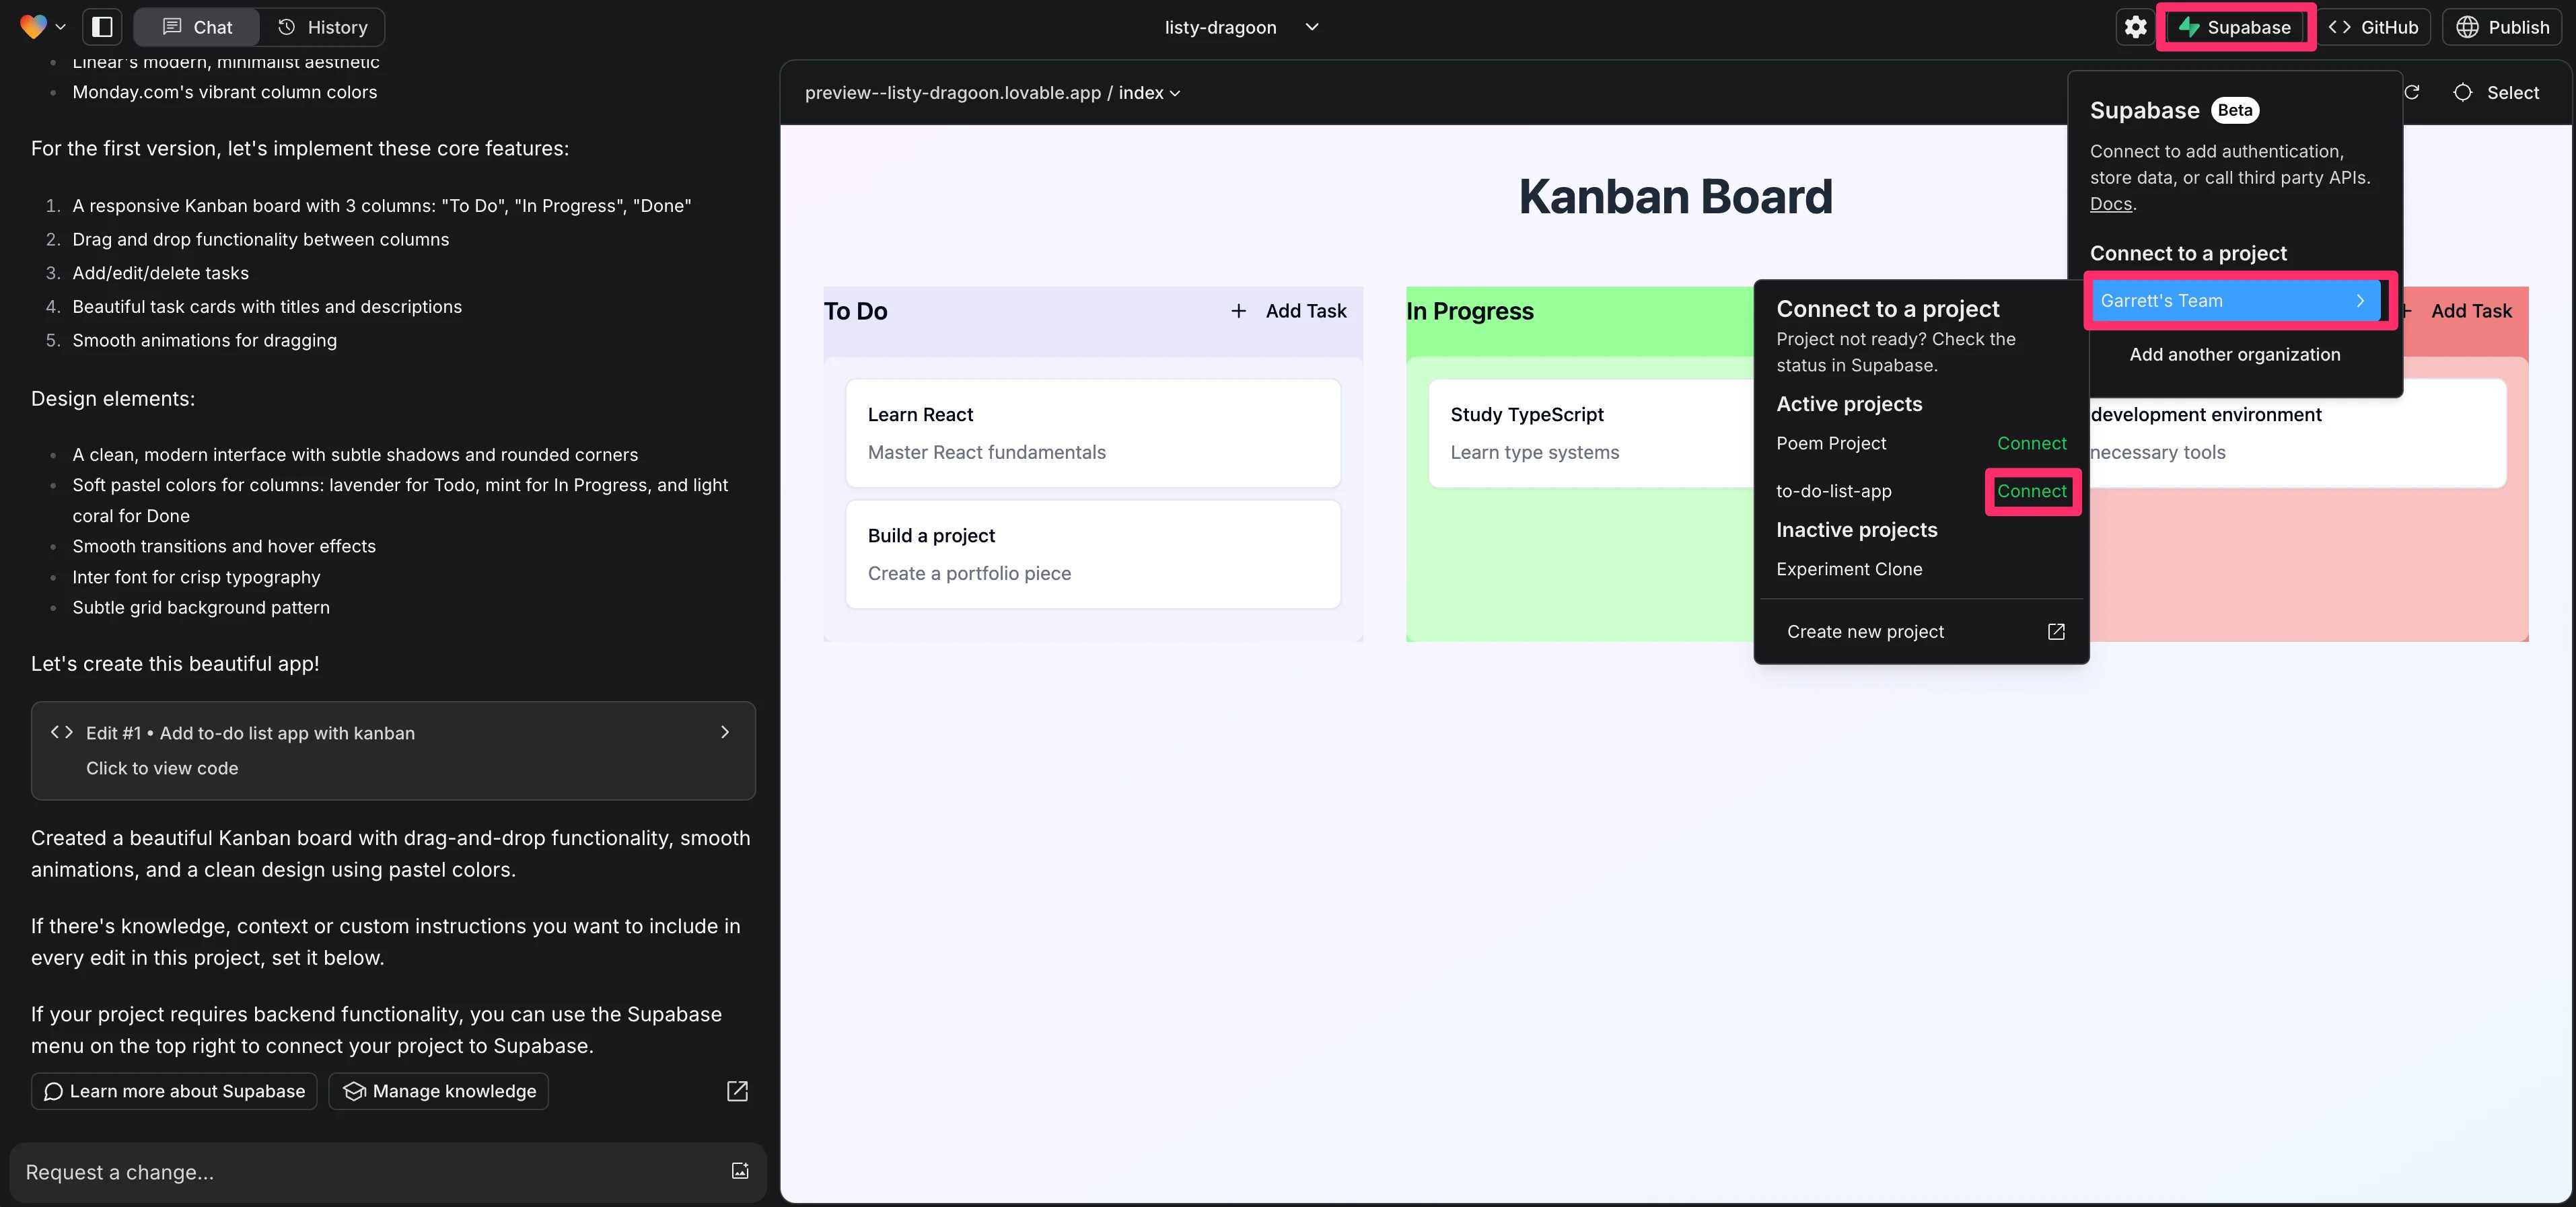
This will send a prompt to Lovable to connect the Supabase project.
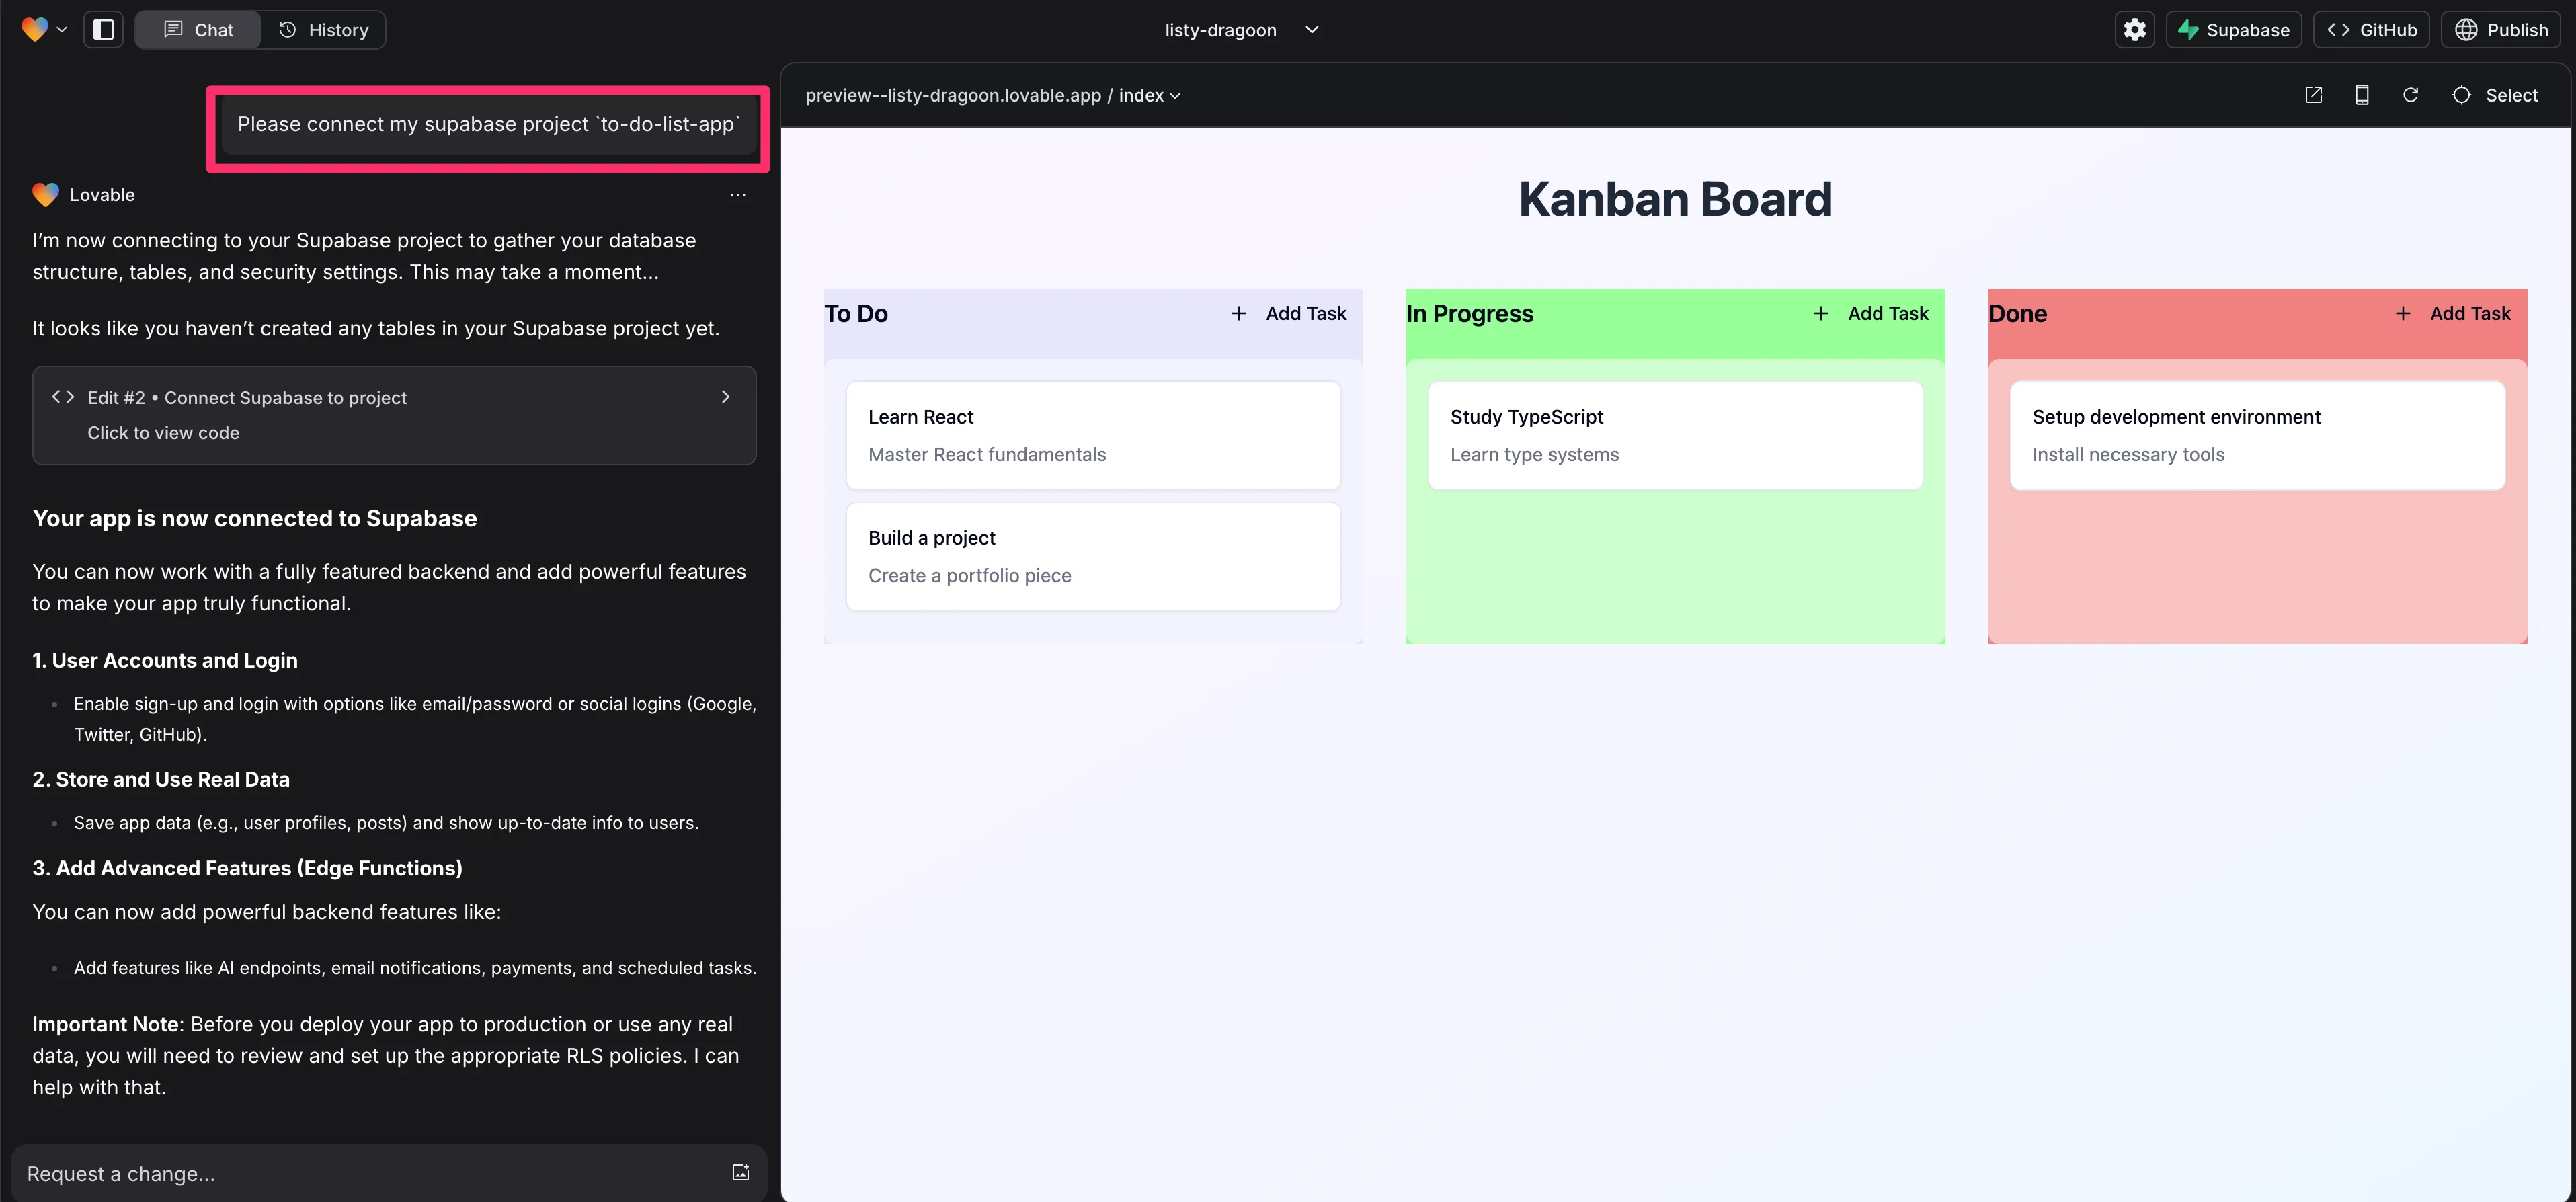
Once that’s done, we can prompt Lovable to create all of the data tables in Supabase to support our application.
Sample Prompt:
Create tables in Supabase so all of the to-do data can be created, read, updated, and deleted from there.
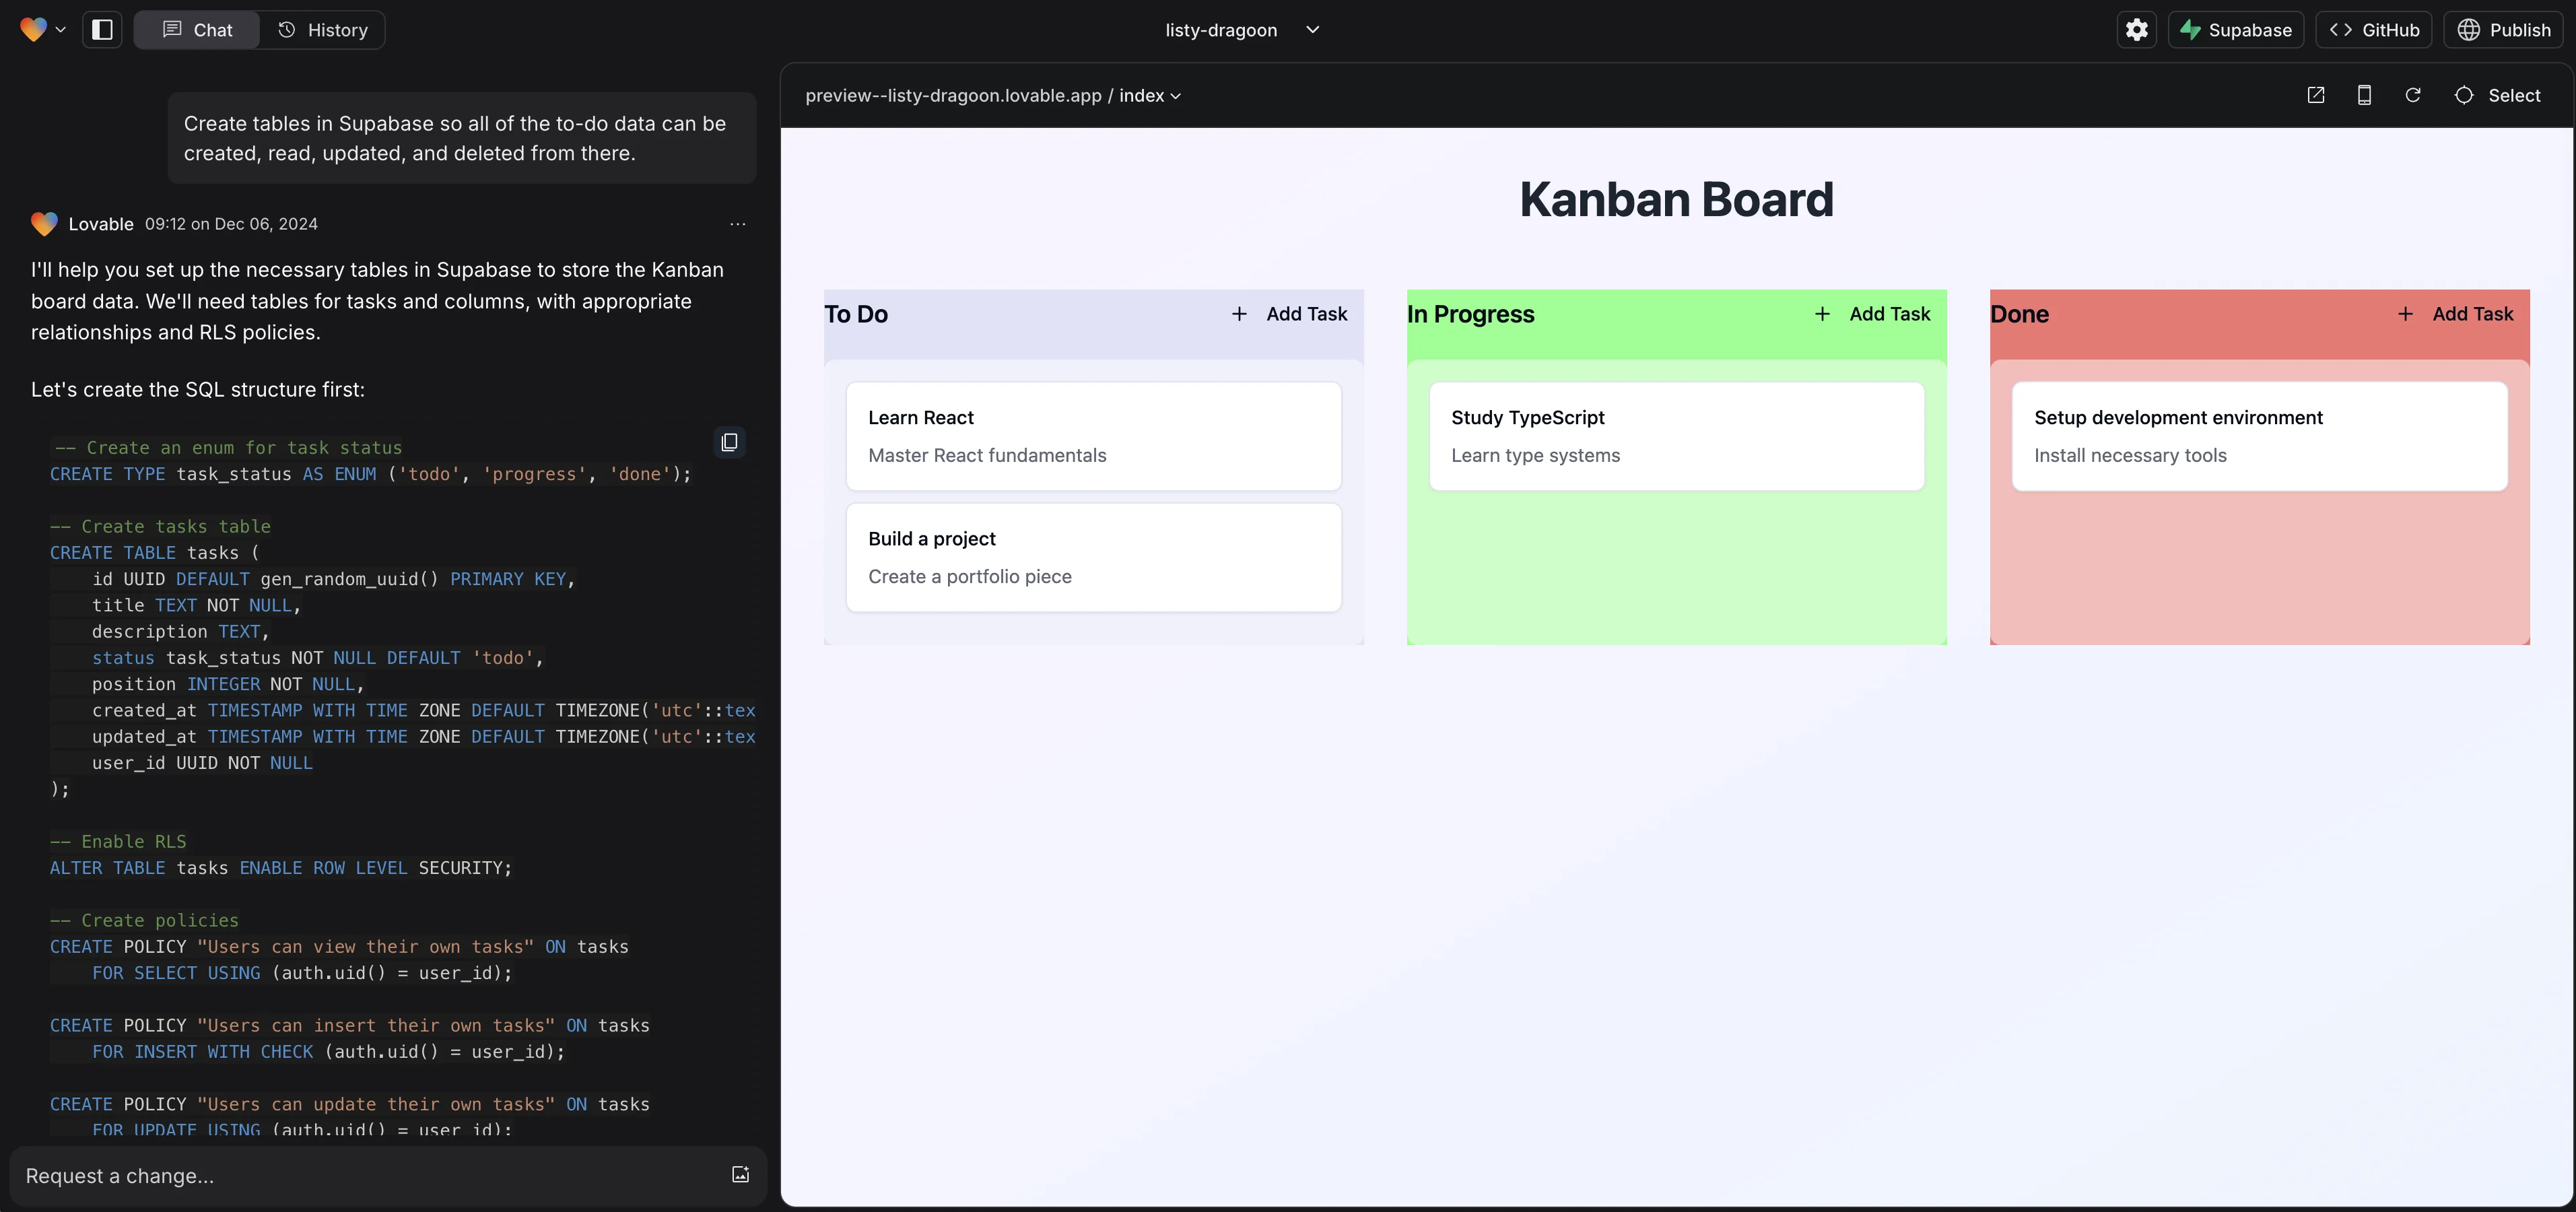
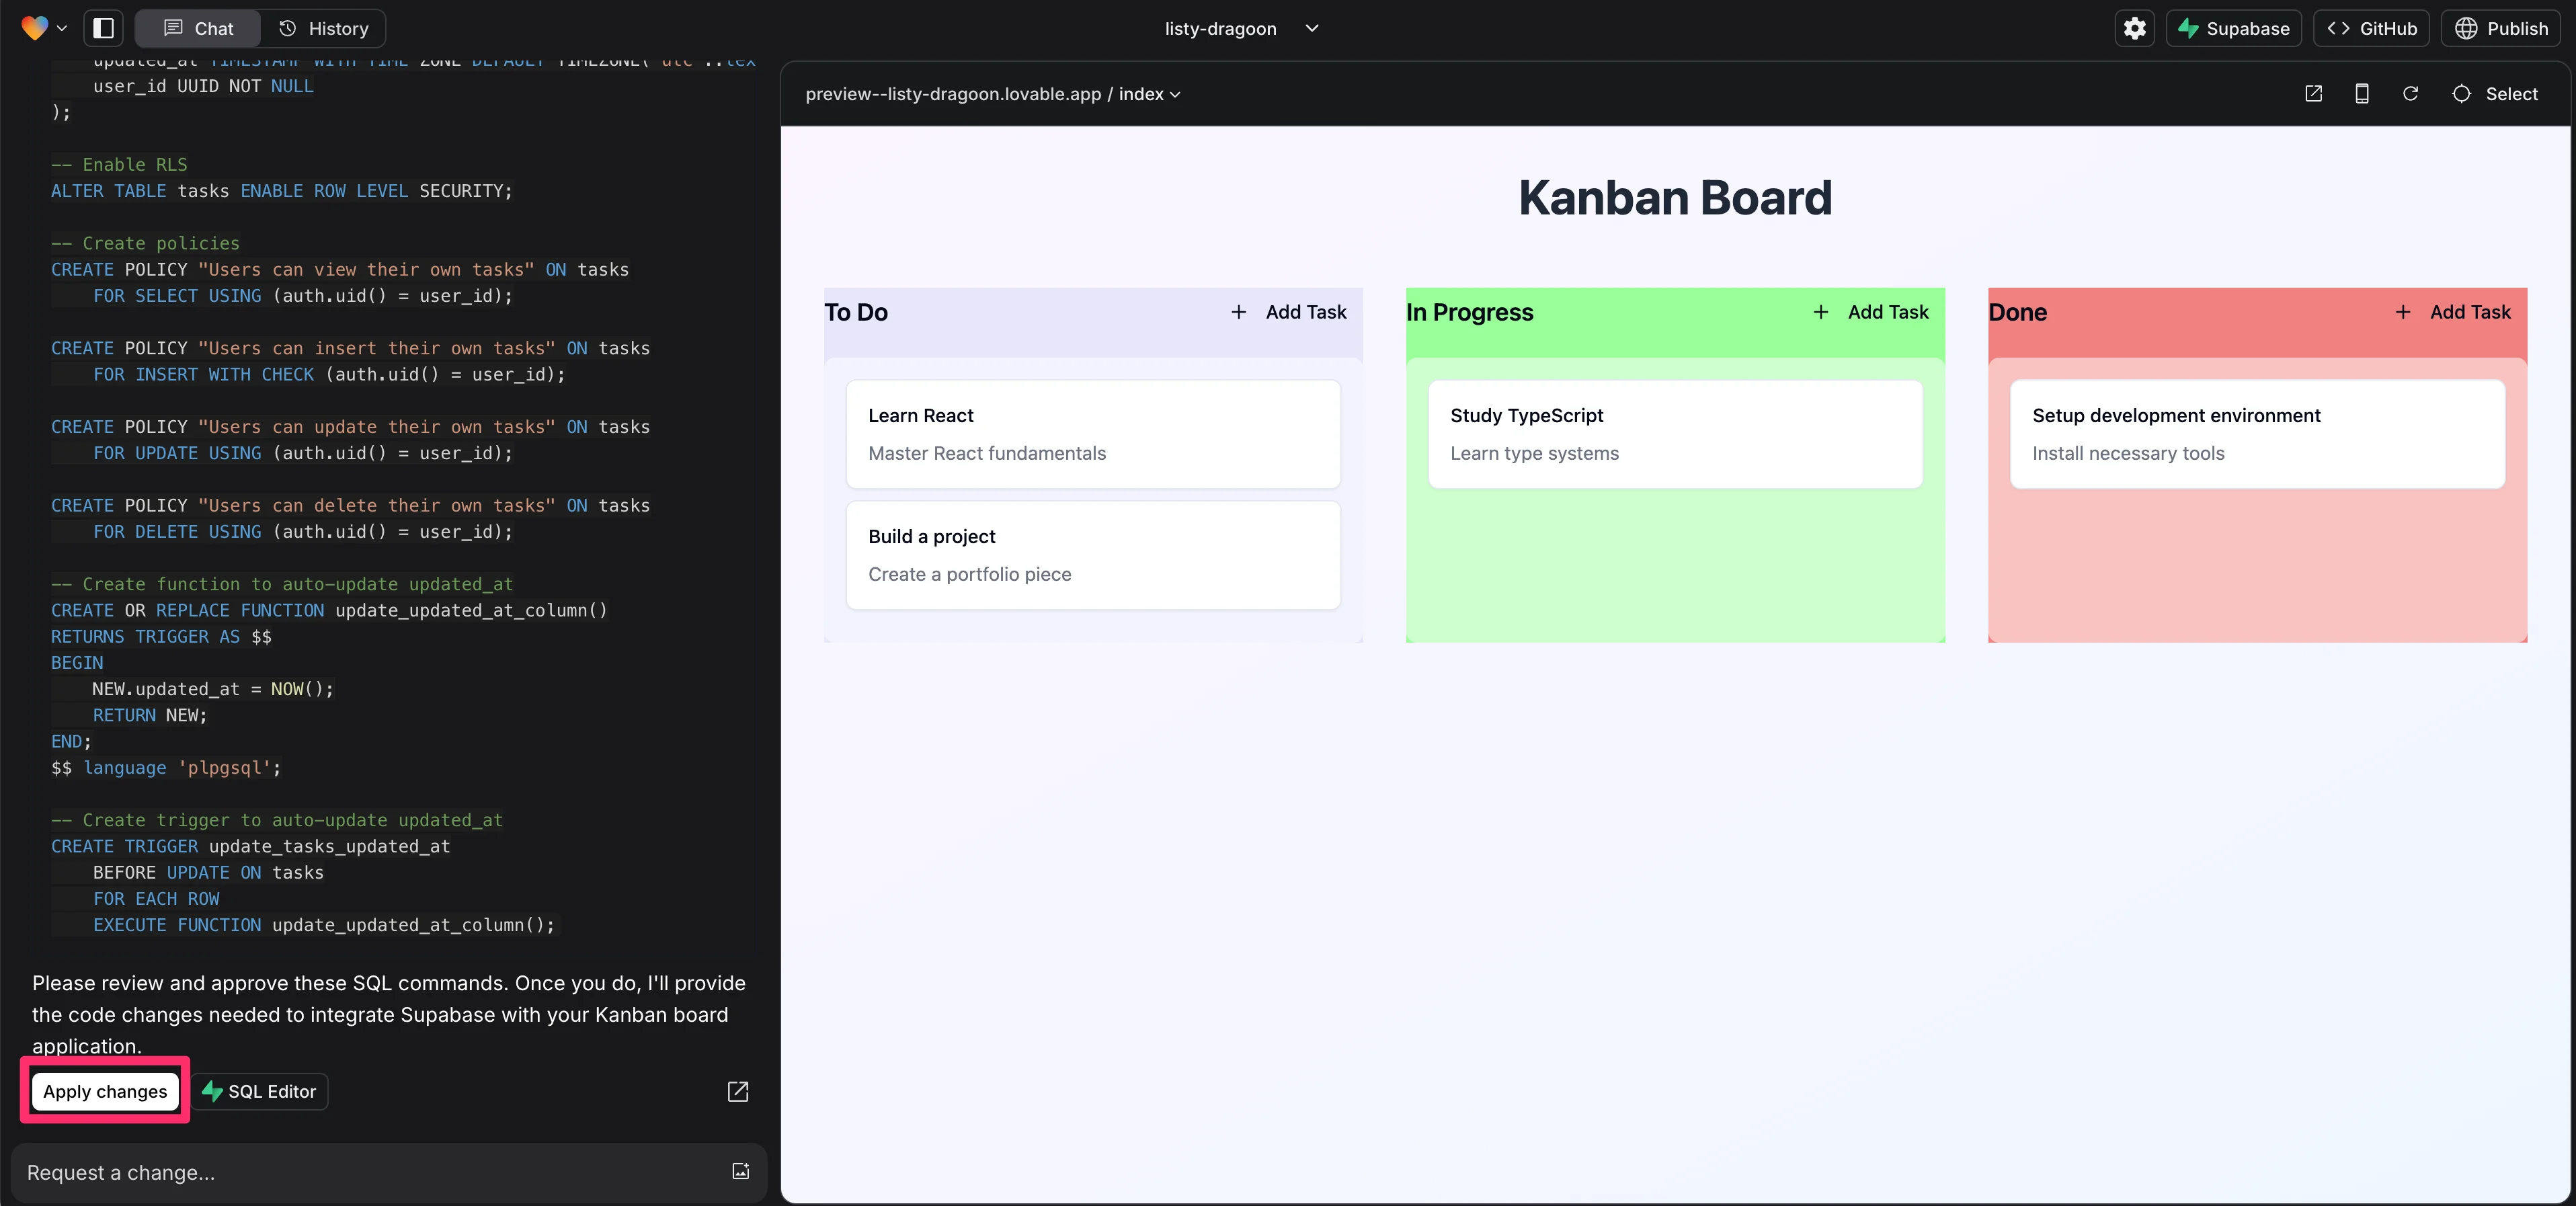
Lovable will generate all the SQL commands needed to create the database for your application. Scroll to the bottom of the response and click “Apply changes” to create the database tables in Supabase.
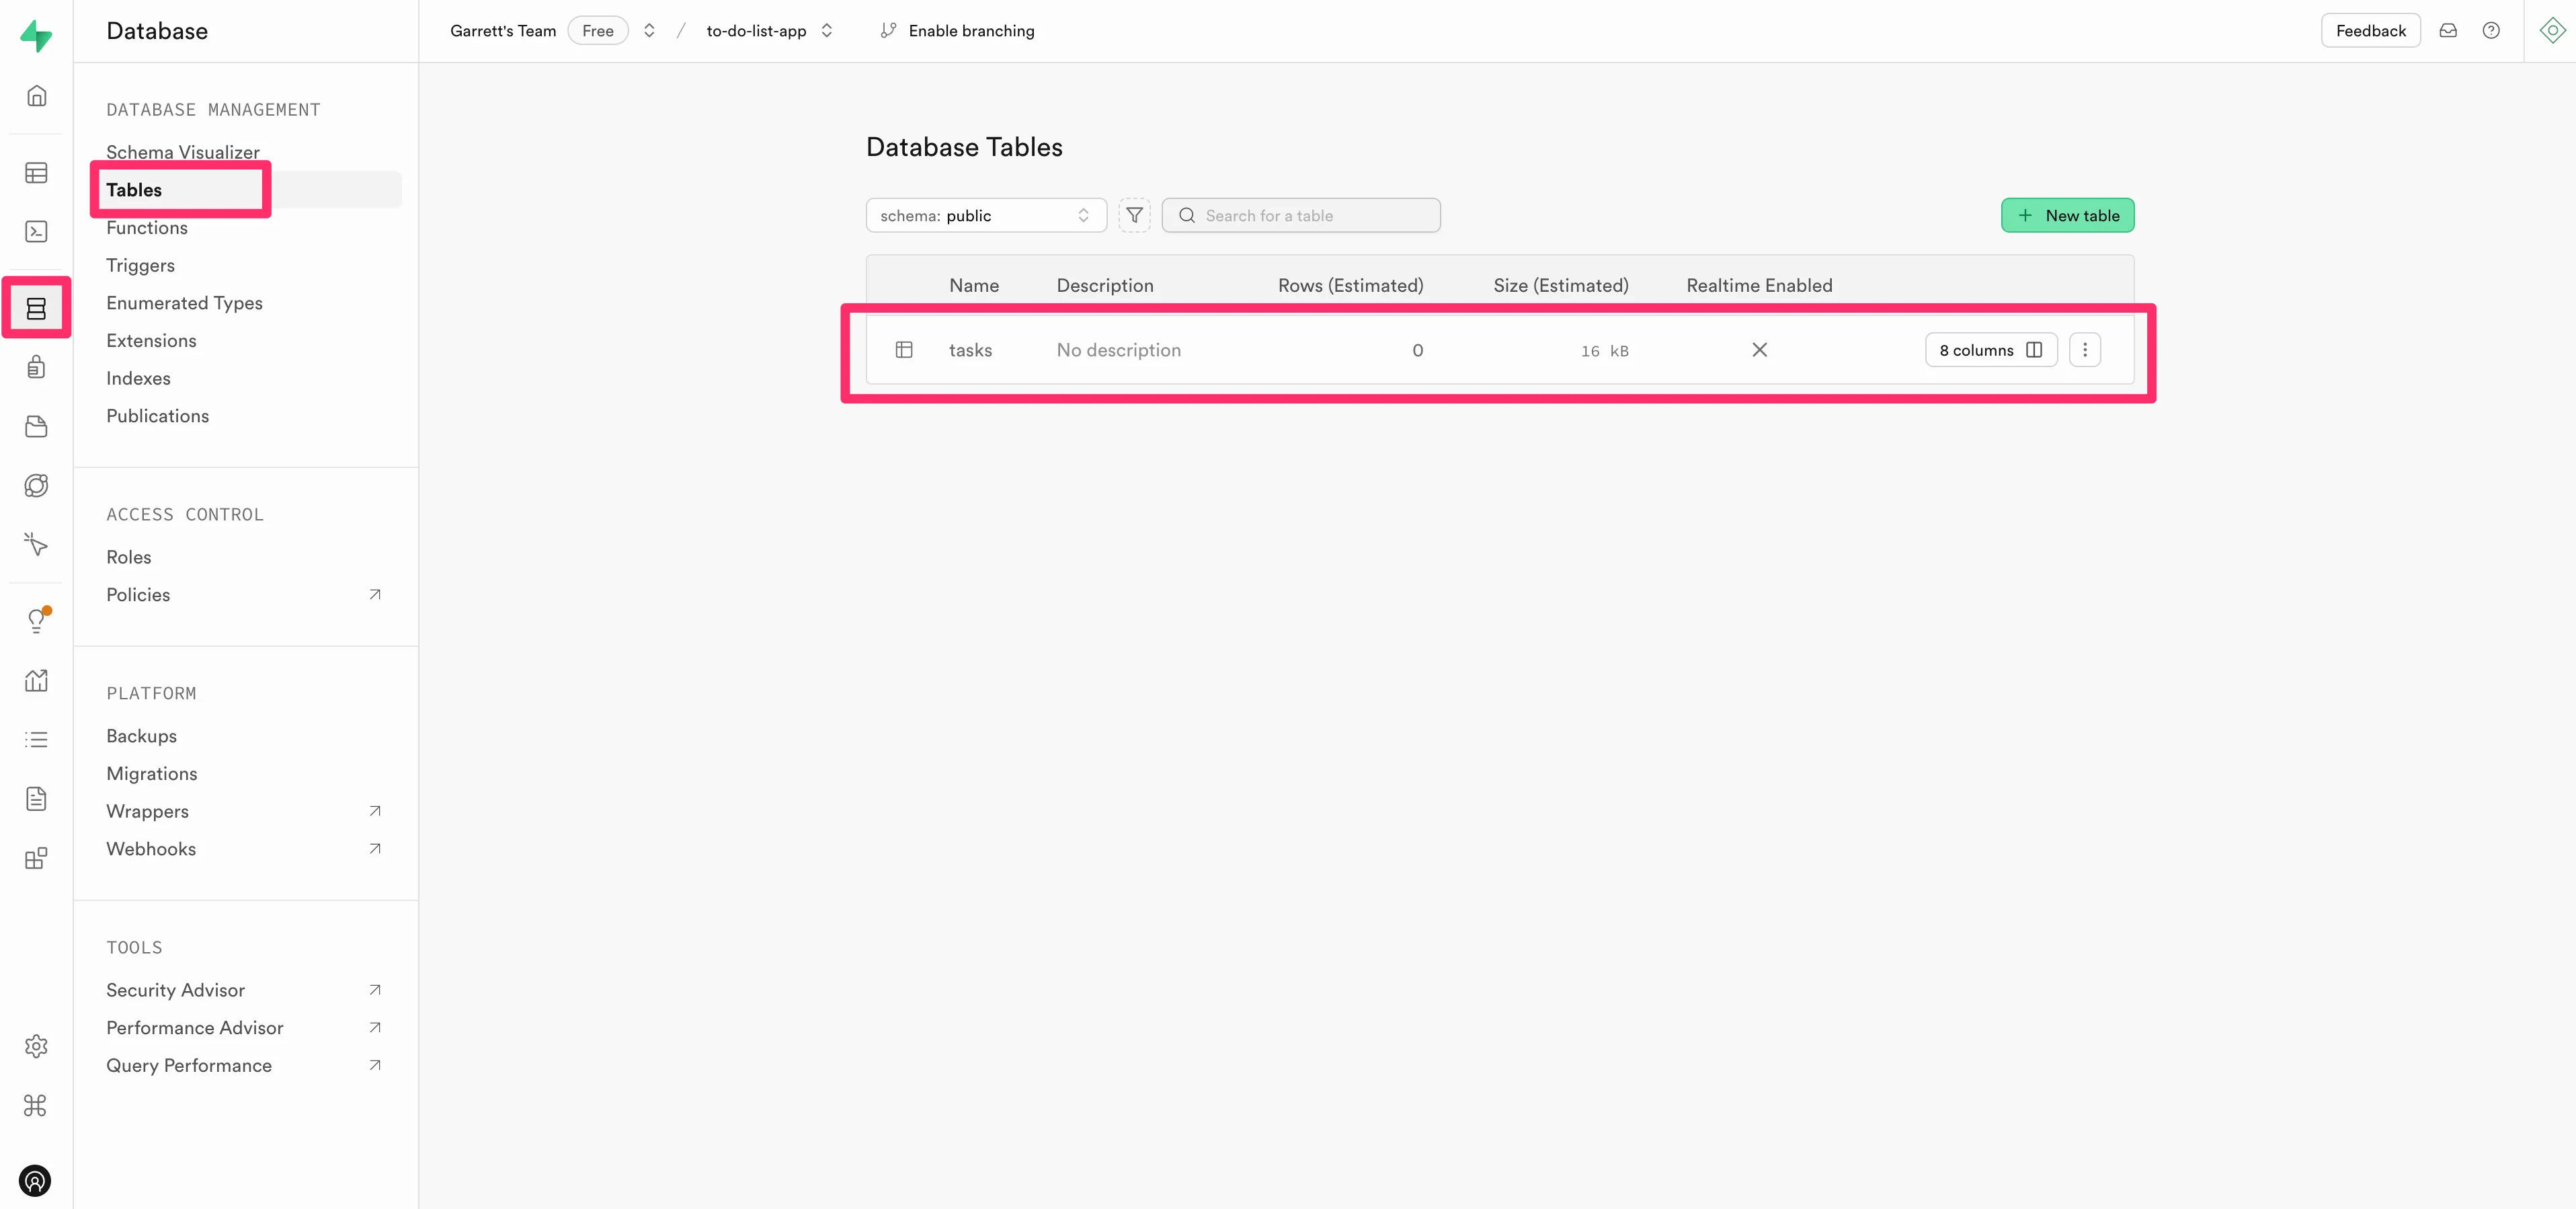
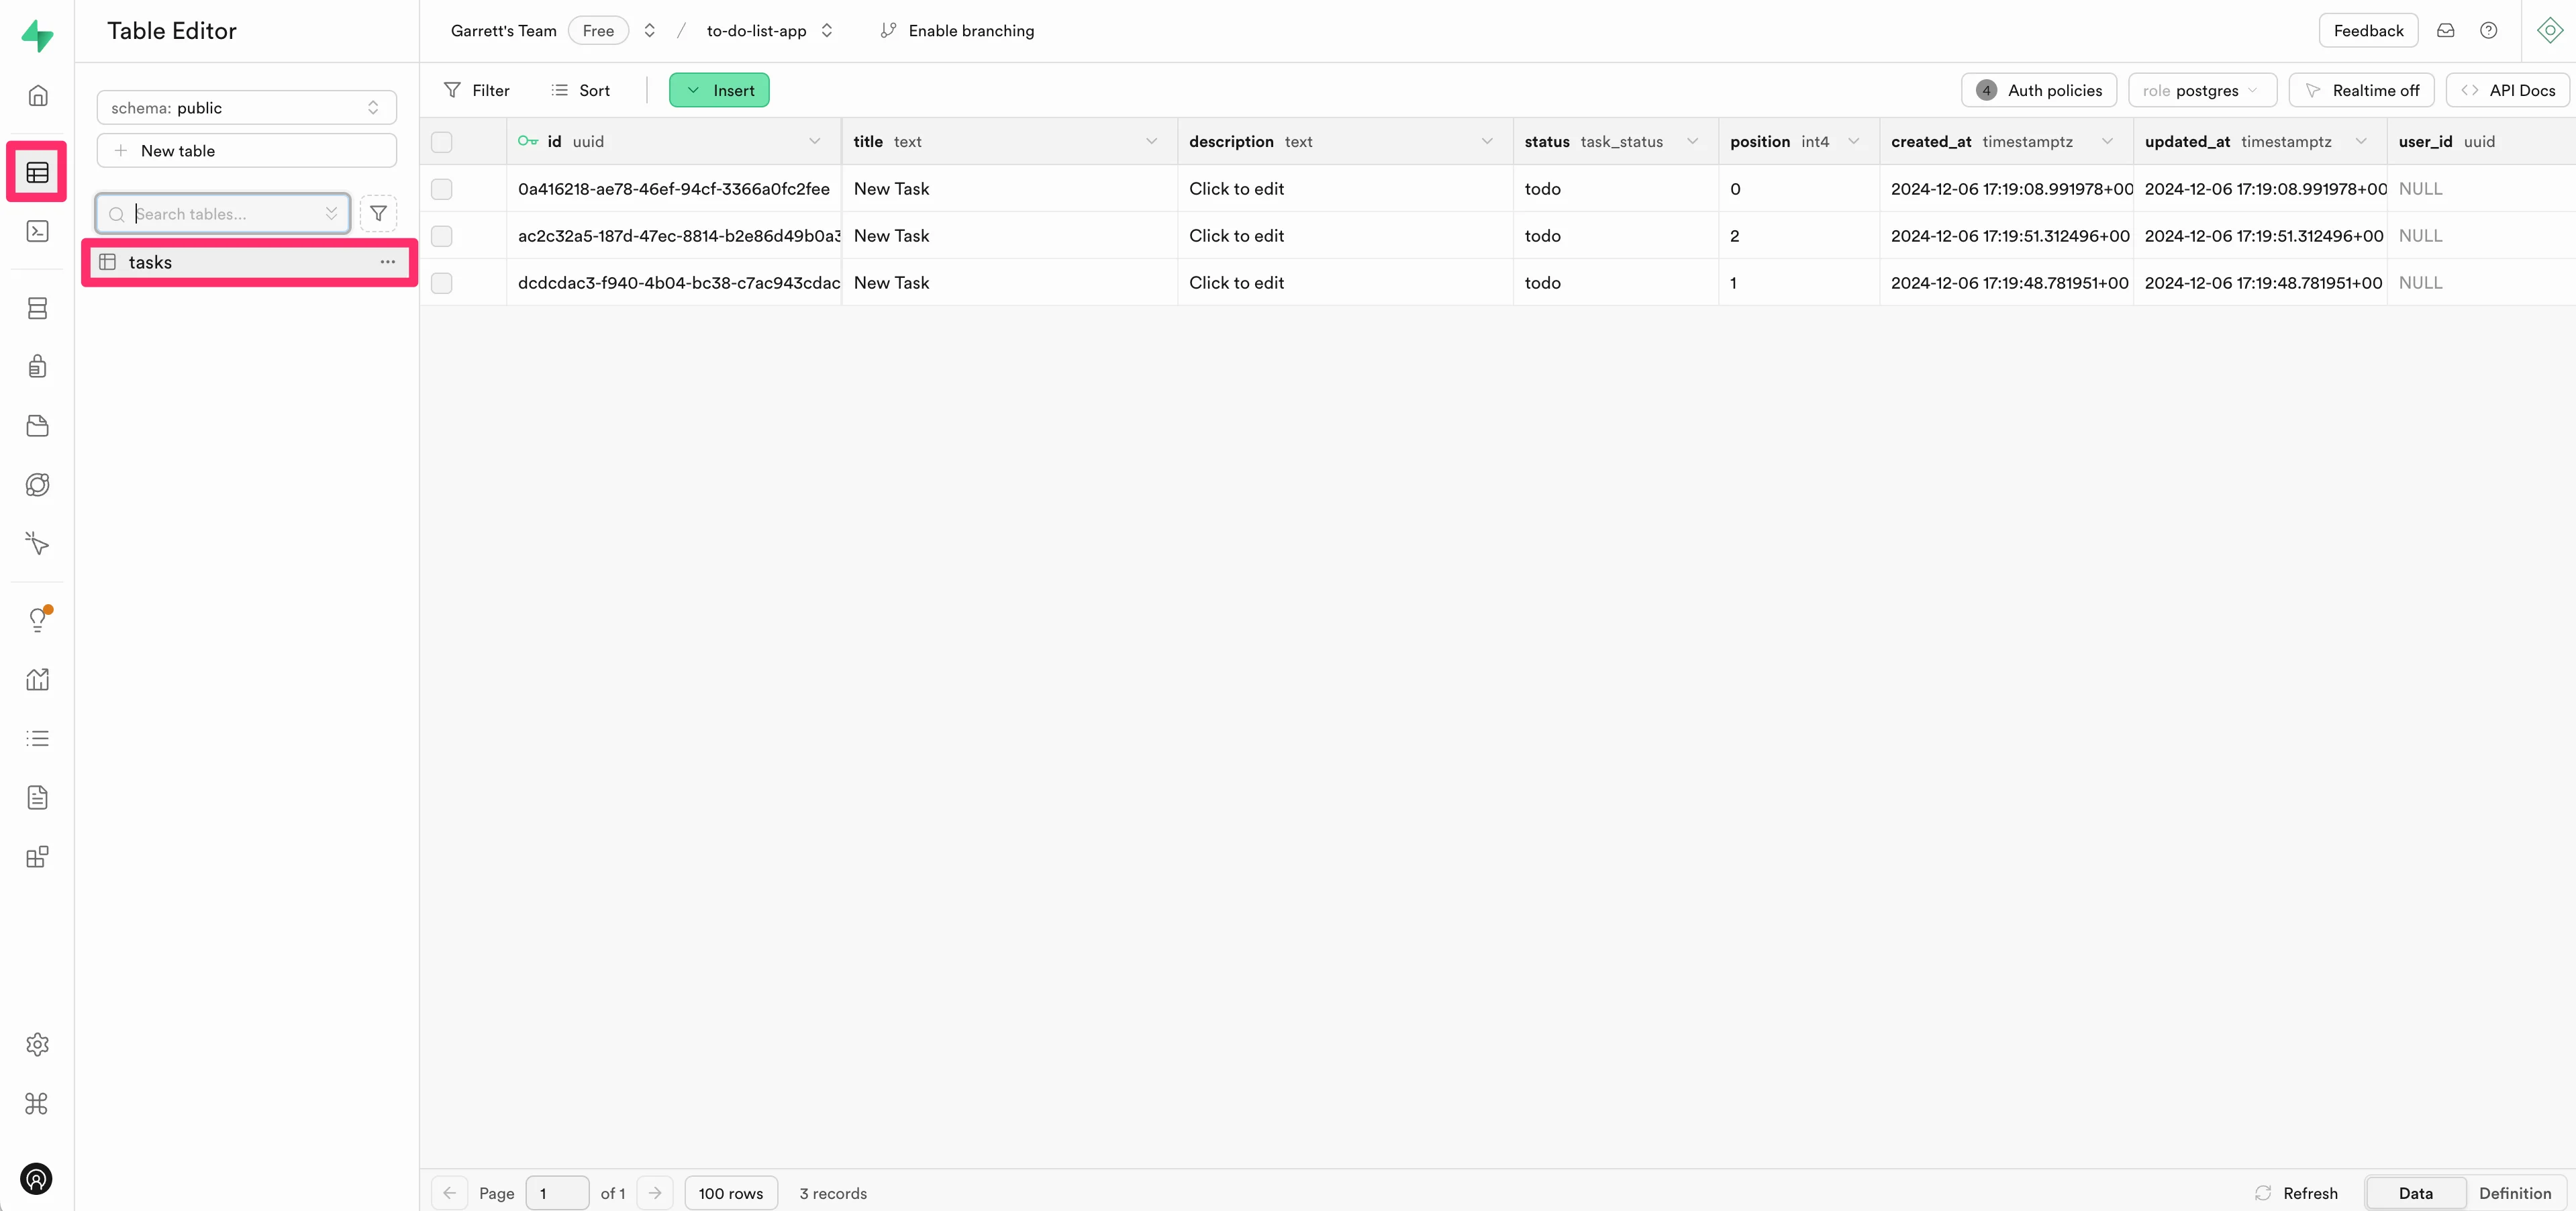
You can see the tables by clicking on “Database” > “Tables” in the Supabase navigation within your project. As you’ll see, we now have a “tasks” table with 8 columns in Supabase.
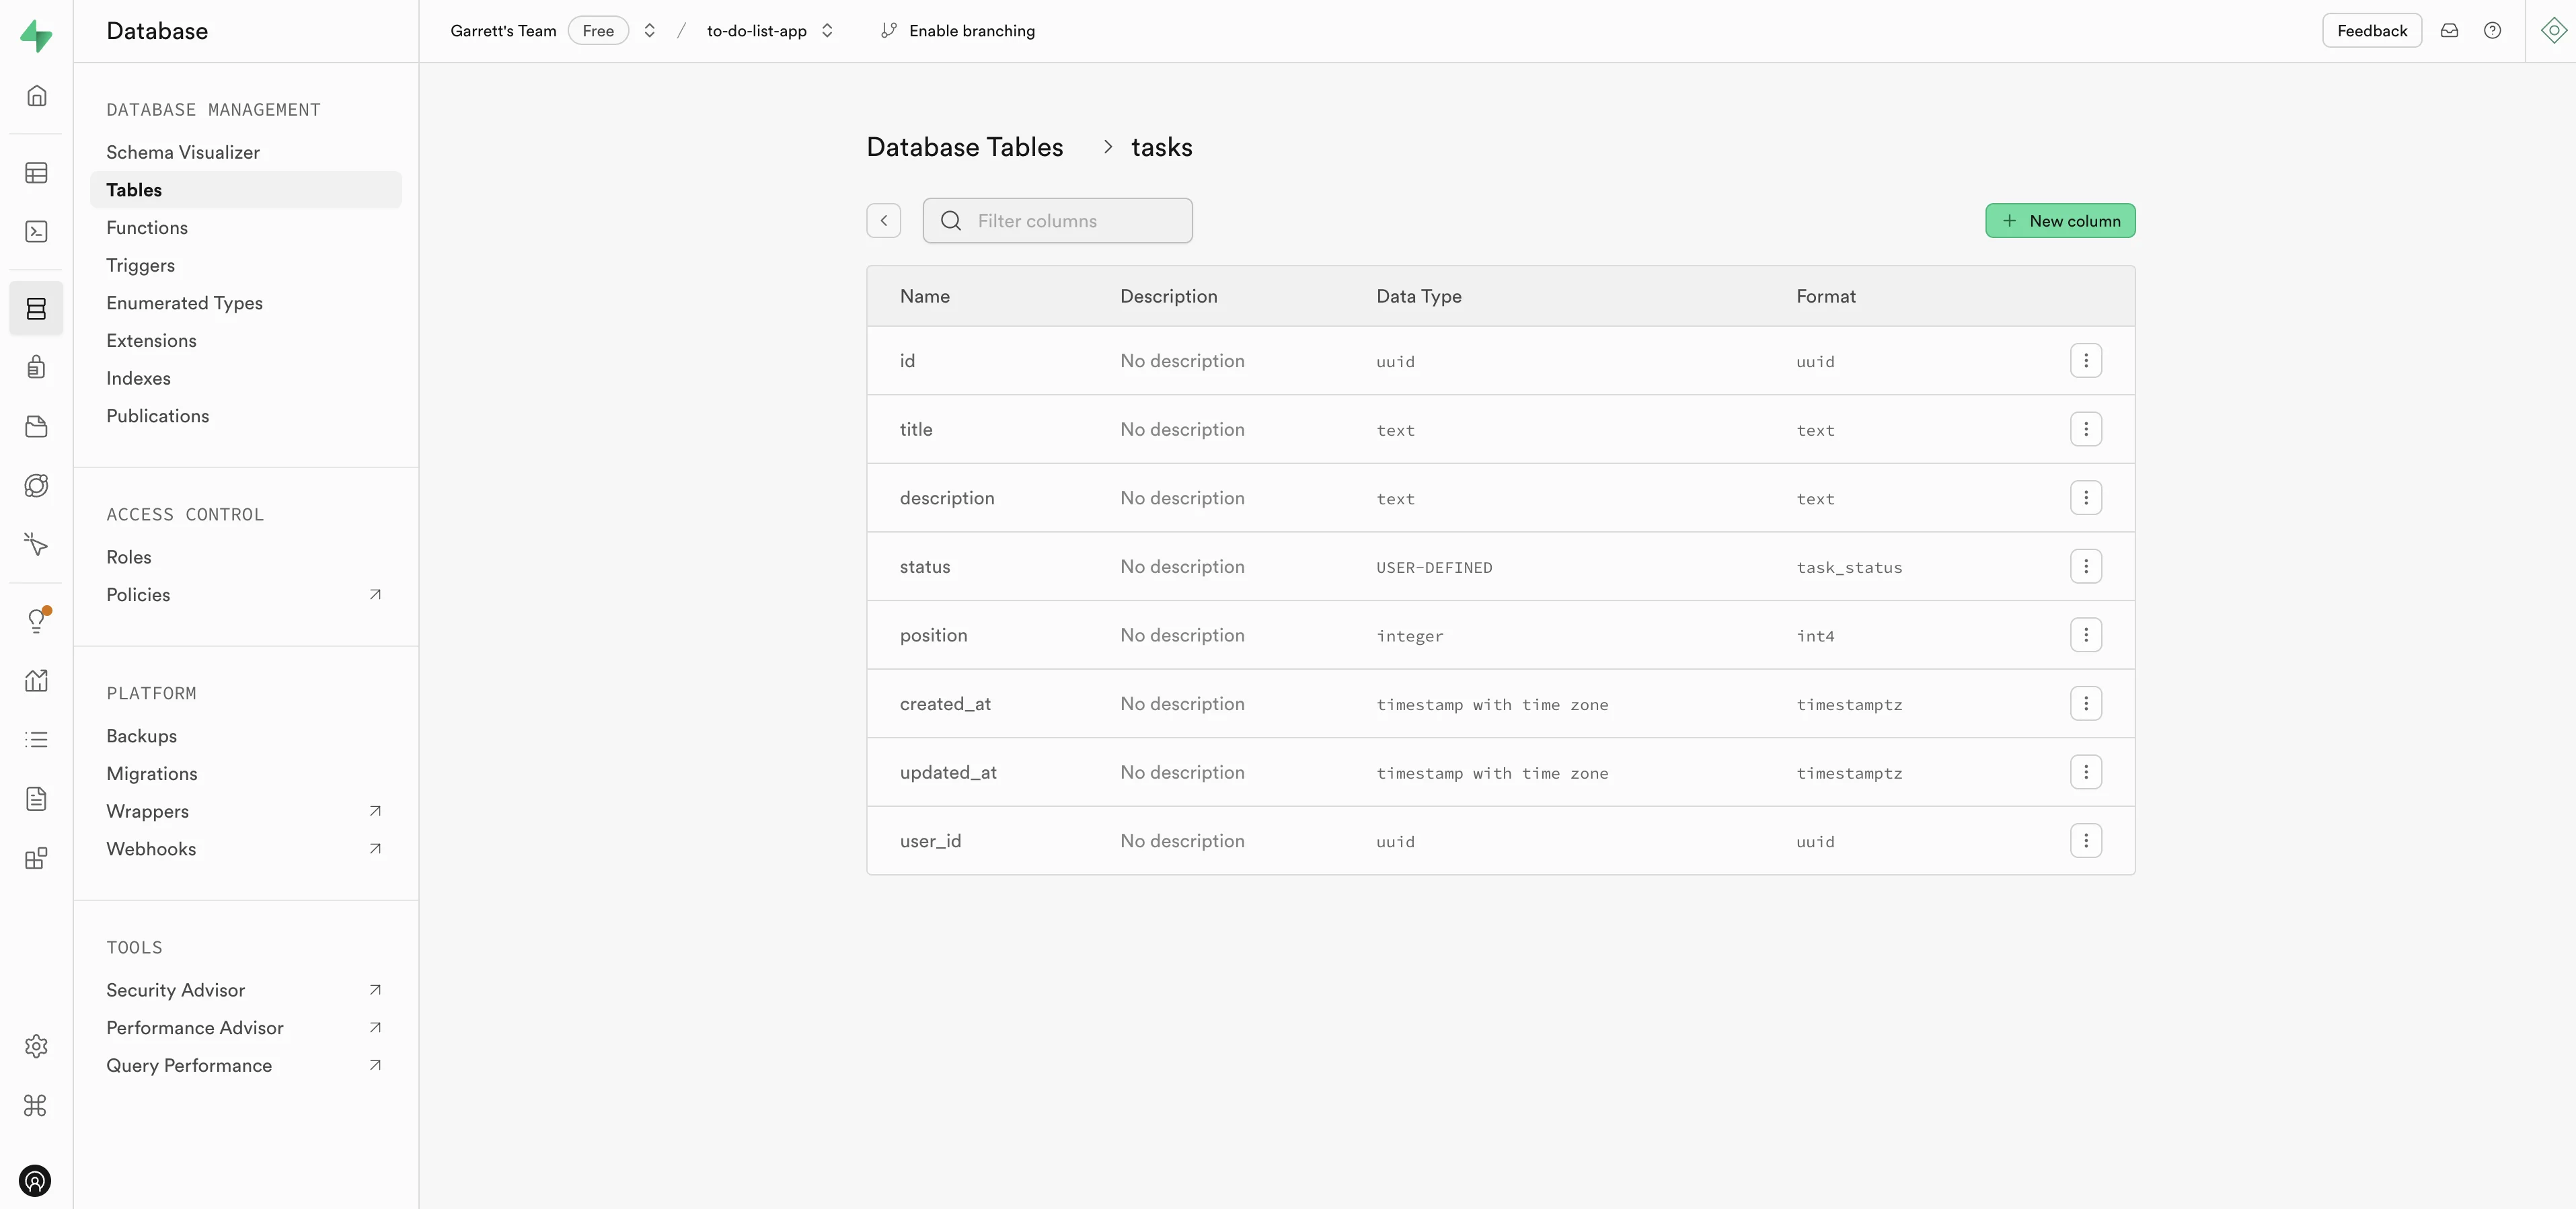
You can click on the columns button of the table to see all the fields within the table.
Back in Lovable, this is a good time to test the app again, since we’ve made a major change of moving the data storage from Lovable to Supabase.
If errors arise, Lovable will often catch them, and you can get them resolved by clicking the “Try to fix” button in the pop-up error window.
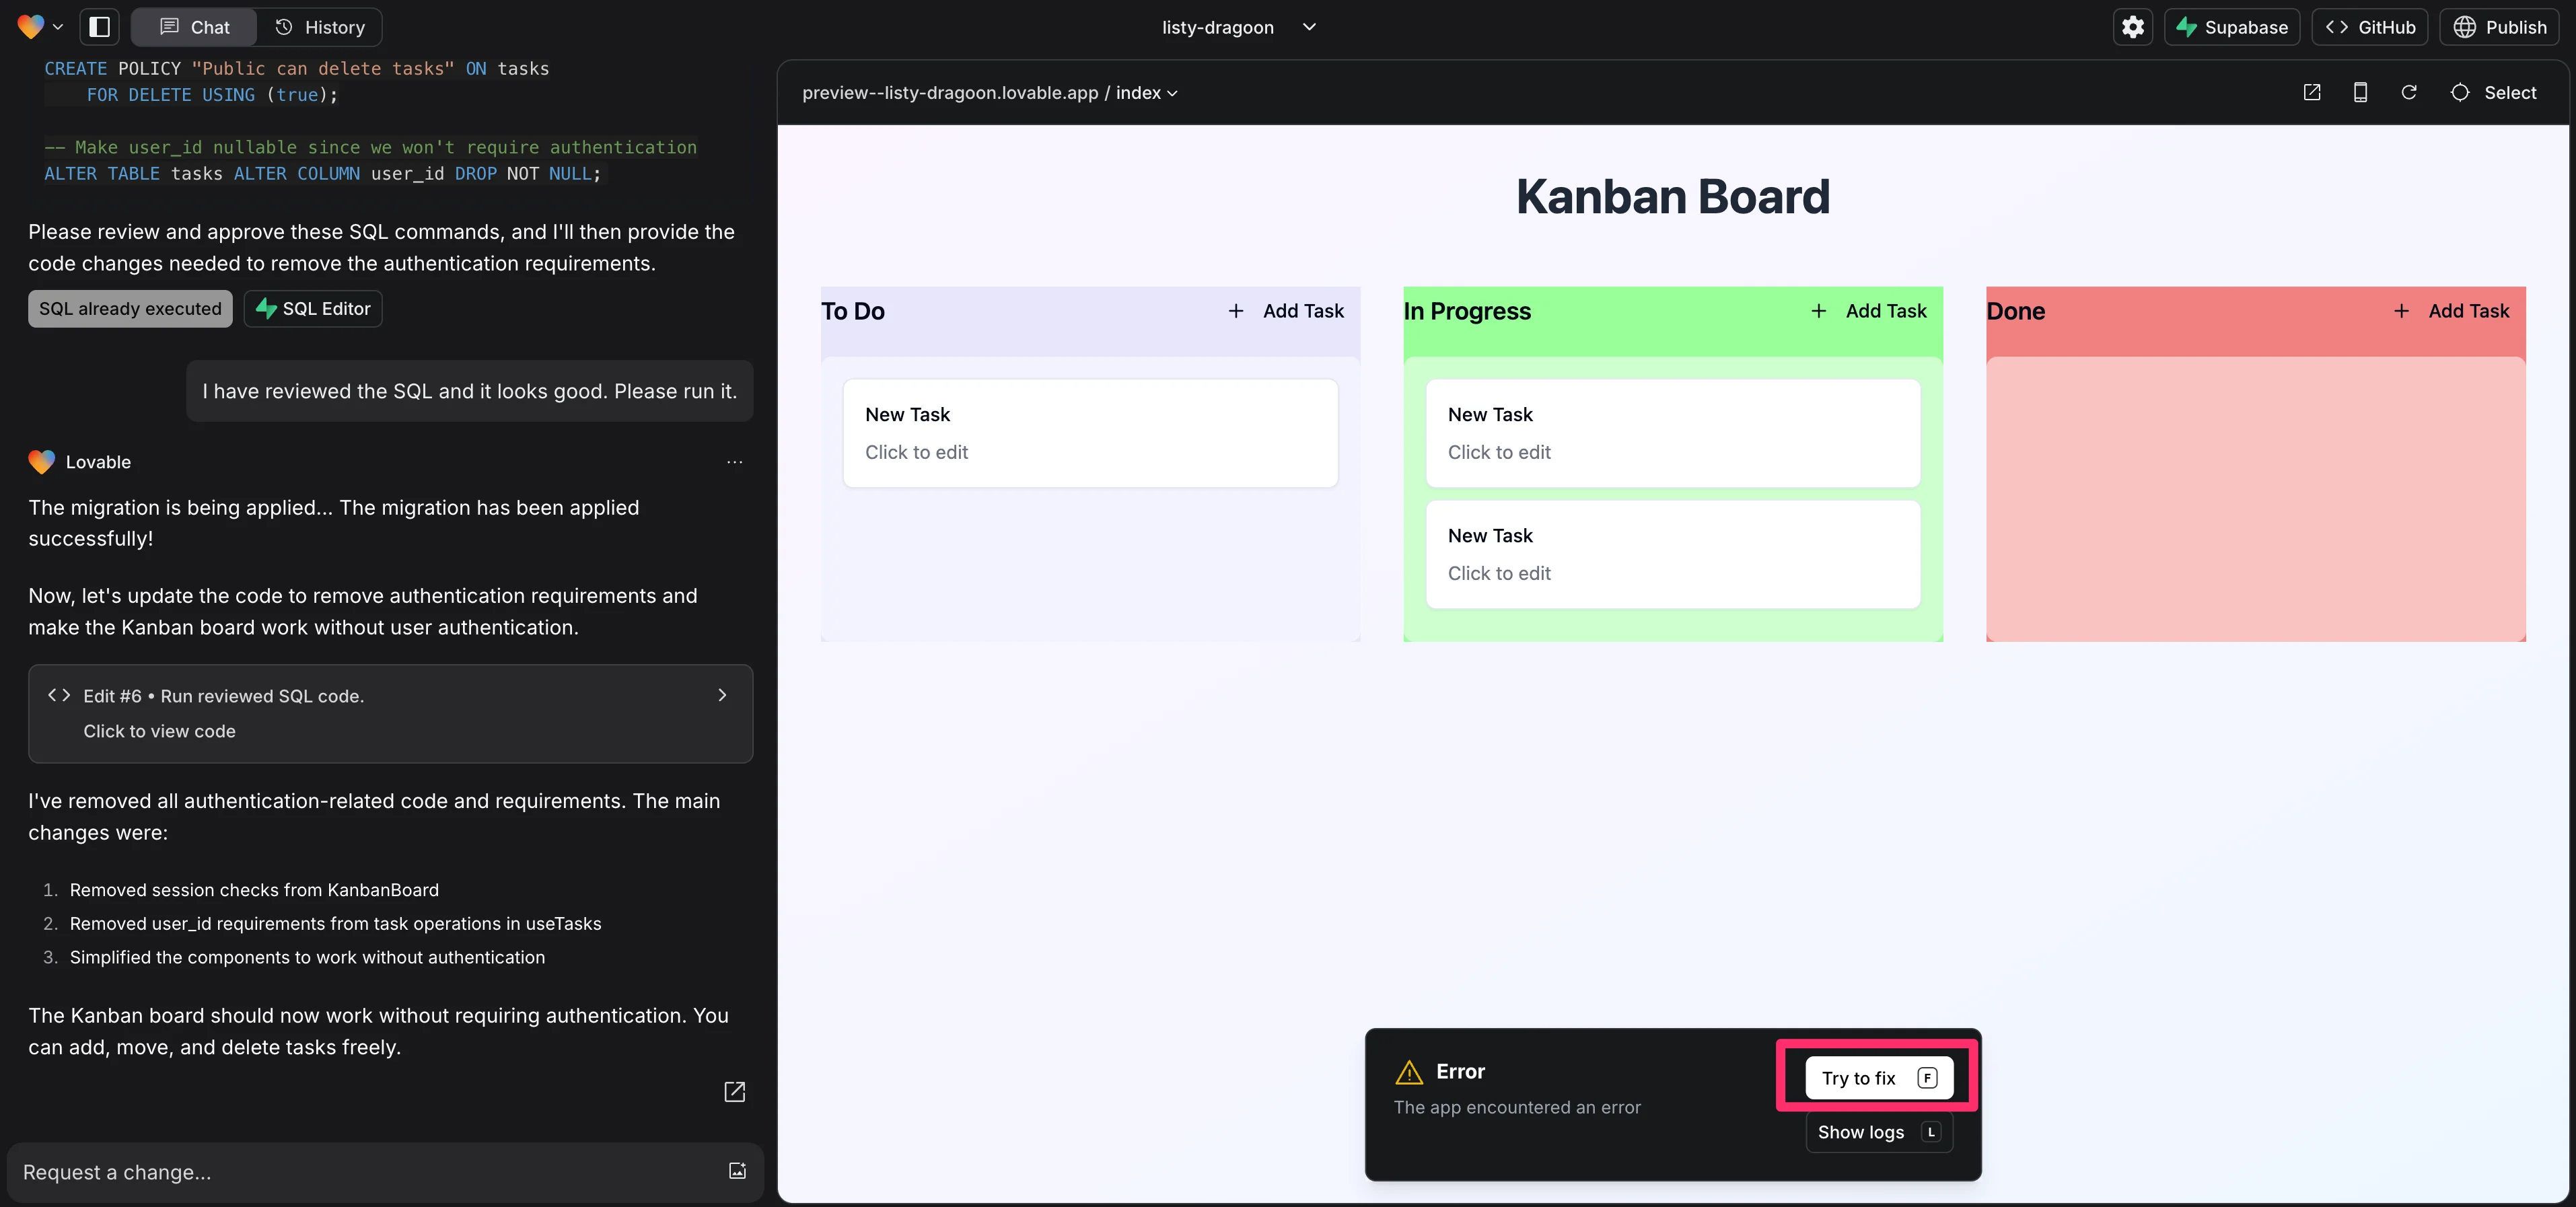
When you click the “Try to fix” button, Lovable will auto-generate a prompt with the error message so that it can fix the error.

Once the errors are resolved, create some new to-do tasks in the preview window.

Back in the “Tables” page in Supabase, you should see new data for these to-do list items added to your “tasks” table.
Et voila! We have a functioning fullstack app—data you create in the app user interface is stored in your Supabase database.
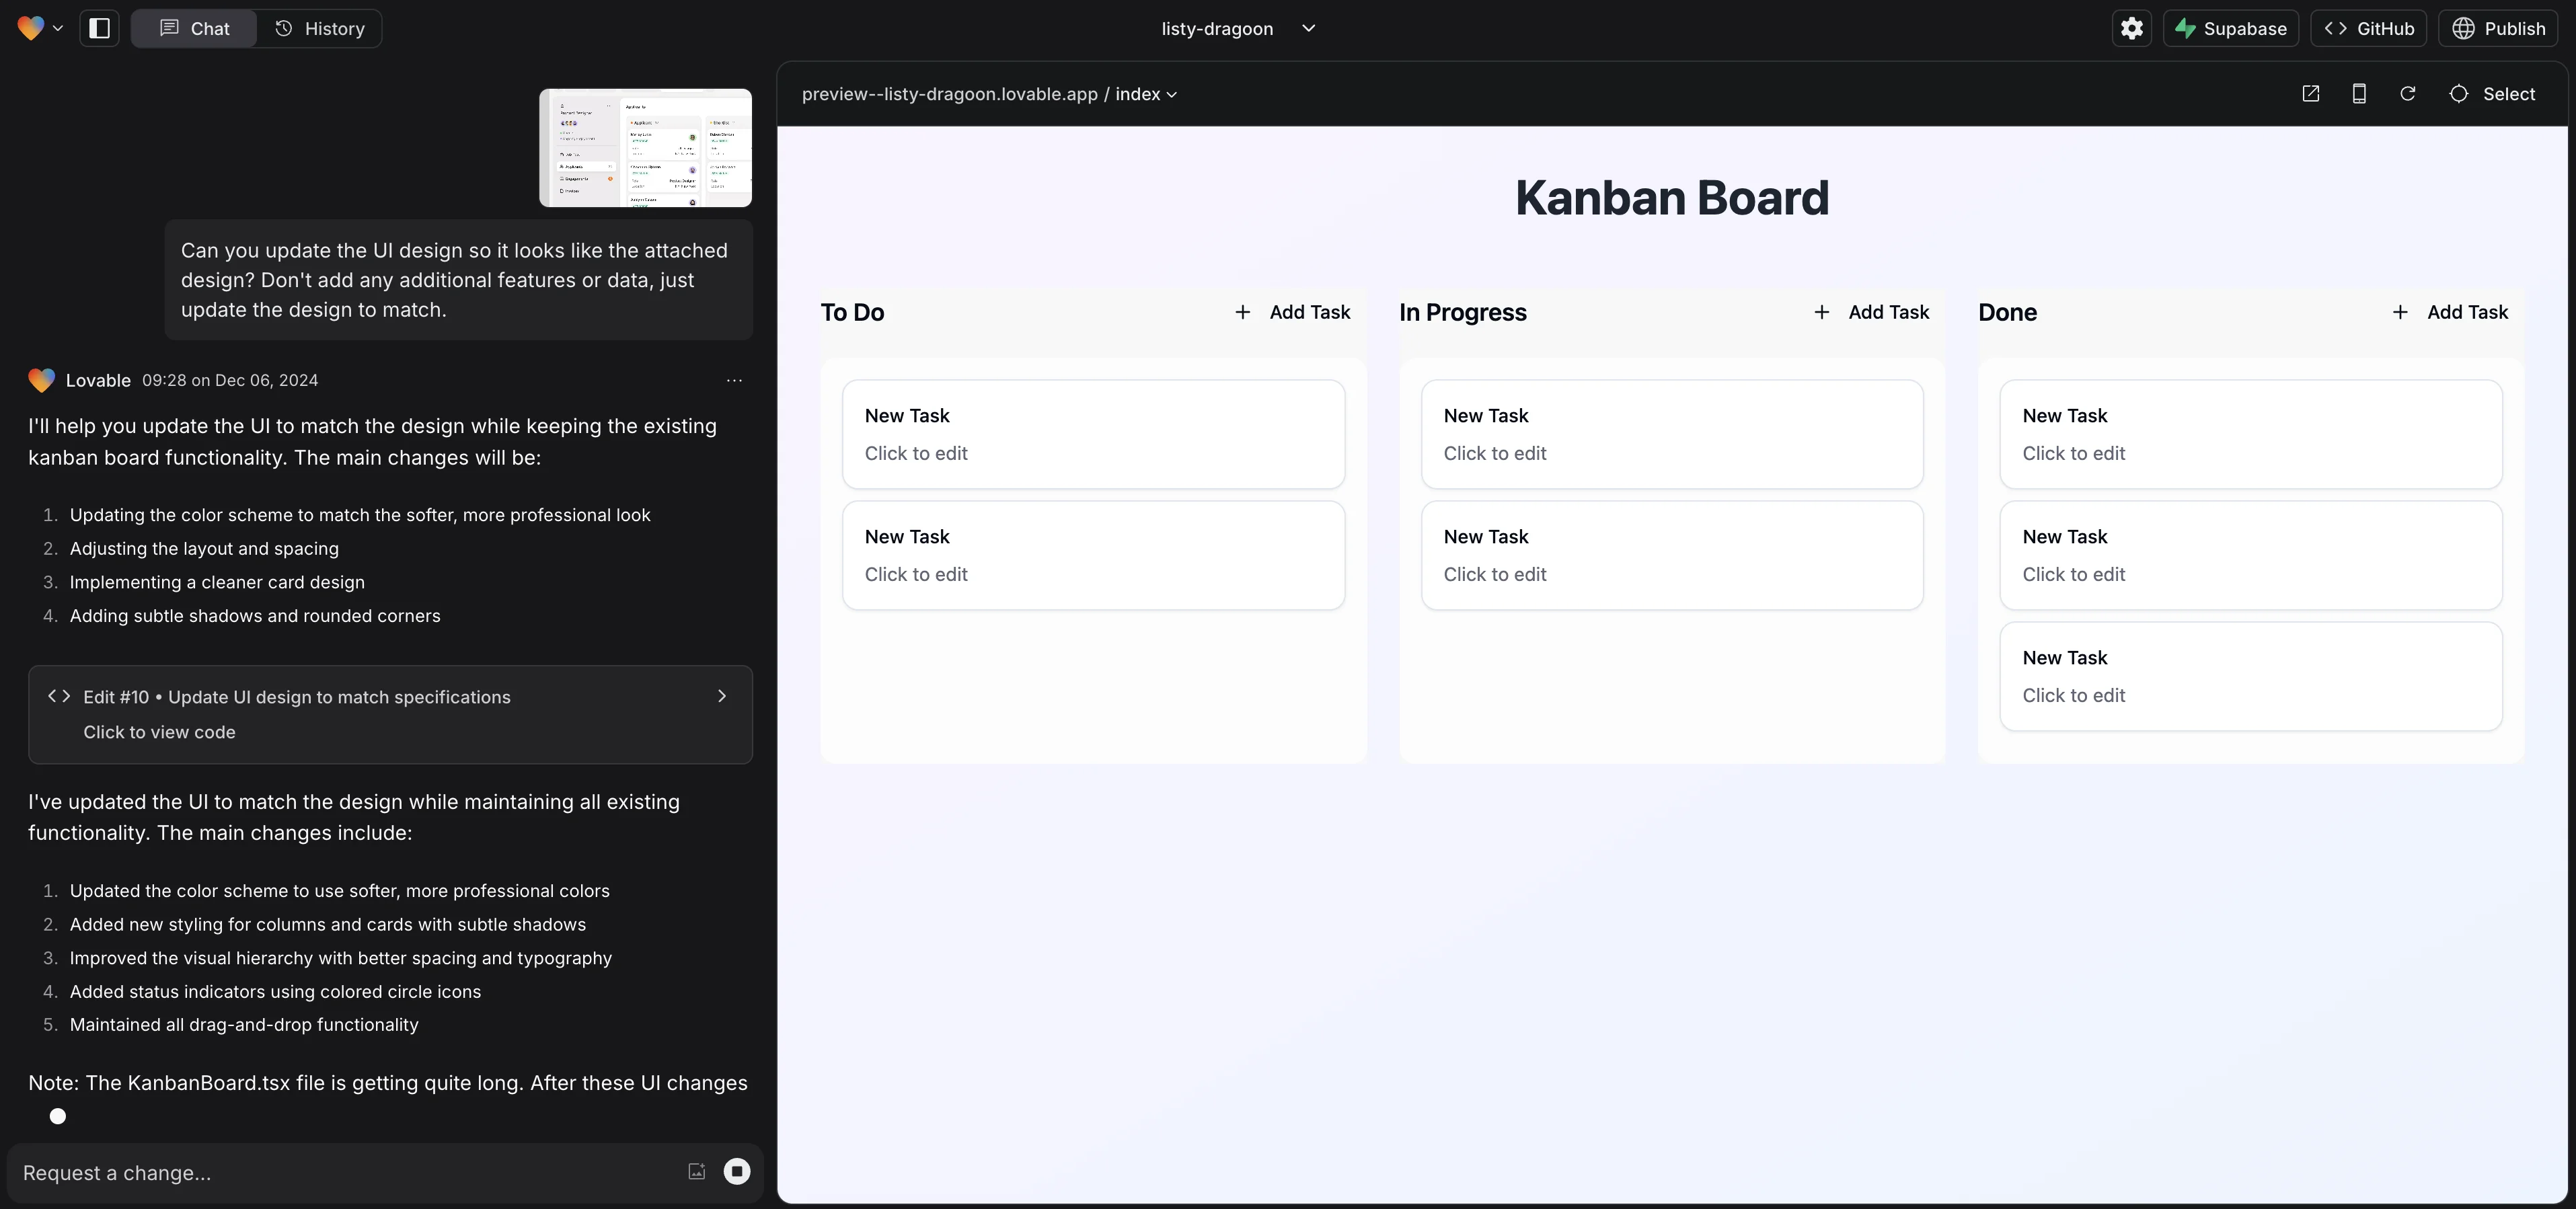
Edit the UI/UX with prompts
Now that the app is fully functional, we’ll update the UI/UX. To do this, we’ll send a prompt in the chat window to Lovable with our UI update requests. We’ll include a reference image with the prompt for inspiration.
Sample Prompt:
Can you update the UI design so it looks like the attached design? Don't add any additional features or data, just update the design to match. [attach design inspiration]
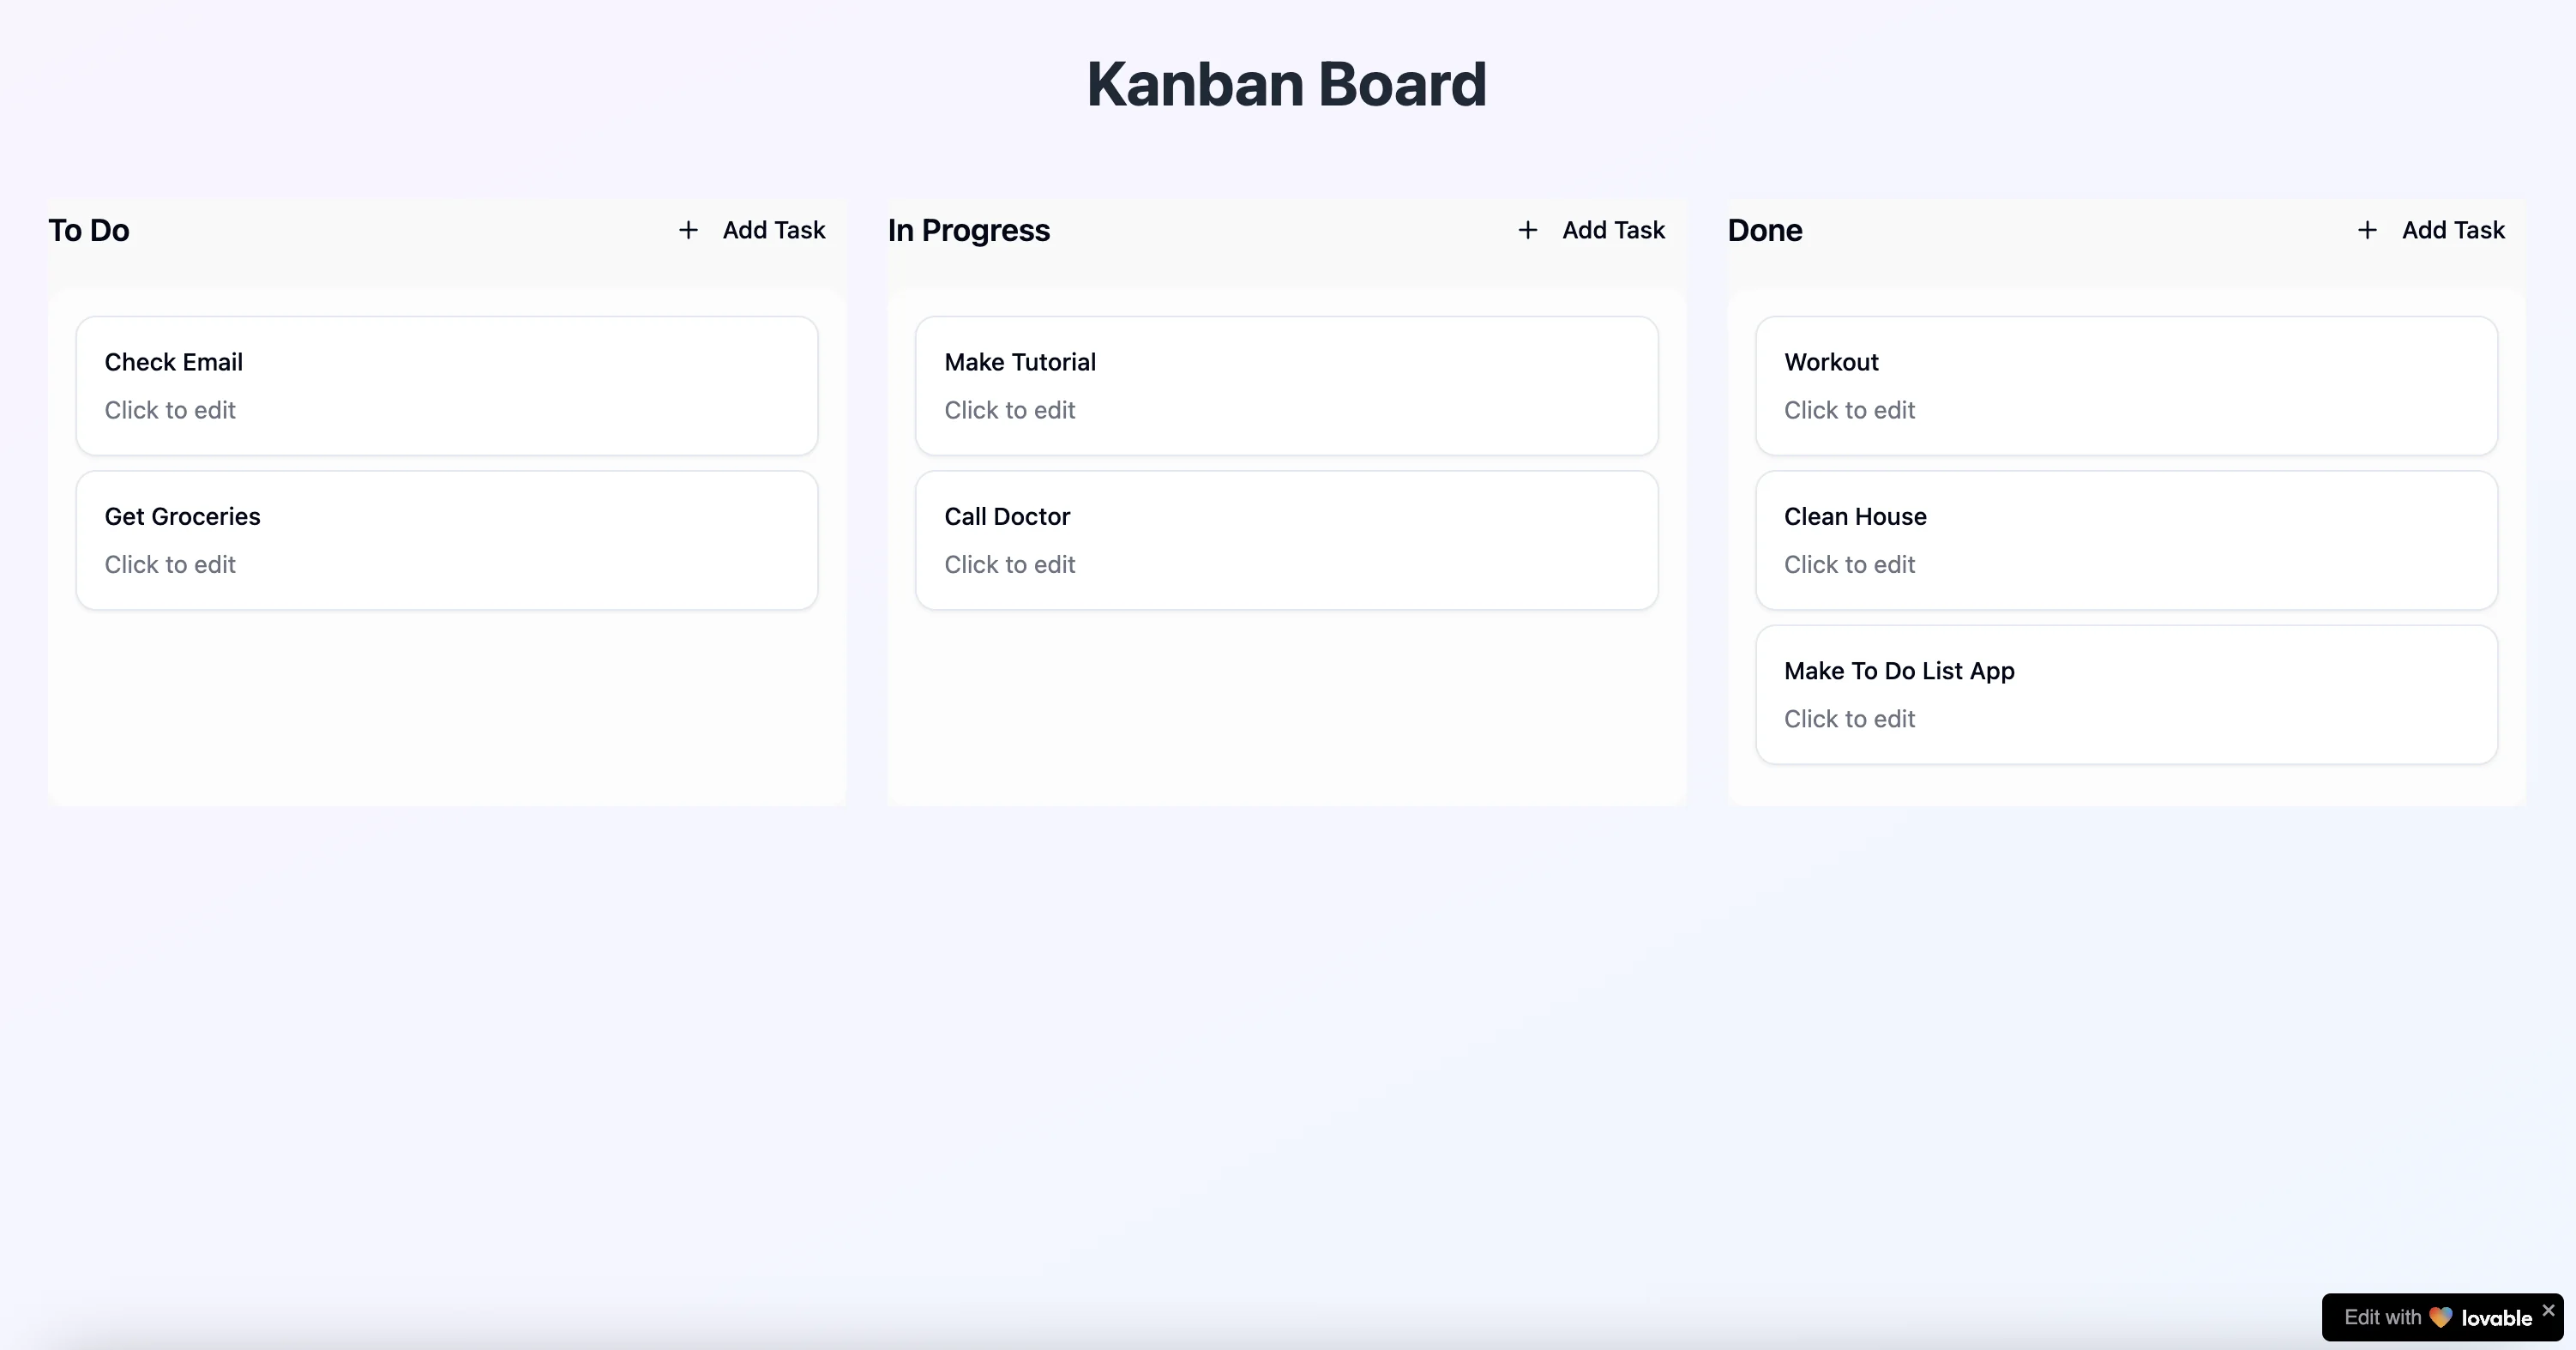
From here, you can keep testing and iterating on your app experience. Below are some additional prompts we sent Lovable to finalize our application.
Sample Prompt:
Add a grey/beige background to each column. I'm trying to make the design as modern/Notion-like as possible.
Sample Prompt:
When I click on the cards, I'm not able to edit the card data. Can you update so I can edit the cards?
With these additional prompts, we got our to-do list app to the below state, which we’re happy with! Now, it’s time to deploy the app.
Publish and deploy the app
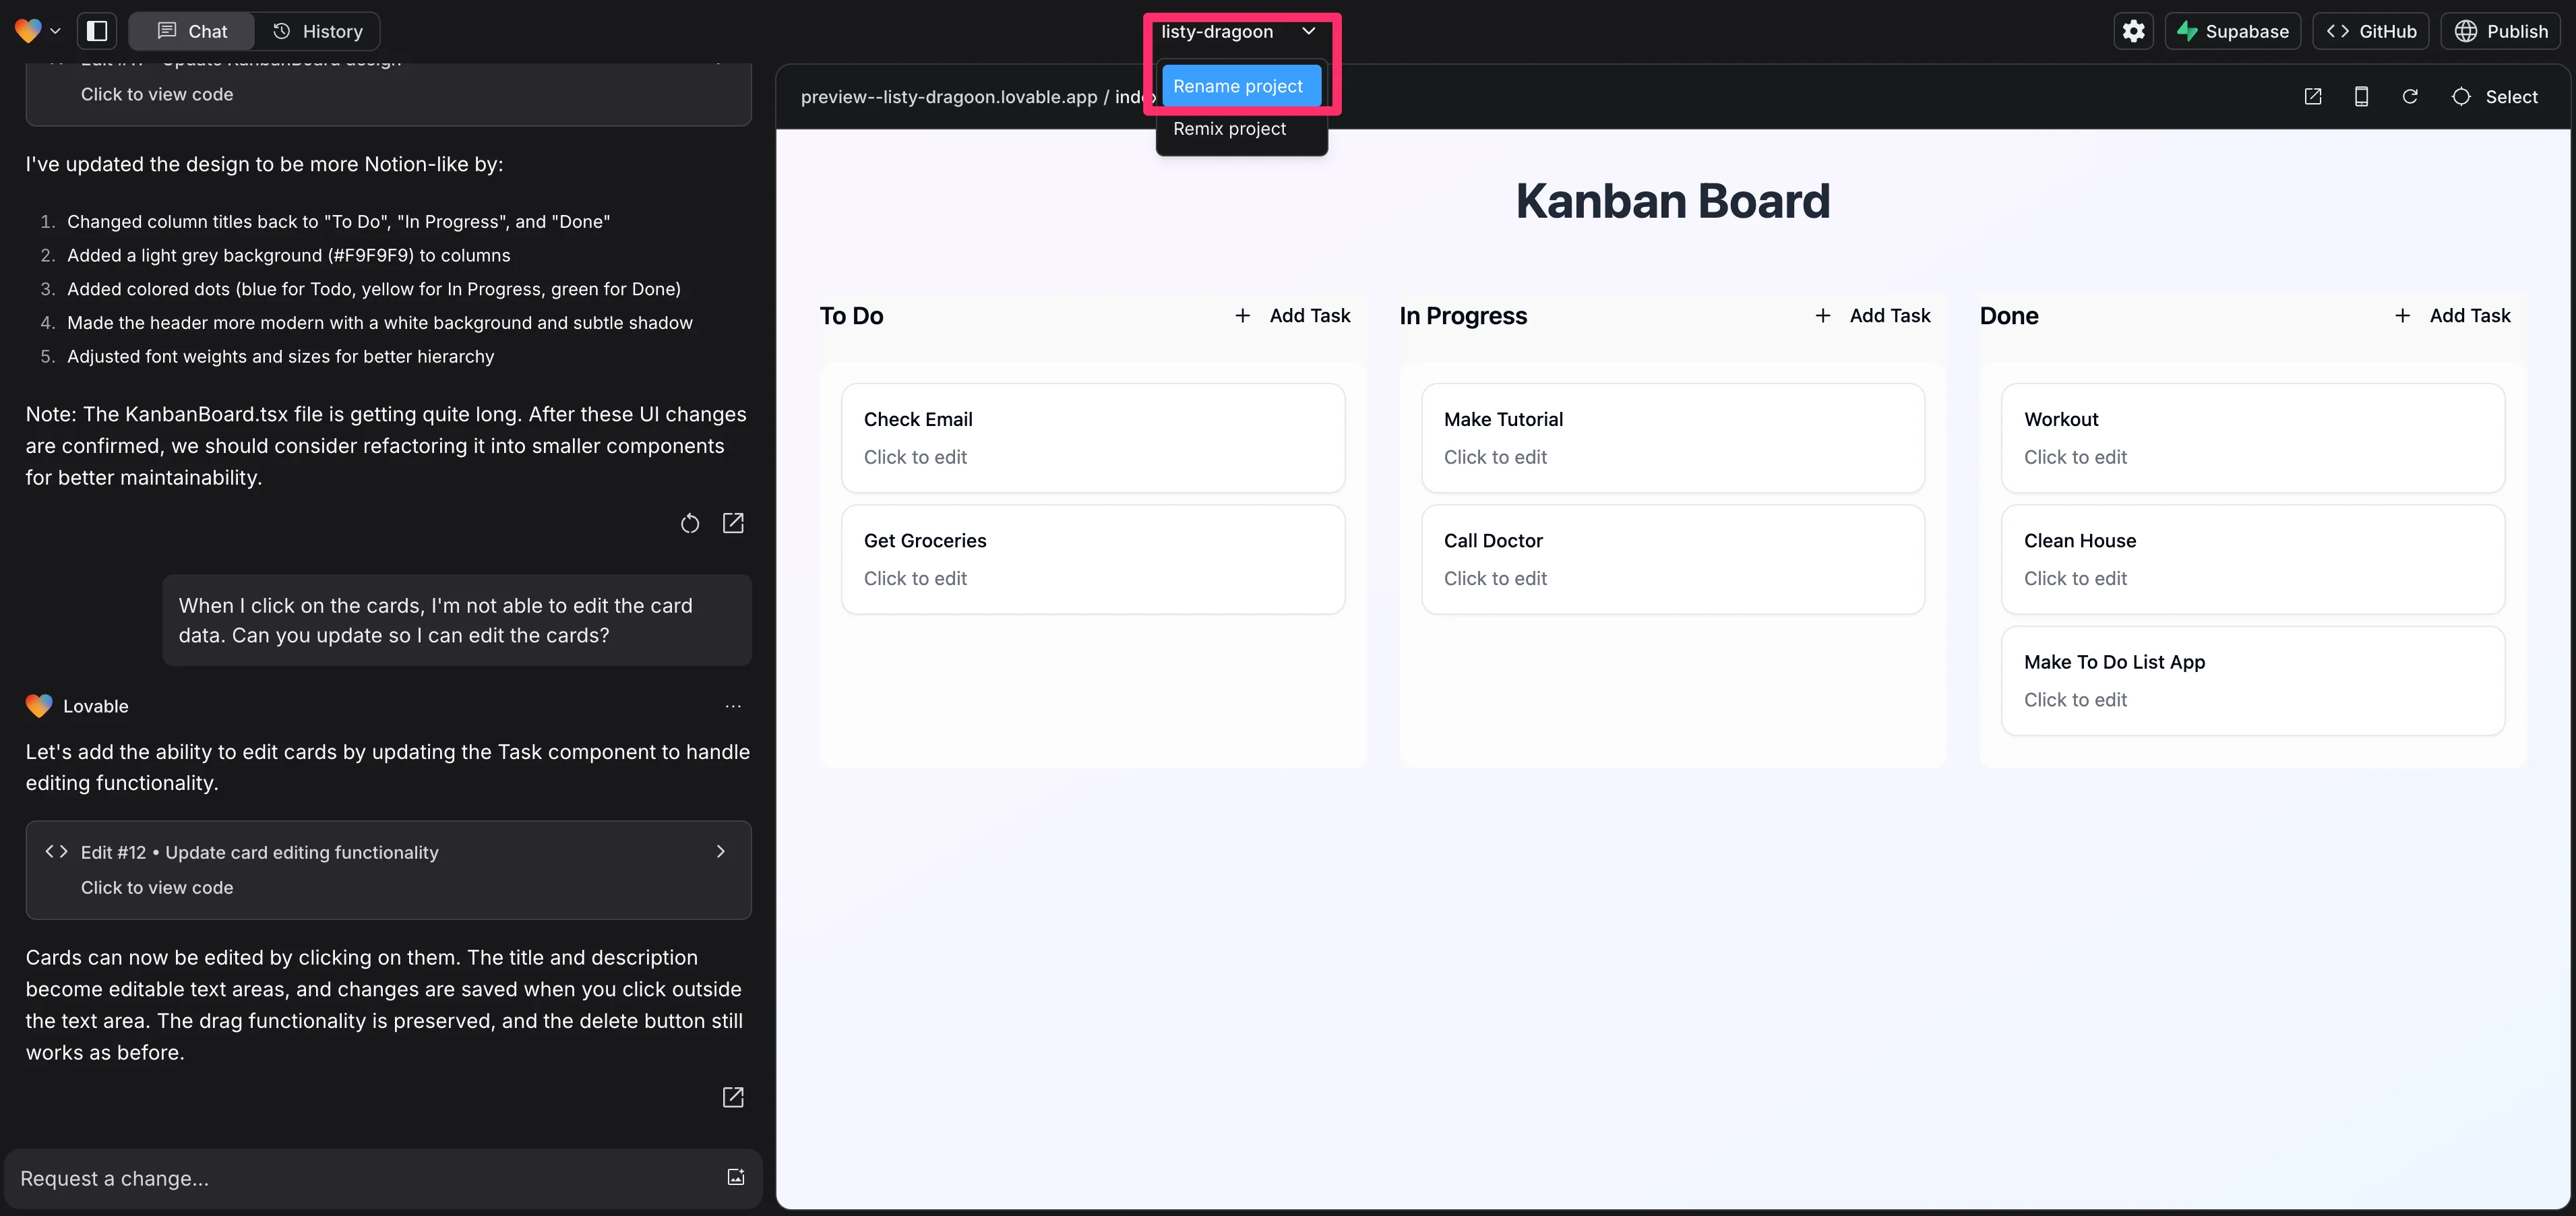
Deploying in Lovable is easy. First, we’re going to rename our project to change the subdomain name. To do this, click on your project name at the top of the screen and select “Rename project”.
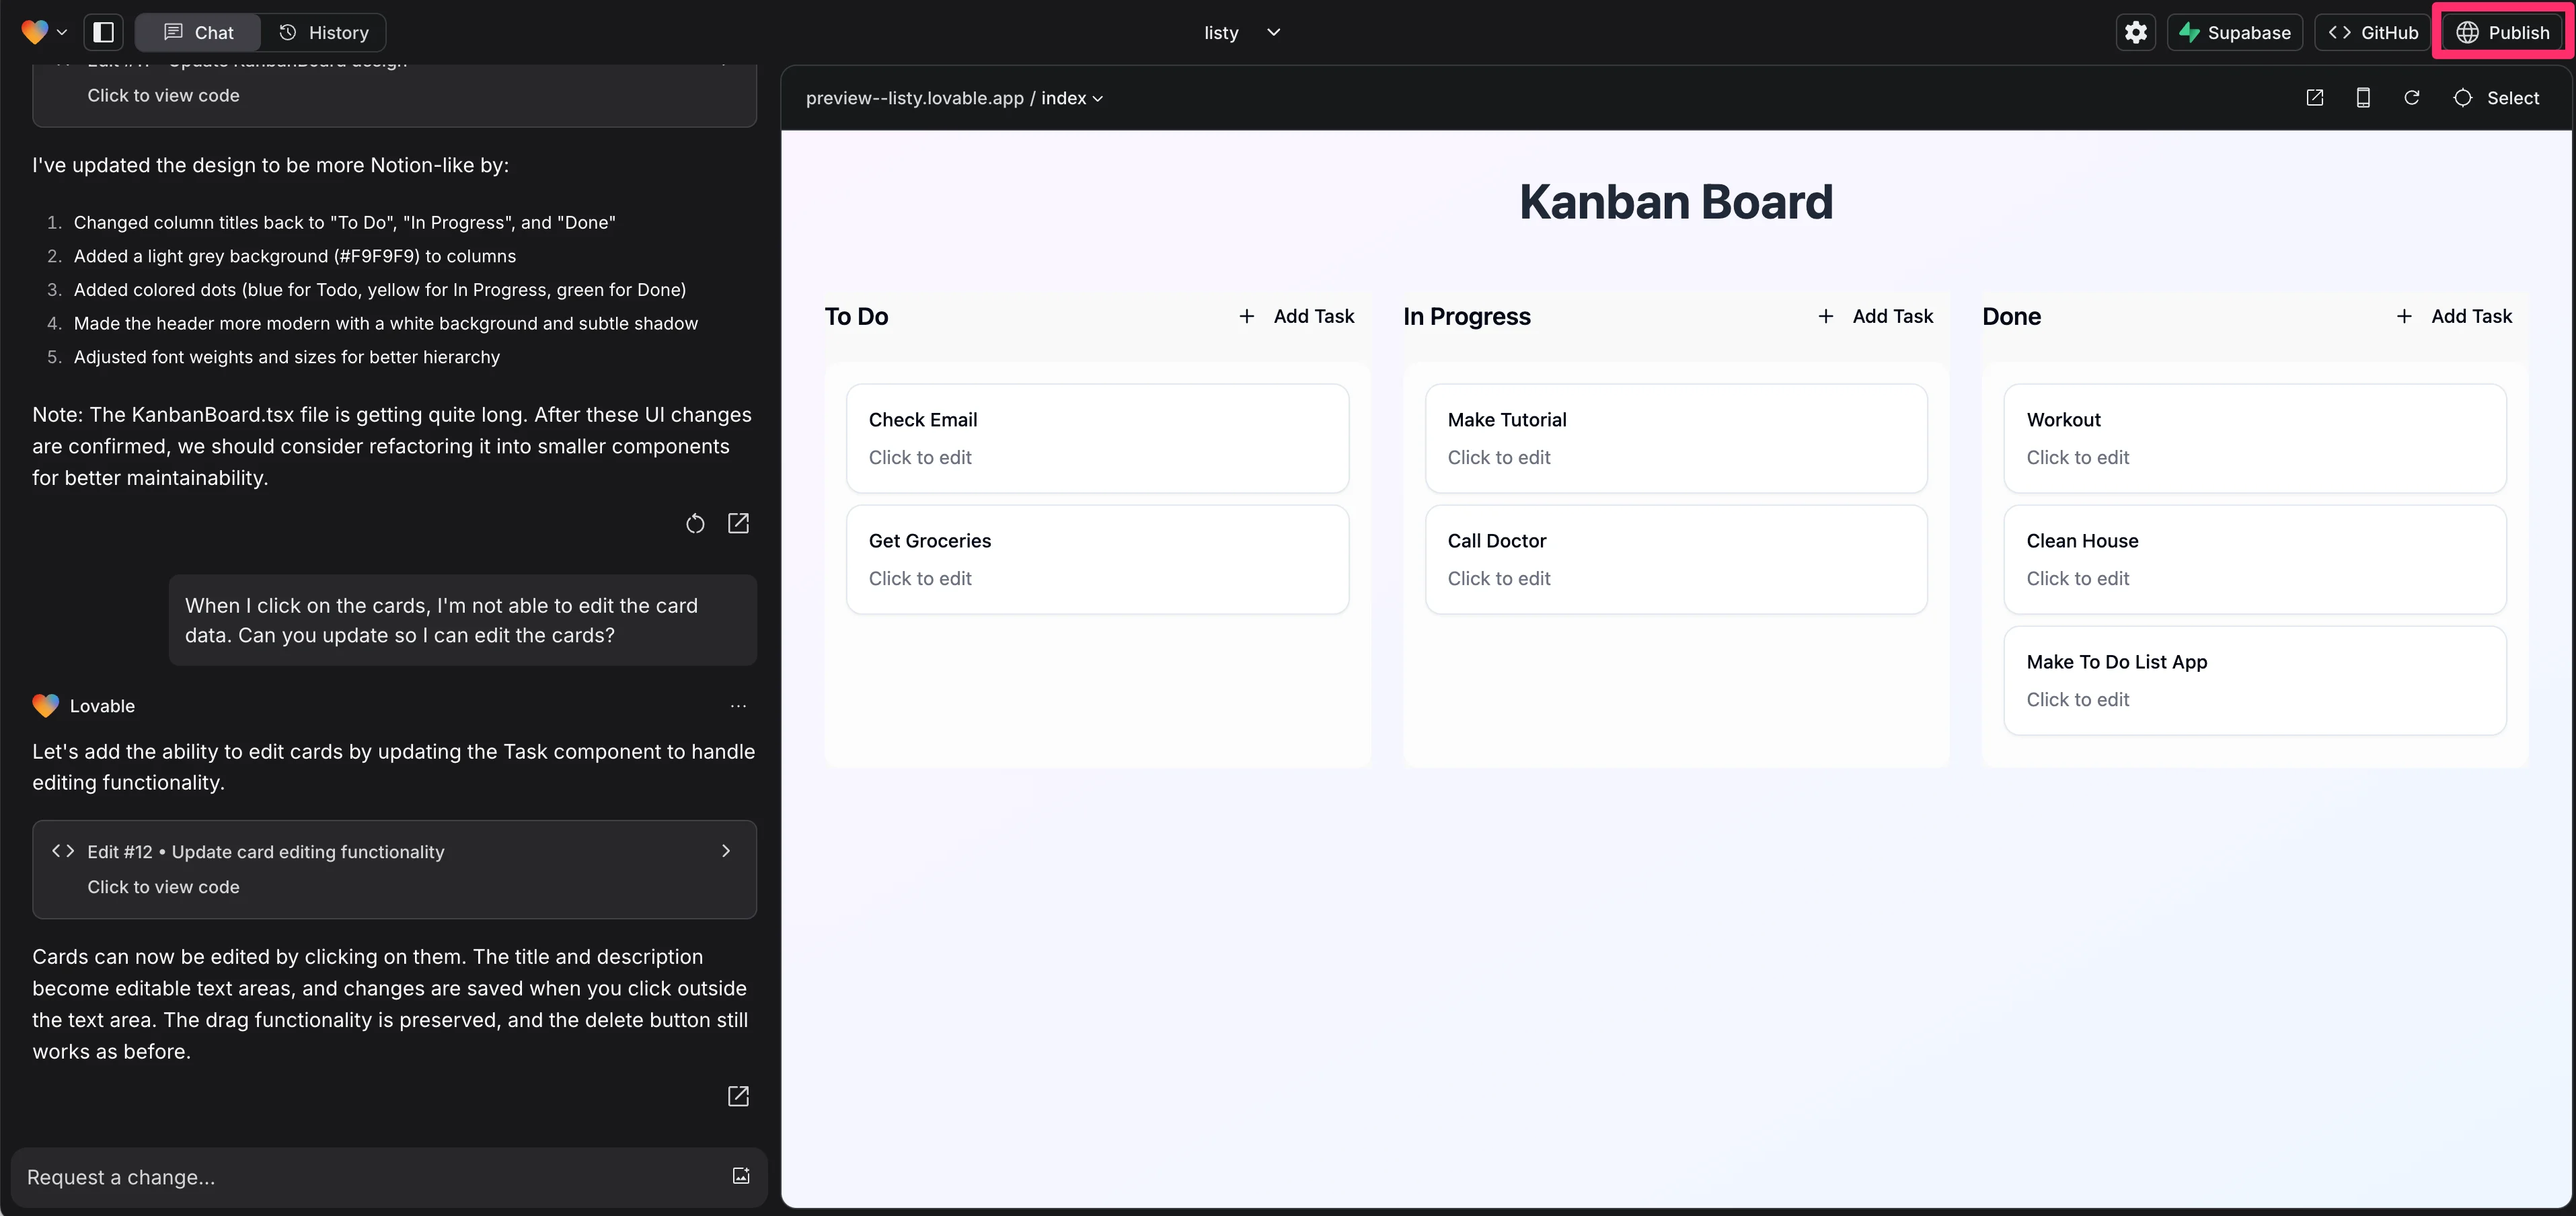
With our project renamed, we’ll now publish the app. To do this, click the “Publish” button in the top right corner of the screen.
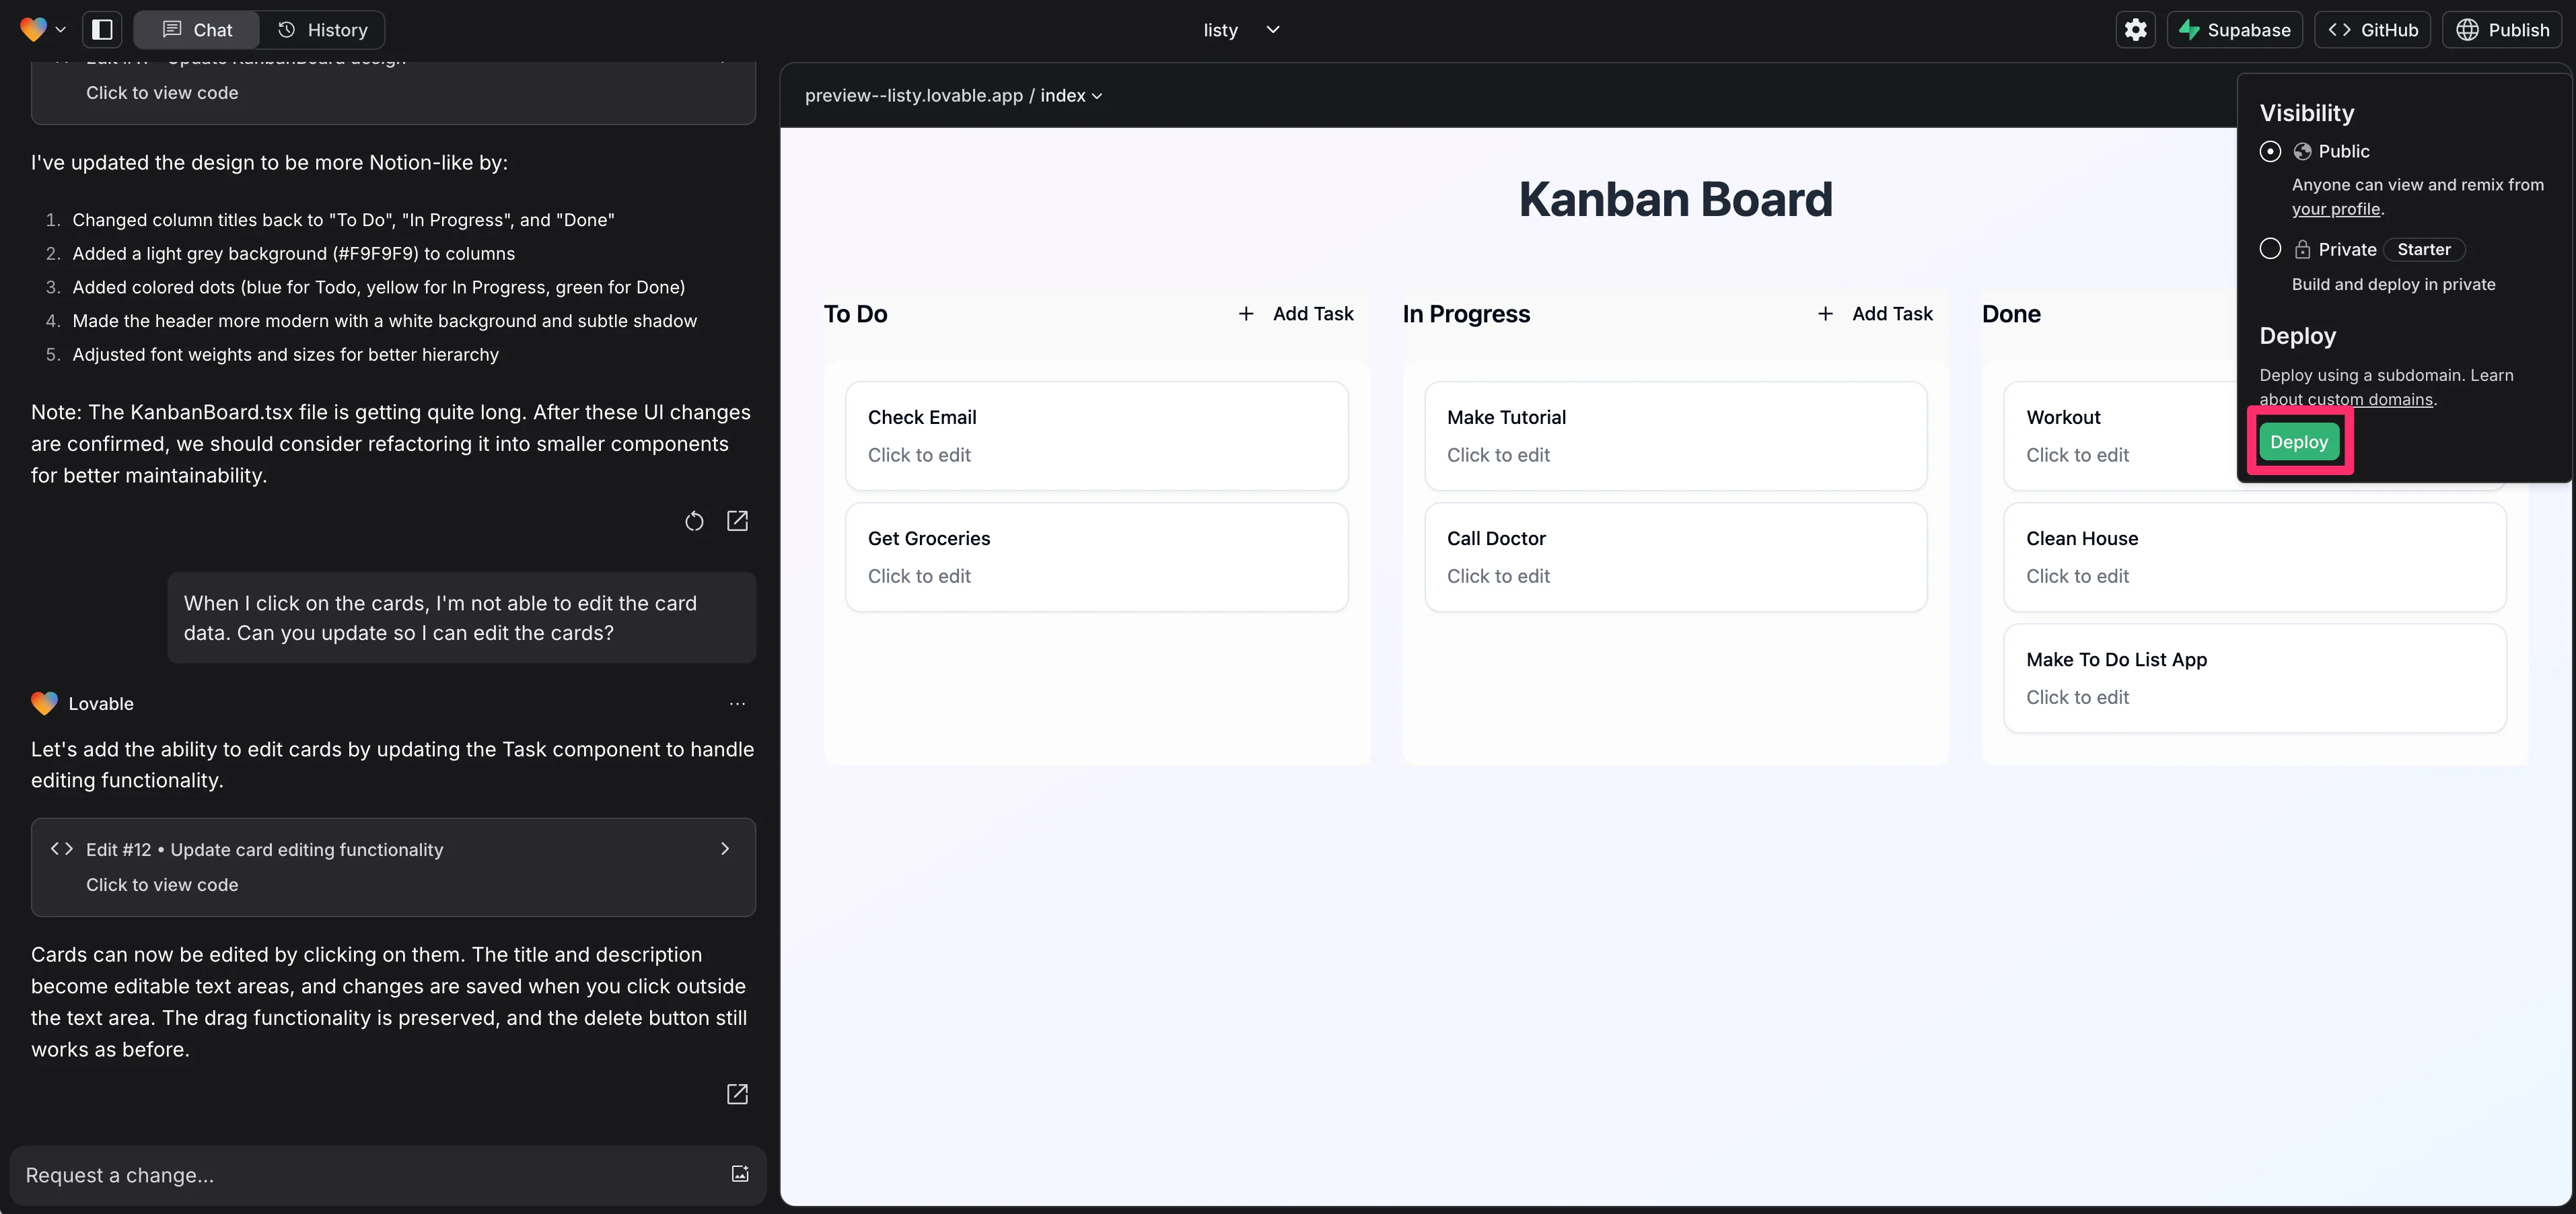
Then, click the “Deploy” button.
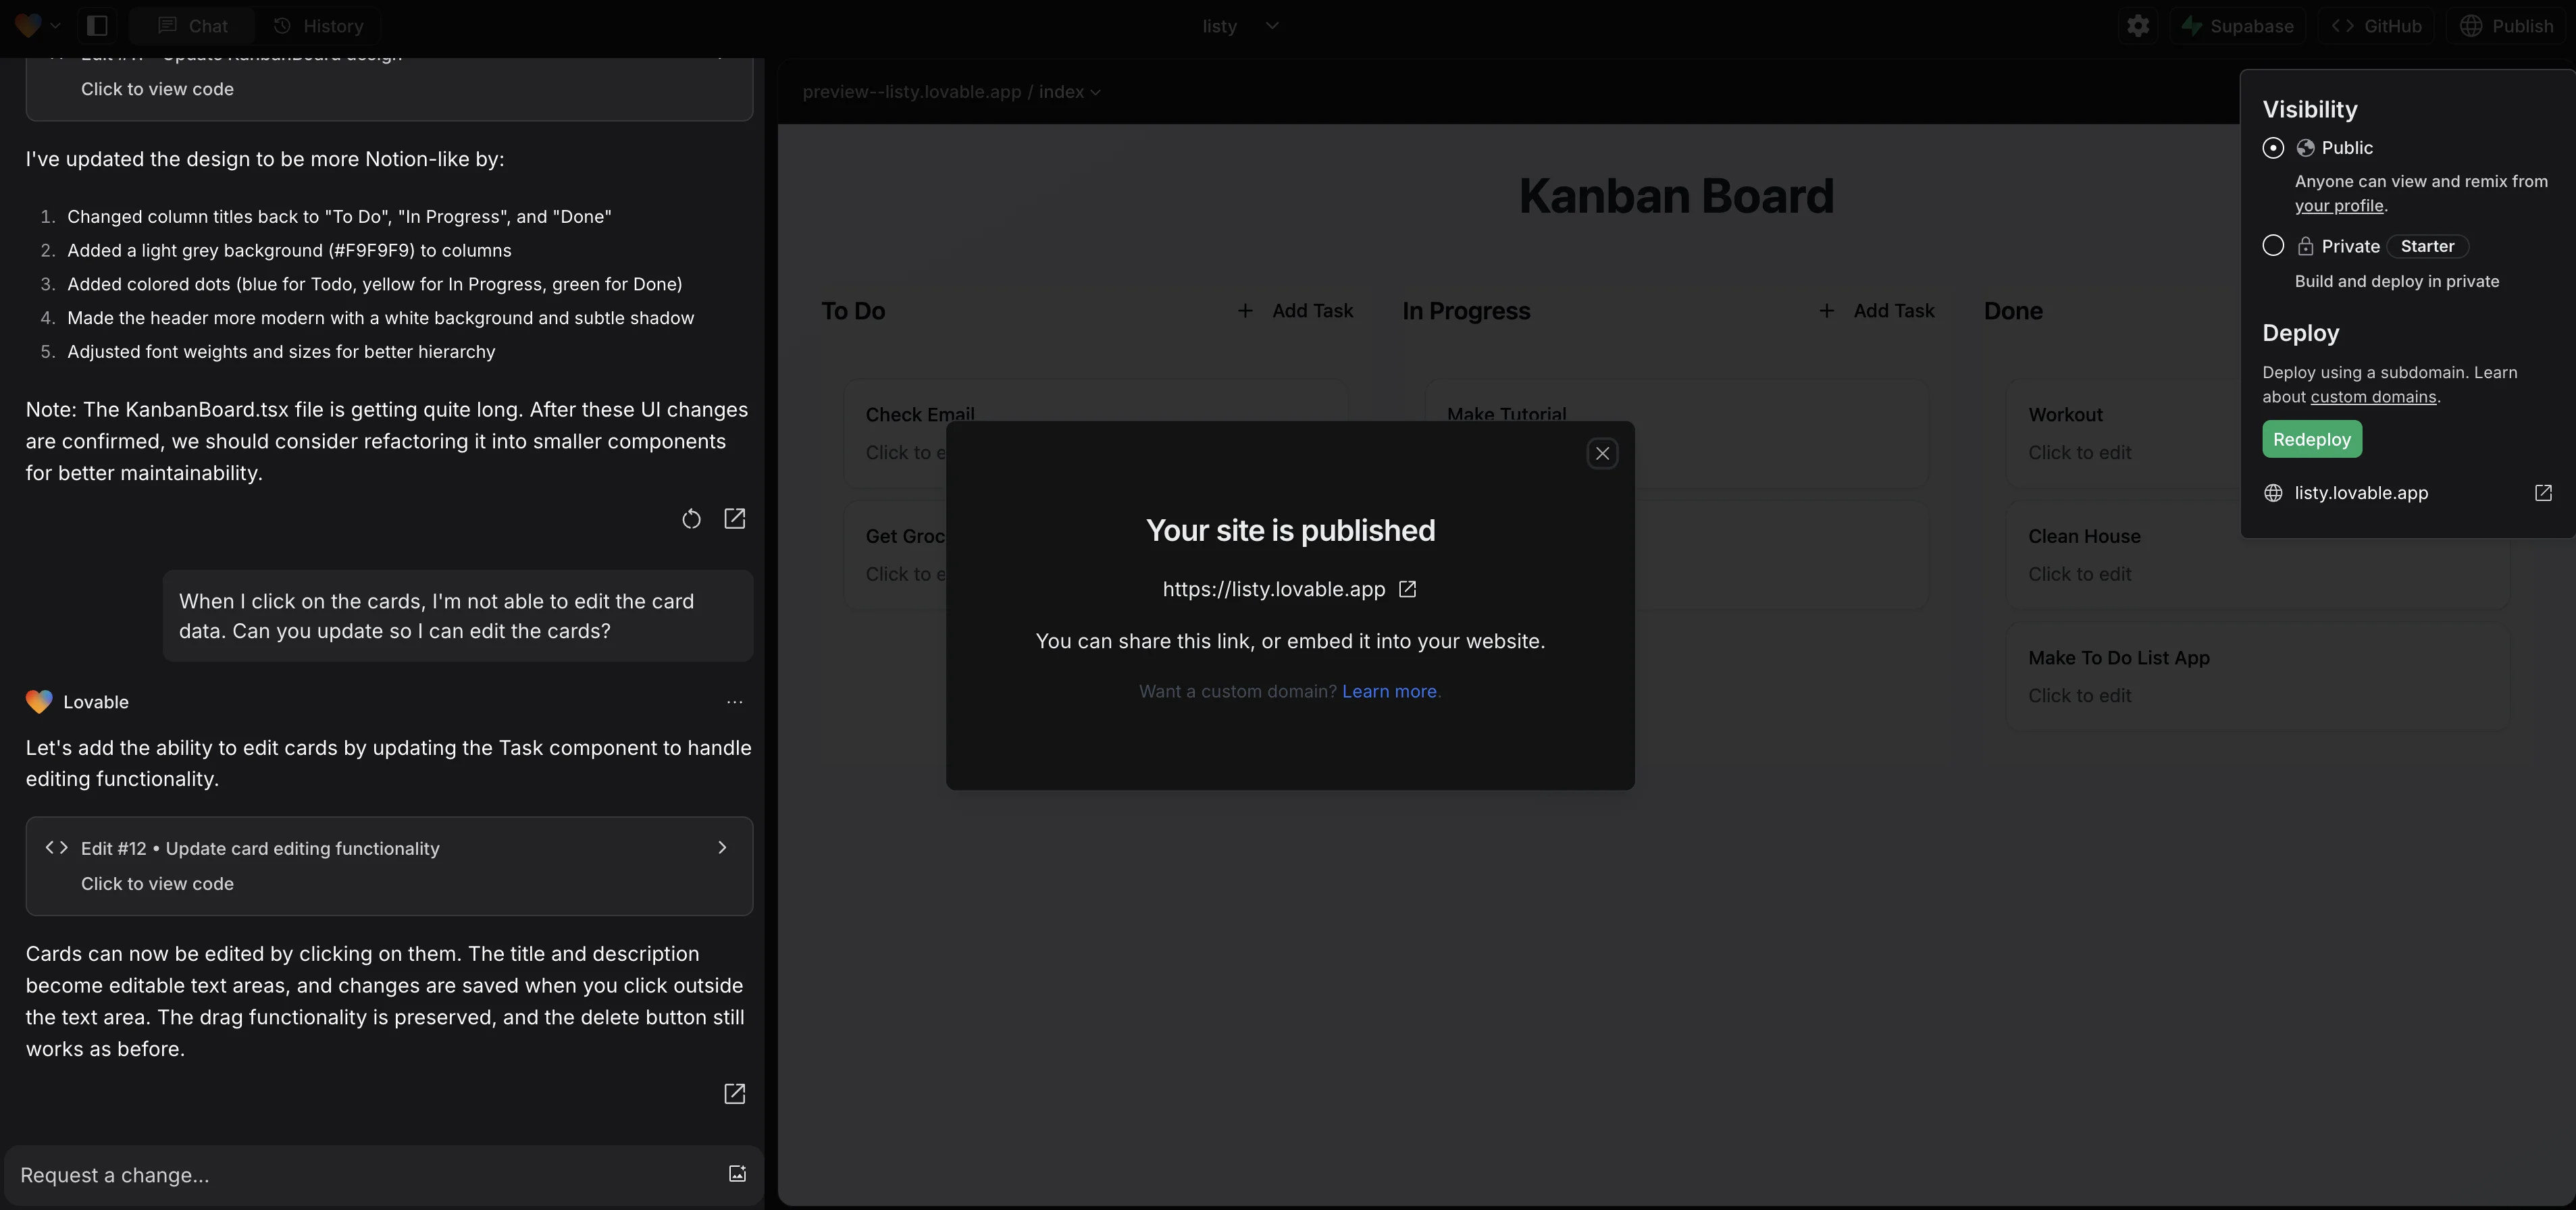
And that’s it! Your app is now published.
Nice work! You now have a fullstack to-do list app. From here, you can continue to update the UI/UX, add more features, develop a landing page, and more.
What else could you build with Lovable? Here are some additional ideas to get your creative juices flowing:
- Landing pages
- Productivity tools and apps (bill generator, PDF reader, etc.)
- SaaS apps
- Web directories
- Data dashboards
Take a look at this directory (built with Lovable) for projects built with Lovable for more inspiration.
This tutorial was created by Garrett.