How to create automations featuring the Perplexity API
Learn how to use Perplexity in Zapier to access search-aware generative AI in your automations.
2024-11-13
OpenAI and ChatGPT aren’t the only options for adding generative AI to your Zapier automations.
Perplexity, which you’ve probably heard of from their online AI-powered search engine, also has an API. This means you can add generative AI to your zaps which has access to up-to-date news and information.
To see this in action, we’ll build a zap that creates a weekly summary of what’s going on where I live.
Steps in this tutorial:
- Create a zap to generate the weekly summary
- Use the Perplexity playground to test your prompt
- Add a Perplexity API step to the zap
You’ll need:
- Zapier paid account.
- Perplexity API account with at least $5 of credit added. Note: this is separate from their paid consumer search app.
Let’s see how it’s done.
Step 1: Create a zap to generate the weekly summary
First, we need to build a zap that triggers every week.
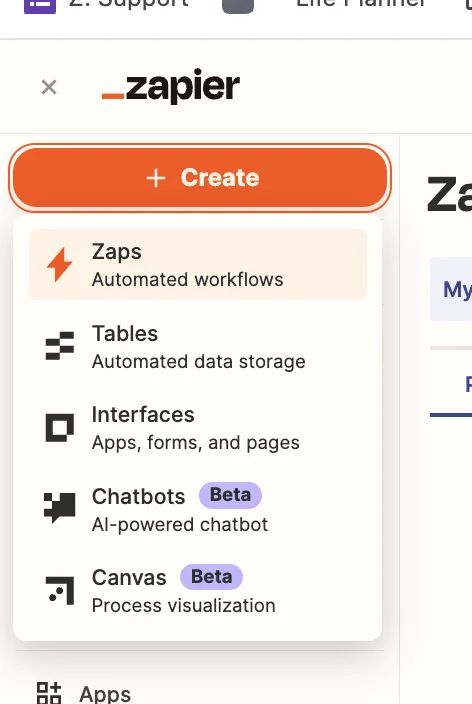
Head over to Zapier, then in the dashboard, in the top left, click the big orange “Create” button and select ‘Zaps’.
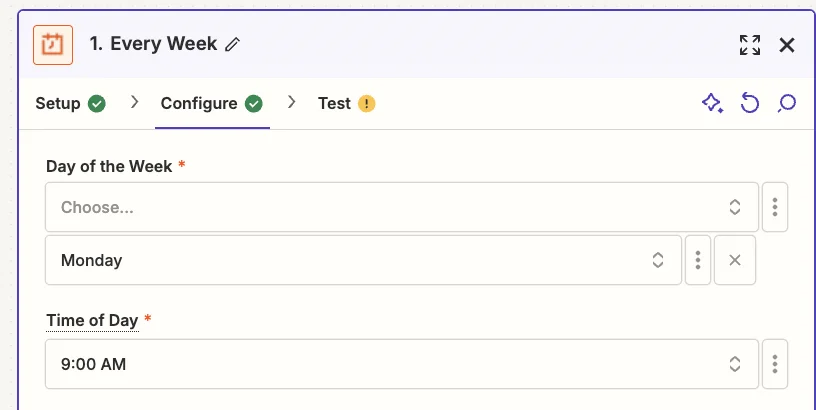
Inside the zap editor, click on the box that says “Trigger” and select/search for ‘Schedule by Zapier’ as the app. Then select ‘Every Week’ as the trigger event.
When configuring the trigger, choose your preferred day and time. I’ve gone with 9am on a Monday.
Test the zap and you’ll see a timestamp for the current time. You can ignore this. When the zap is live it will run at the correct time.
Step 2: Use the Perplexity playground to test your prompt
Create an account on the main Perplexity website and then go to their API Playground.
Here we’re going to simulate a chat conversation with Perplexity’s API to perfect our prompt.
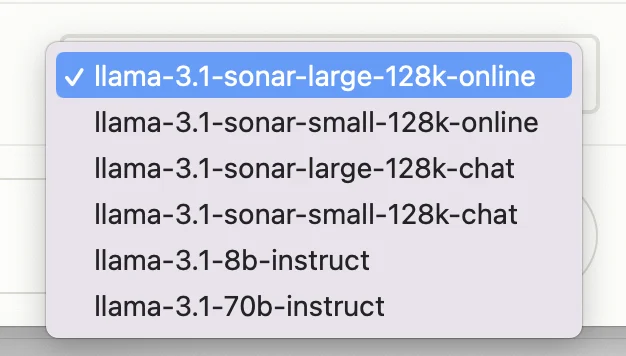
In the bottom right, you’ll see a dropdown where you can select which model to use. We’ll stick with “llama-3.1-sonar-large-128k-online” which is their most powerful model, and has access to search data.
I live in Budapest, Hungary, so I’m going to base my prompt on that:
What’s happening at the moment in Budapest?

Type that into the chat input at the bottom, click the green arrow button, and you’ll see the AI response generated in realtime.
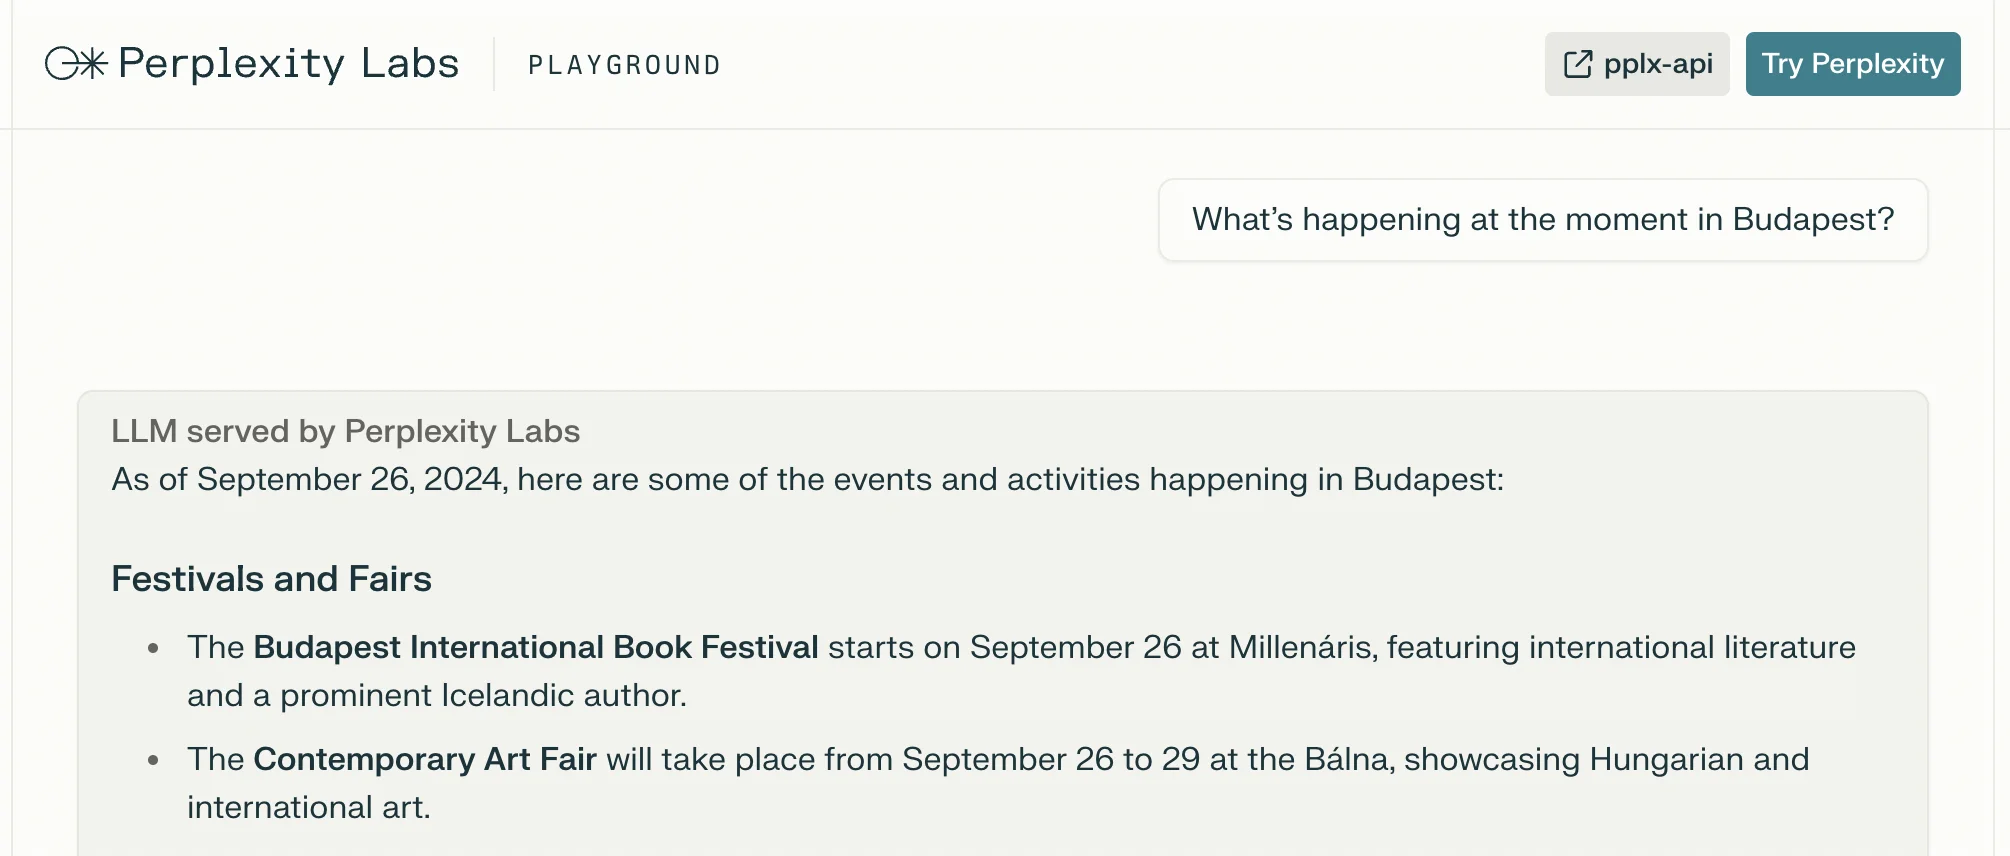
The date is correct, as is its summary of what’s going on in Budapest right now. Great!
Step 3: Add a Perplexity API step to the zap
Back on the main Perplexity website, click the settings cogwheel icon in the bottom left, then navigate to the “API” tab.
If you haven’t already, buy at least $5 worth of credits.
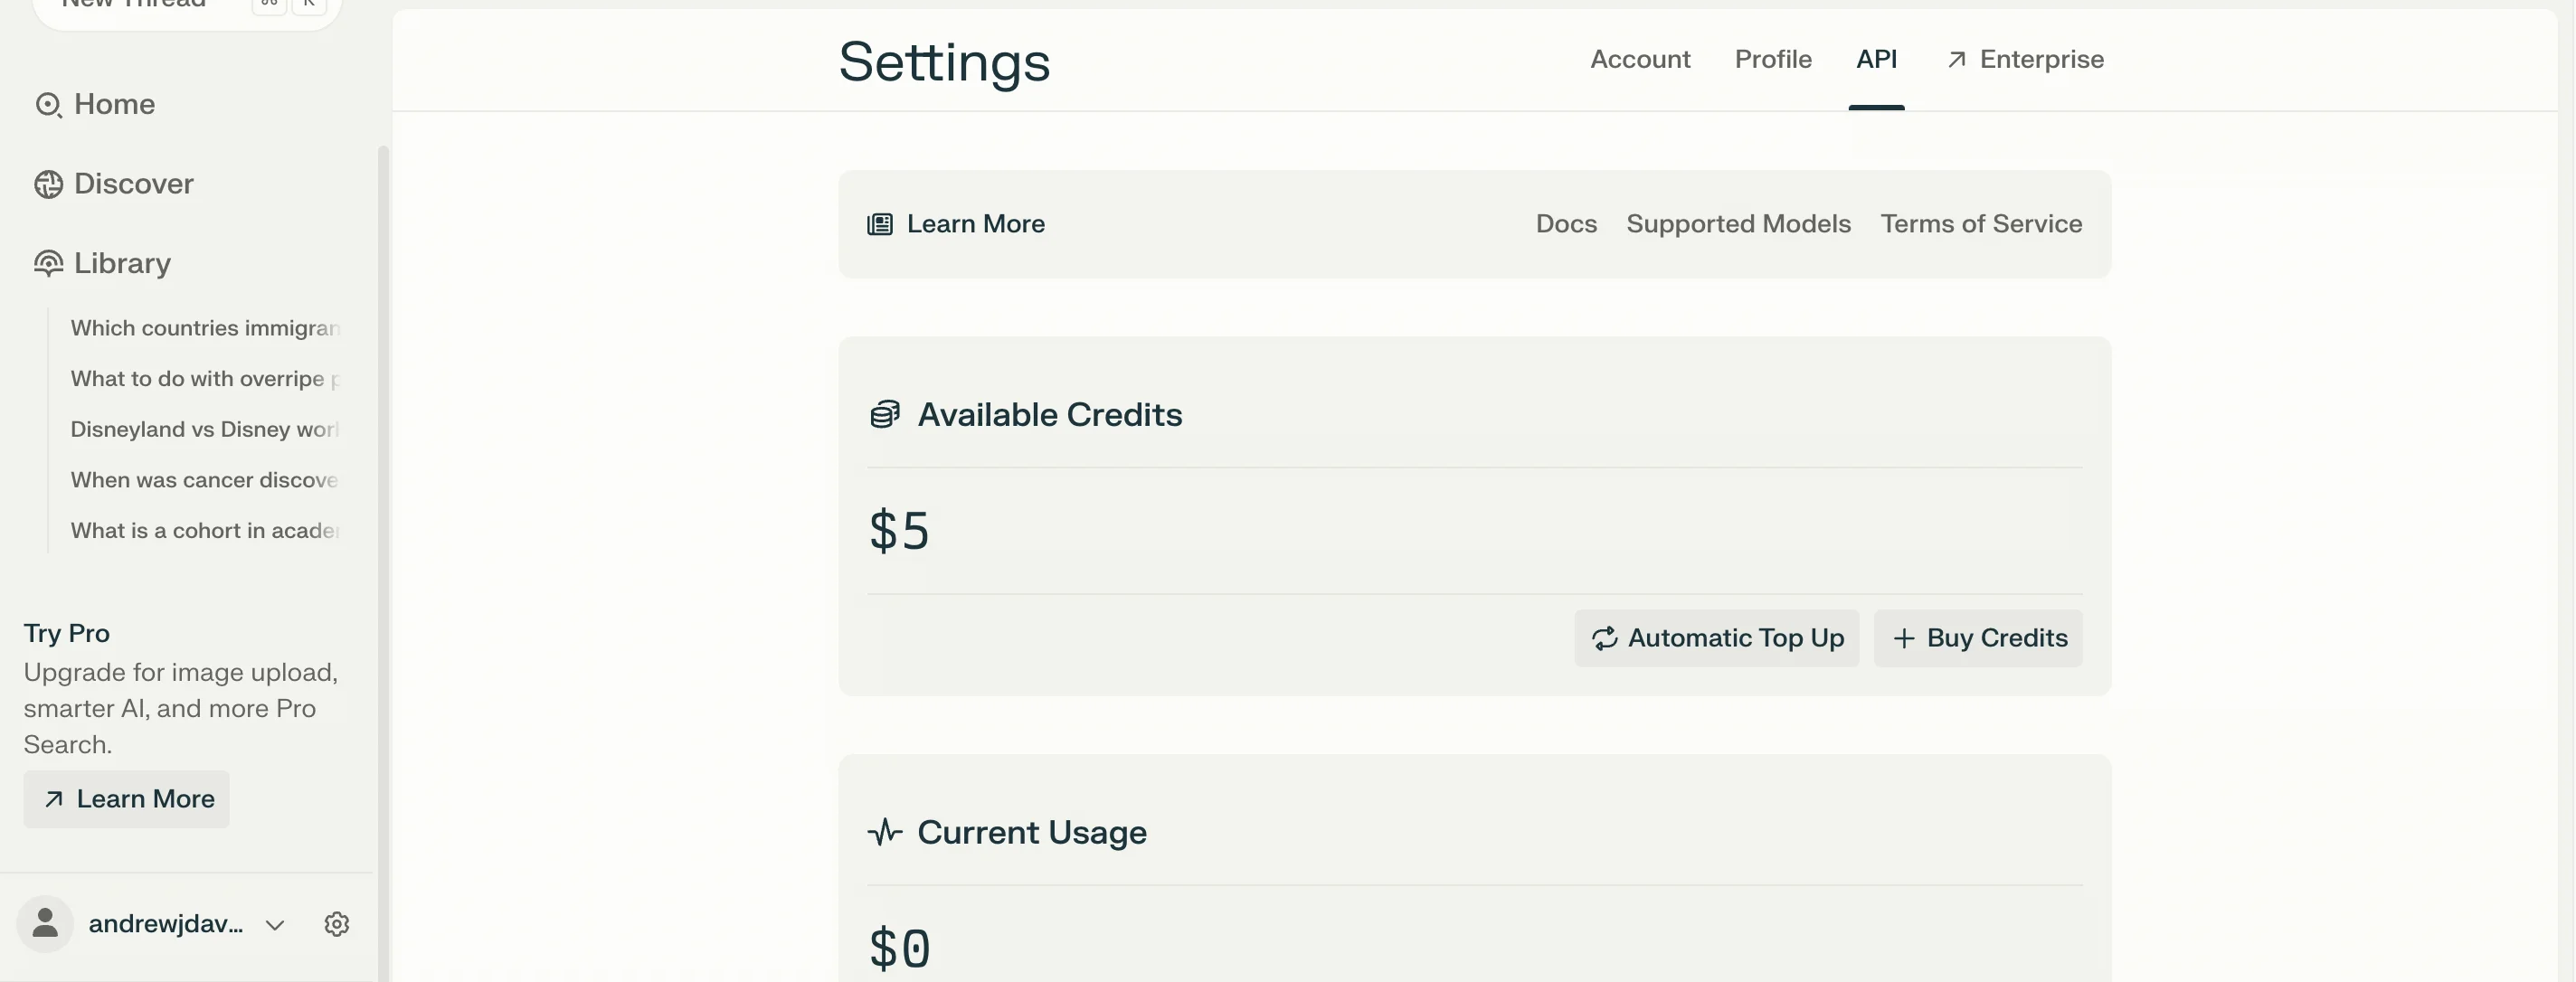
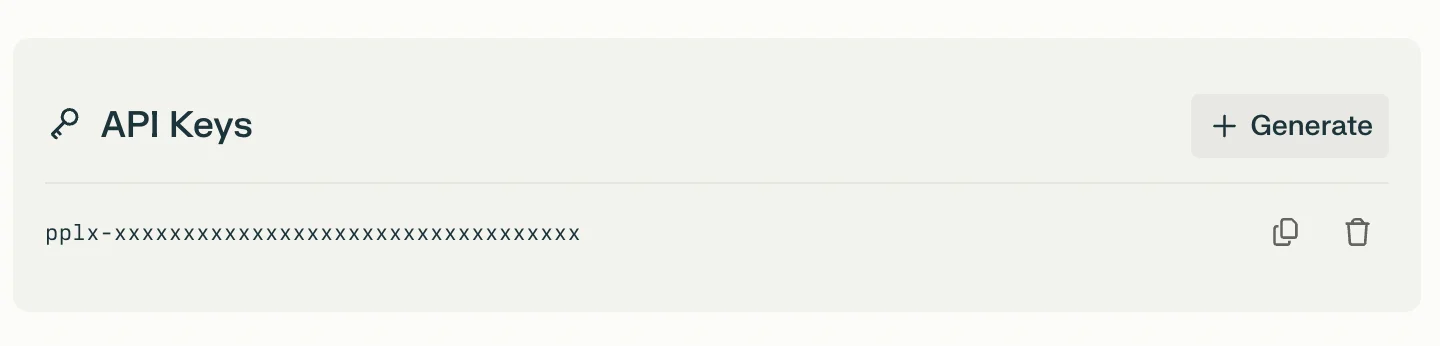
Then scroll down the page and click “Generate” to create an API key.
Unfortunately, Perplexity doesn’t have a Zapier integration, so we’re going to use a webhook step inside Zapier to send and receive data from the API.
In the zap editor, click the “Action” box. Select "Webhook by Zapier" as the app, and ‘Custom Request’ as the action event.
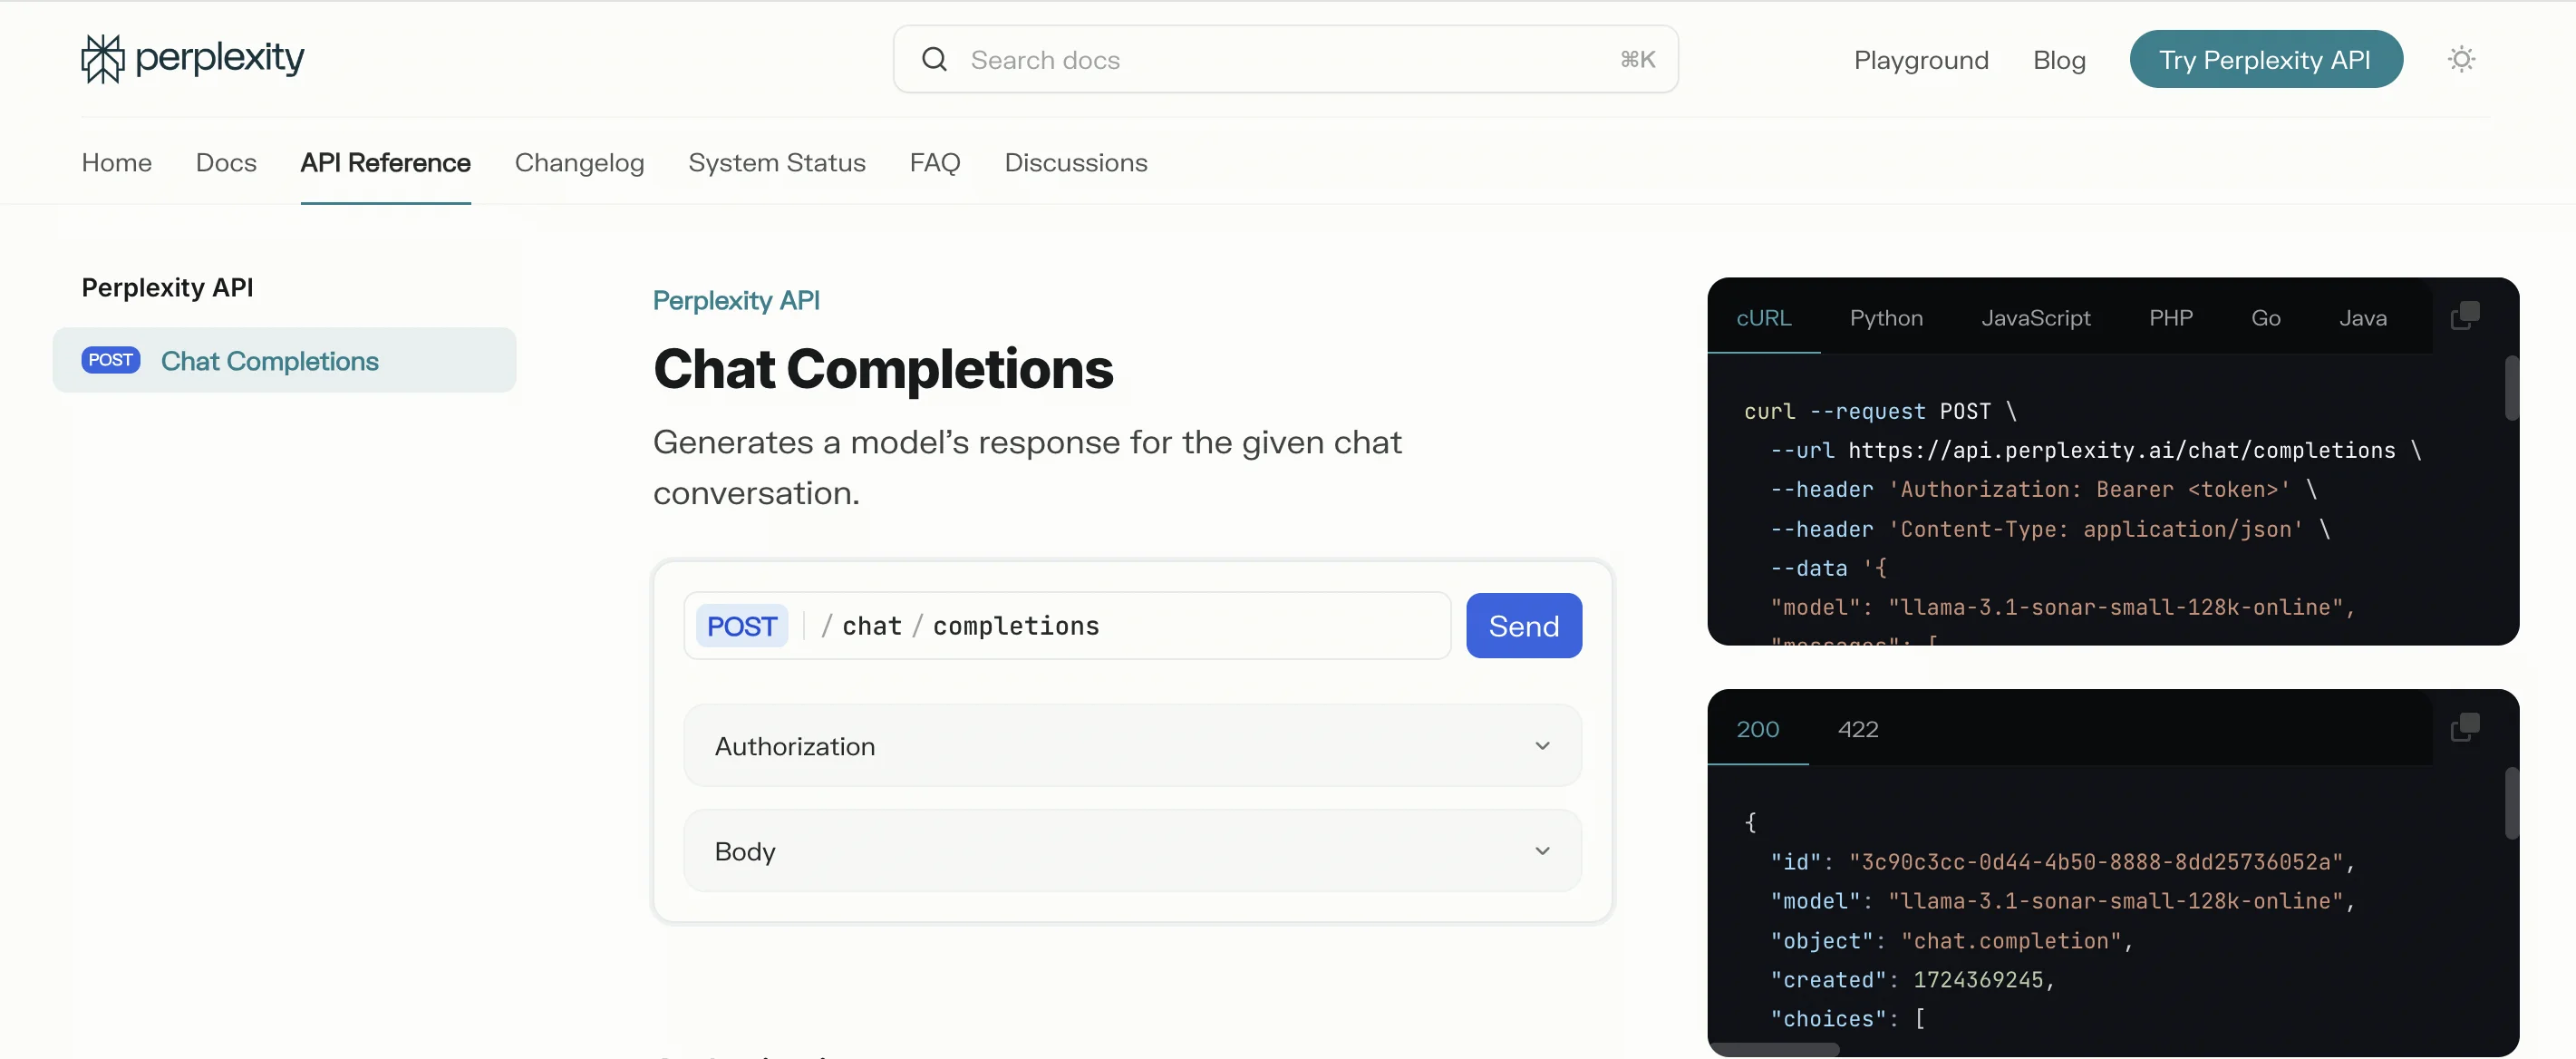
Perplexity has some API docs that tell us how to set up the API call: https://perplexity.mintlify.app/api-reference/chat-completions
Here are the fields you need to configure in the zap step.
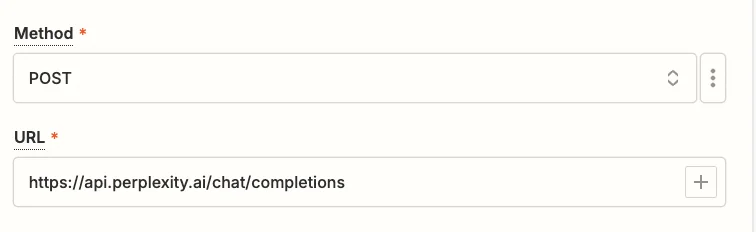
- Method
Select ‘POST’.
- URL
Input “https://api.perplexity.ai/chat/completions”.
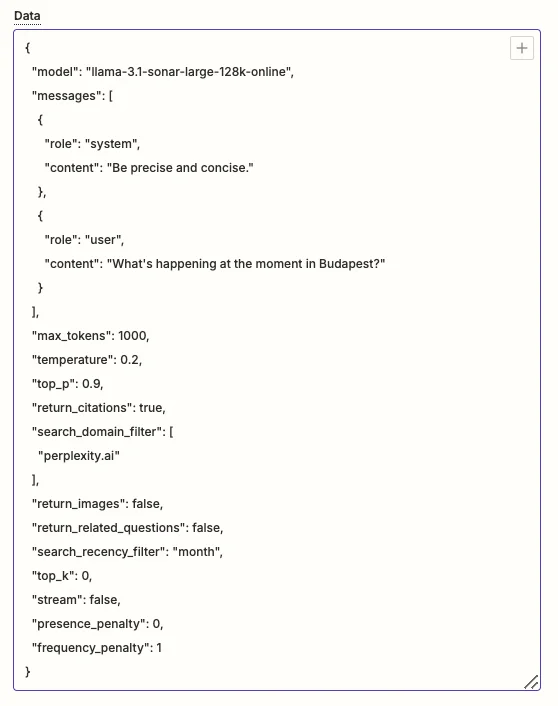
- Data
- Use the following code. You’ll see it includes the same model and user message we used in the playground test.
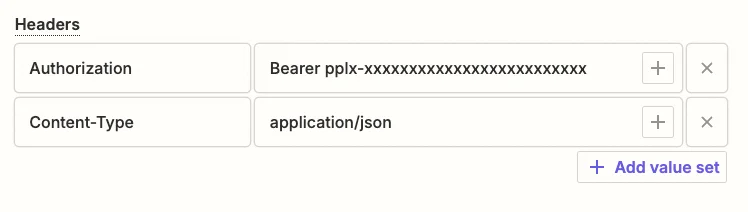
- Headers
Two lines need to be added here:
- Authorization = Bearer [Perplexity API Key]
- Content-Type = application/json
Test the zap step, and in the “Data out” tab, scroll down until you see the the output from Perplexity. Again, it all looks accurate.
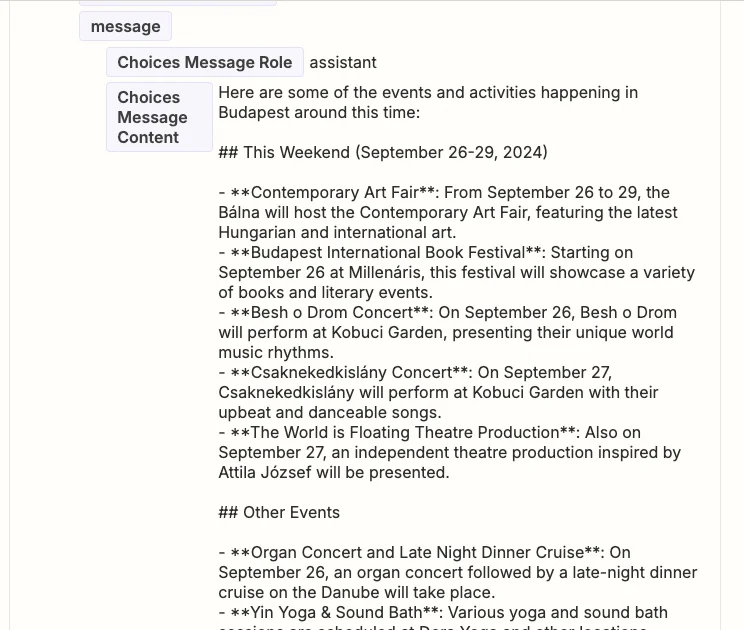
You now have the AI response as a field you can map in subsequent zap steps.
You could send the summary by email, or as a Slack message or even add it to a spreadsheet. Whatever you want!
This tutorial was created by Andrew.