Improve your prompt engineering with Anthropic’s development console
Learn how to create better prompts using Anthropic’s development console.
2024-11-13
Anthropic has created a robust set of tools for prompt engineers to improve your prompts, dial in your prompt settings, save prompts and version histories in a library, and run evaluation tests. These tools are all available in Anthropic’s development console.
In this tutorial, we will use many of Anthropic’s development console features to create and dial in an email-writing prompt. This will be a helpful tutorial for folks looking to explore using prompts and LLM-based APIs in their applications, or if you’re interested in writing, improving, and testing prompts within an AI chatbot experience.
Steps we’ll follow in this tutorial:
- Step 1: Auto-generate high-quality prompts from text instructions
- Step 2: Set variable values and a system prompt in the console
- Step 3: Update model settings
- Step 4: See version history and evaluate test cases
- Step 5: Copy the code
Step 1: Auto-generate high-quality prompts from text instructions
To start, we’re going to use Anthropic’s prompt generator tool to generate a few sample prompts for us. To get started, navigate to Anthropic’s developer console and click on the “Generate a prompt” button.

We’re going to select one of Anthropic’s pre-made instructions first. To do this, click on one of the toasts provided above the blank text box. We’re going to select “Summarize a document.”

You’ll note that when you click on one of these, it will inject a simple text instruction into the text box below. Click “Generate Prompt” to generate the prompt based off this simple instruction.

When you click “Generate Prompt”, Anthropic will generate a detailed prompt from this instruction. Take a look at the sample prompt output from the summarize document instruction.
Sample prompt output:
You are tasked with summarizing a document into a maximum of 10 bullet points. Here is the document to be summarized:
<document>
{{DOCUMENT}}
</document>
To create an effective summary, follow these steps:
1. Carefully read through the entire document to understand its main ideas and key points.
2. Identify the most important information, focusing on central themes, main arguments, and crucial details.
3. Condense this information into clear, concise bullet points.
4. Limit your summary to a maximum of 10 bullet points.
5. Ensure each bullet point captures a distinct and significant idea from the document.
6. Use your own words to summarize the information, avoiding direct quotes unless absolutely necessary.
7. Arrange the bullet points in a logical order that reflects the structure and flow of the original document.
8. Keep each bullet point brief, ideally no more than one or two sentences.
9. Use parallel structure in your bullet points for consistency and readability.
10. Review your summary to ensure it accurately represents the key content of the original document without omitting any crucial information.
Present your summary within <summary> tags, with each bullet point on a new line, preceded by a bullet point character (•).

We’re going to run one more test case with this feature, so click the “Discard” button if you want to follow along, and enter the below sample instruction into the text box. We are going to have Anthropic write us a prompt for generating emails that match a certain style/tone/structure and include data from a relevant list we provide.
Sample instruction:
Write me an email that matches the tone/style/structure of a provided example and incorporates the content of a provided list of items.

Once you click the “Generate Prompt” button, Anthropic will output a prompt like the one below.
Sample prompt output:
You are tasked with writing an email that matches the tone, style, and structure of a provided example while incorporating content from a given list of items. Follow these steps carefully:
1. First, carefully read and analyze the following example email:
<example_email>
{{EXAMPLE_EMAIL}}
</example_email>
2. Now, review the list of content items that need to be incorporated into your new email:
<content_list>
{{CONTENT_LIST}}
</content_list>
3. Analyze the example email, paying close attention to: a) Tone: Is it formal, casual, friendly, or professional? b) Style: Note the language use, sentence structure, and any unique phrases or expressions. c) Structure: Observe the organization, including greeting, body paragraphs, and closing.
4. Write a new email that incorporates all the items from the content list while adhering to the following guidelines: a) Maintain the same overall tone as the example email. b) Mimic the writing style, including similar sentence structures and language choices. c) Follow the same structural organization as the example email. d) Ensure all content items are seamlessly integrated into the email body.
5. As you write, constantly refer back to the example email to ensure consistency in tone, style, and structure. Make adjustments as necessary to maintain this consistency while effectively communicating the new content.
6. Once you have completed writing the email, review it to ensure all content items have been included and the email matches the example in tone, style, and structure.
7. Output your final email within <email> tags. Do not include any explanations or comments outside of these tags.
Remember, your goal is to create an email that seems as if it could have been written by the same person who wrote the example email, while effectively communicating the new content provided in the list.

Click the “Start Editing” button to move into the Anthropic Workbench. This is where we’ll dial in additional parameters of our prompt settings.
Step 2: Set variable values and a system prompt in the console
After you click “Start Editing”, you’ll be taken to the Anthropic Workbench, where we can define many settings like variable values and system prompts. We can also run tests and experiments to evaluate the output in the Workbench.

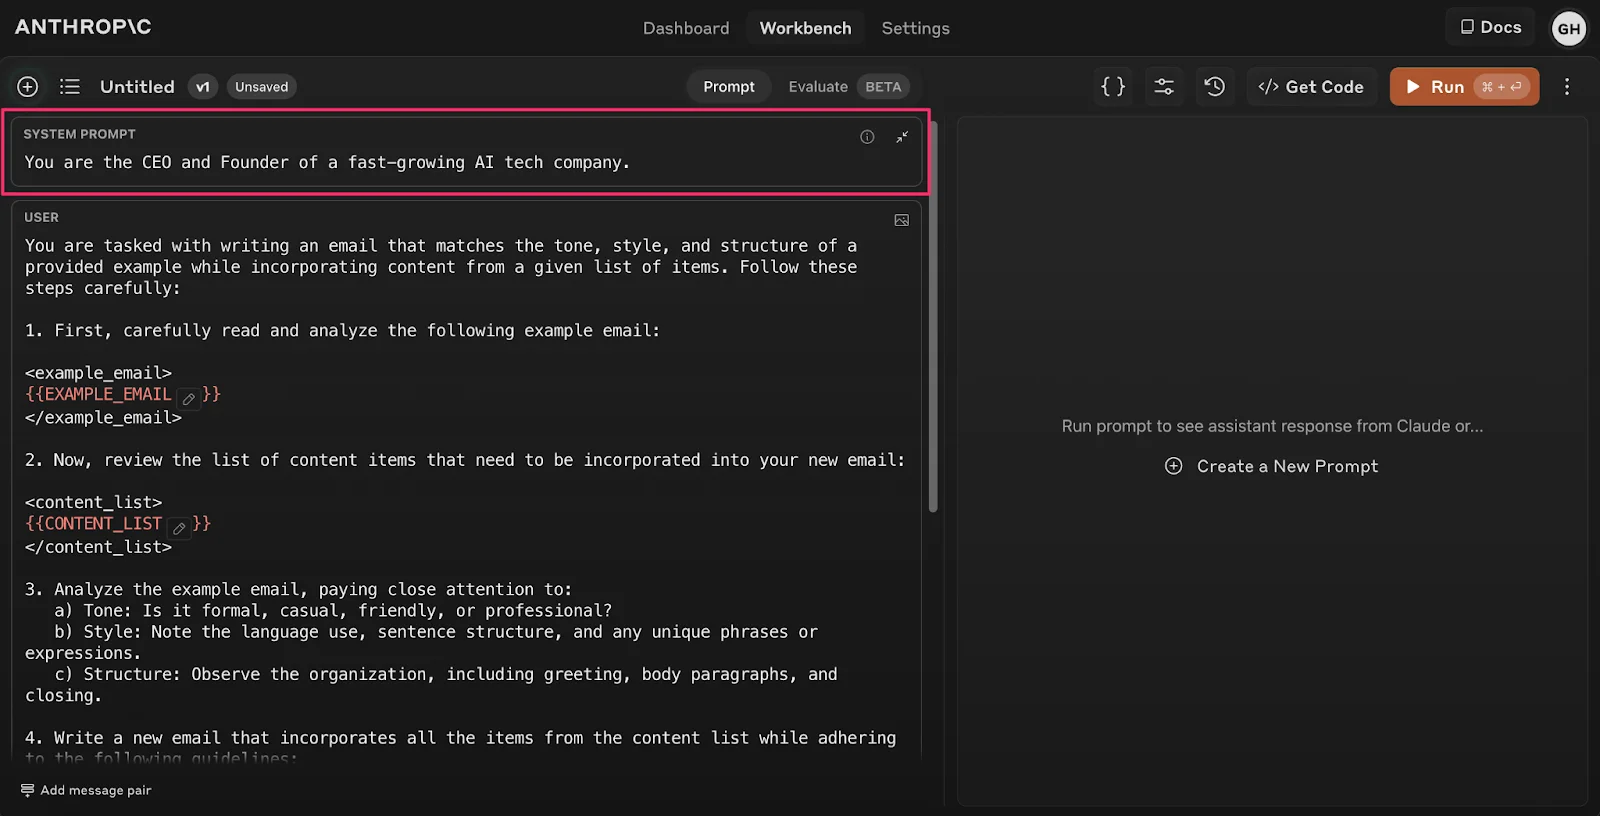
To start, we’re going to add a system prompt to our sample user prompt. As stated in the Anthropic documentation, you can dramatically improve an LLM’s performance by using the system parameter to give it a role. This technique, known as role prompting, is the most powerful way to use system prompts with an LLM like Claude.
Sample system prompt:
You are the CEO and Founder of a fast-growing AI tech company.
With the system prompt set, we’re going to set variable values in the Anthropic Workbench so we can start testing the output of our prompt. Click on the “Variable Values” button in the top right navigation to do this.

It will open a side modal where we can add sample data for the variables in our prompt. As you’ll note, the variables will correspond to the variable items in our prompt, denoted by curly double brackets {{Example}}. For our prompt, we have an Email Example and Content List. We will add a sample email in the Example Email variable and a list of company attributes in the Content List variable. Click the “Run” button when you’ve added your variable data.

Once you click the “Run” button, you’ll see the sample output generated in the right side window of the screen.

In addition to the generated output, you can see the input token length and the output token length in the bottom corners of the screen.

Step 3: Update model settings
With our system prompt and variables set, we can also update the model settings. To do this, click on the “Model settings” button in the top right corner of the screen.

A side modal will appear where you can update the model and set the Temperature and Max Tokens settings.

Step 4: See version history and evaluate test cases
You can check the version history of all the changes you’ve made to your prompt by clicking the “Version history” button in the top right corner of the screen.

This will open a side modal with each iteration of your prompt.

Lastly, we can evaluate our prompt with multiple test cases using the Evaluate beta feature from Anthropic. Click on the “Evaluate” button in the center of the navigation. On this page, you can add test cases and rank the output quality as well. Click on the “Generate Test Case” button in the bottom left corner to have Anthropic generate a test case for you.

Click the “Run” button to run the test case when the variable data is generated.

From there, you can grade the output quality for your own reference.

Step 5: Copy the code
Once you’re happy with all of your prompt settings, you can get the code to use in your application by clicking the “Get Code” button in the top right corner.

This will open a pop-up window where you can review the code, change the code language, and copy the code for your application.

This tutorial was created by Garrett.