Review marketing emails and synthesize learnings
Build an AI automation that studies marketing sequences in your inbox and recommends effective drip campaign strategies.
2024-12-10
Marketing emails in your inbox are valuable learning resources. However, we usually just delete these emails or save them without much thought. Later, when it's time to create our own marketing emails, we either start completely fresh or waste time searching through old emails for ideas.
Here's a better way: imagine having an AI tool that automatically organizes your marketing emails and helps you learn from them. This tool can suggest ideas for your business's email marketing by analyzing what other companies are doing. That's exactly what we're going to create in this tutorial.
We’ll use Lindy to create an email monitoring and labeling workflow and a query agent that can query all the best marketing emails in your inbox and use them as inspiration for your marketing campaigns.
Steps we’ll follow in this tutorial:
- Set up your inbox monitor
- Create labeling logic
- Develop your email querying workflow
- Test and iterate
Tools:
- Gmail
Let’s get into it!
Set up your inbox monitor
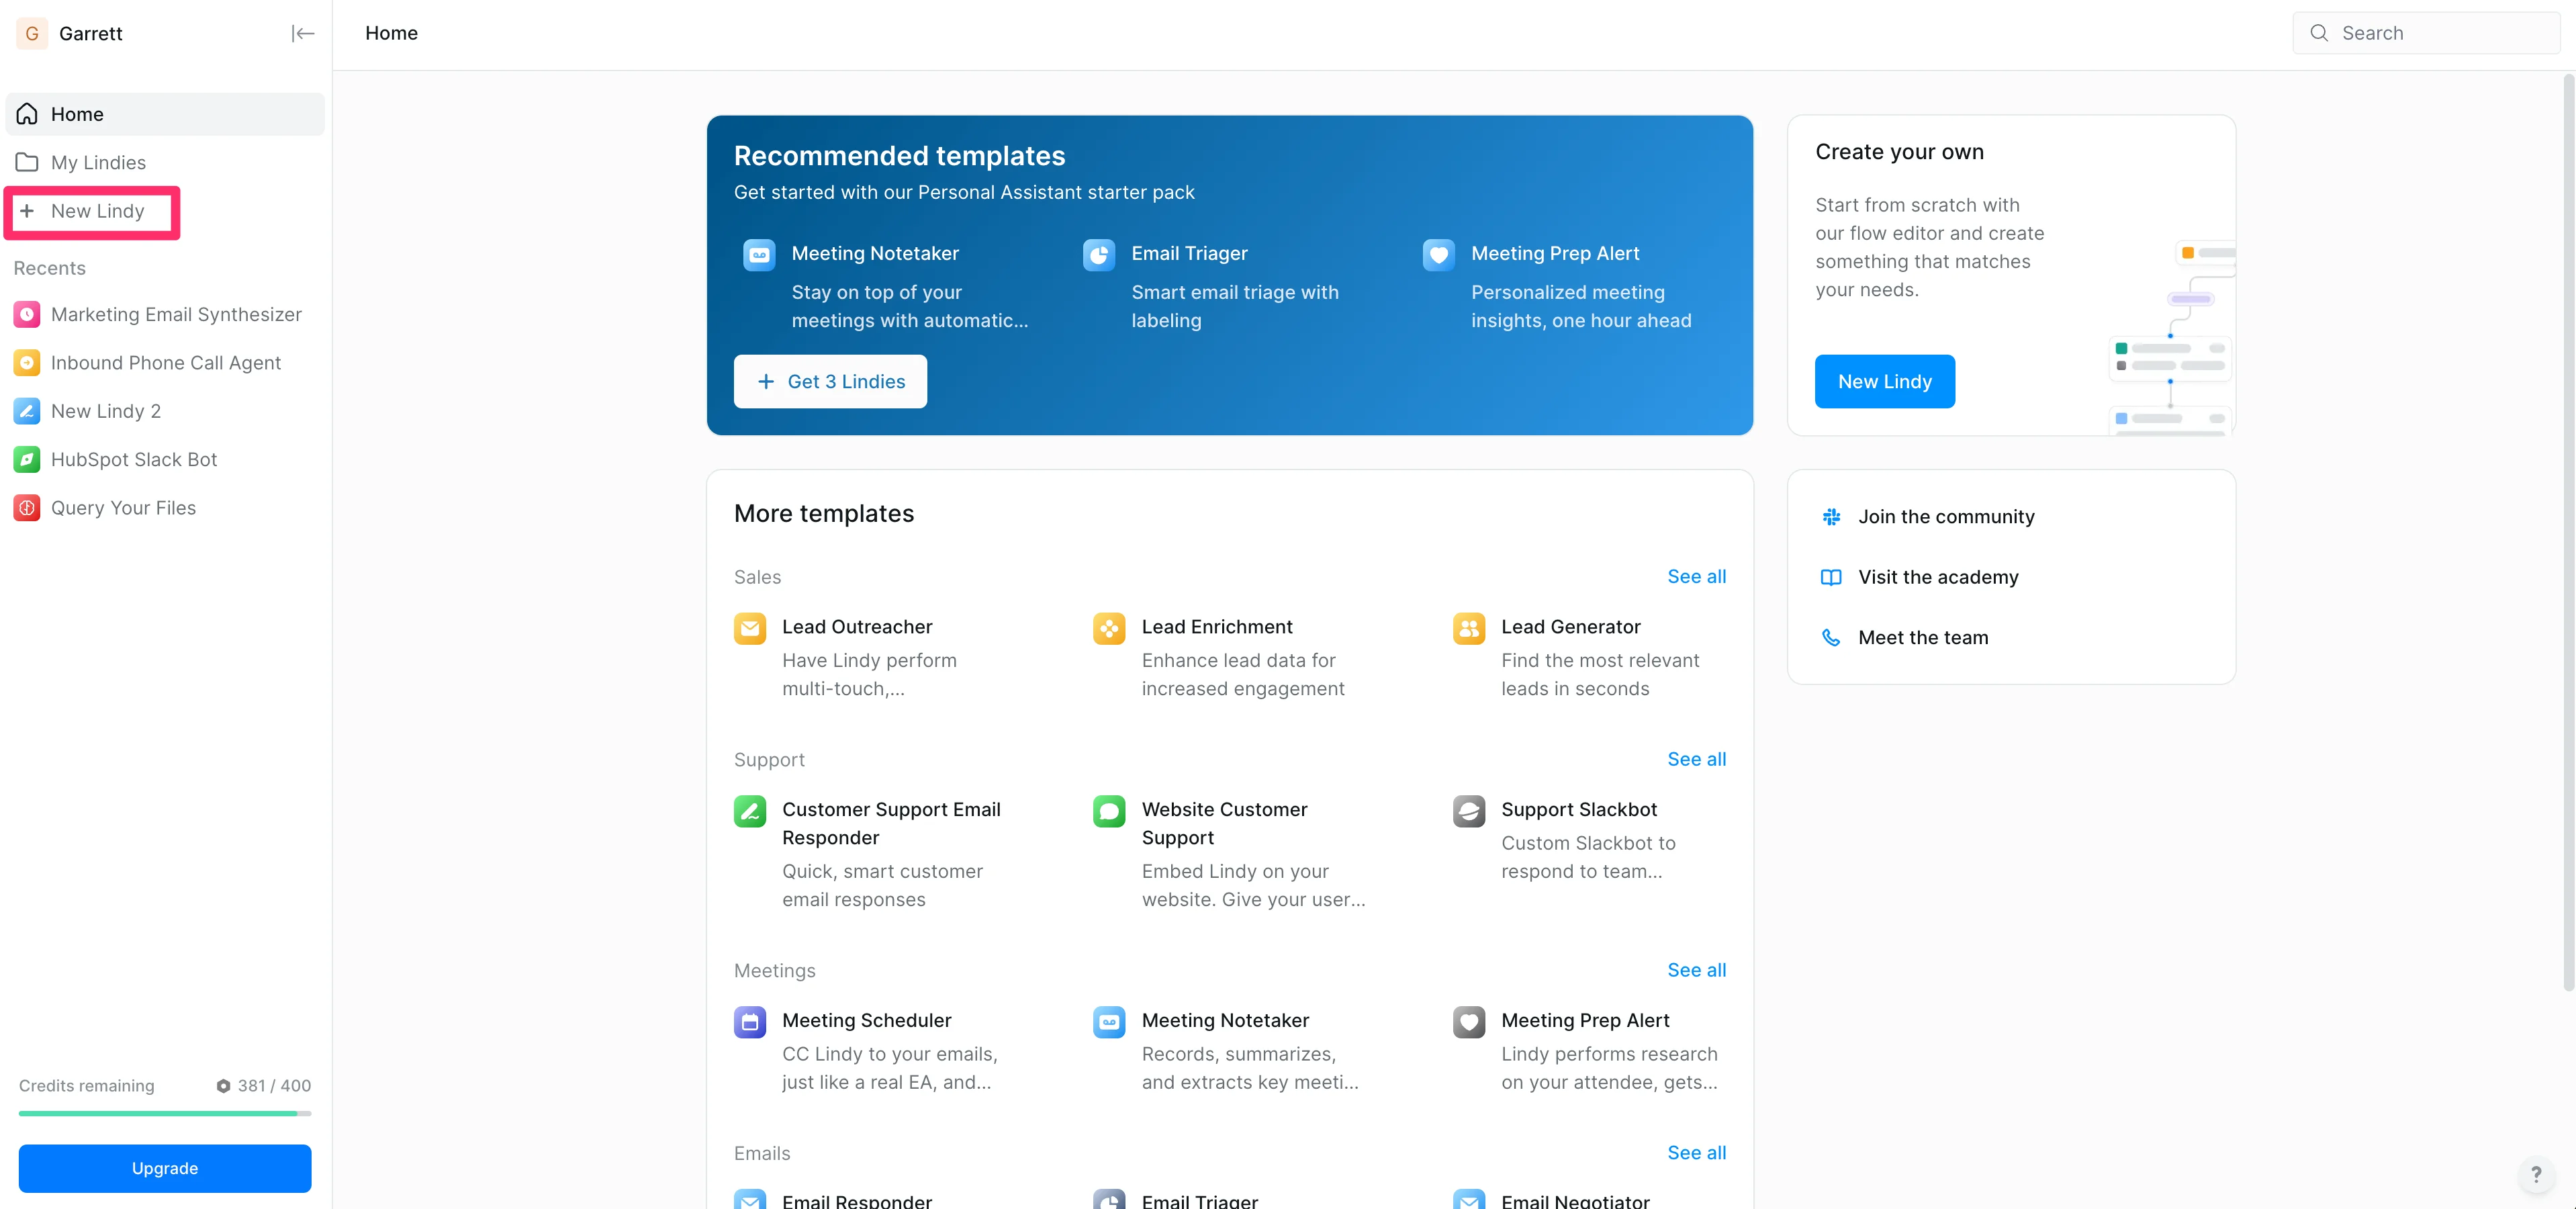
On your Lindy homepage, click the “New Lindy” button to get started.
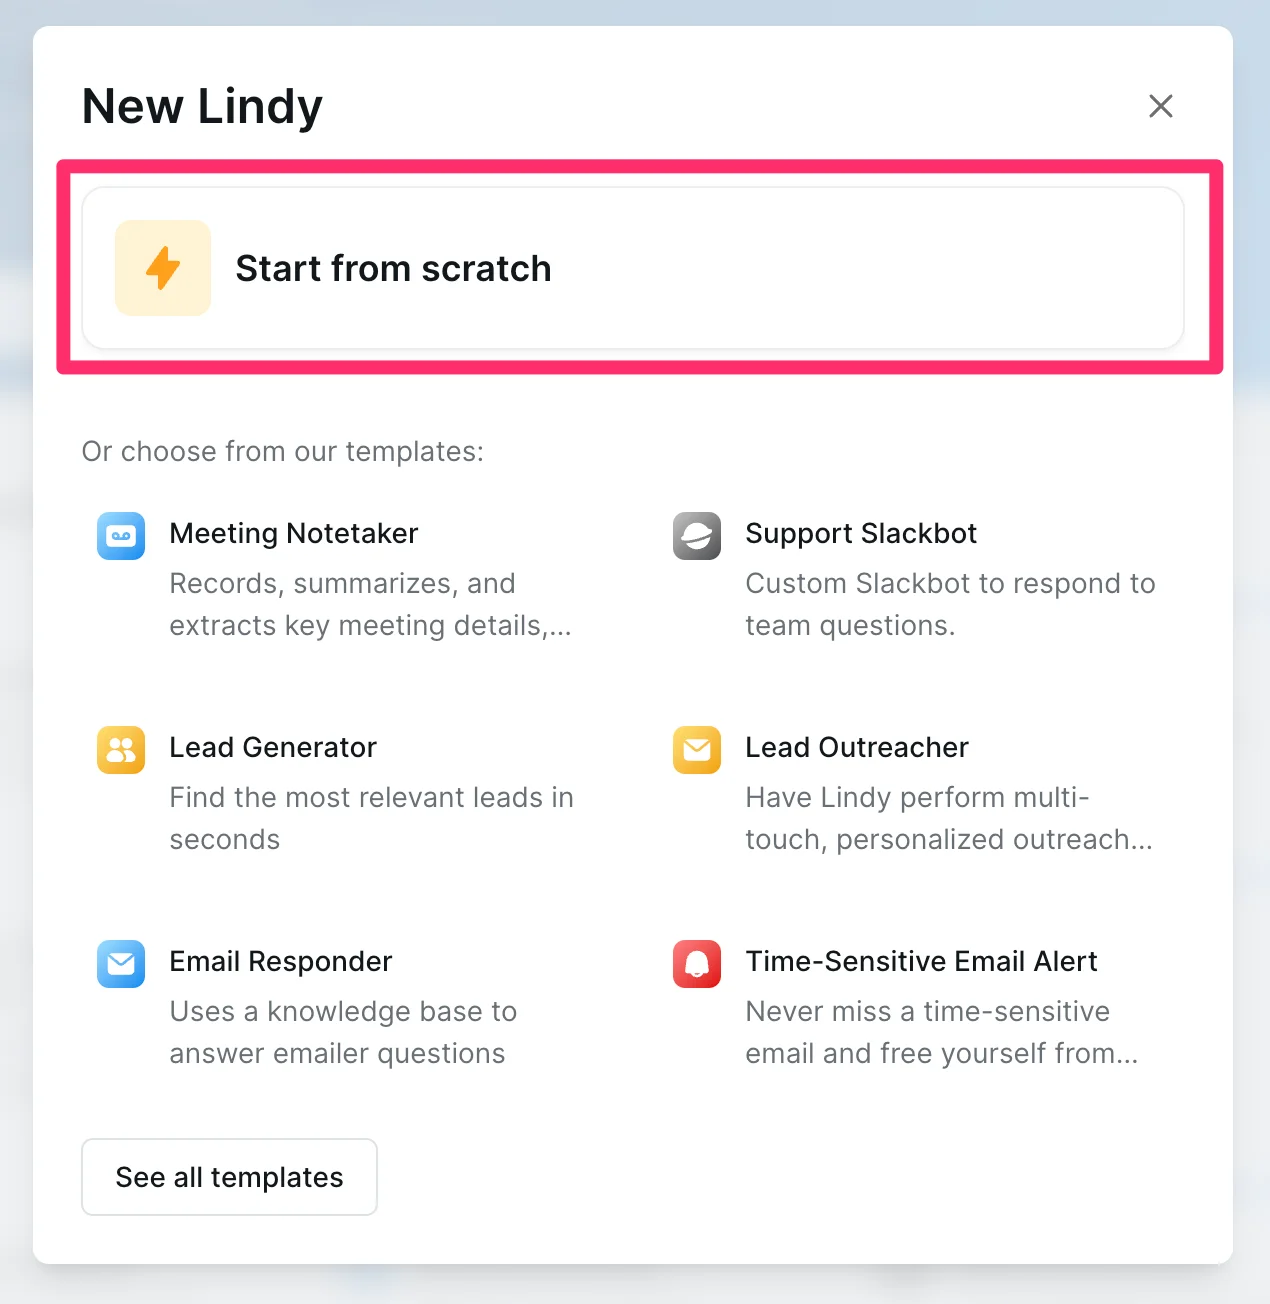
Select the “Start from scratch” option on the resulting pop-up window.
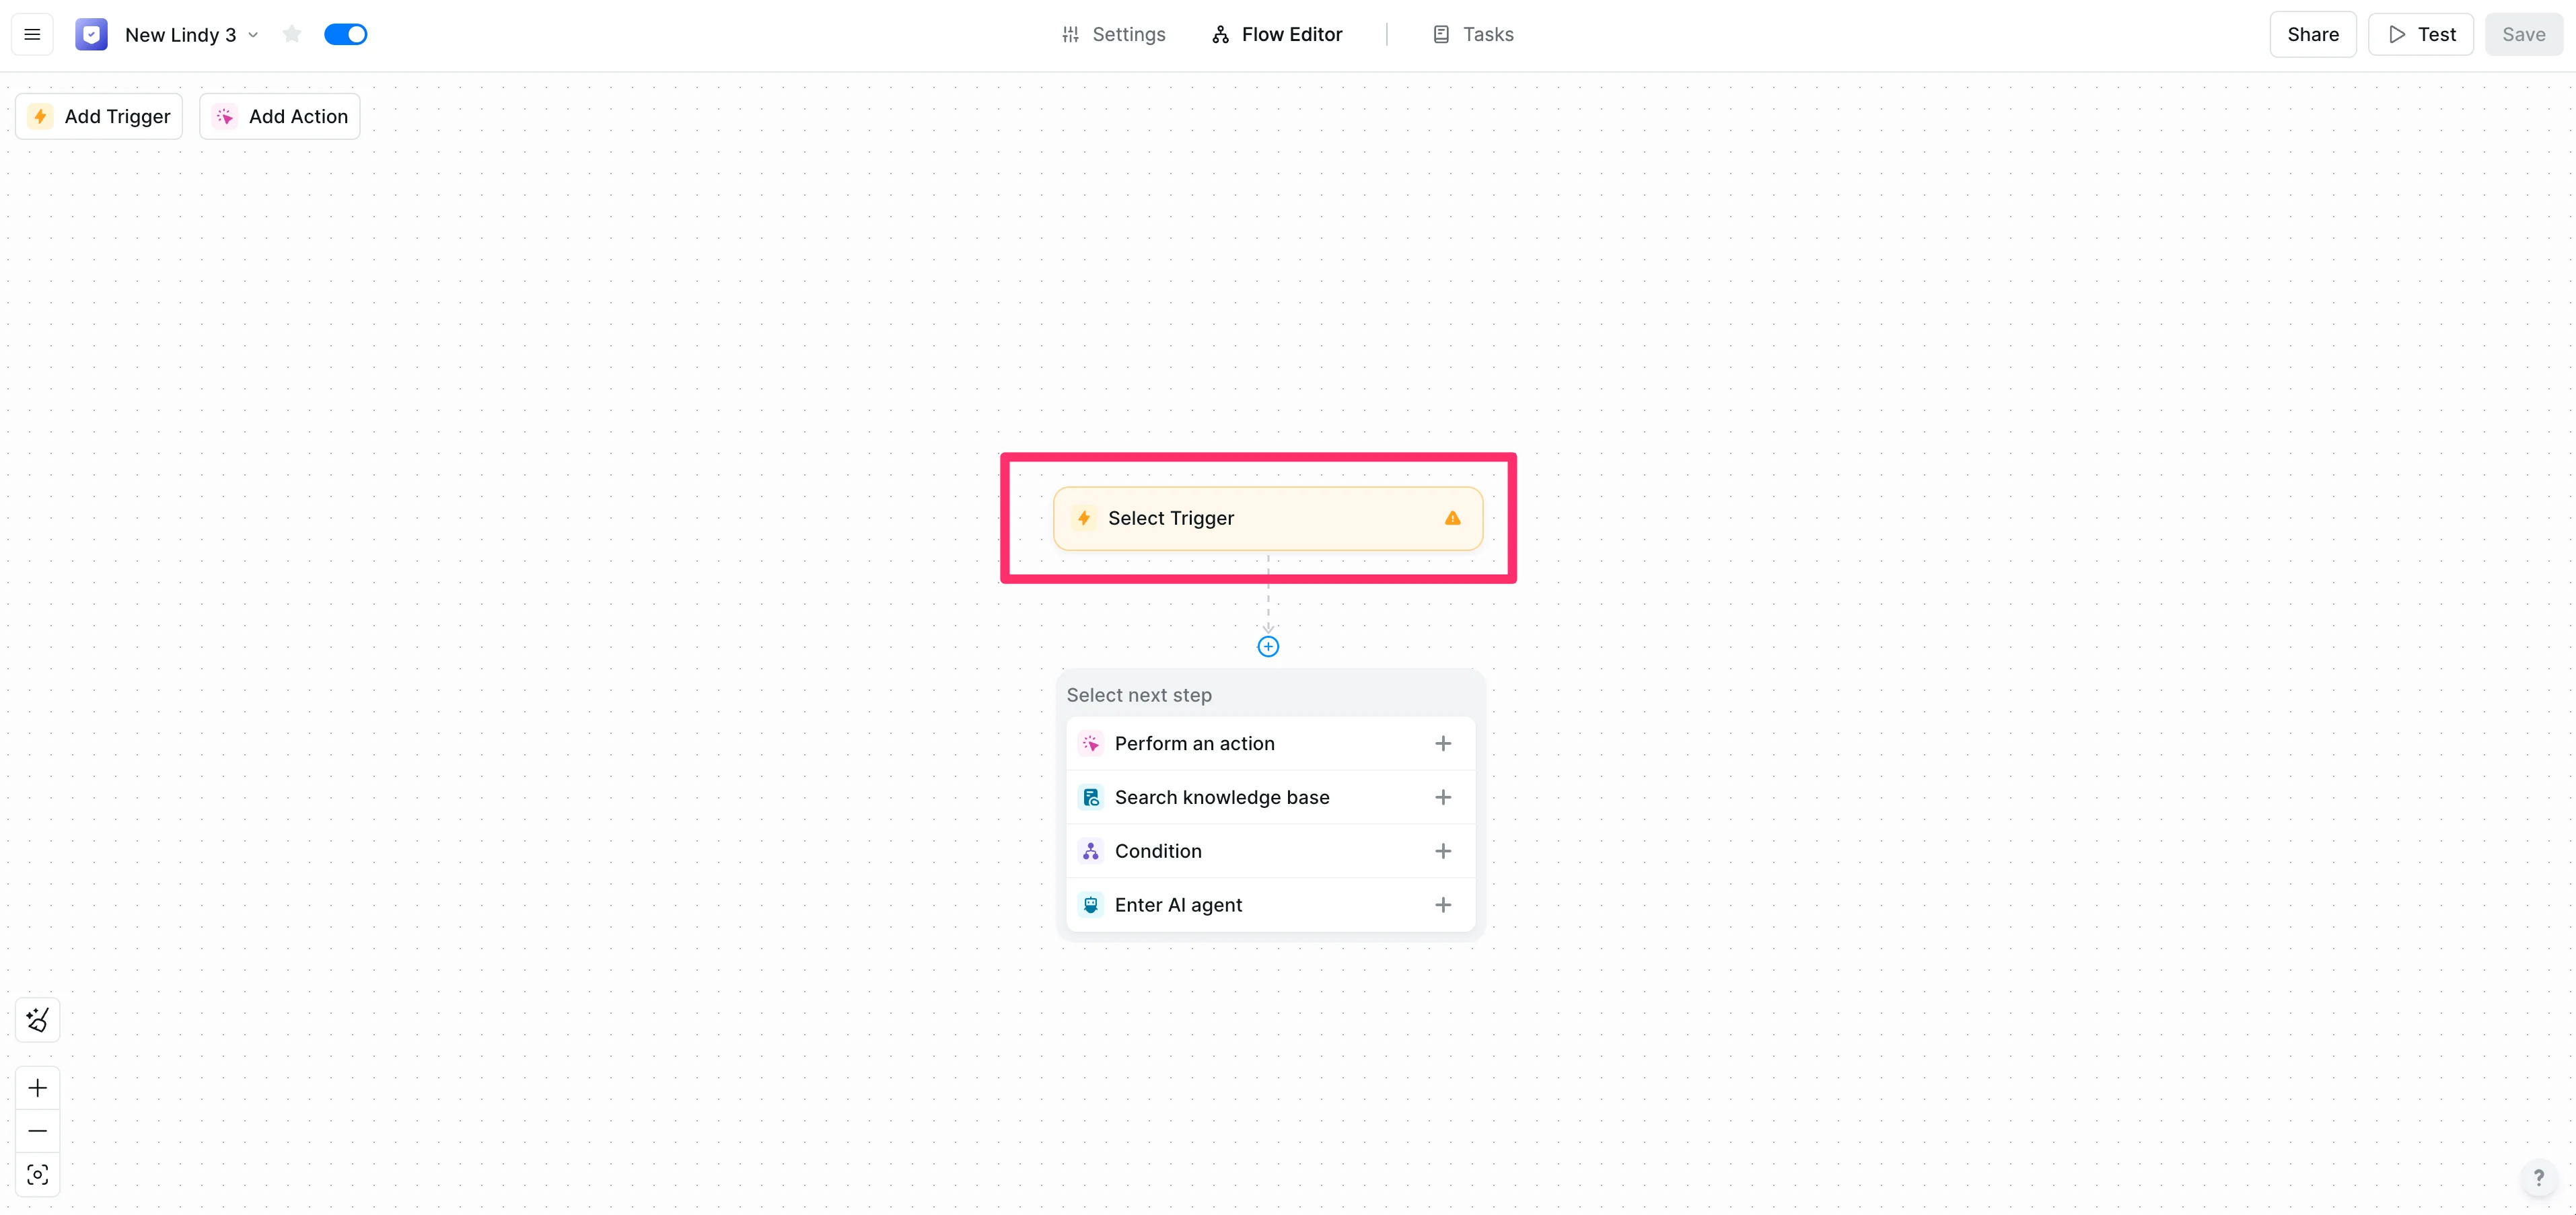
This will take you to the Lindy flow editor page. This will be a two-part workflow: one flow automatically labels marketing emails and the other allows us to query that folder. We’ll get started with the auto-labeling flow. To do this, click the “Select Trigger” option.
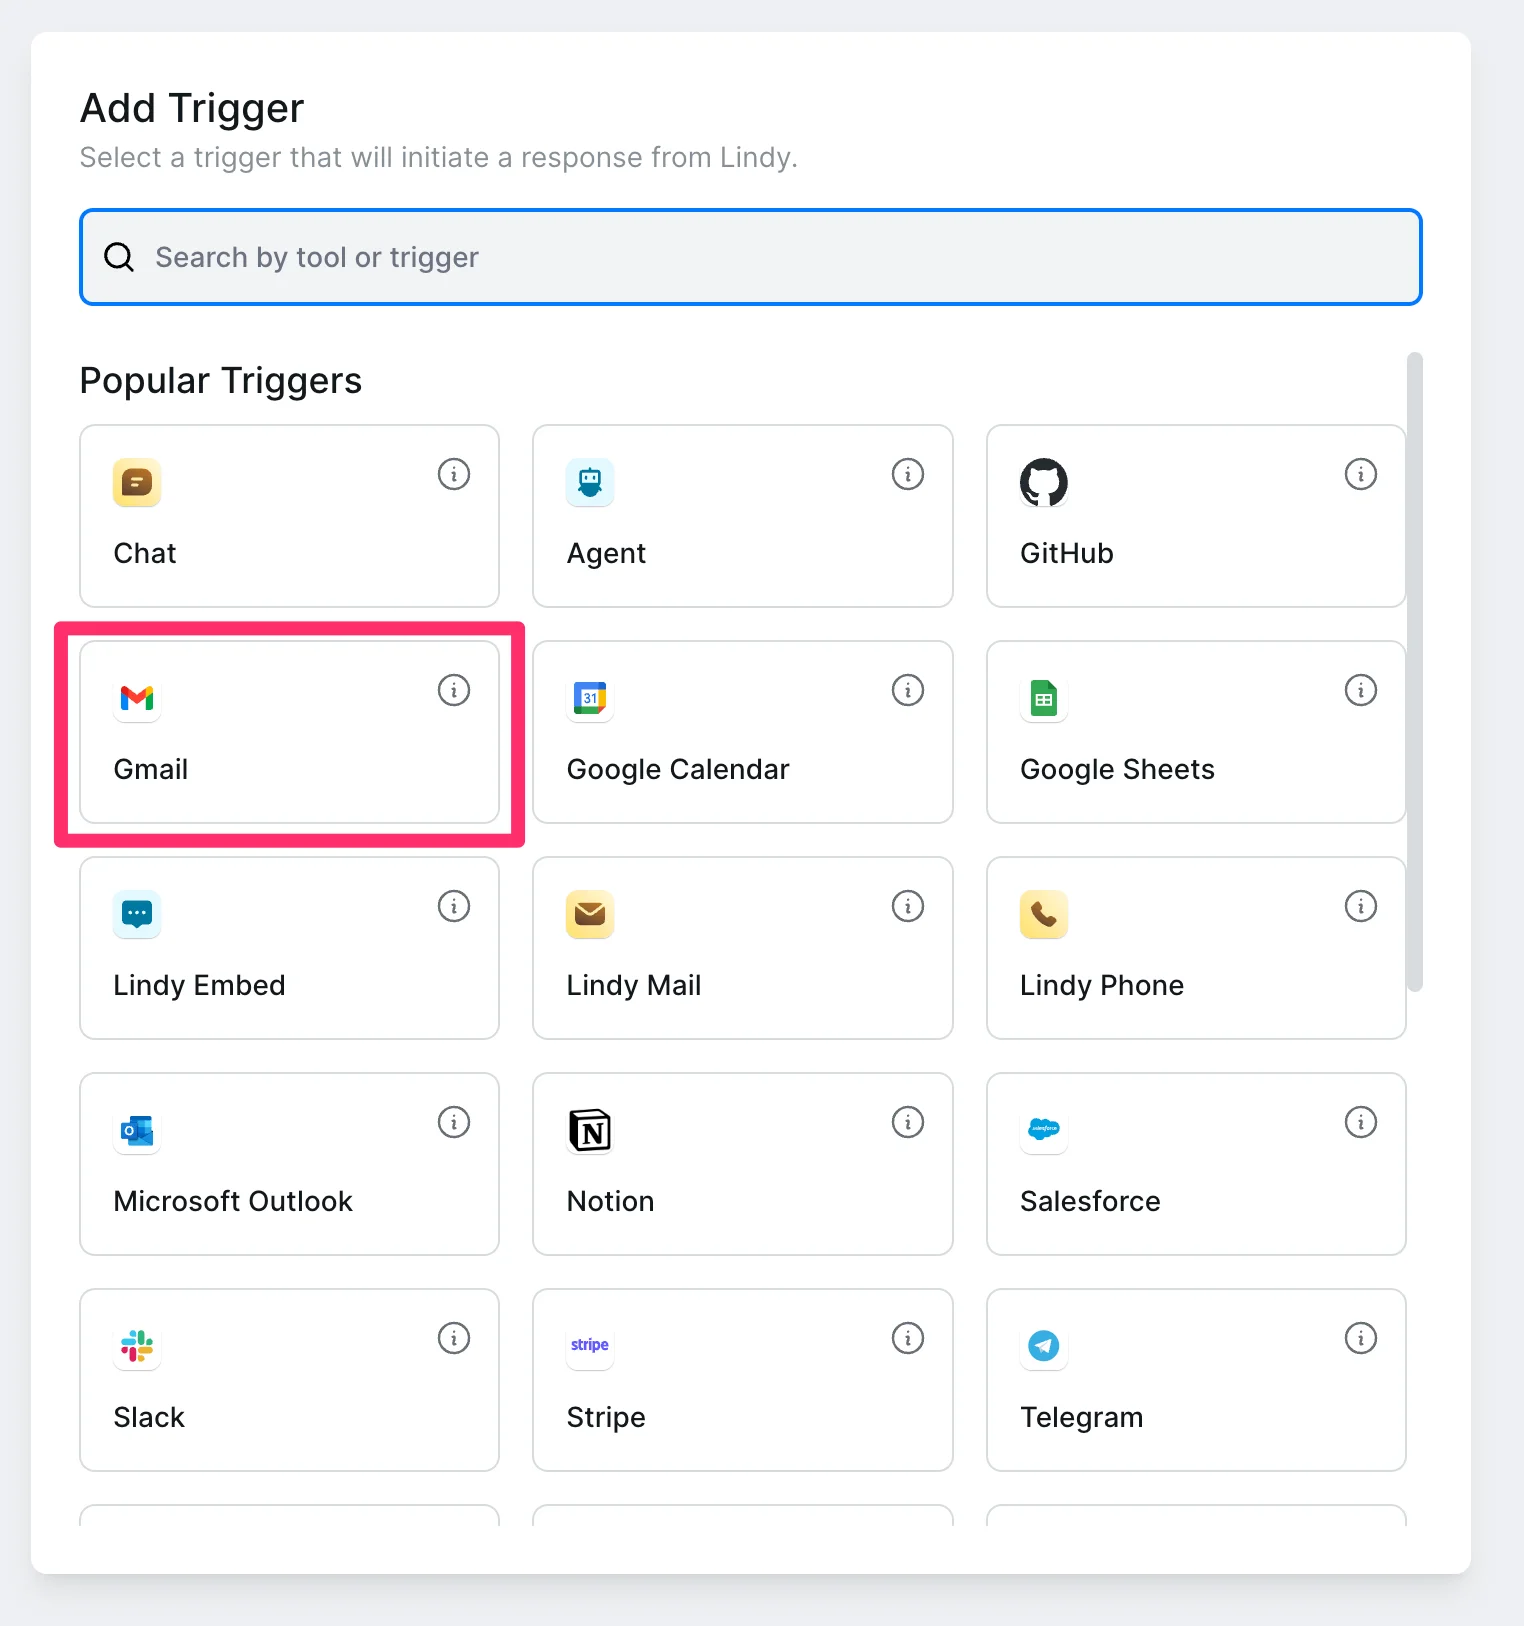
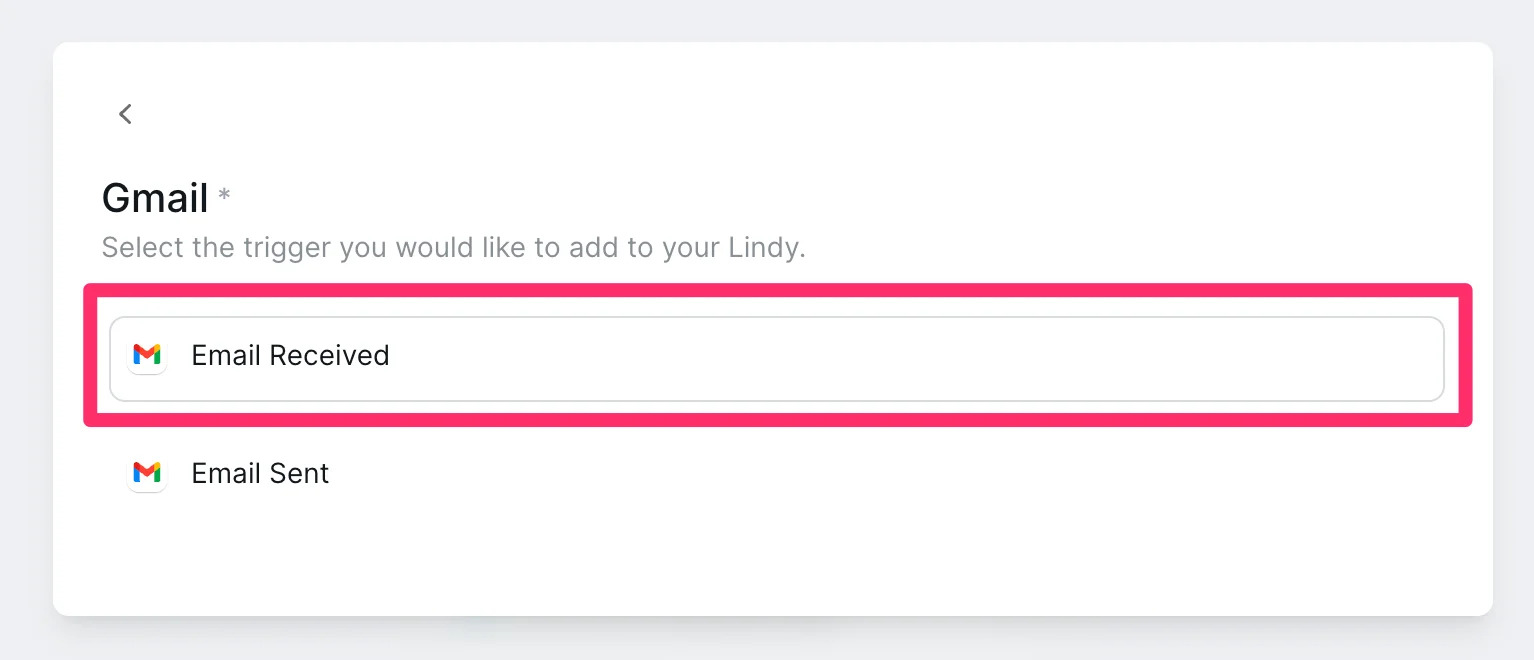
Then, select the Gmail application.
For the trigger action, select “Email Received”.
Connect your Gmail account in the top right corner of the “Email Received” action editor.
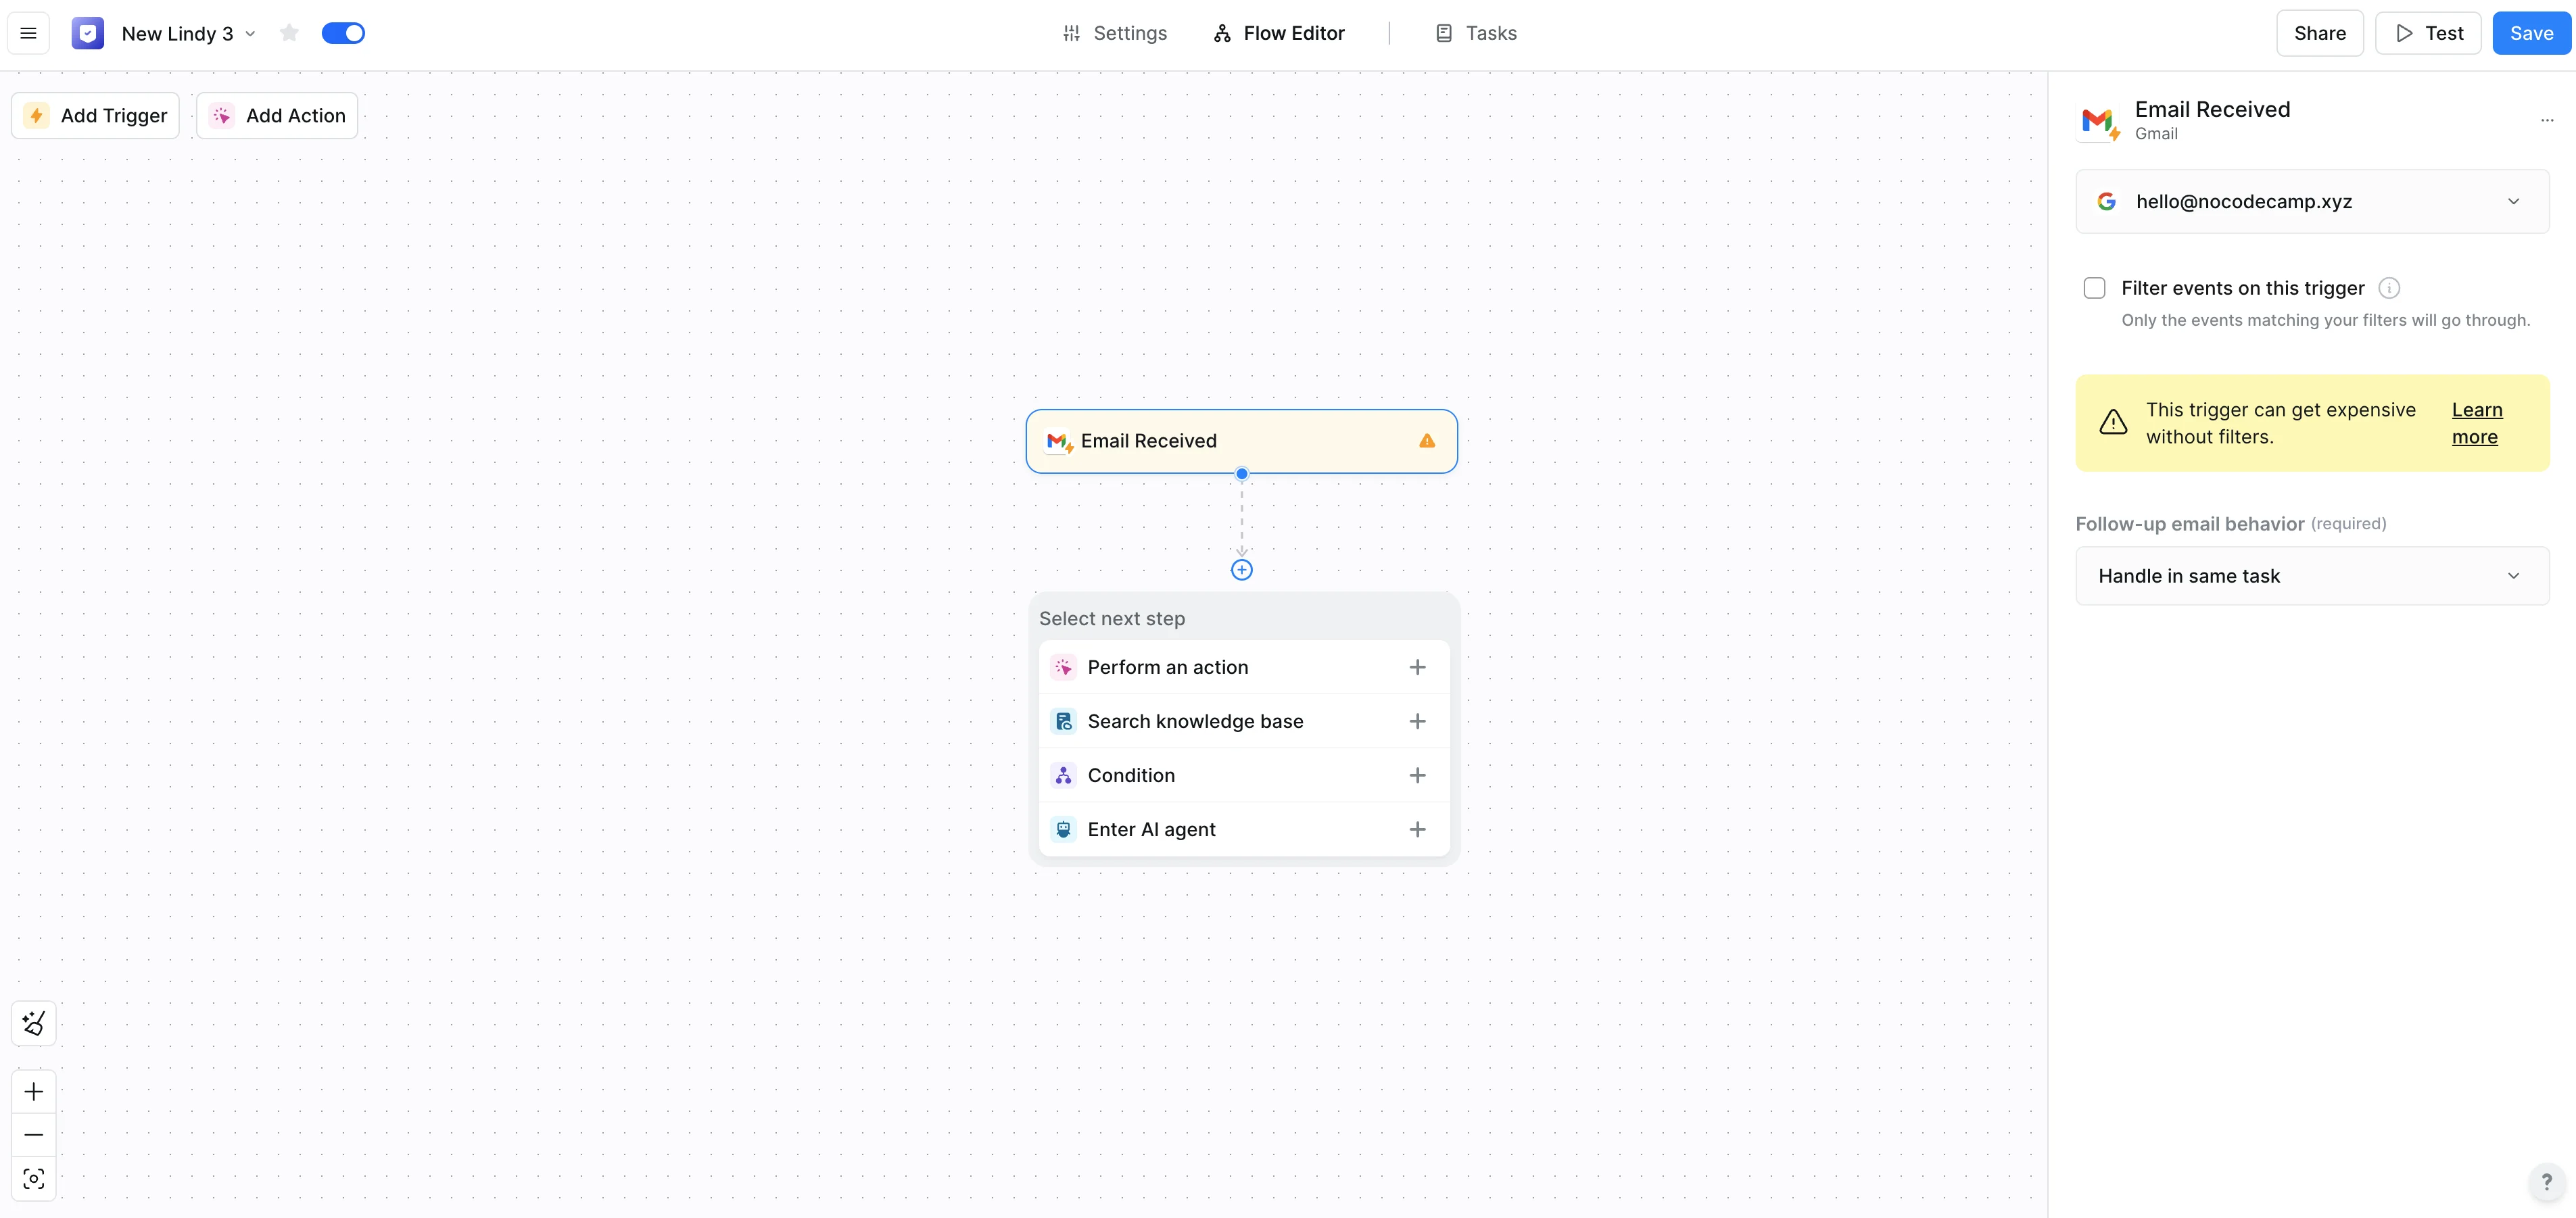
Create labeling logic
With our email now triggering the flow, we can add a condition to auto-label marketing emails. To do this, click the “Condition” option in the “Select next step” dialog box.
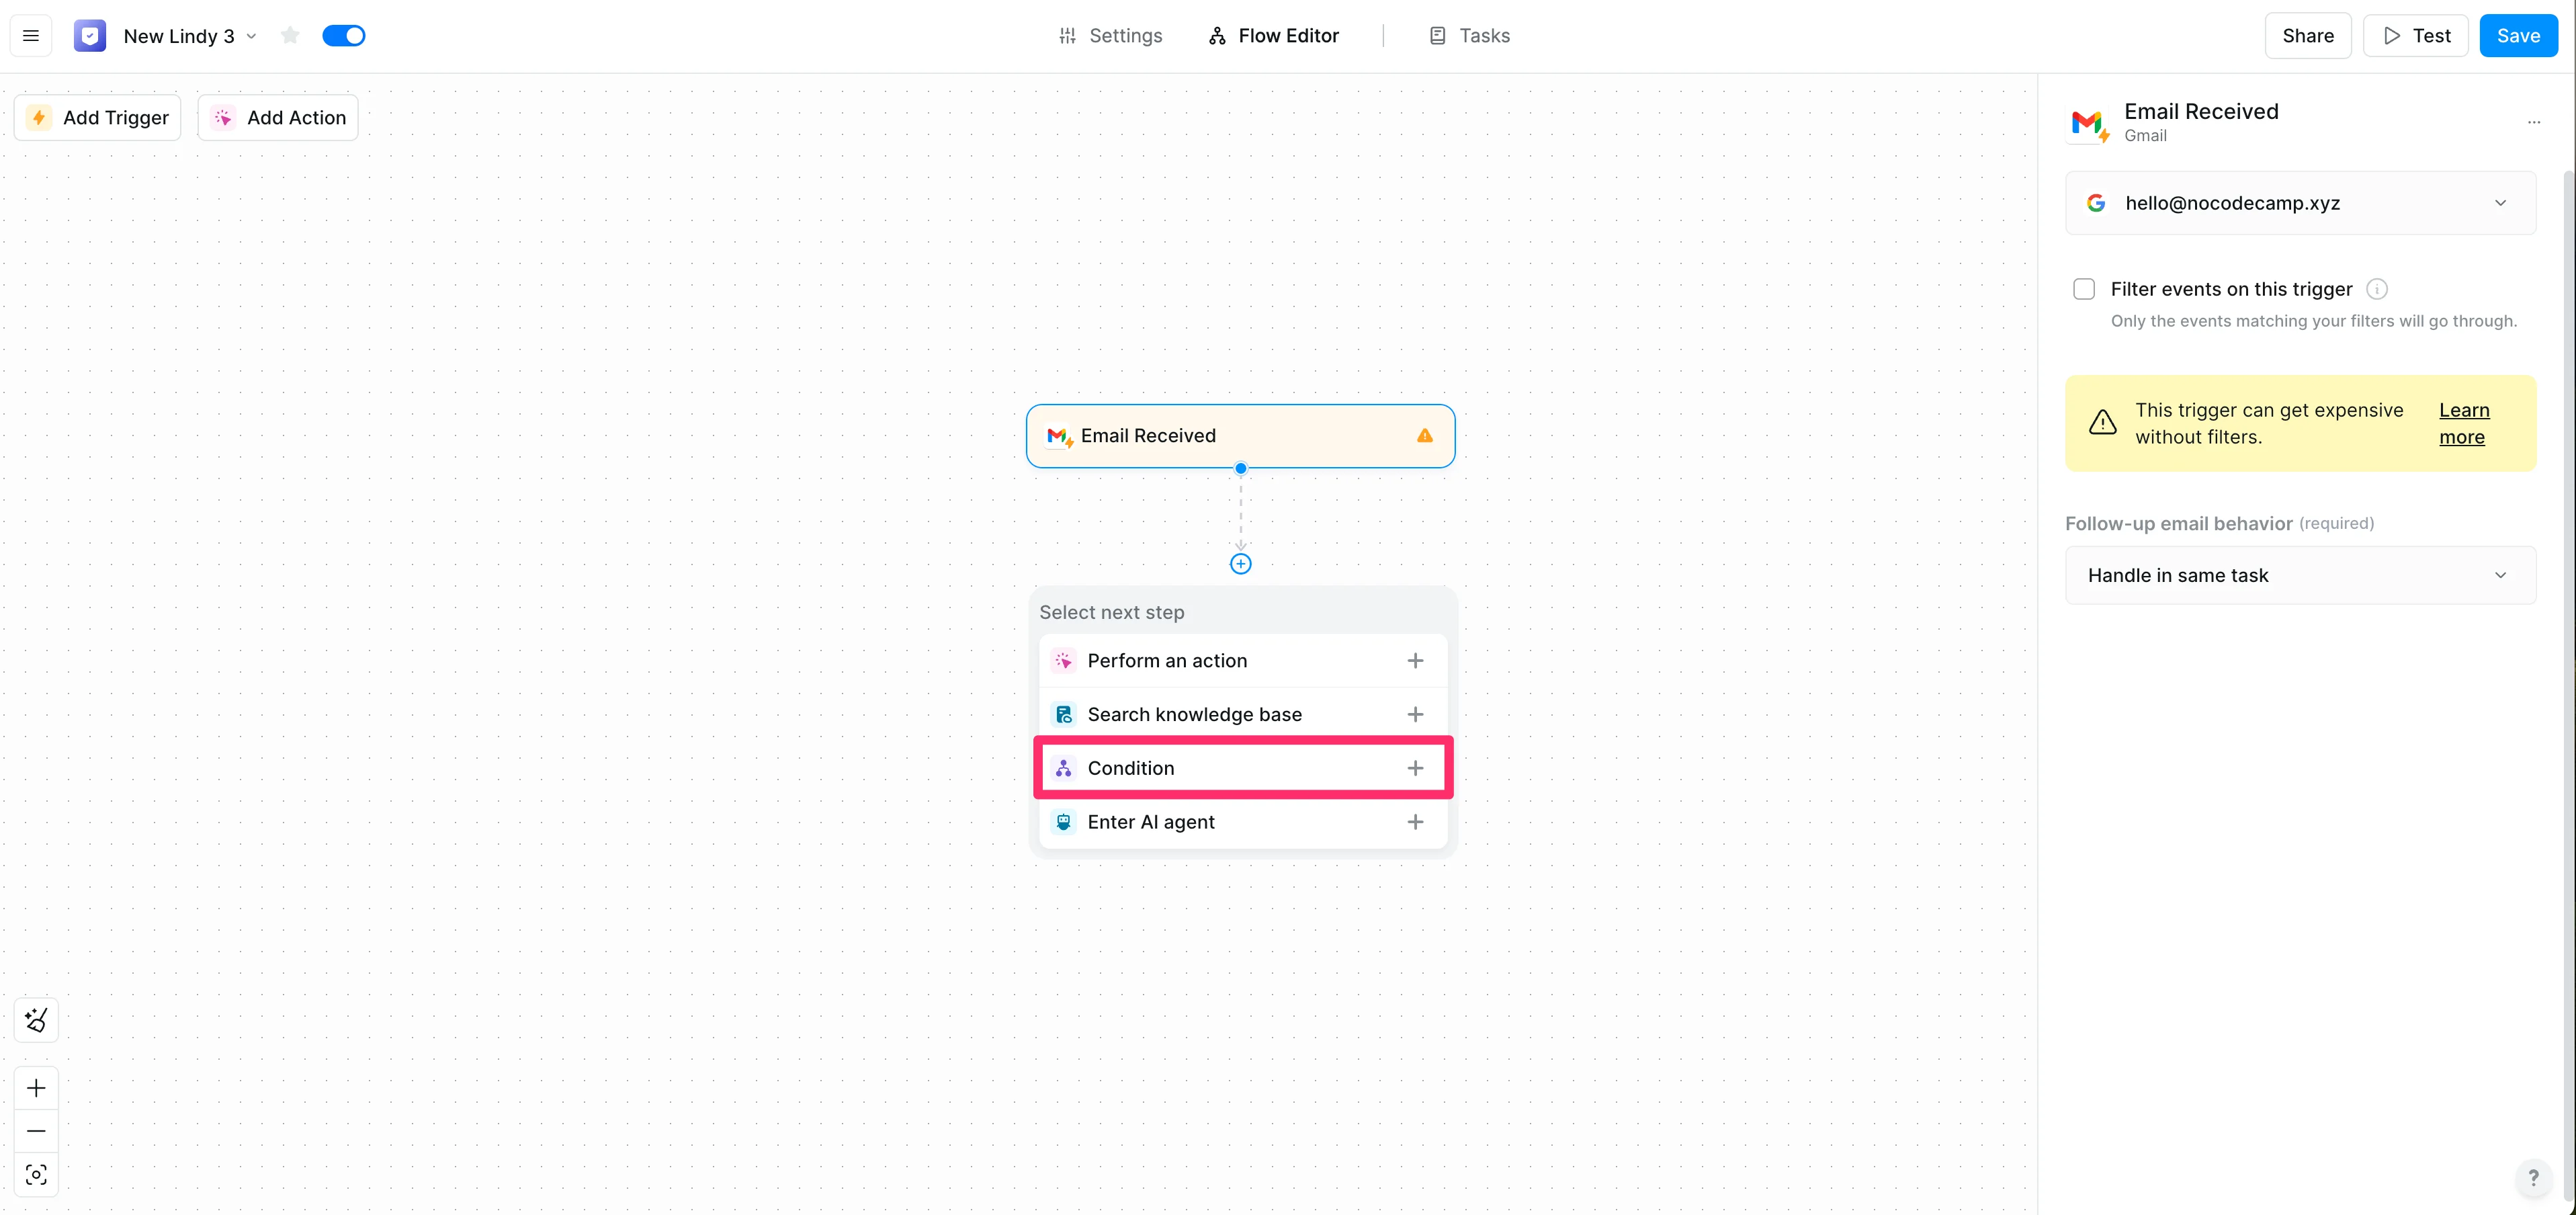
For the condition, we’ll use an AI prompt to define this conditional labeling.
Sample Prompt:
The email is a marketing email.
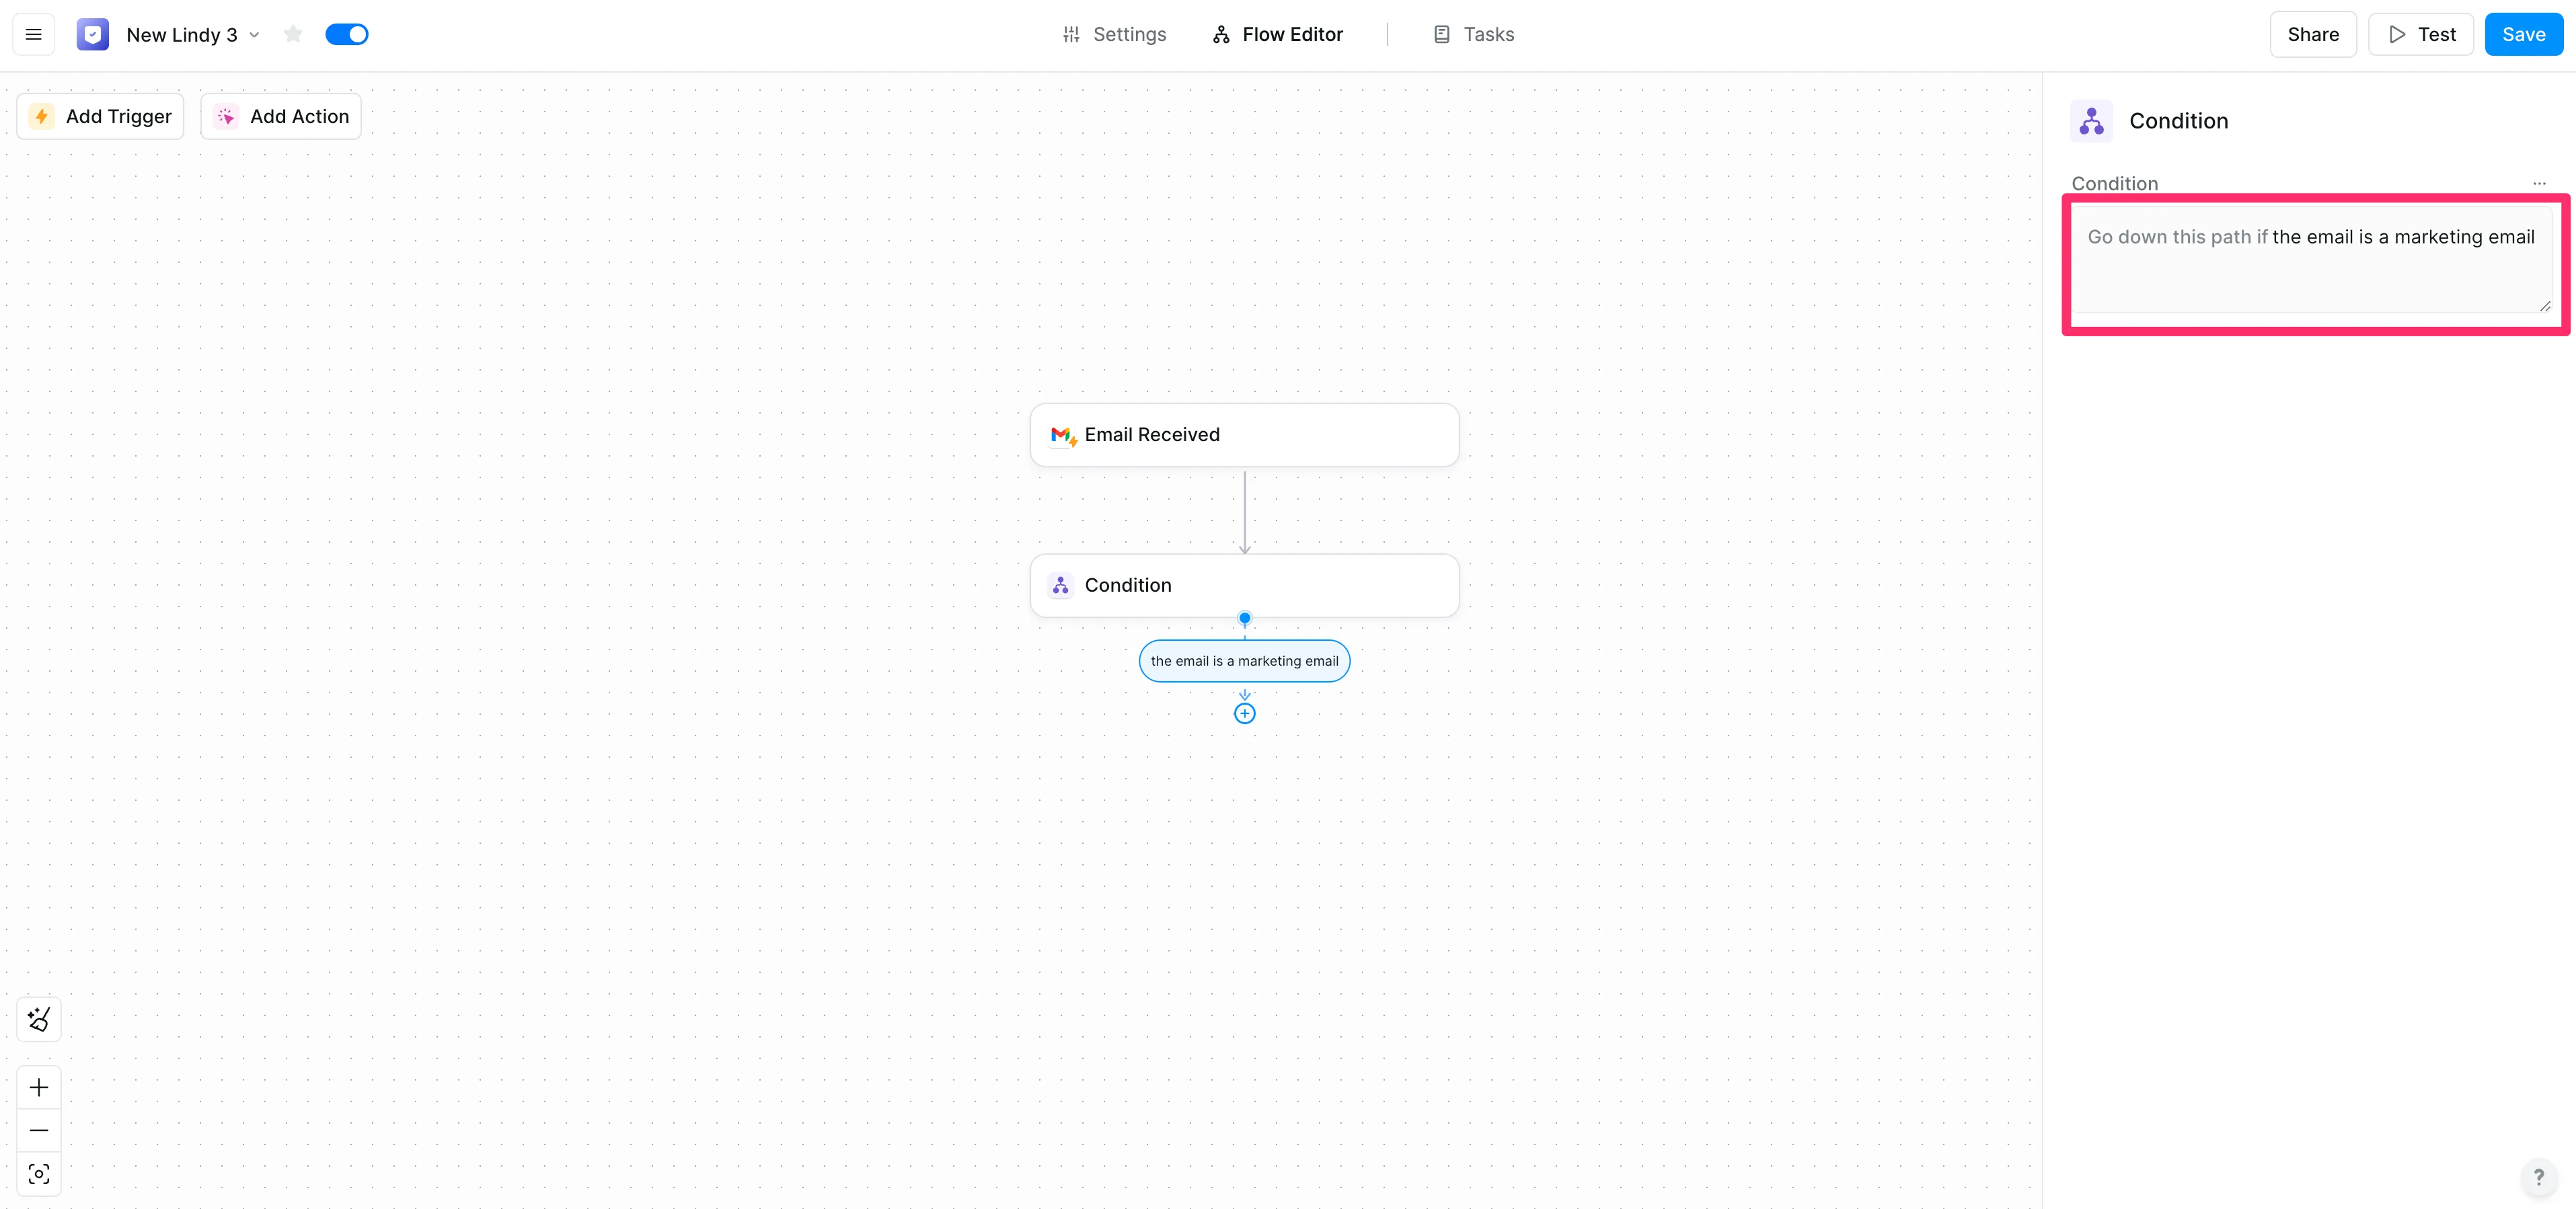
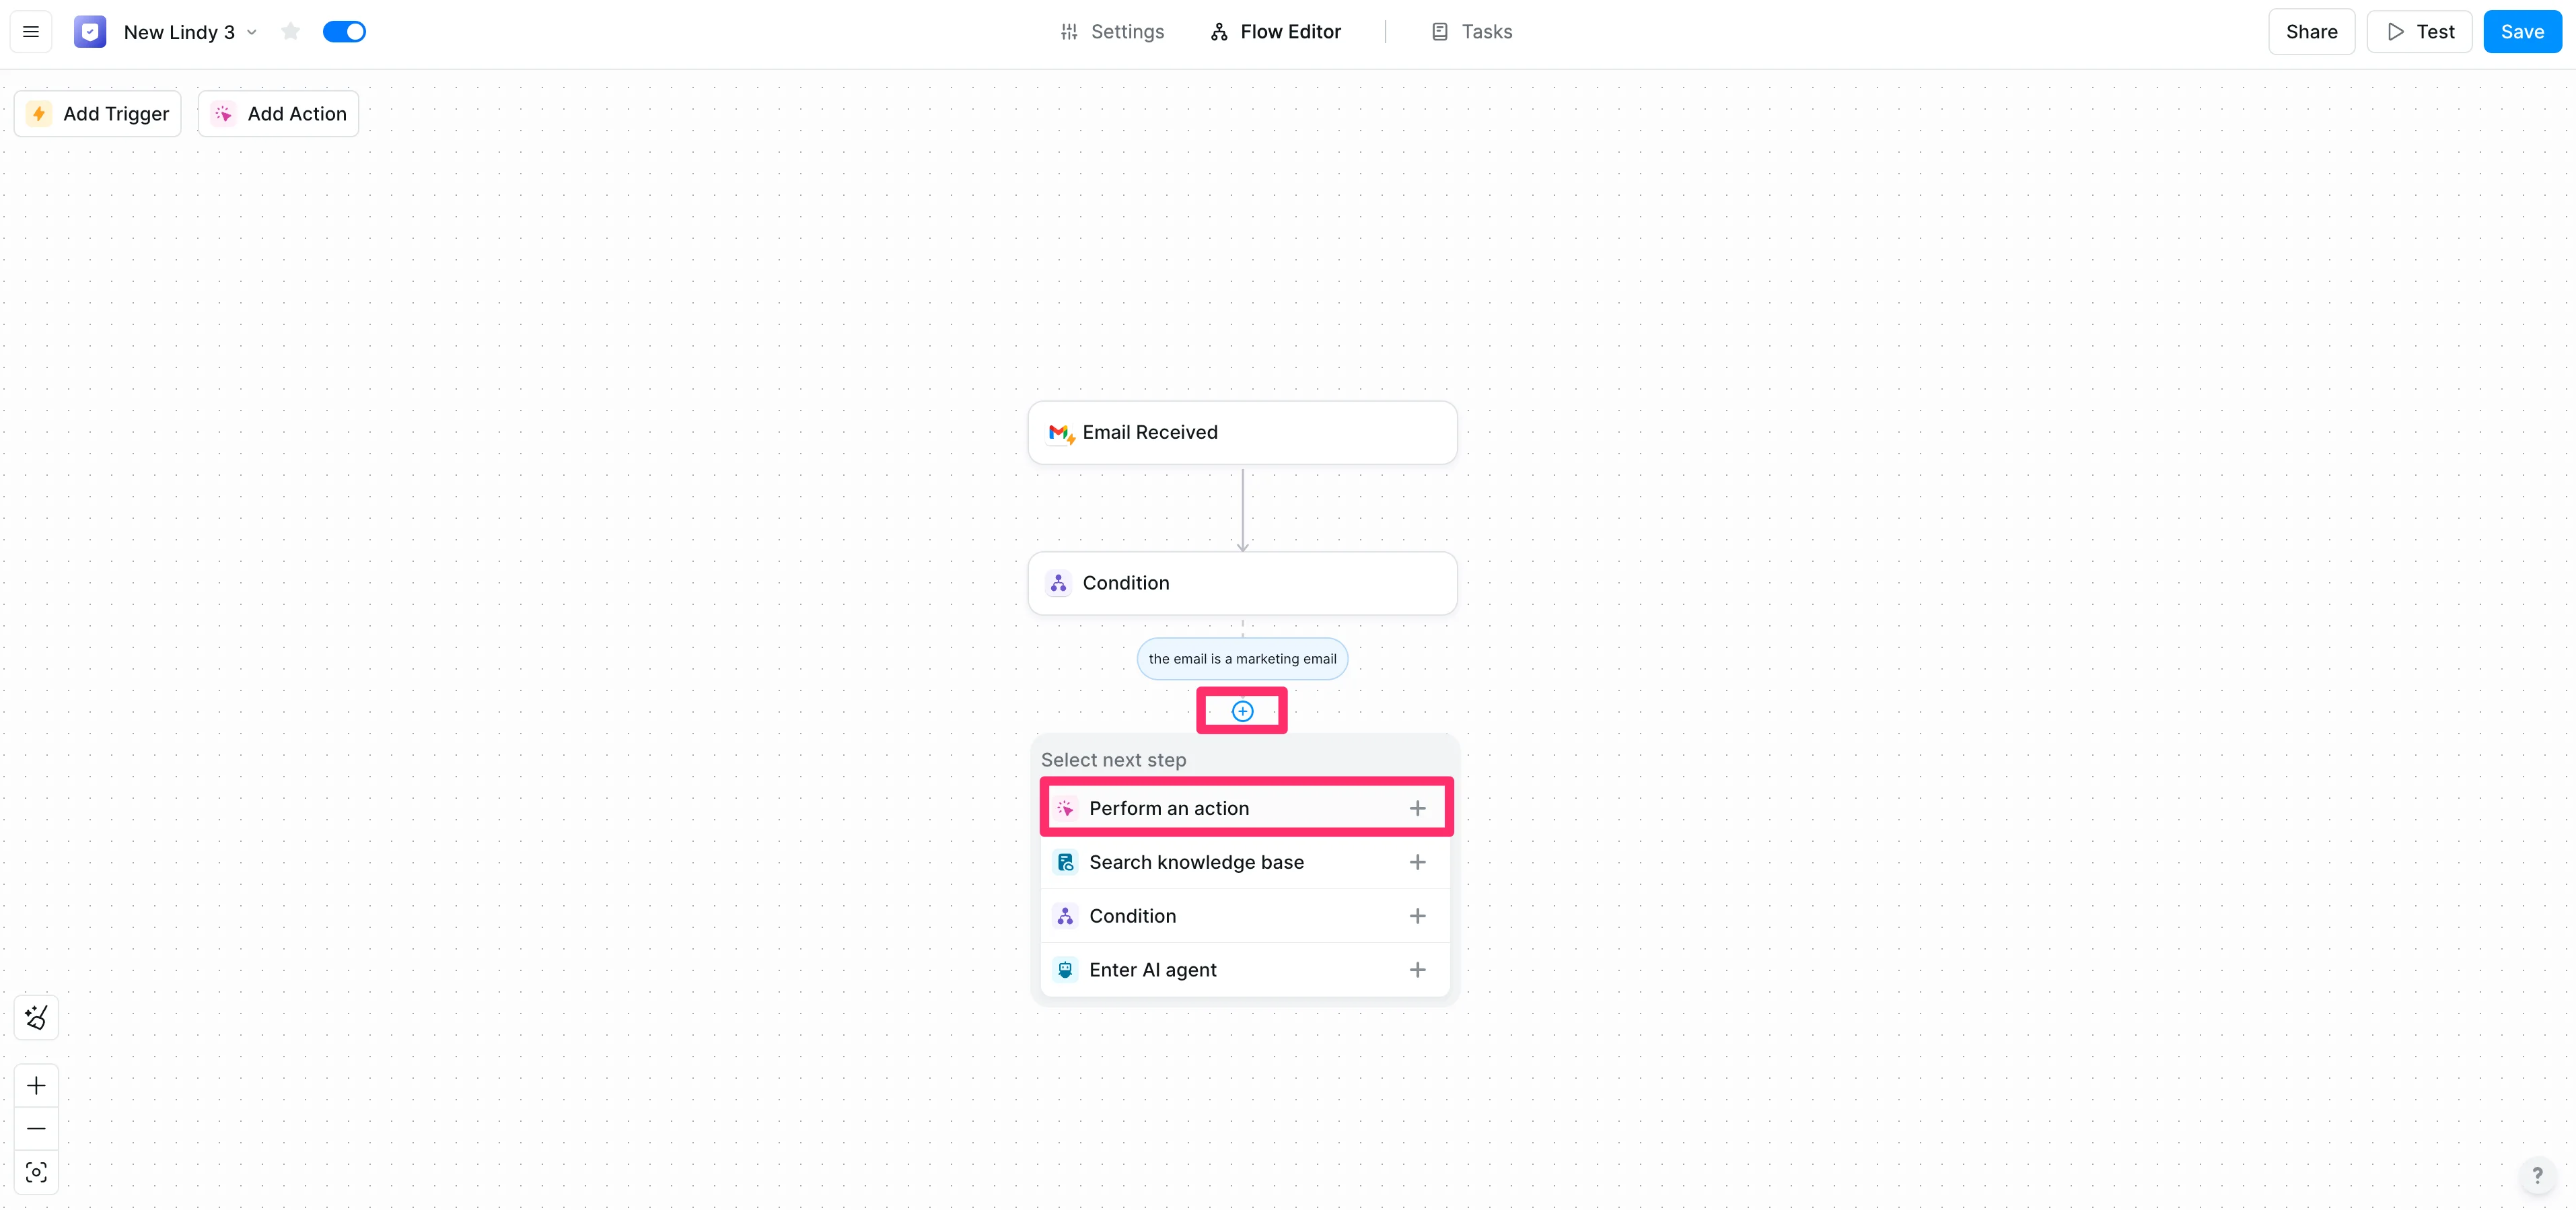
With our condition set, we can now add the inbox label. To do this, click the “+” button below the condition step and select “Perform an action”.
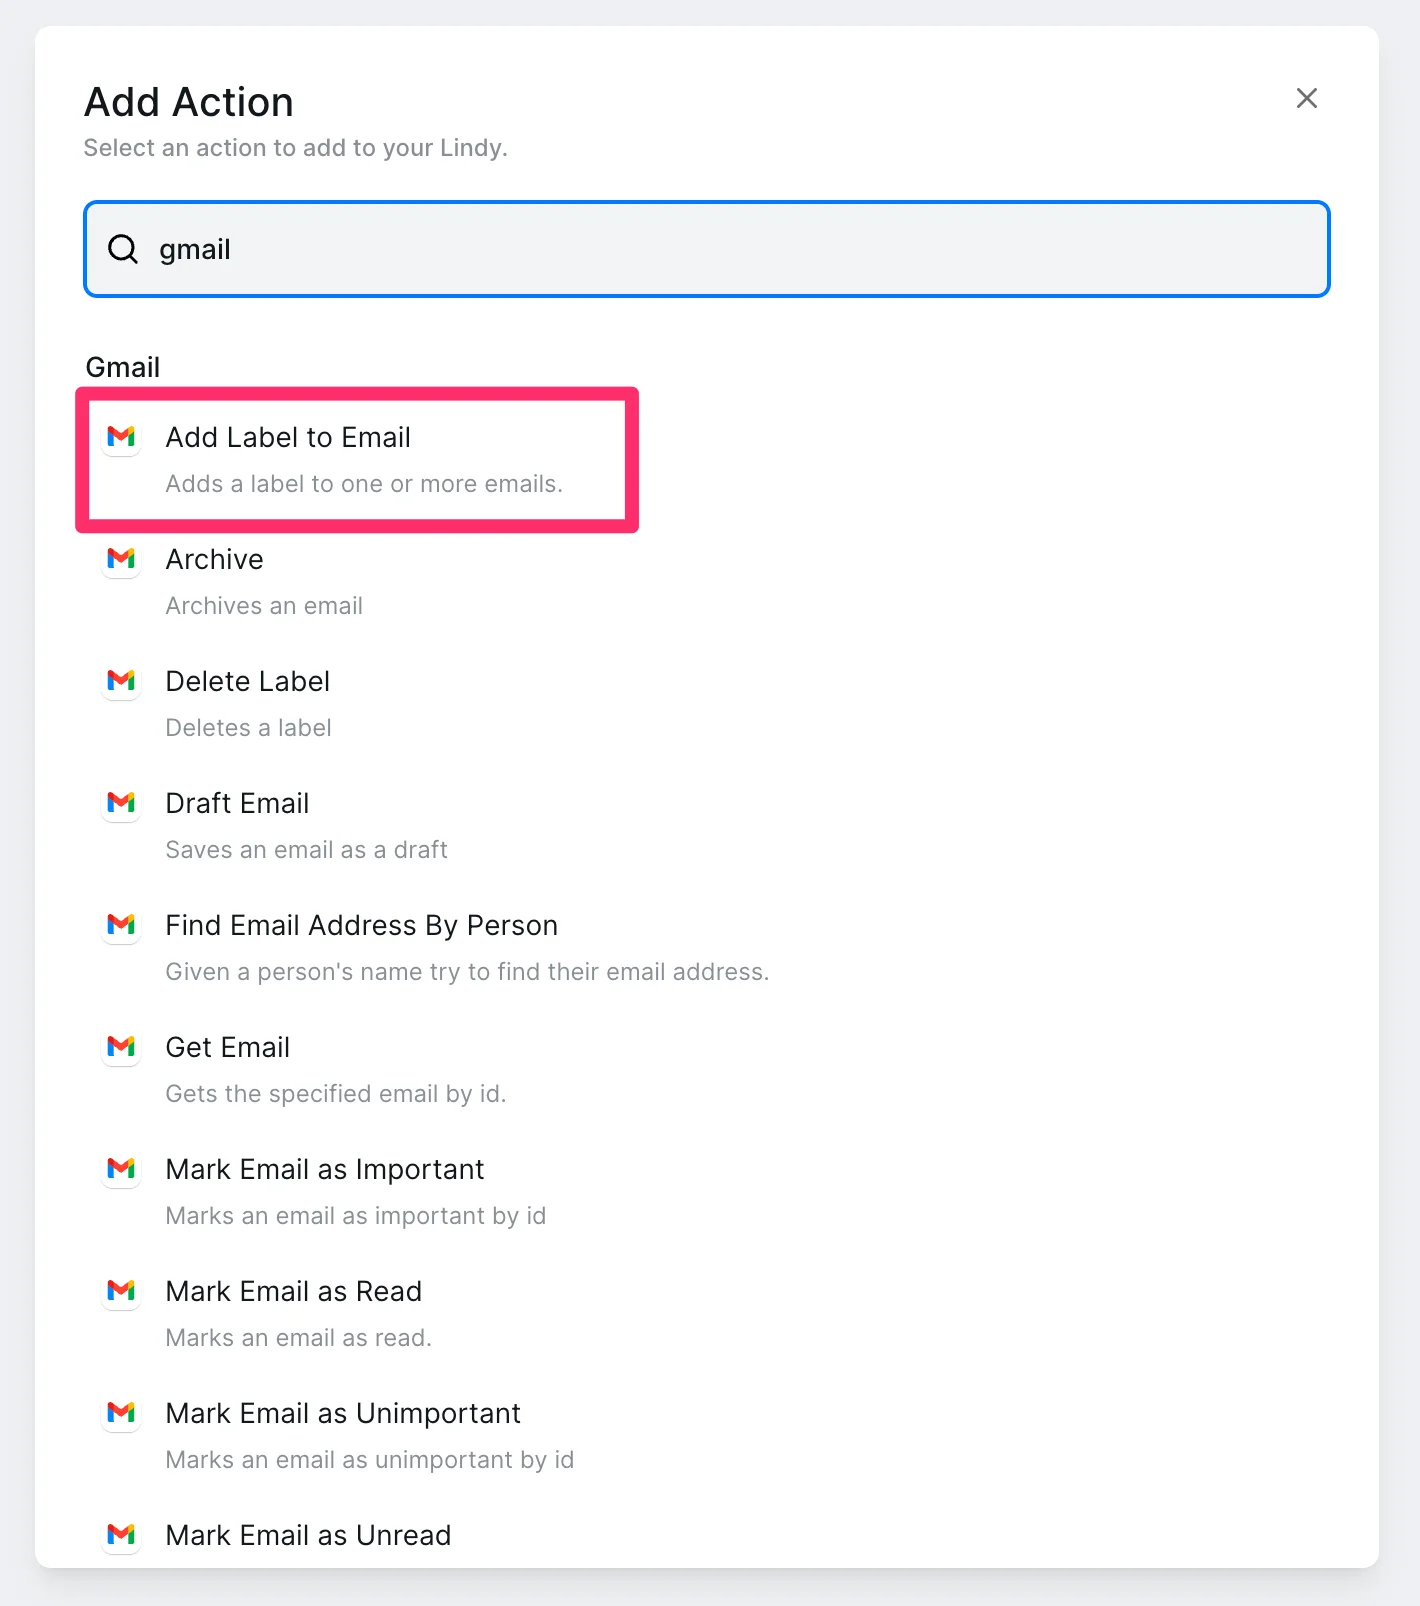
Search “Gmail” and select the “Add Label to Email” action option.
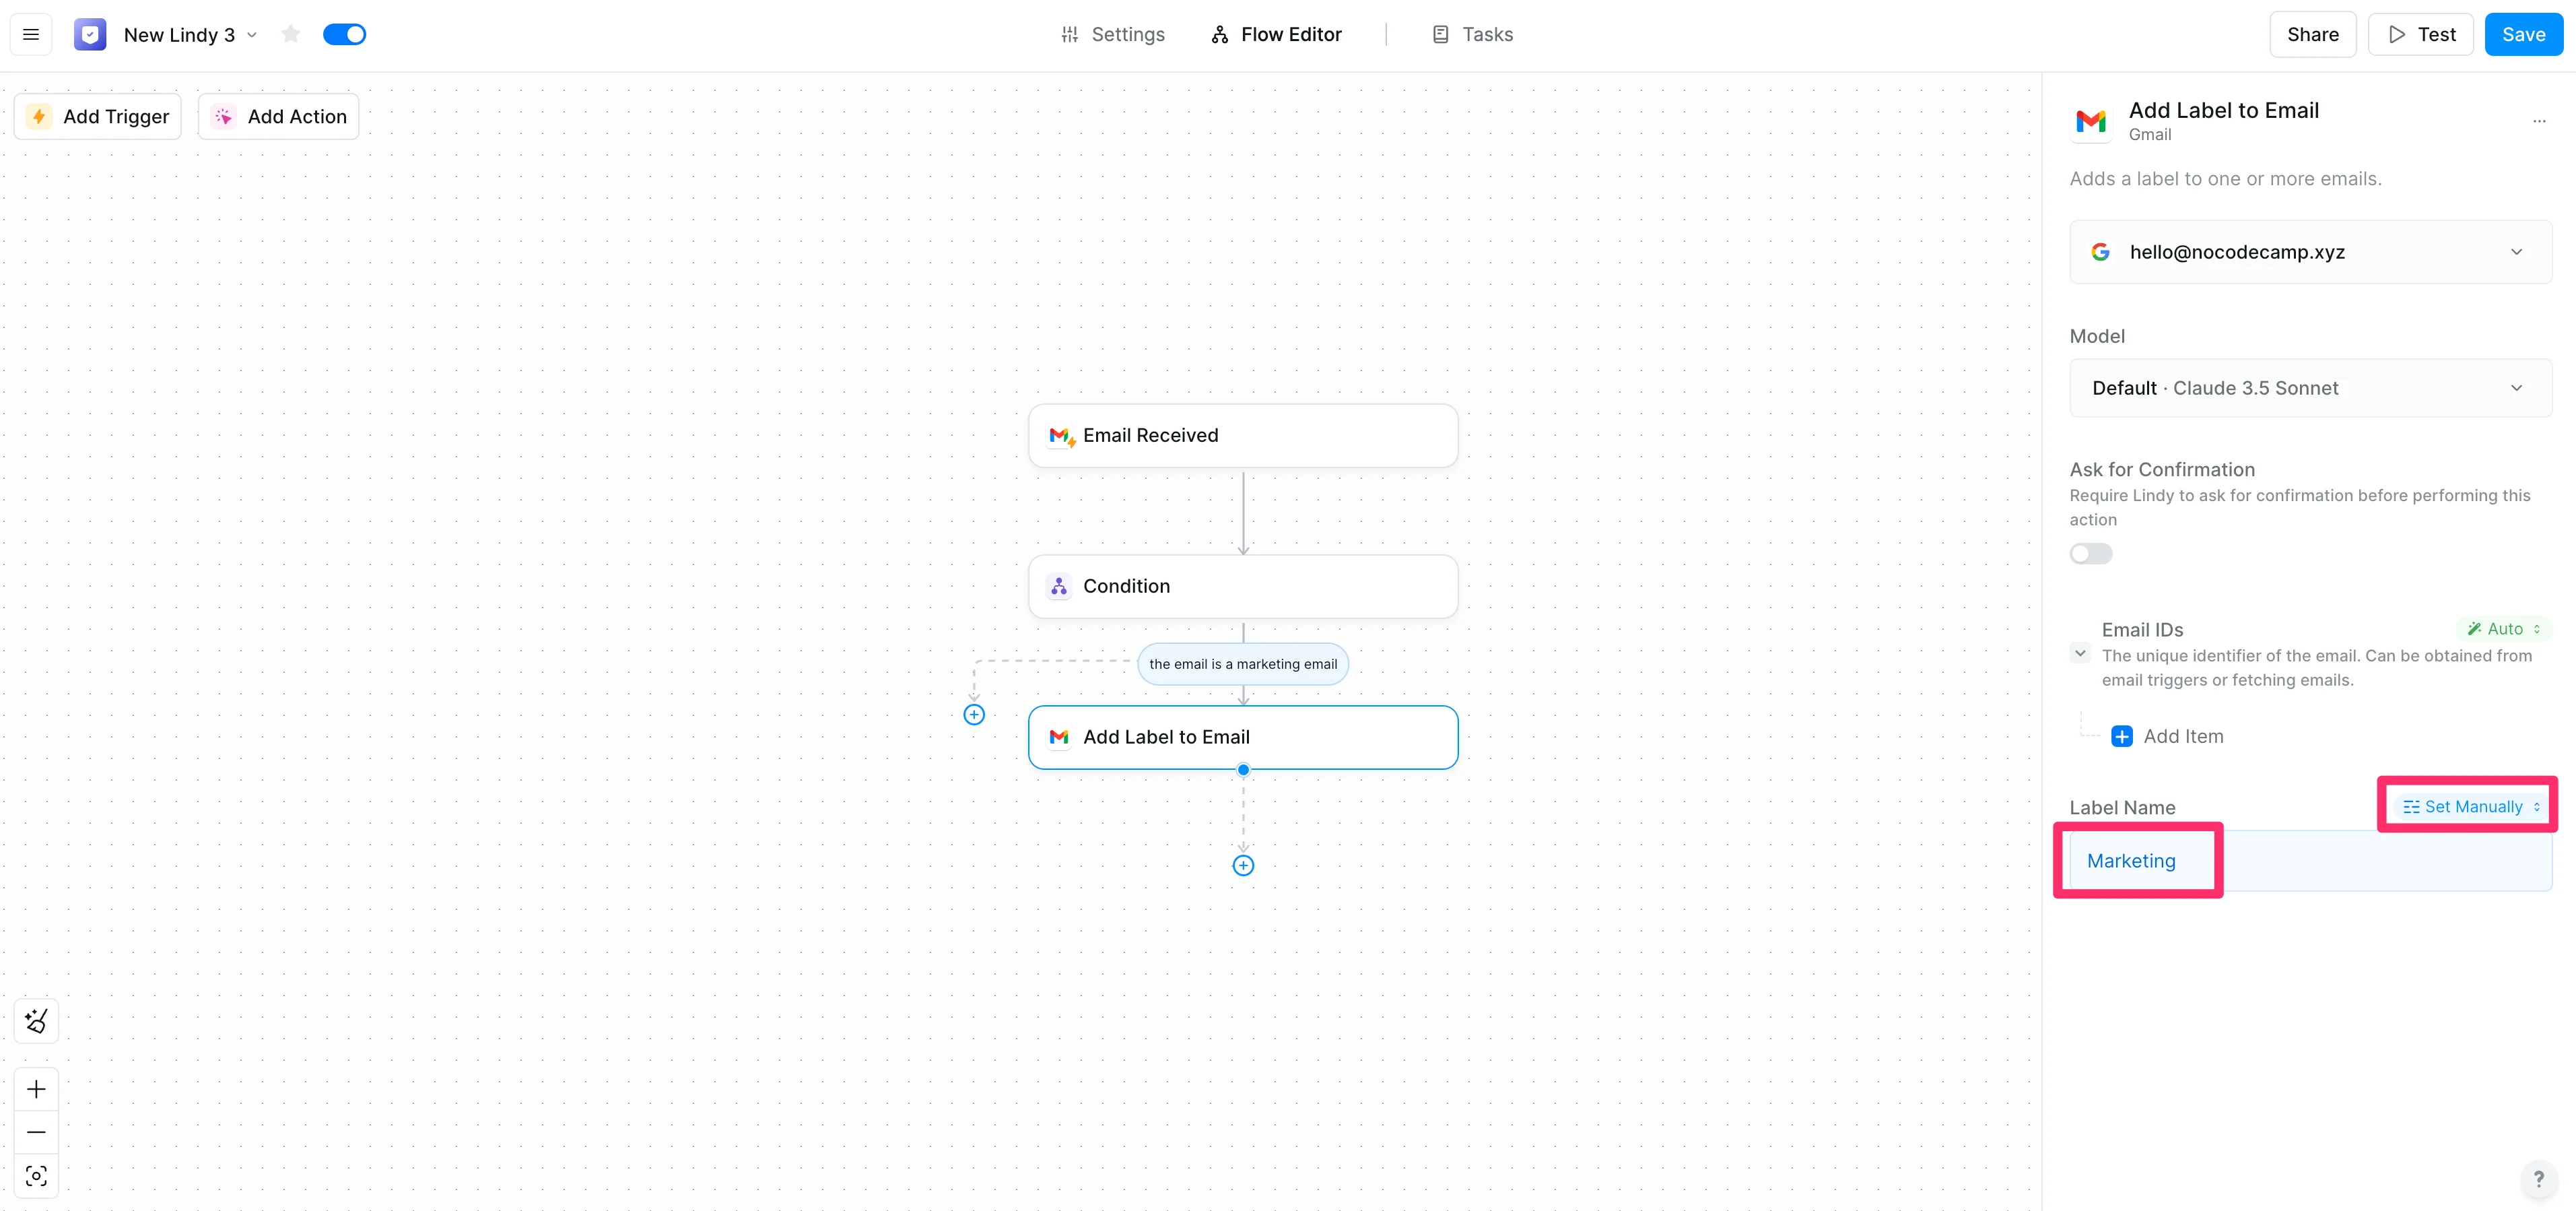
In the action editor, update the “Label Name” to “Marketing”. (Or, your preferred label name of choice).
Develop your email querying workflow
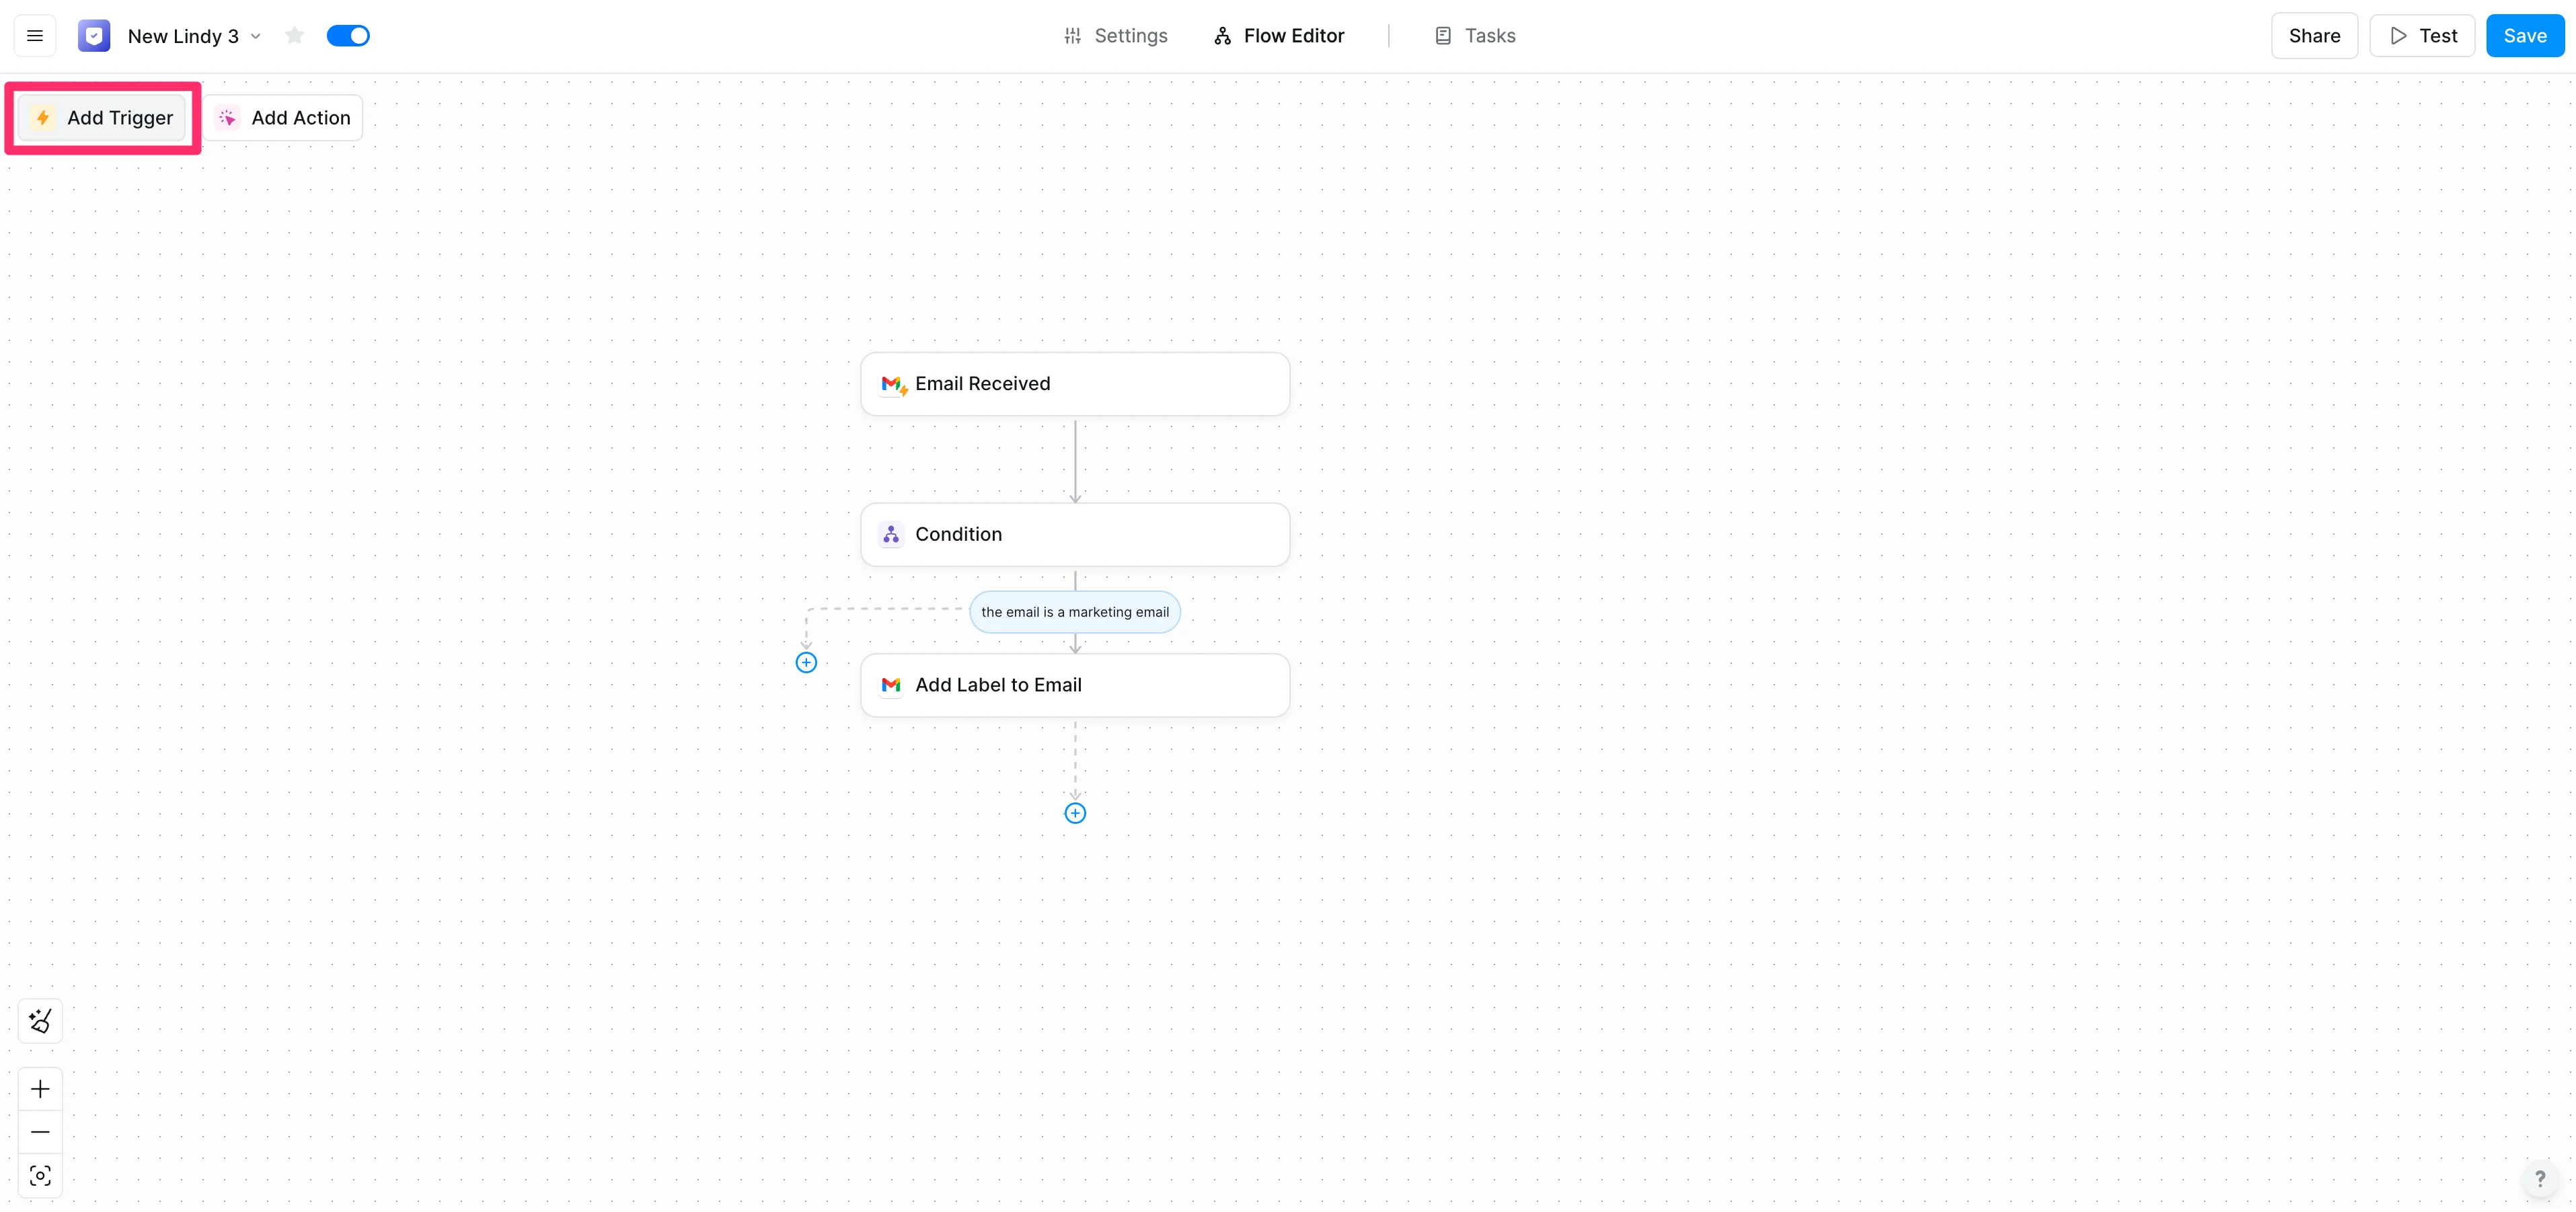
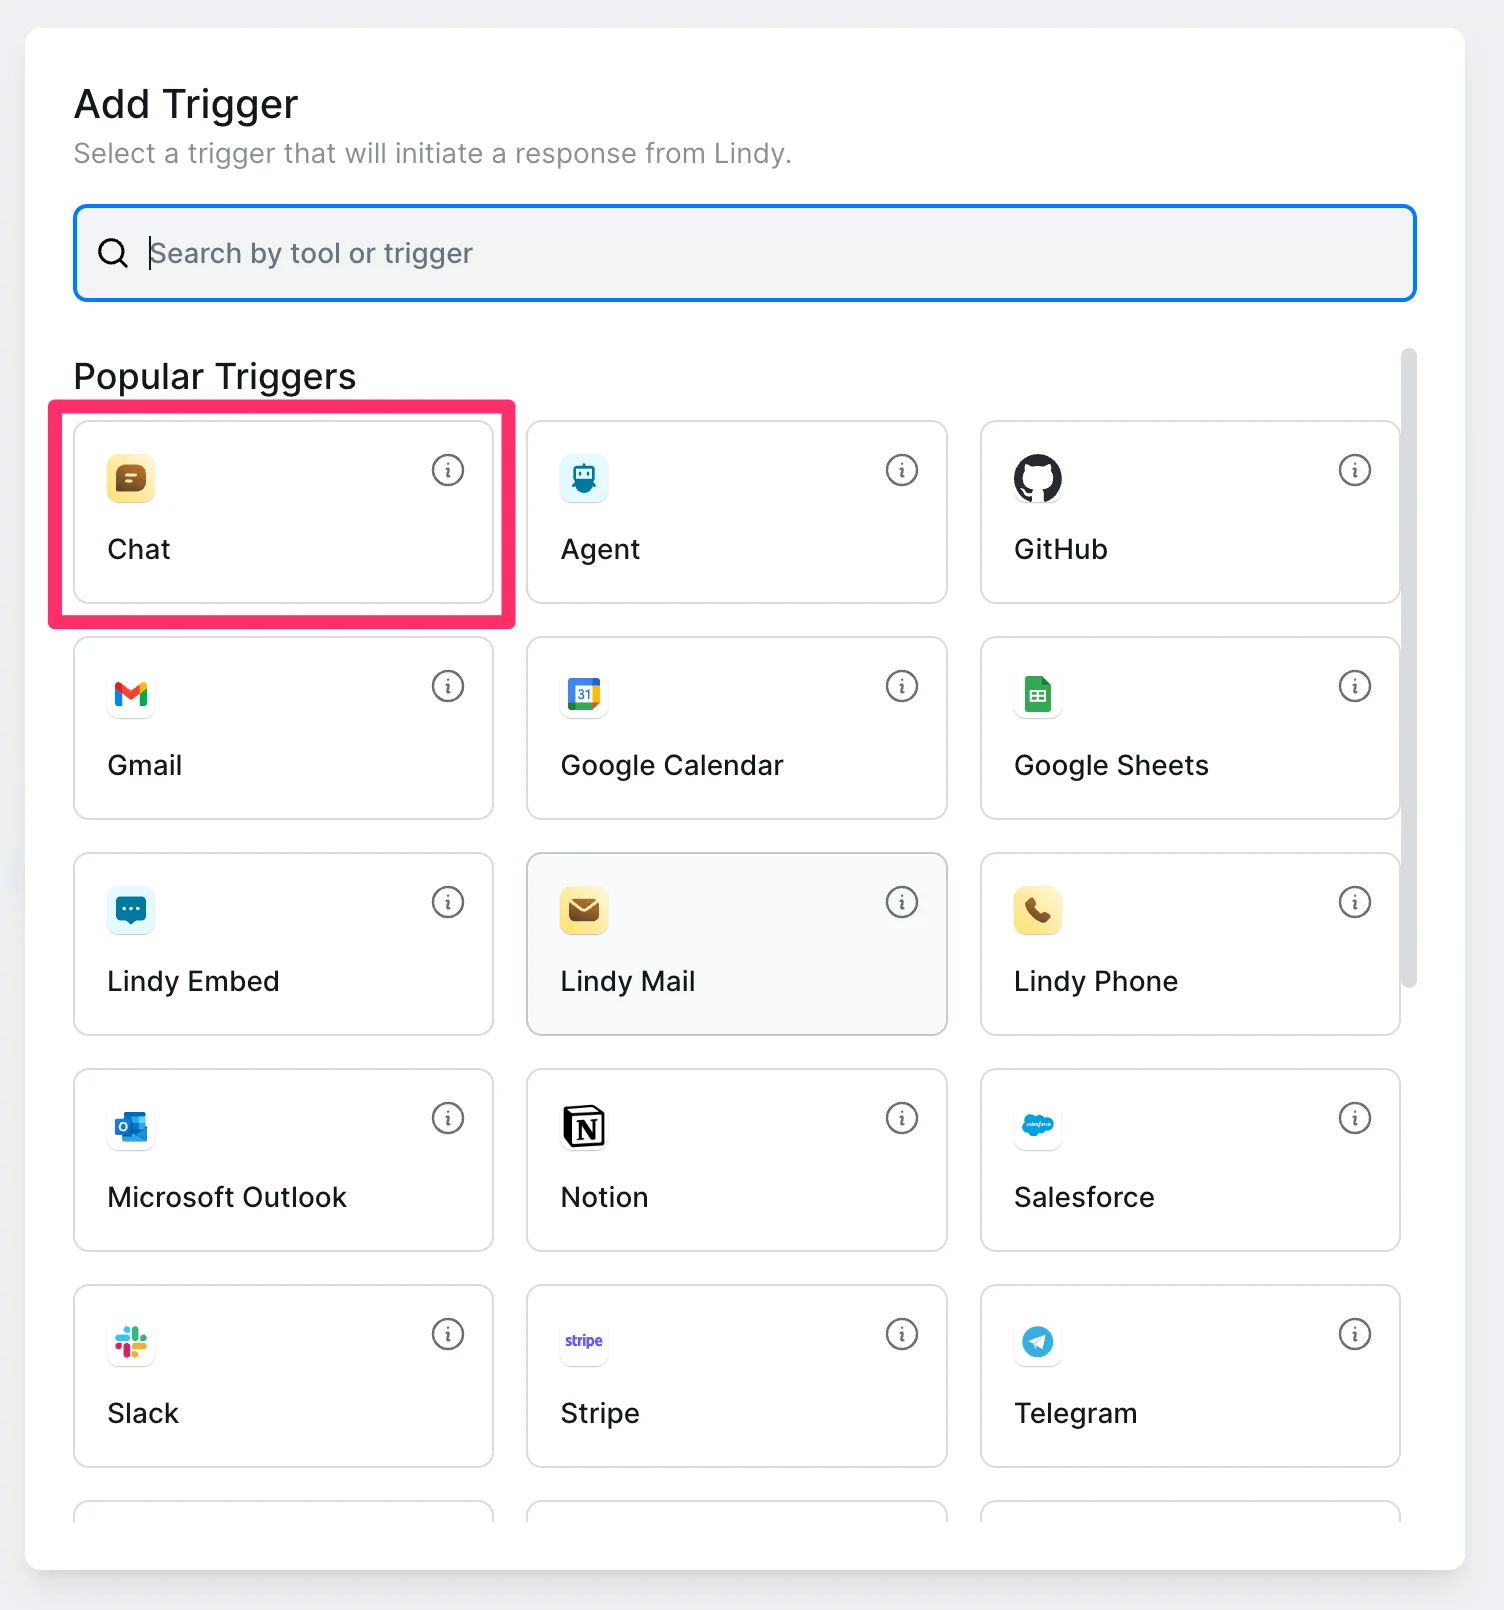
That’s it for our email labeling flow! Now, we can set up our email querying flow. This is where we’ll trigger Lindy to query our “Marketing” email folder based on a certain request. To do this, click on the “Add Trigger” button in the top left corner of the flow editor.
In the resulting pop-up window, select the “Chat” option from the “Popular Triggers” section.
With our trigger selected, we can set the “Greeting Message” to make it clear what we need to chat to properly trigger this workflow. We’re going to send a specific sender’s email to trigger the query, so we’ll set the “Greeting Message” accordingly.
Greeting Message:
Send me the sender email of te marketing sequence you want to breakdown.
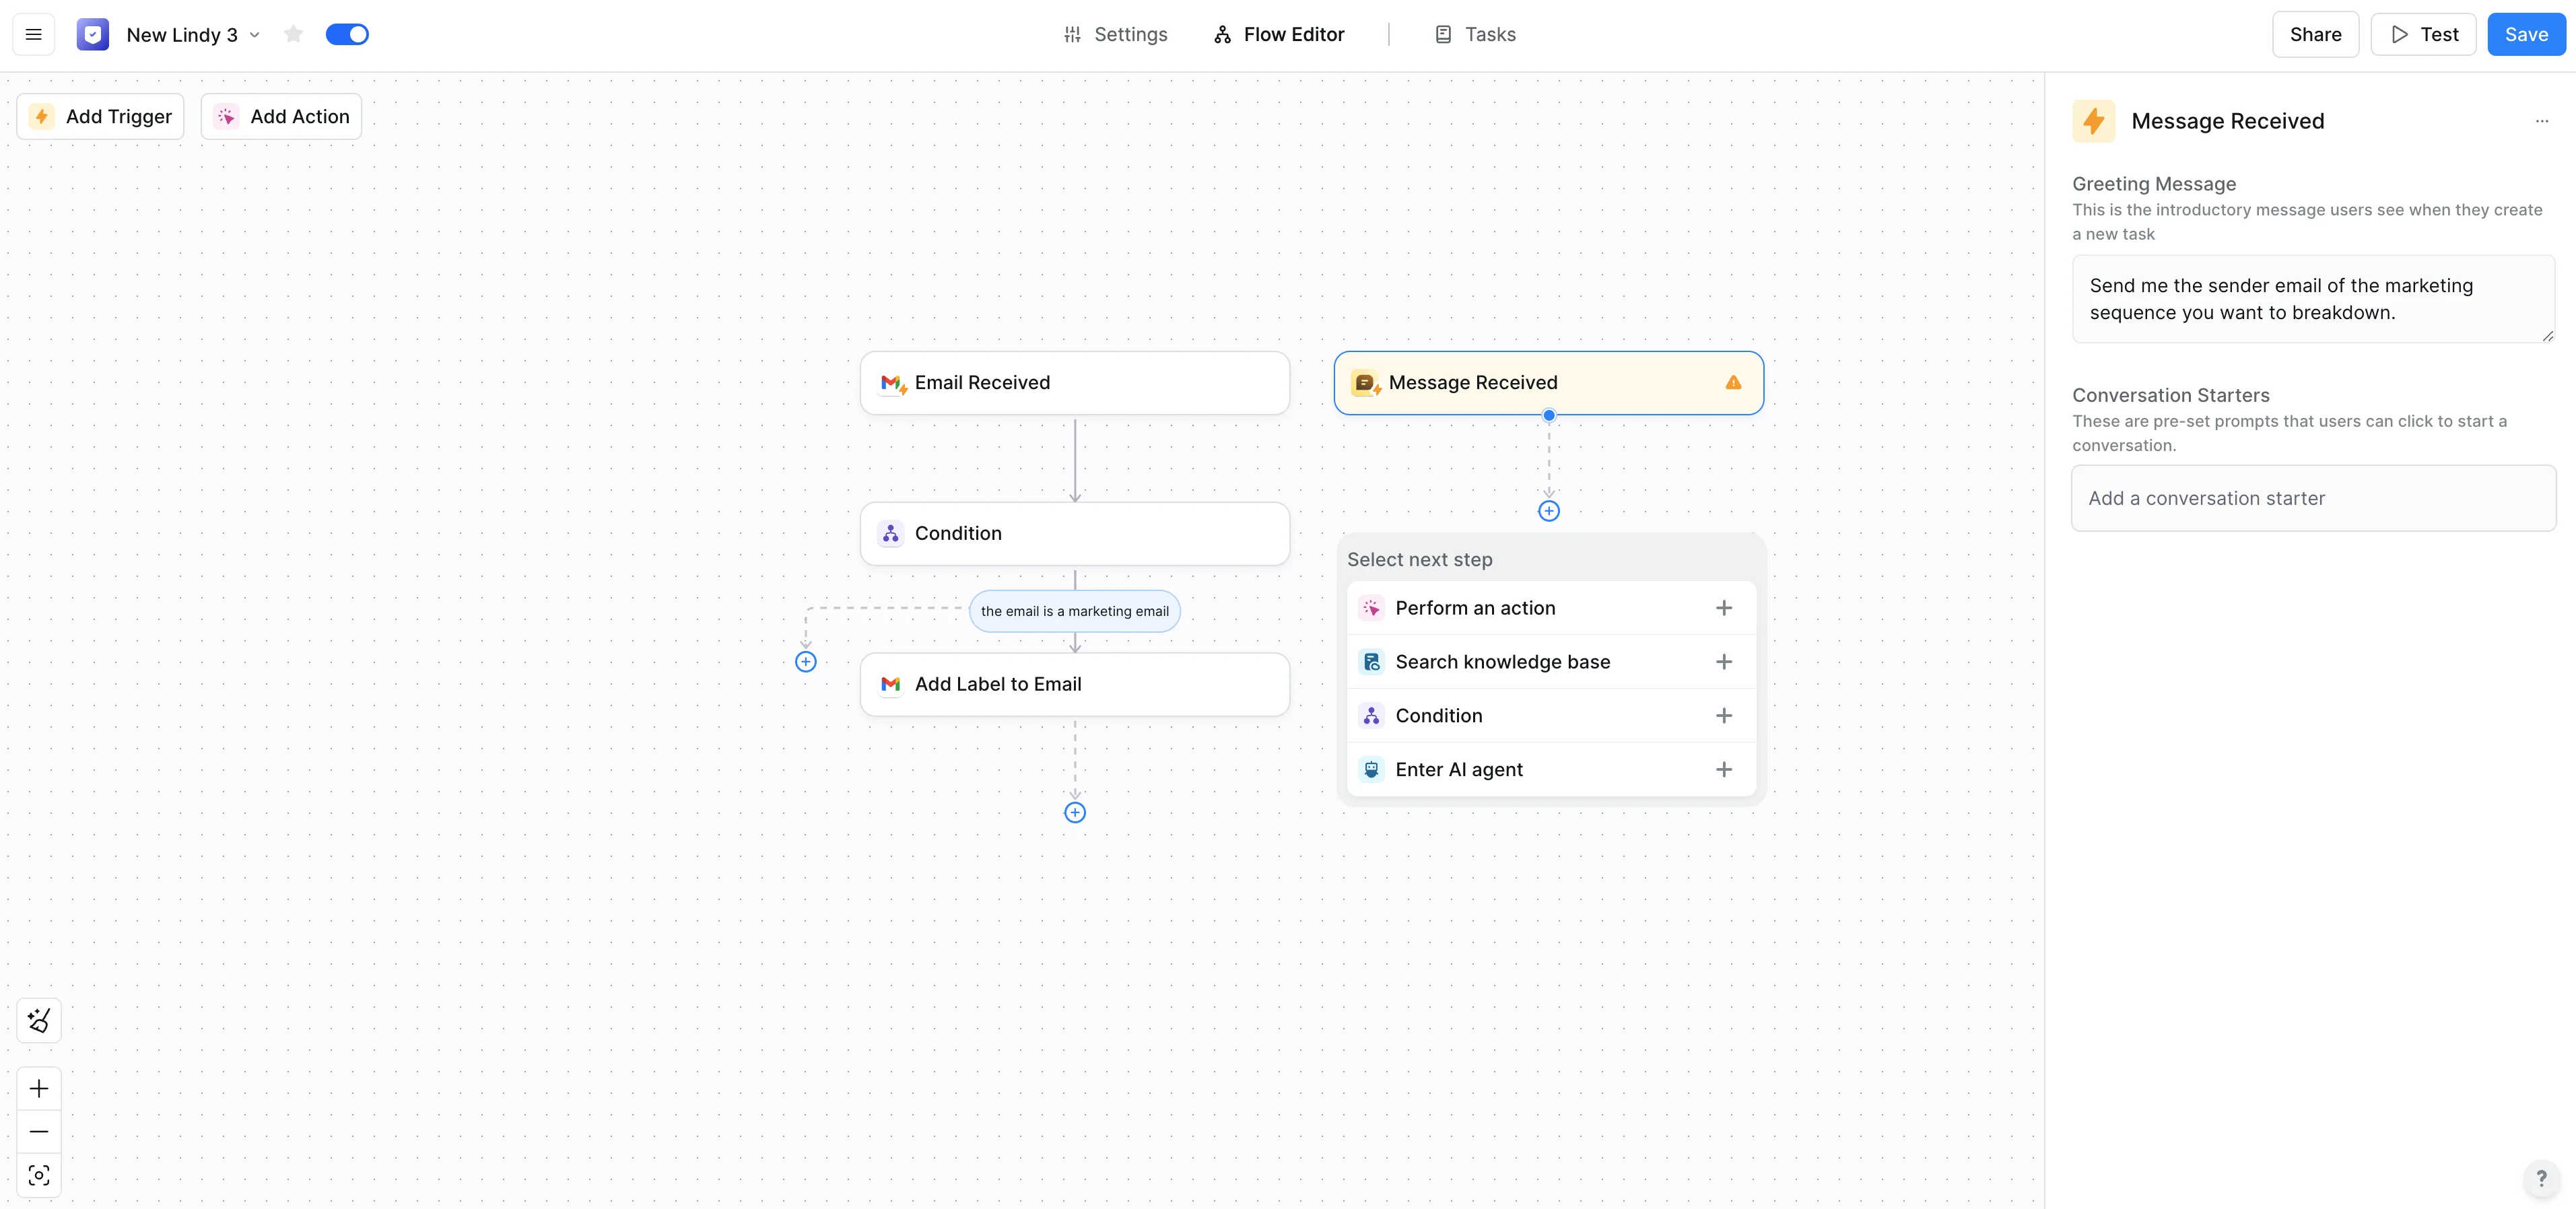
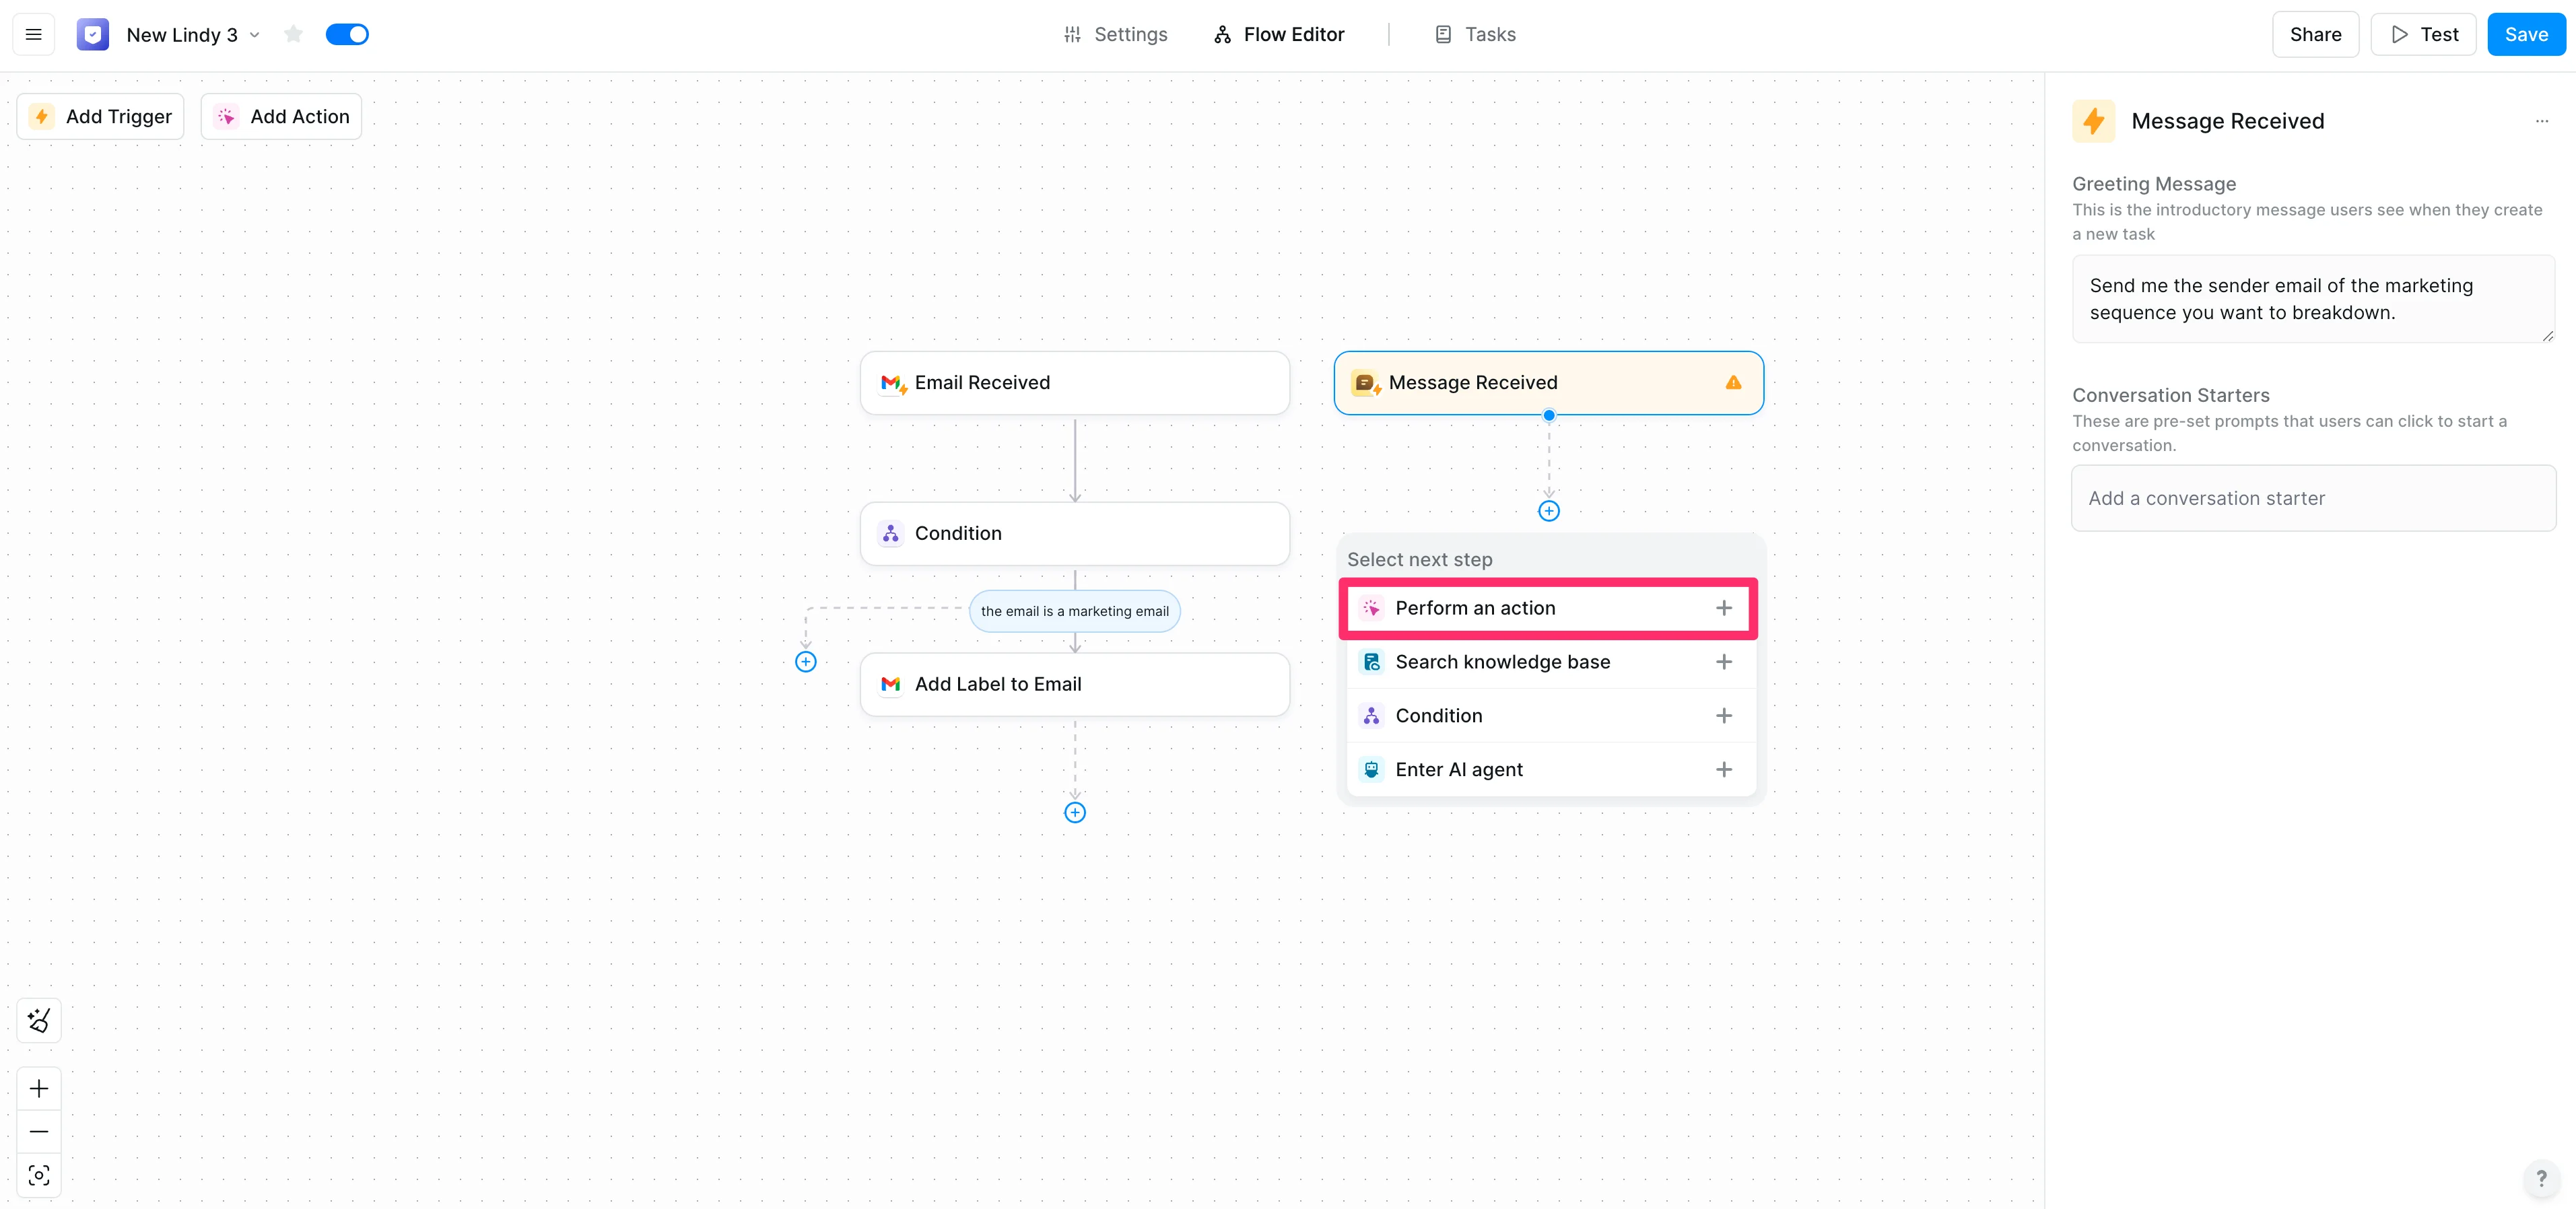
With the trigger set, we’ll add the email query action to this flow by clicking the “Perform an action” option in the flow editor.
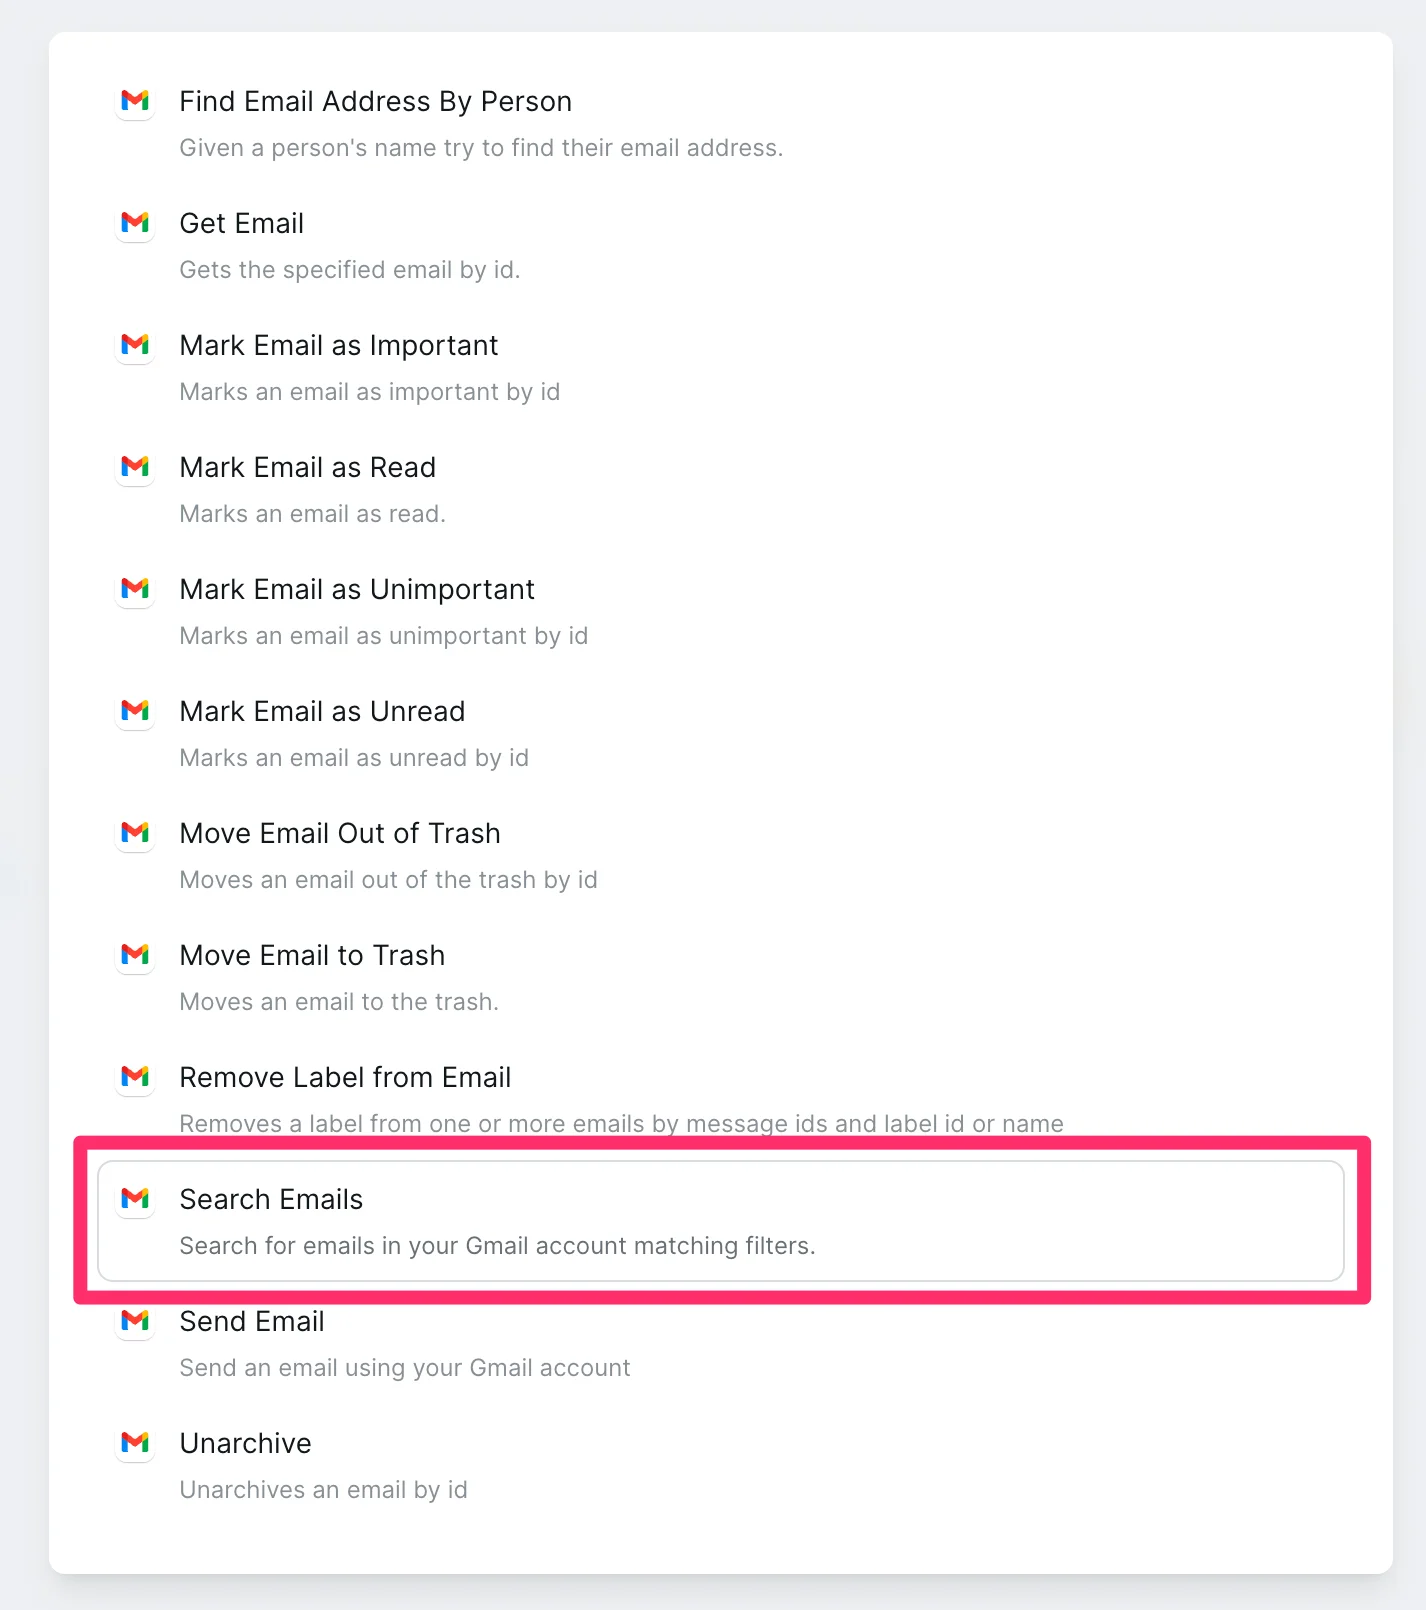
In the resulting pop-up, search for “Gmail” and select the “Search Emails” action option. This action will allow us to query our email inbox specifically for emails stored in our new “Marketing” label.
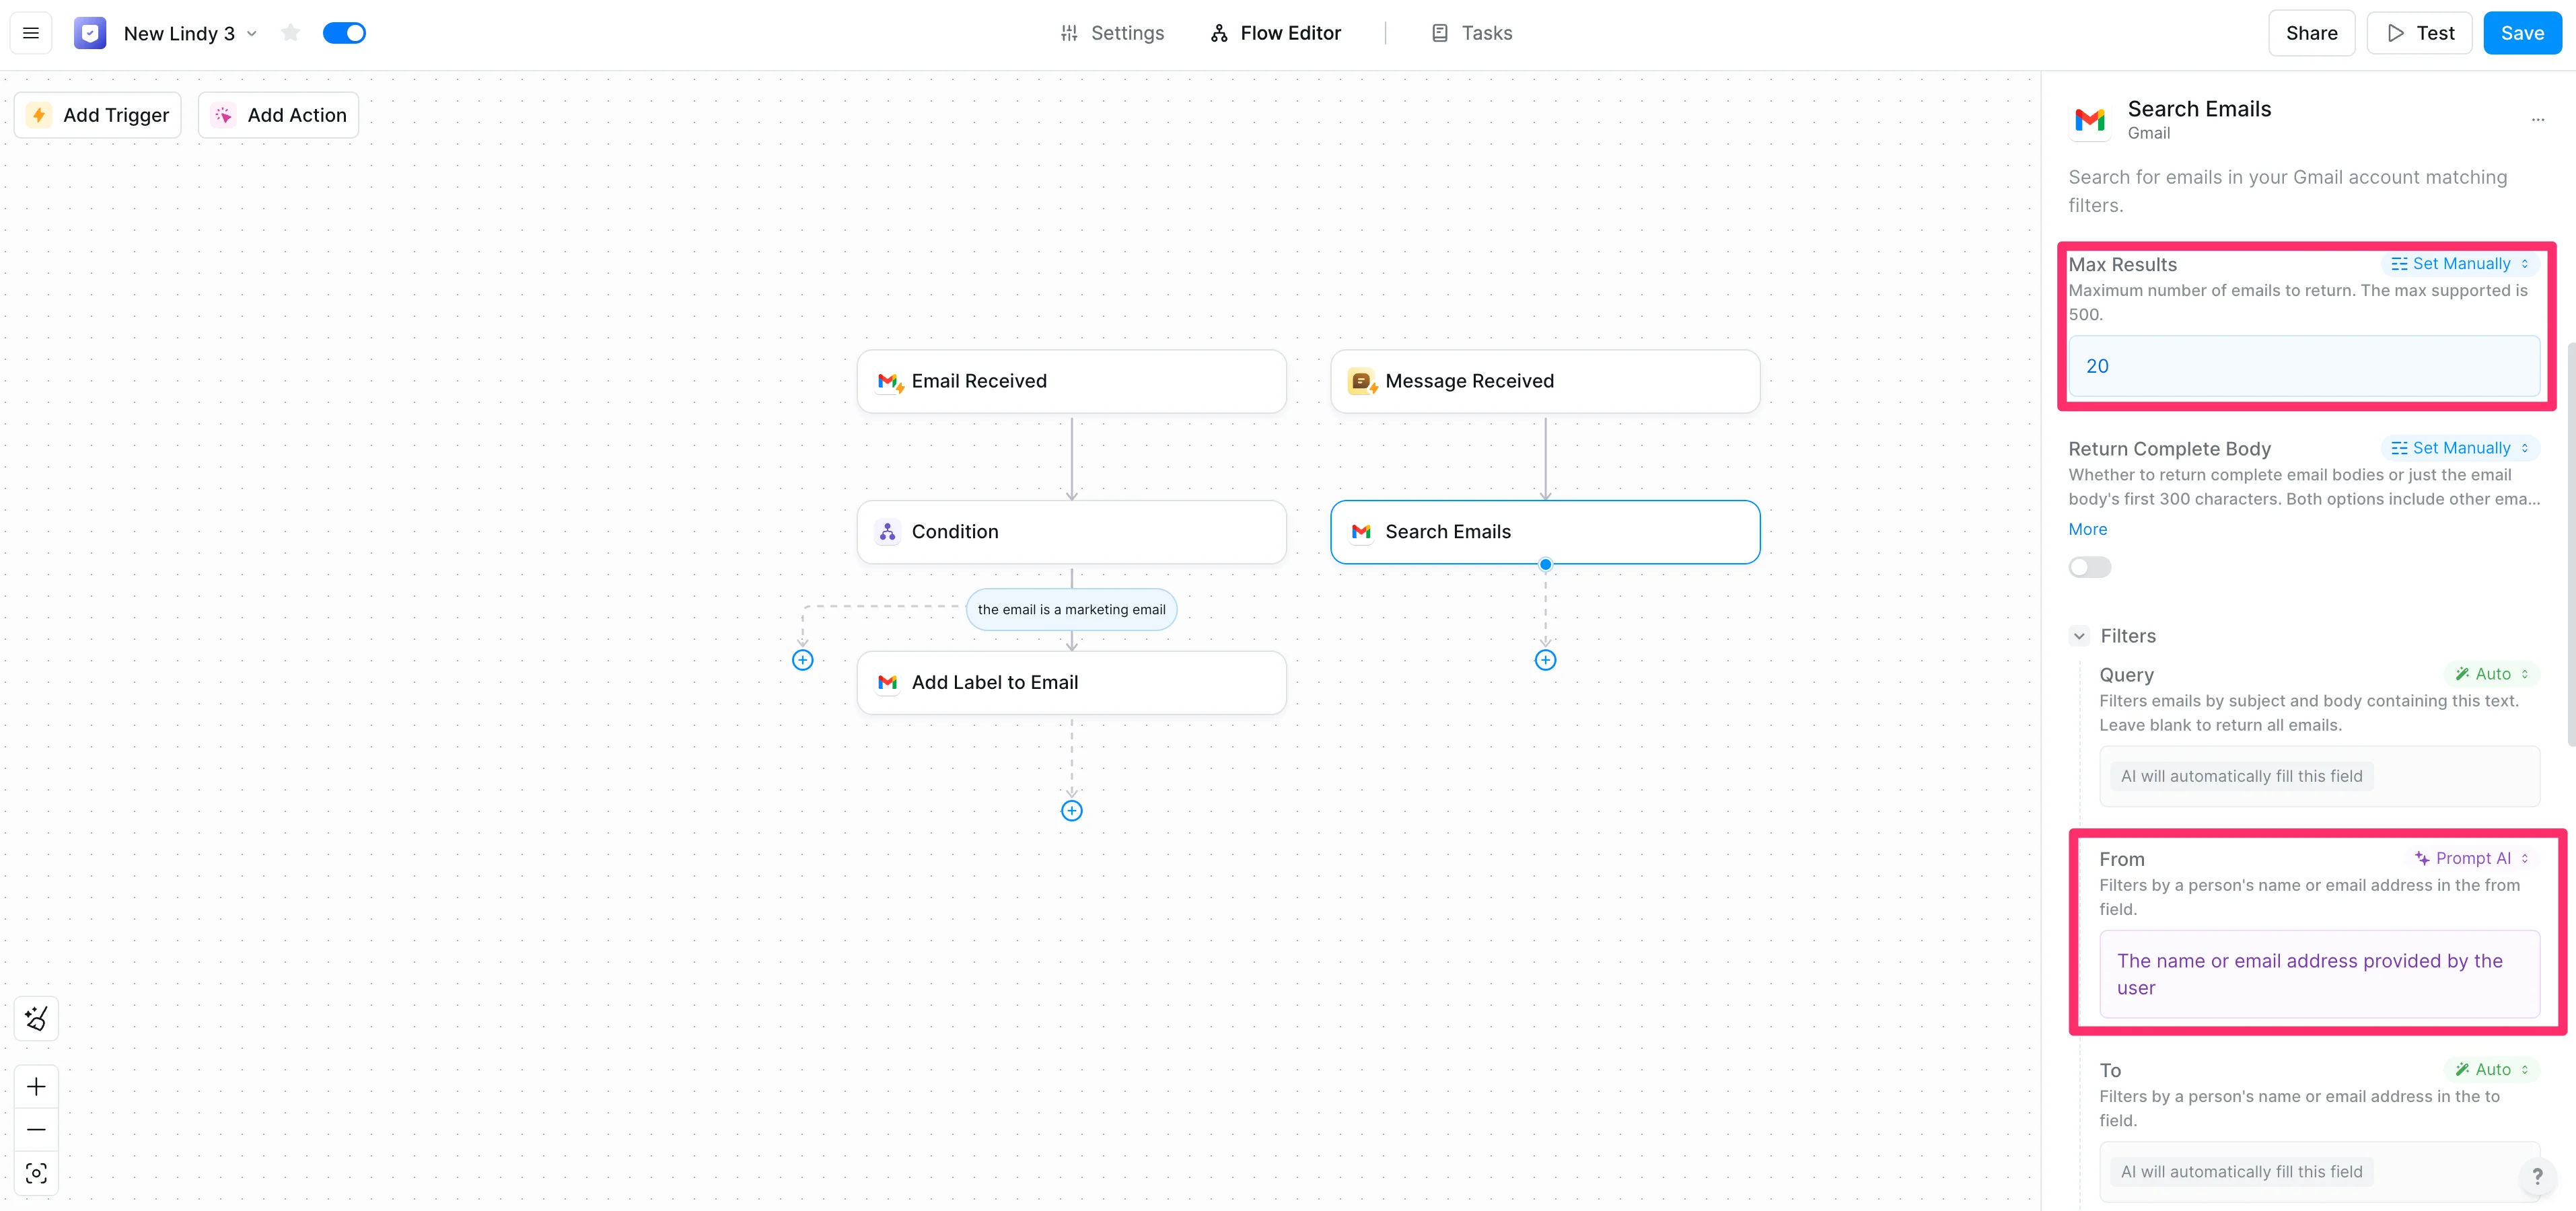
In the action editor for this step, we’ll set the parameters of our search. For “Max Results” we’ll leave it at the default 20. For the “From” field, we’ll update the mode to “Prompt AI” and instruct the AI to query for emails with the email or name from our previous “Message Received” step.
Sample Prompt:
The name or email addresses provided by the user.
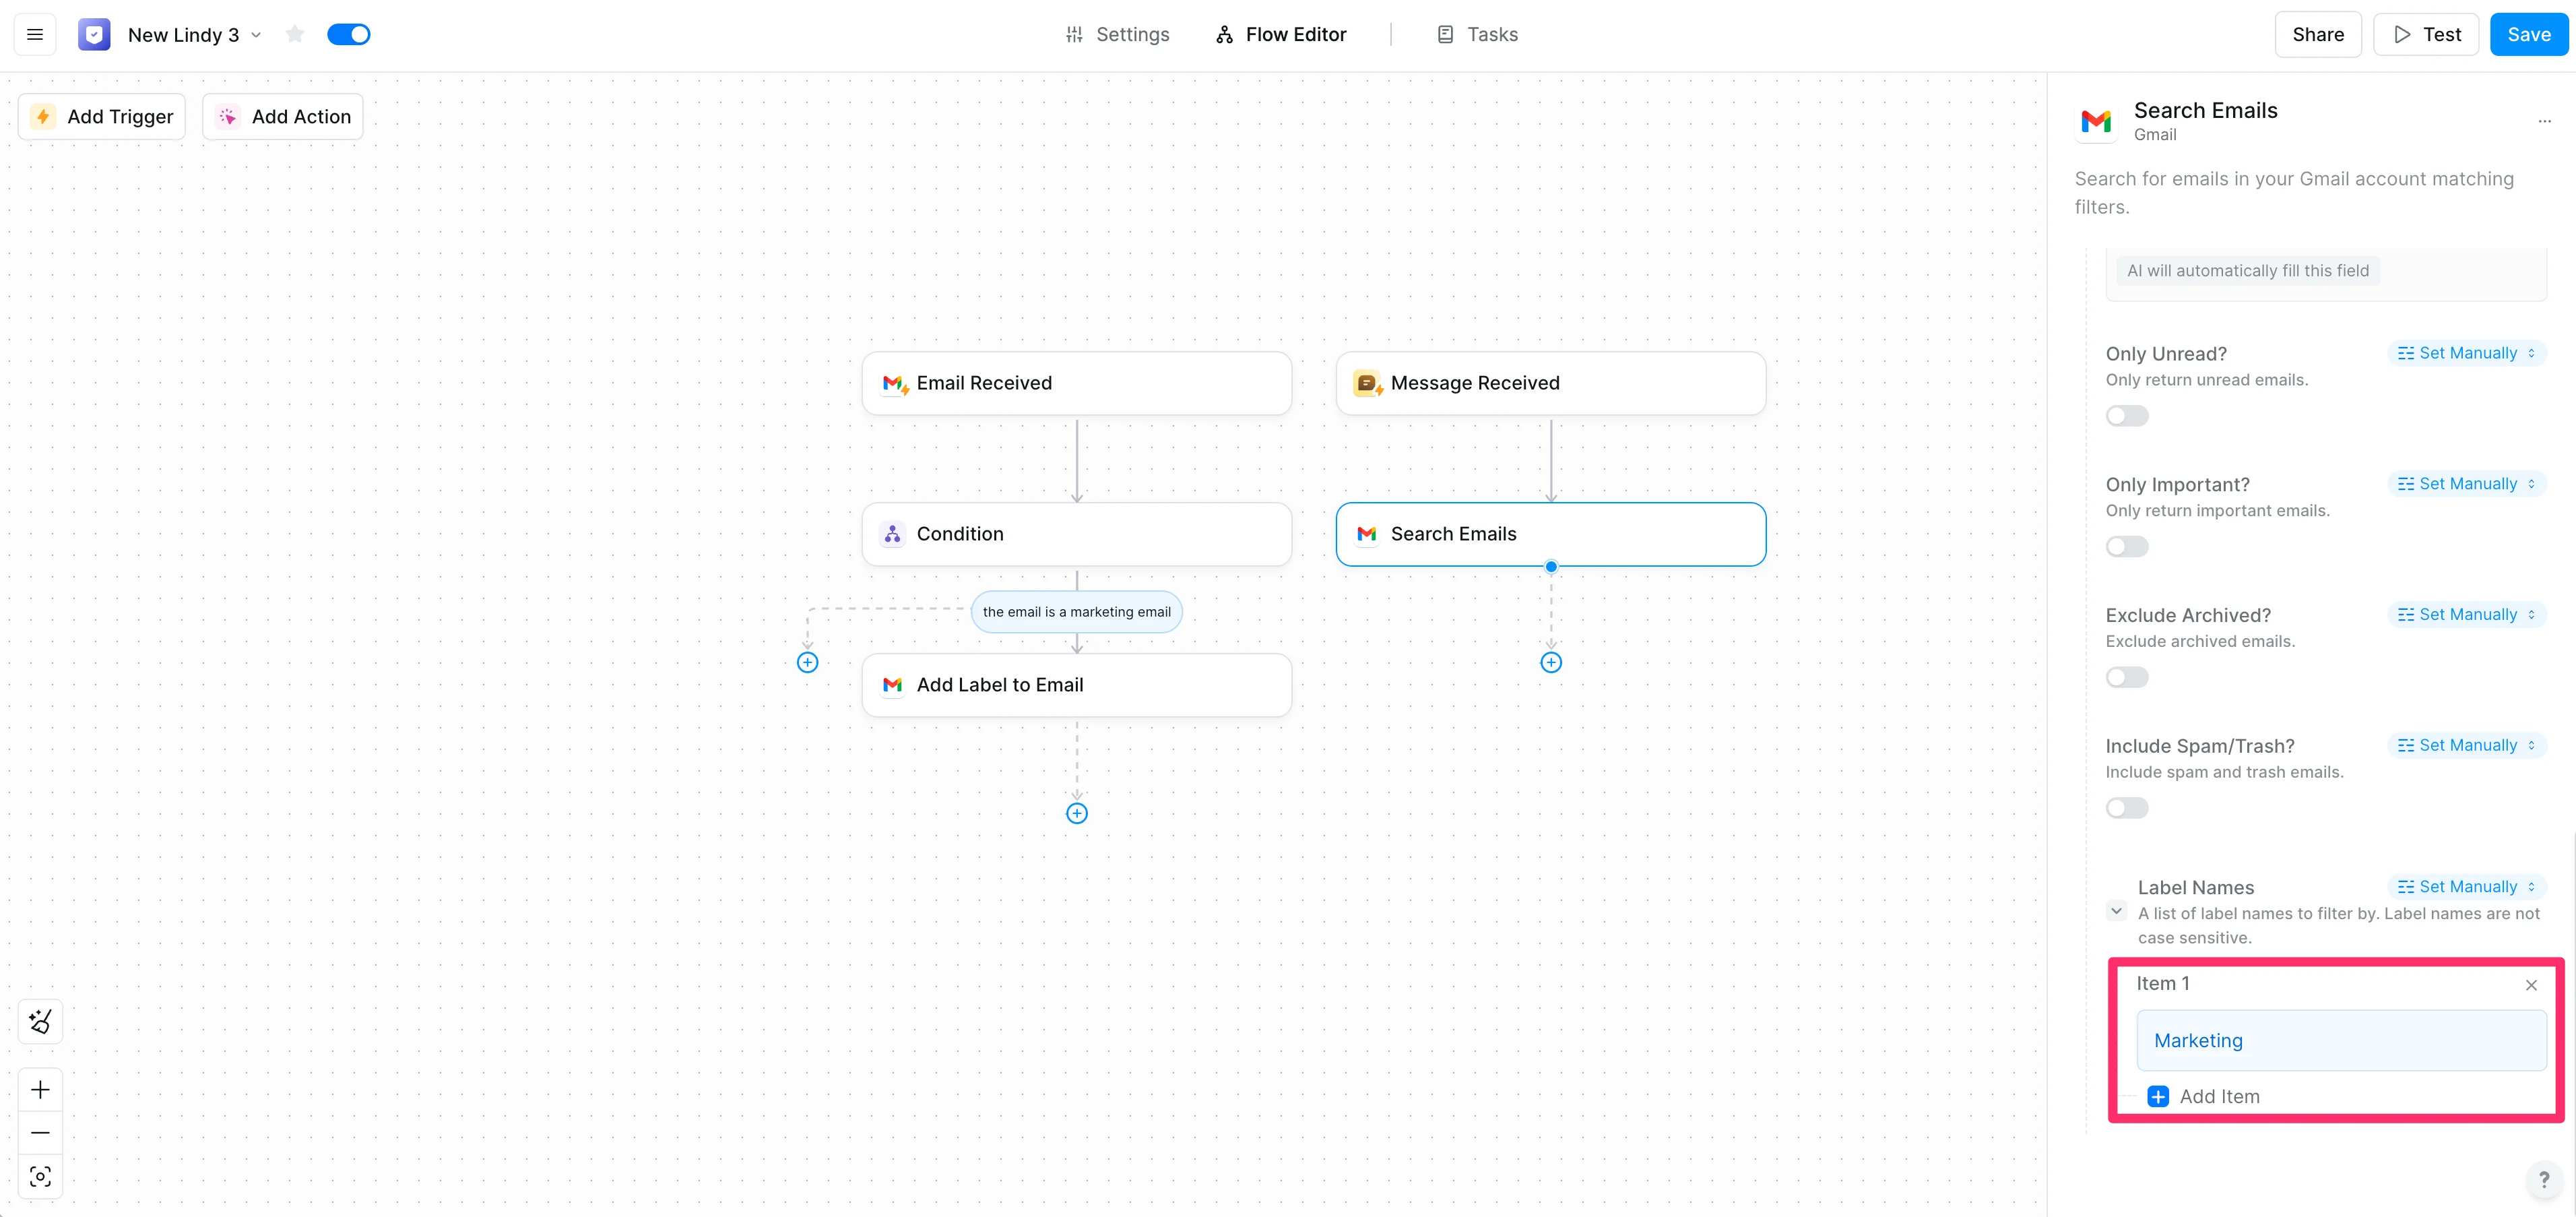
Lastly, at the bottom of this action step editor, we’ll set the “Label Names” to “Marketing”. This will constrain the email search to just emails with that label.
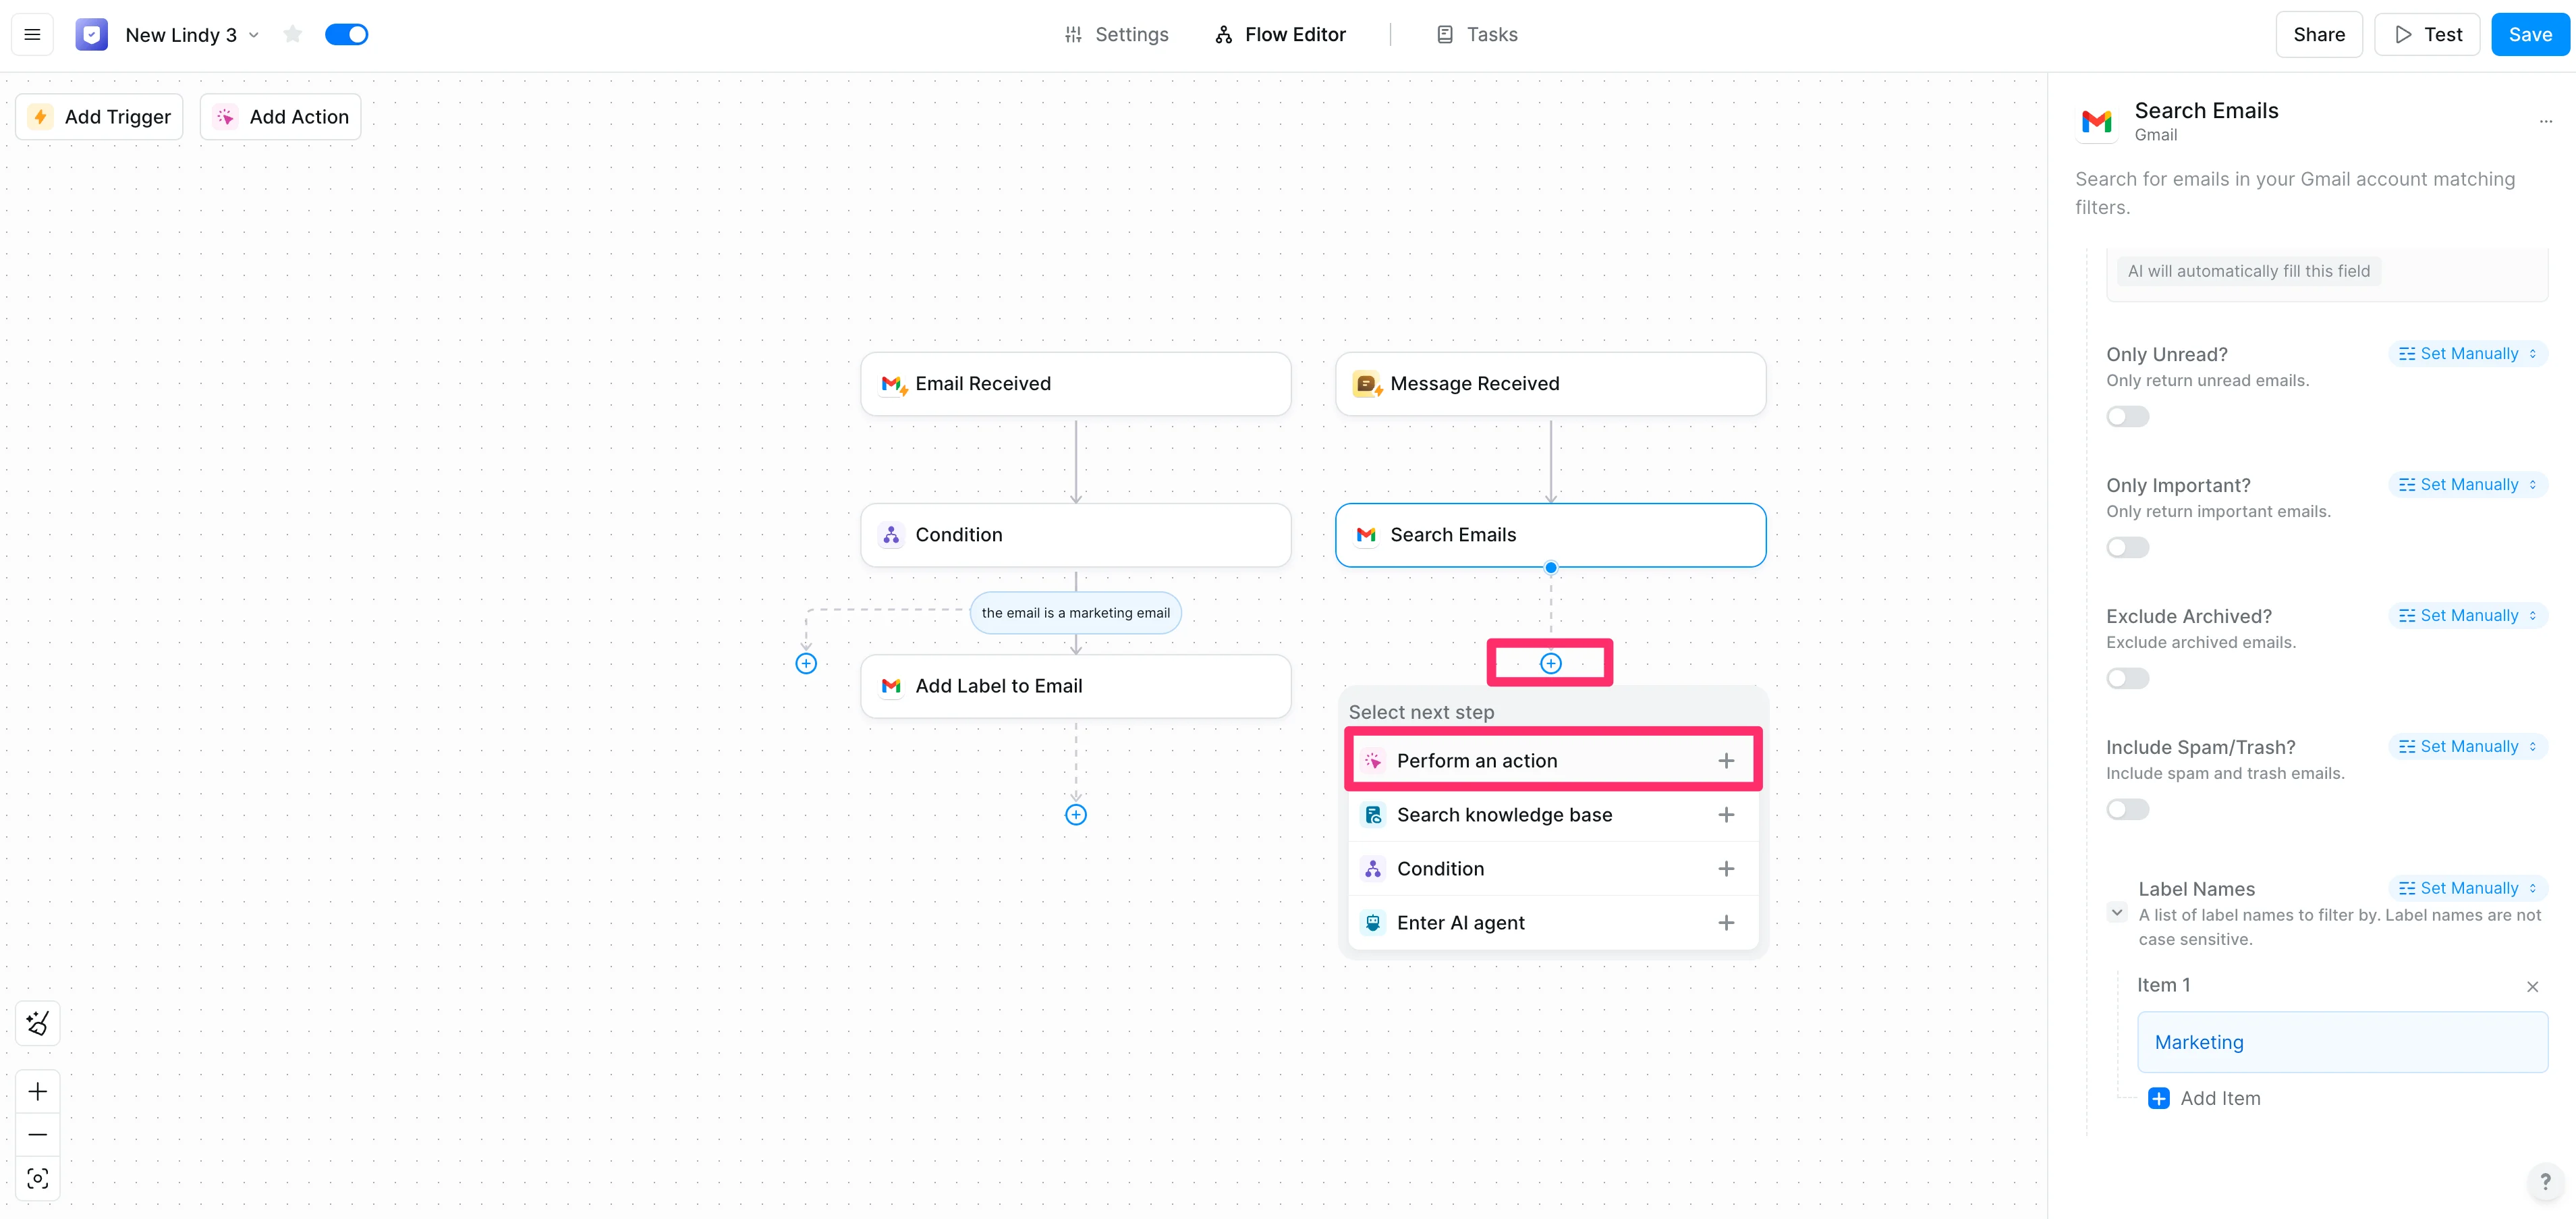
To finish off this part of the flow, we’ll need to add a step where Lindy will message us back with the synthesis of the marketing emails from the query and provide a recommendation for our own marketing messages accordingly. To do this, click the “+” button under the “Search Emails” step and select the “Perform an action” option.
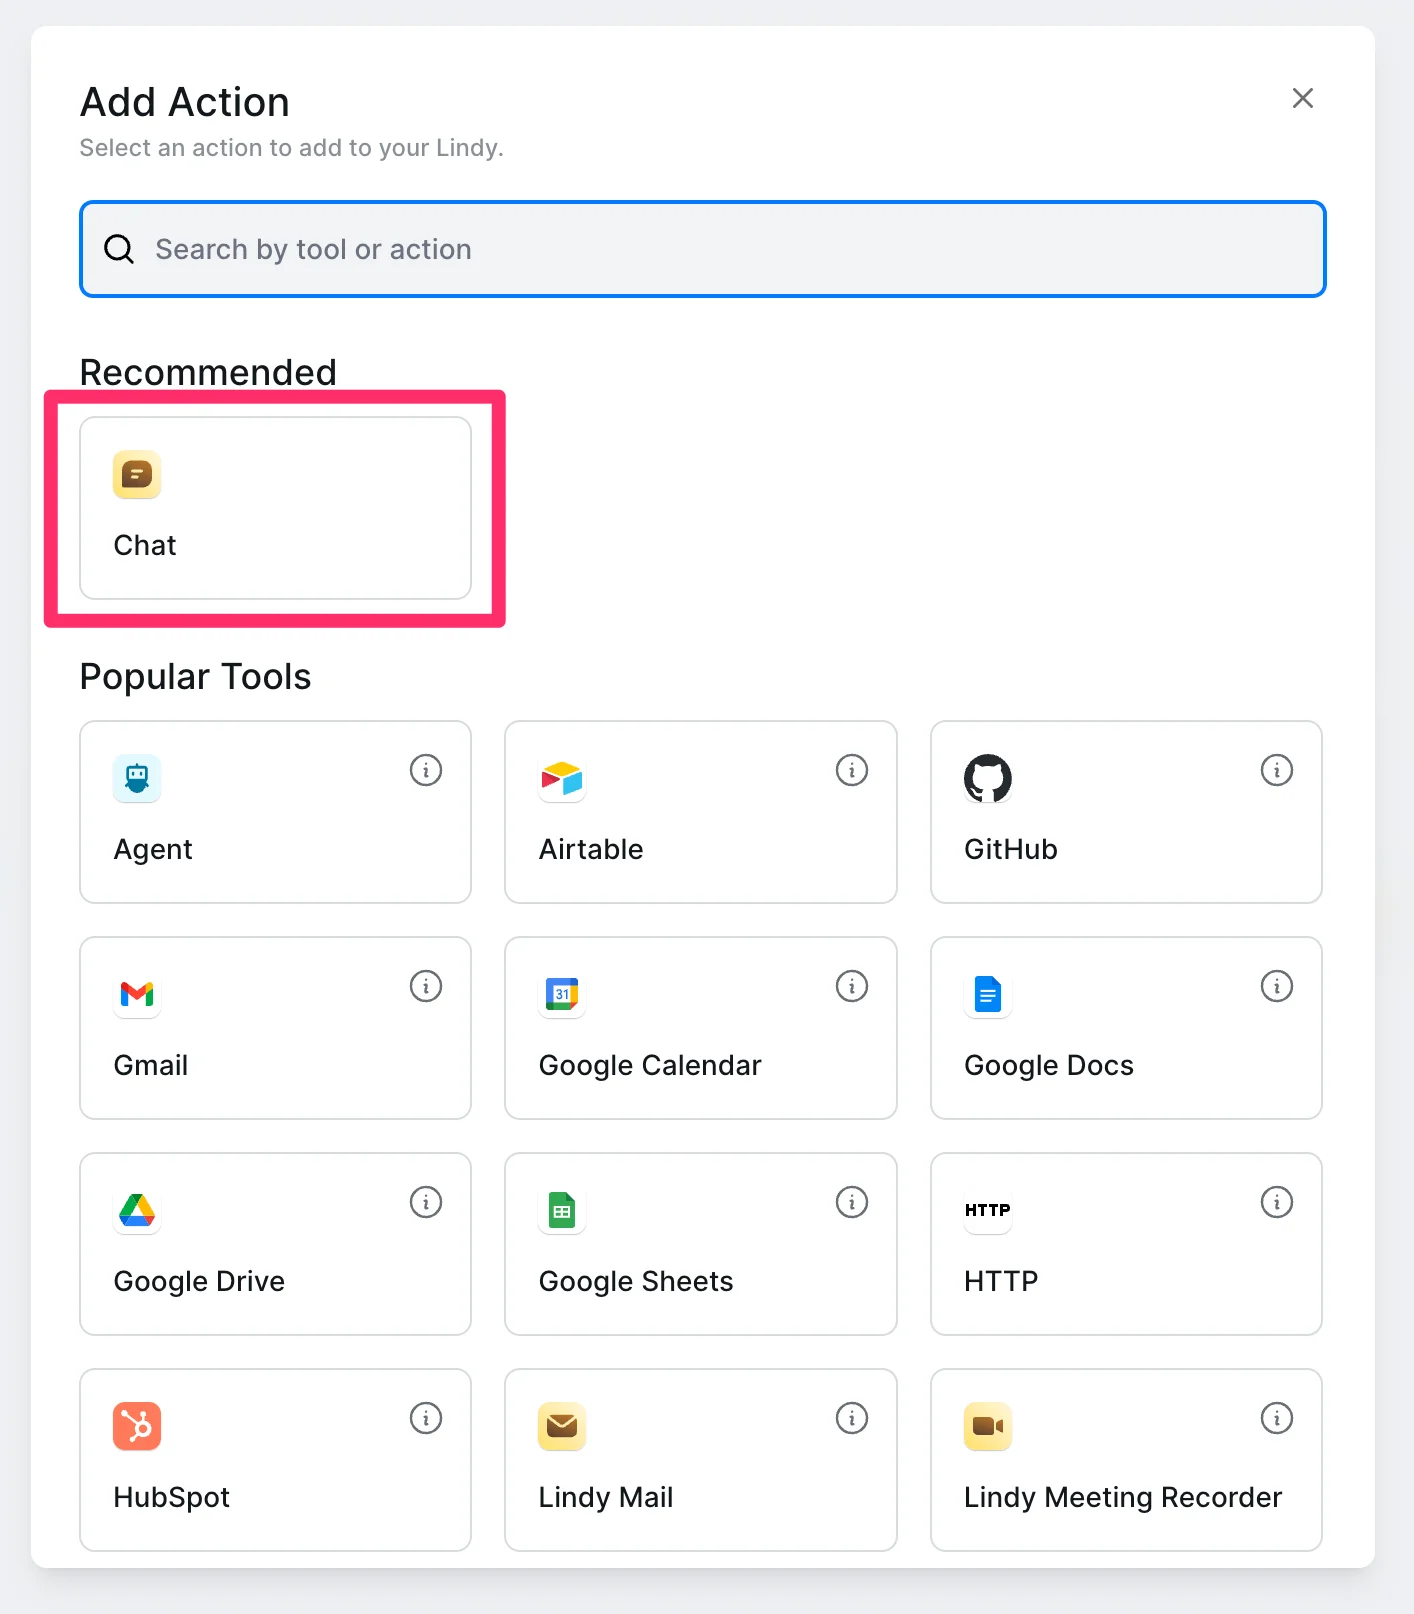
Select the “Chat” option from the “Recommended” section in the resulting pop-up window.
Then, select the “Send Message” action.

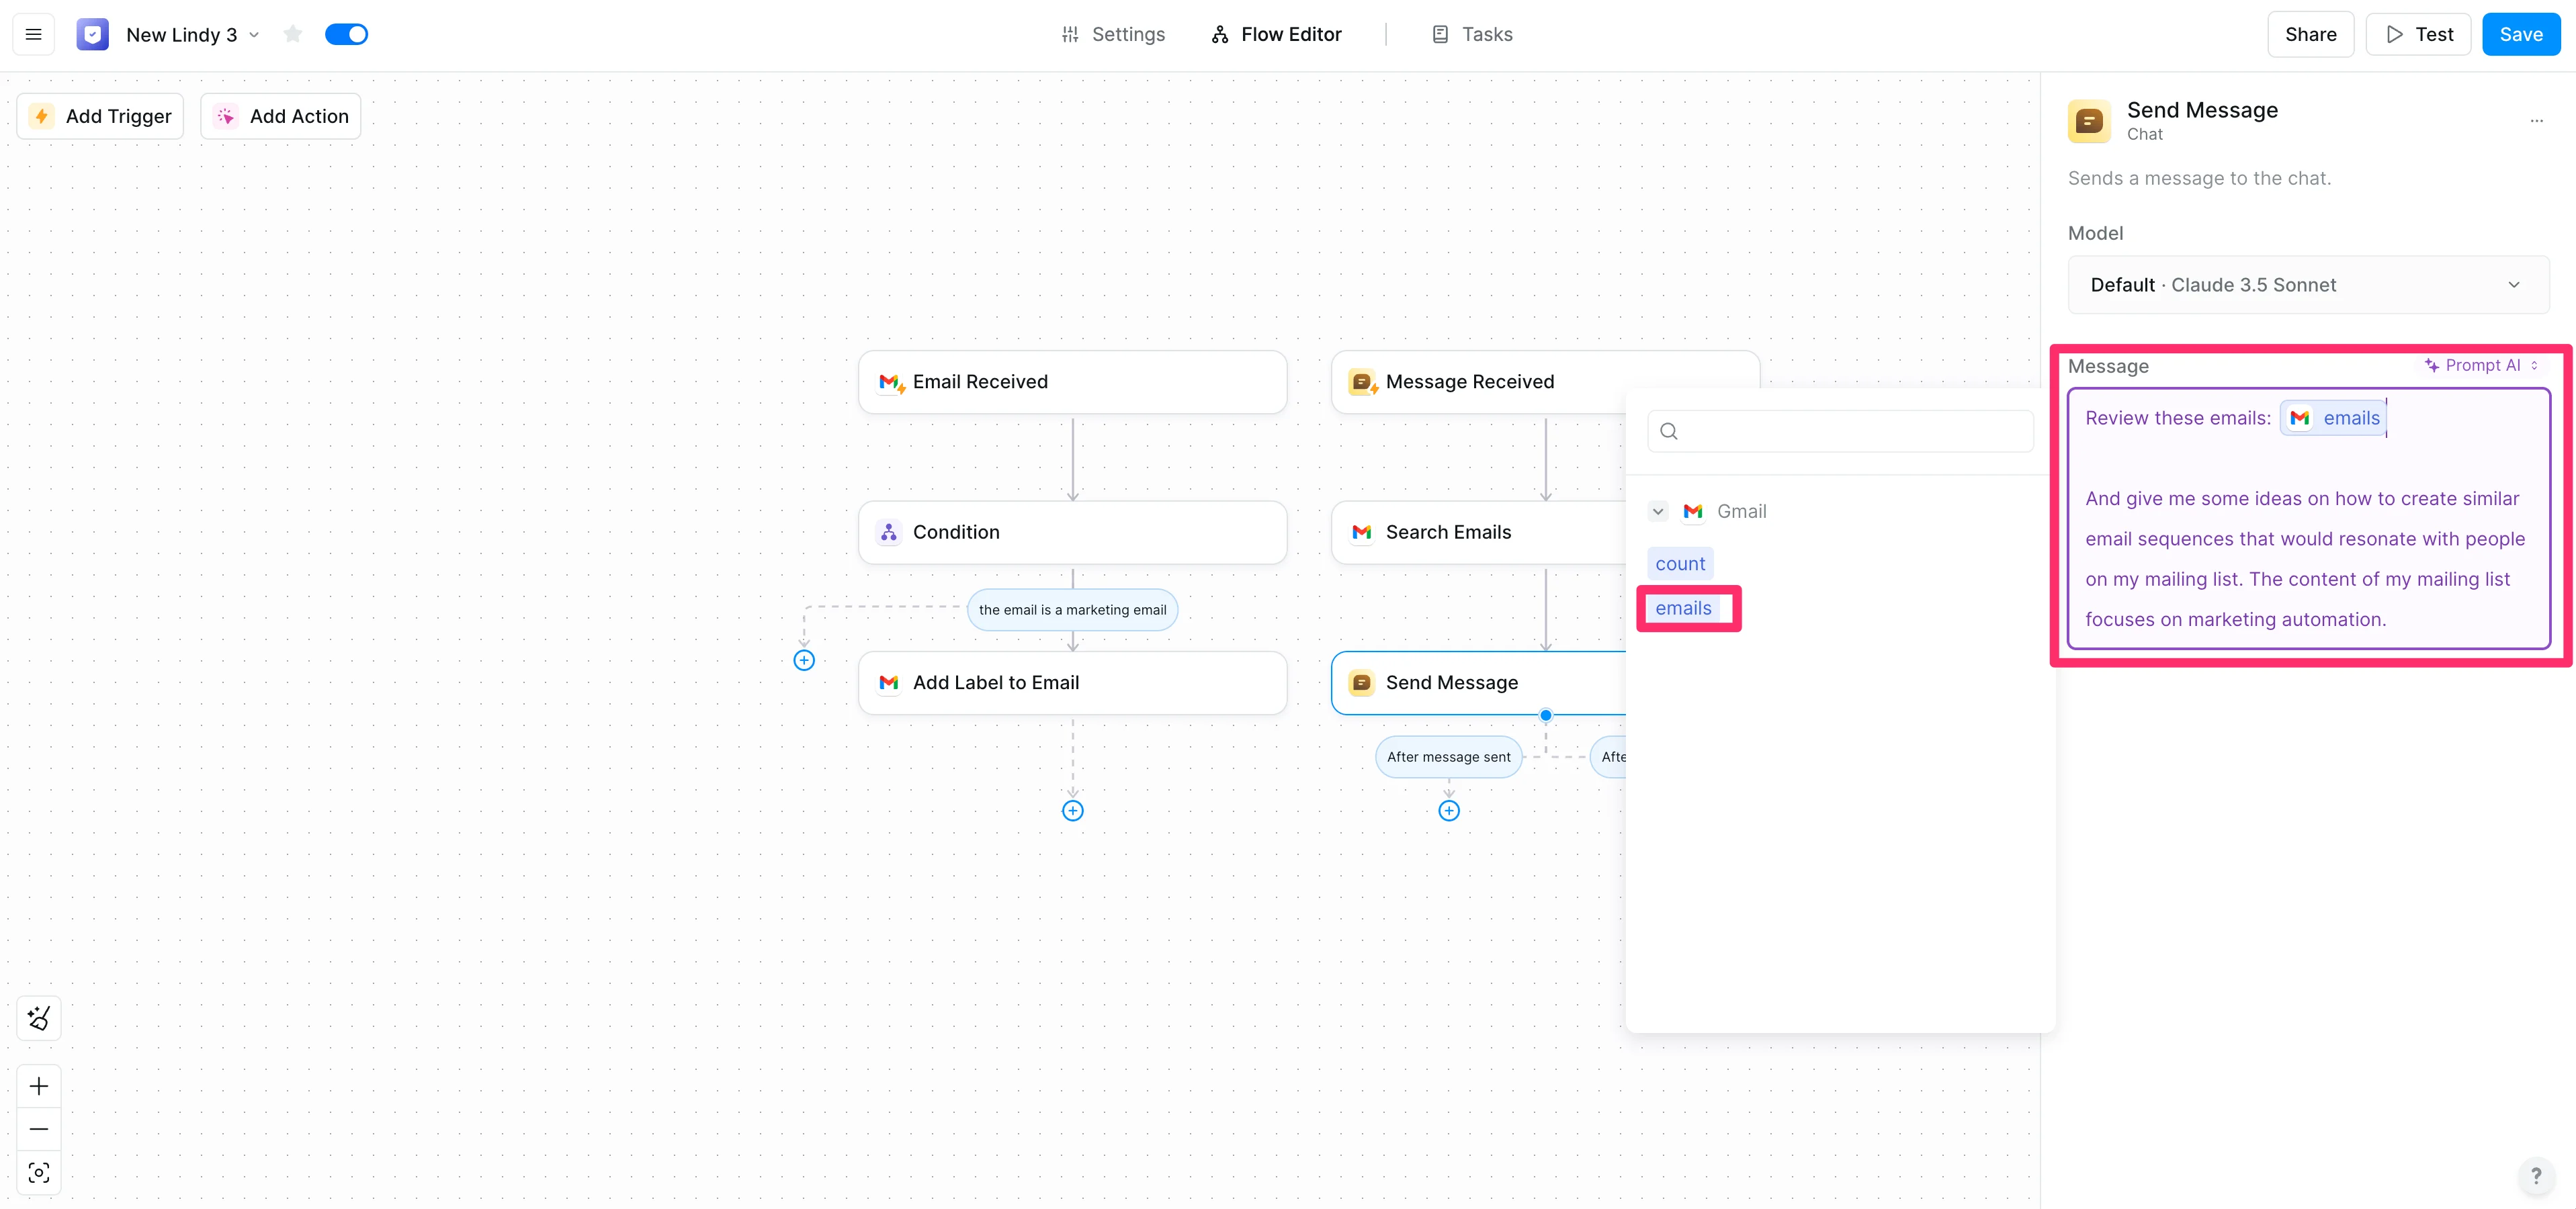
The “Message” field is where we’ll instruct the Lindy via a prompt on how to synthesize the email query results and what to send us back as a result. Update this field setting to “Prompt AI” and provide your instructions. Make sure to include the ‘emails’ variable from the previous step as an input.
Sample Prompt:
Review these emails: [insert ‘emails’ variable]And give me some ideas on how to create similar email sequences that would resonate with people on my mailing list. The content of my mailing list focuses on marketing automation.
Test and iterate
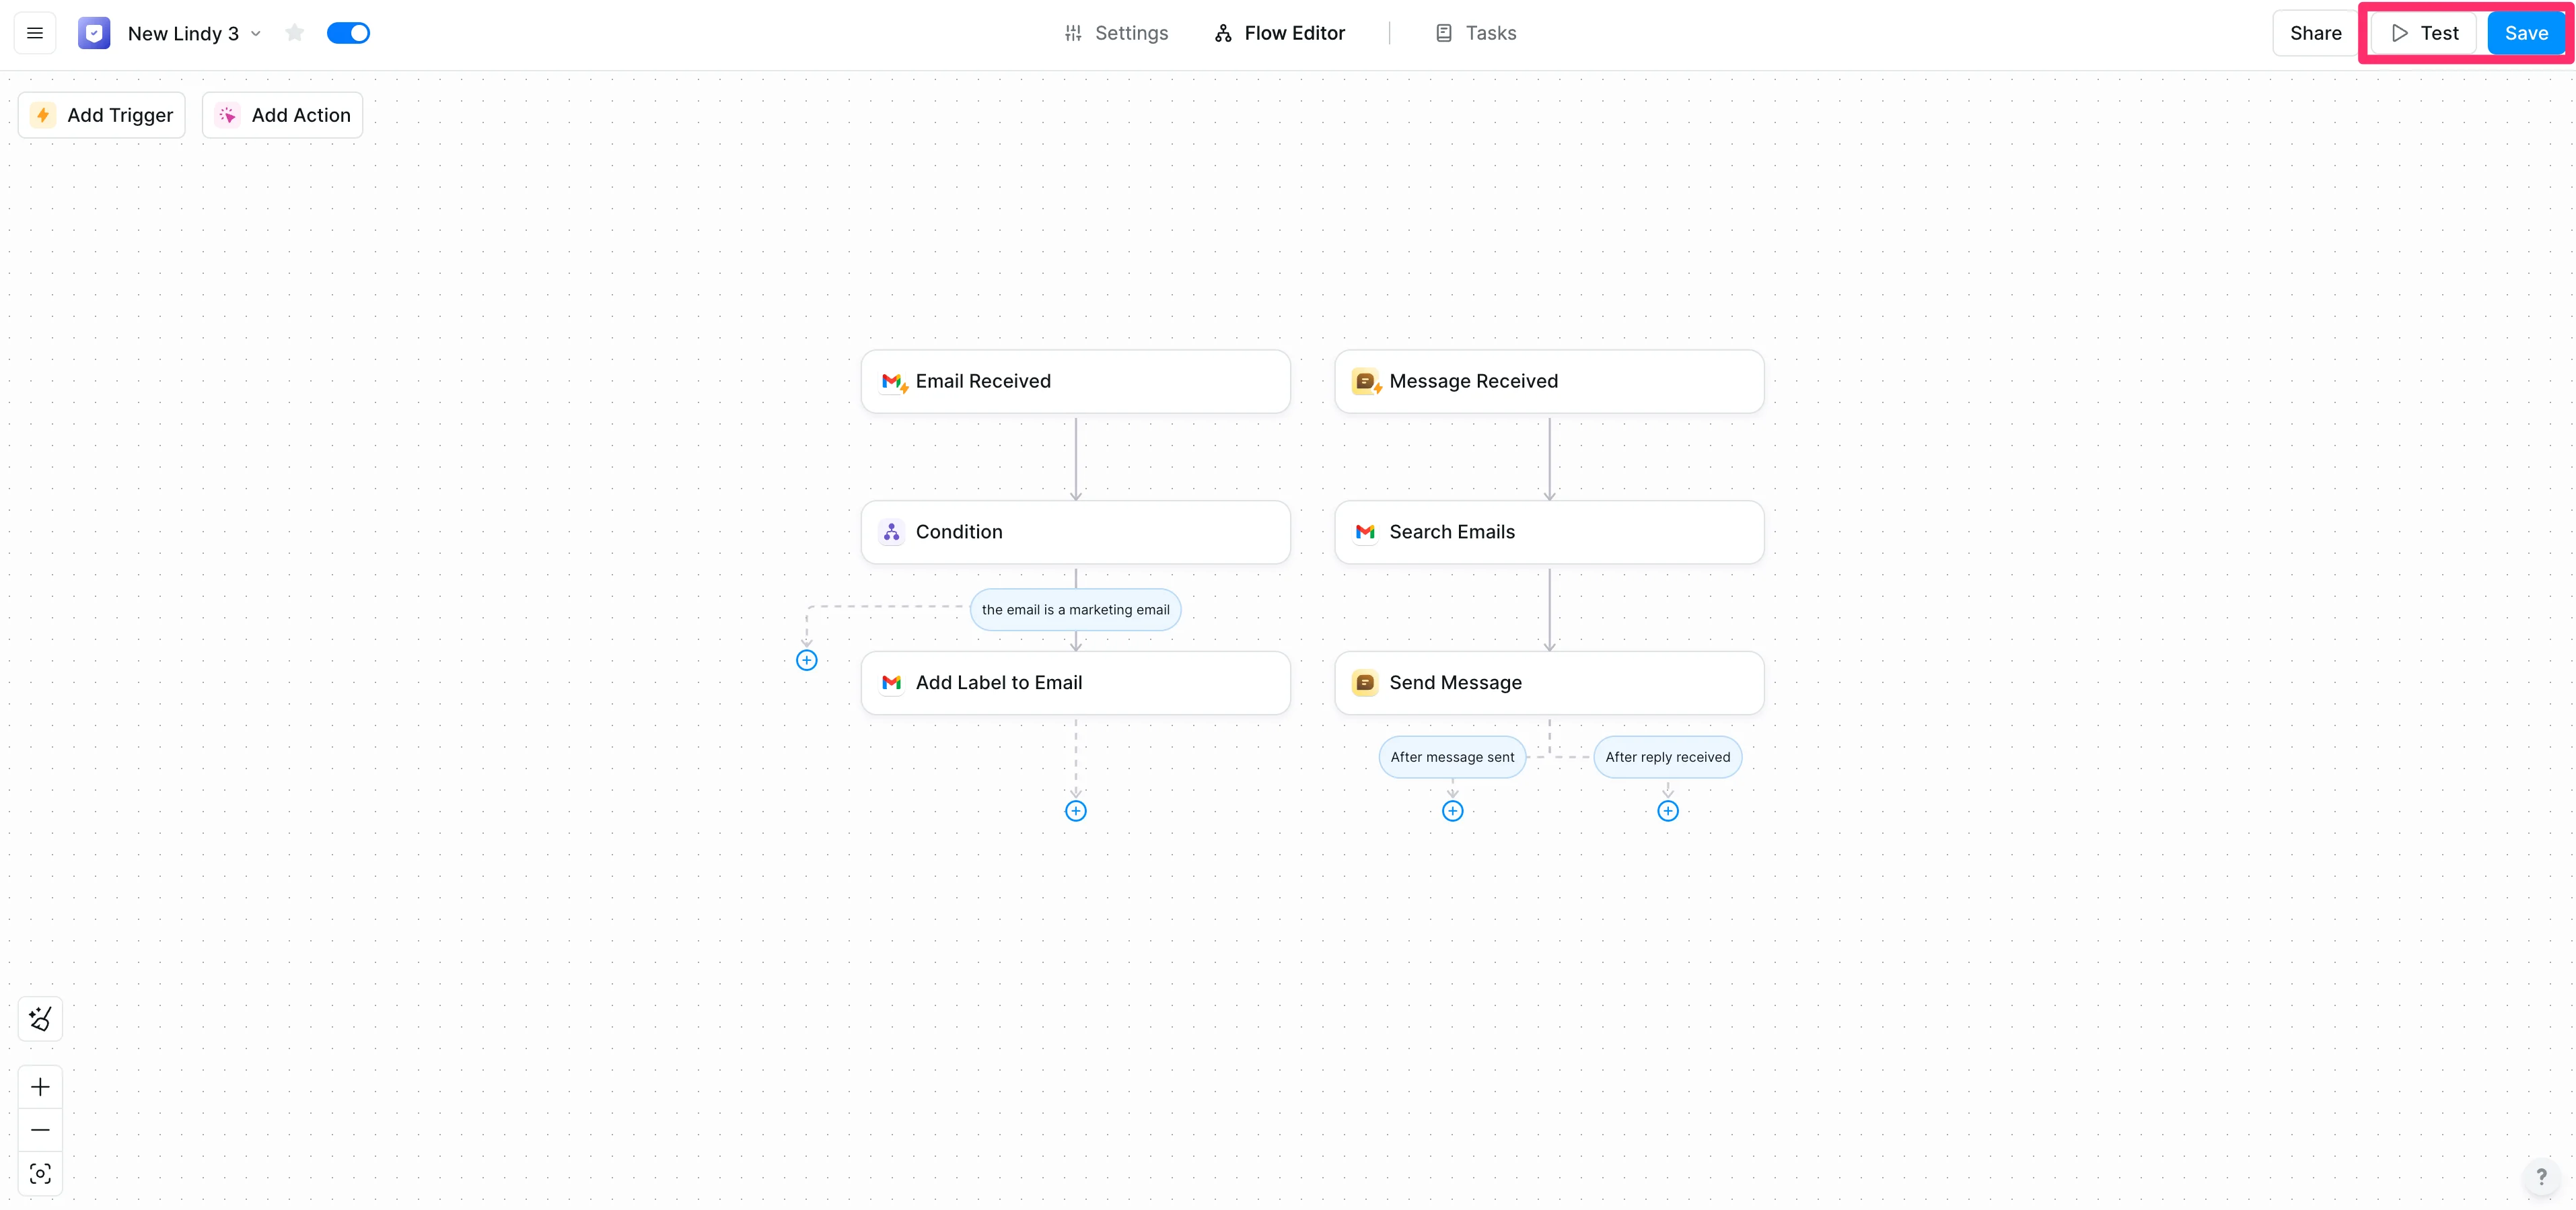
Our flow building is complete! Make sure to click the “Save” button in the top right corner of the page, and then click the “Test” button to test the workflow.
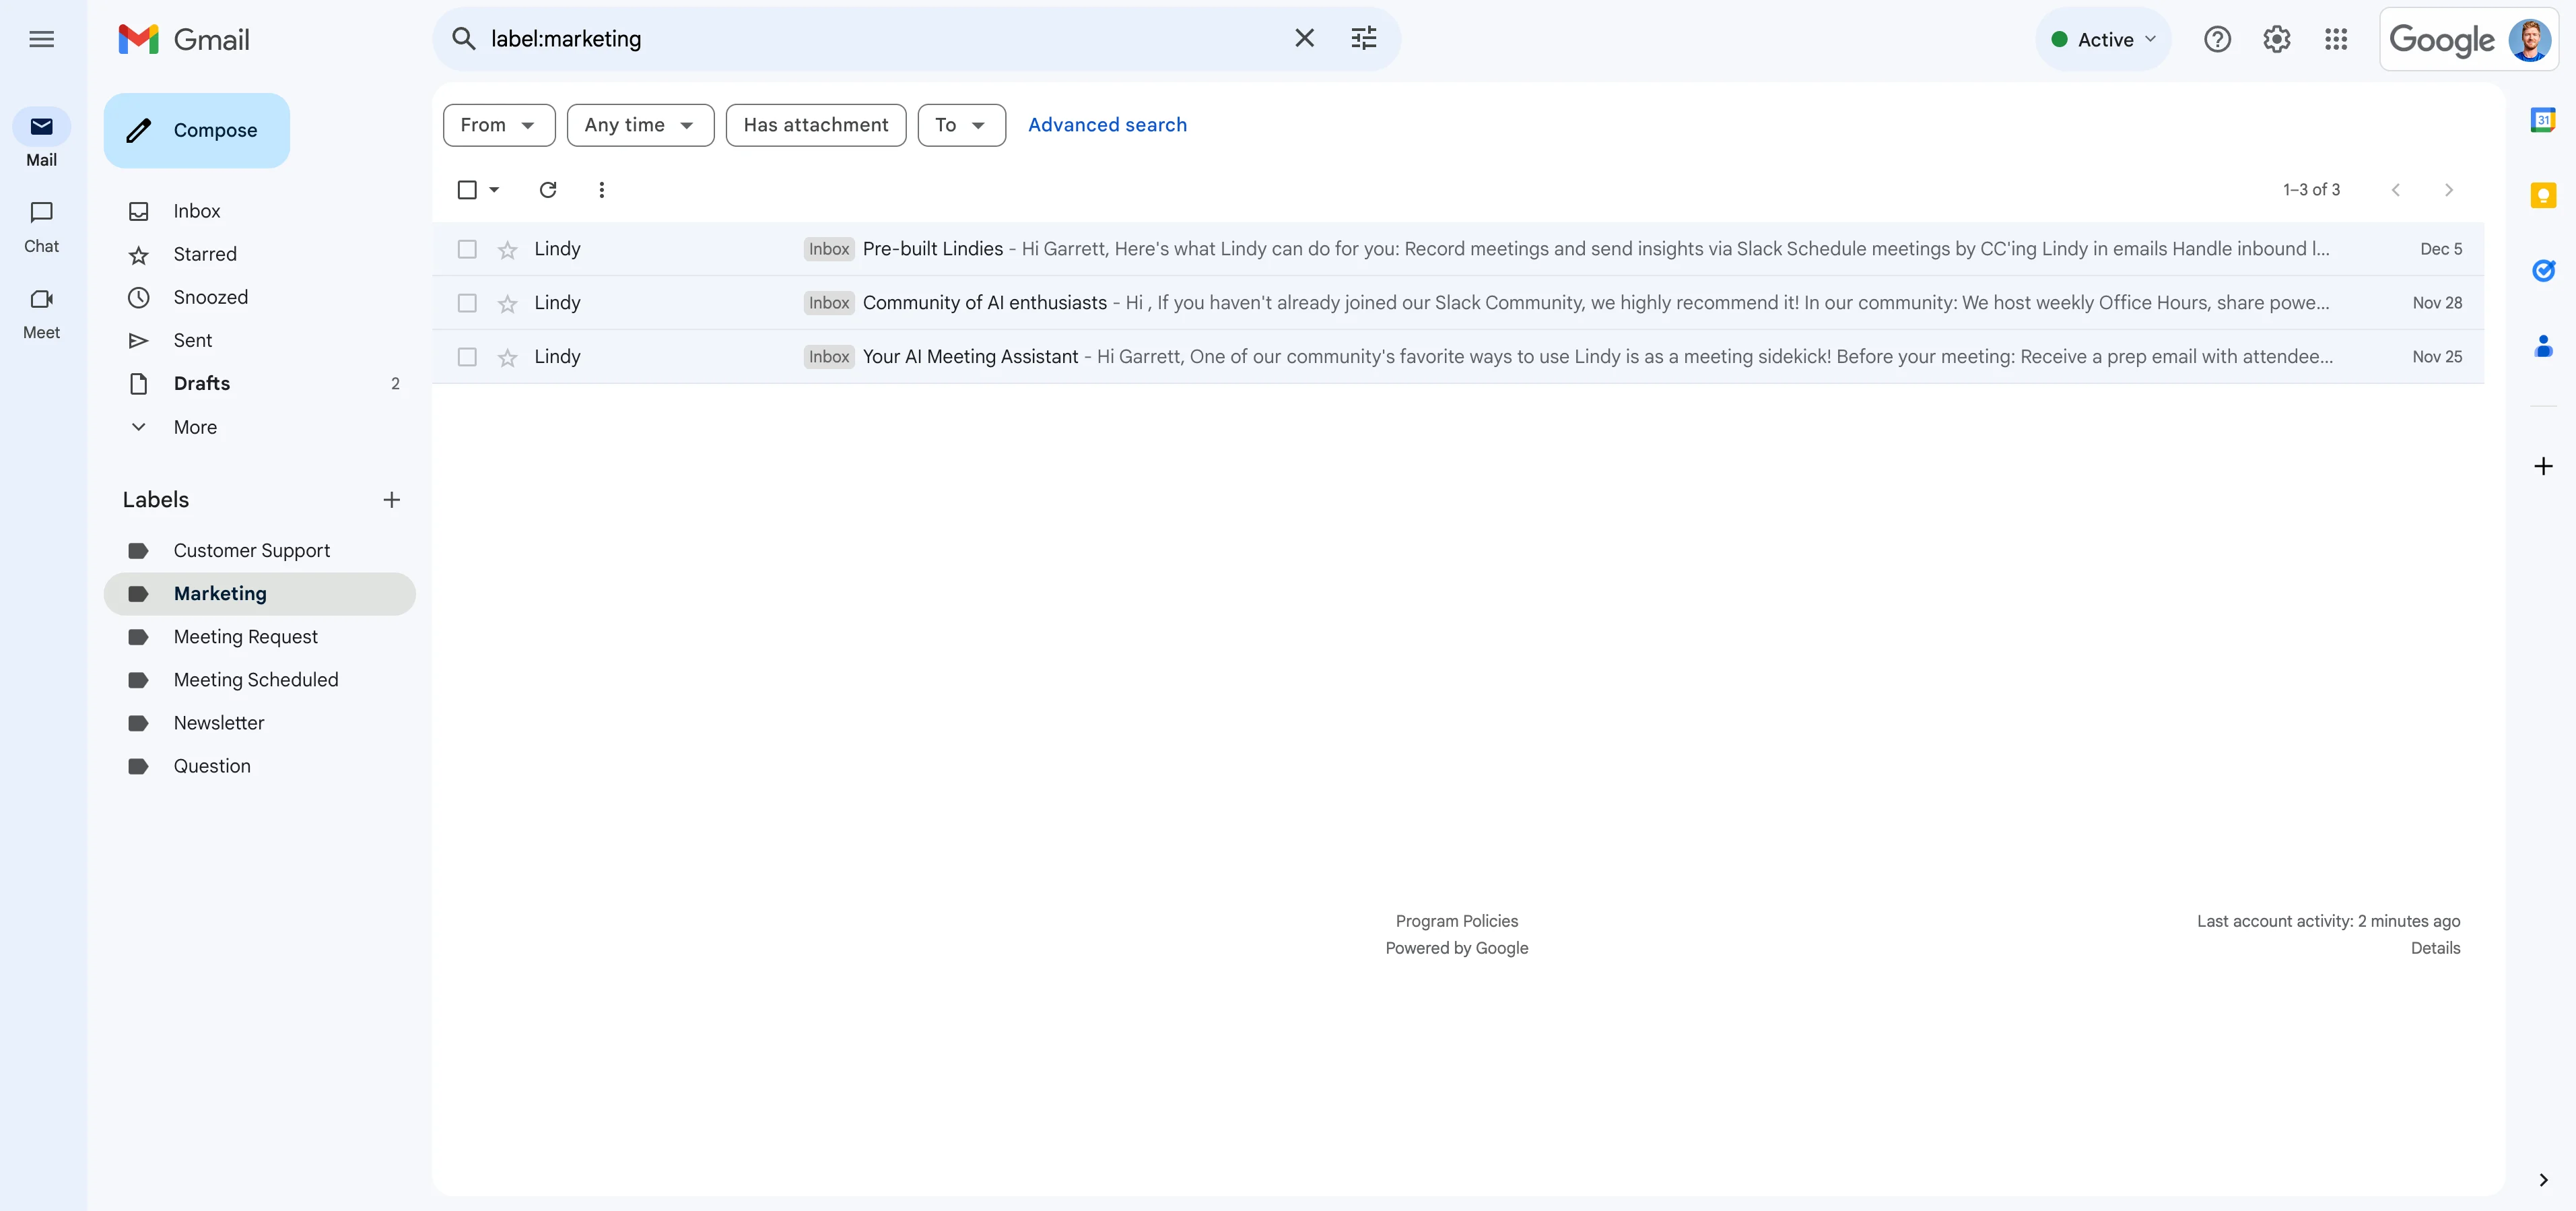
Rather than testing the automated labeler, we’re just going to test our marketing message synthesizer flow. So we’ll go to our Gmail inbox, create a “Marketing” label, and manually label some emails with the label (we’re labeling emails from Lindy, to demonstrate this step):
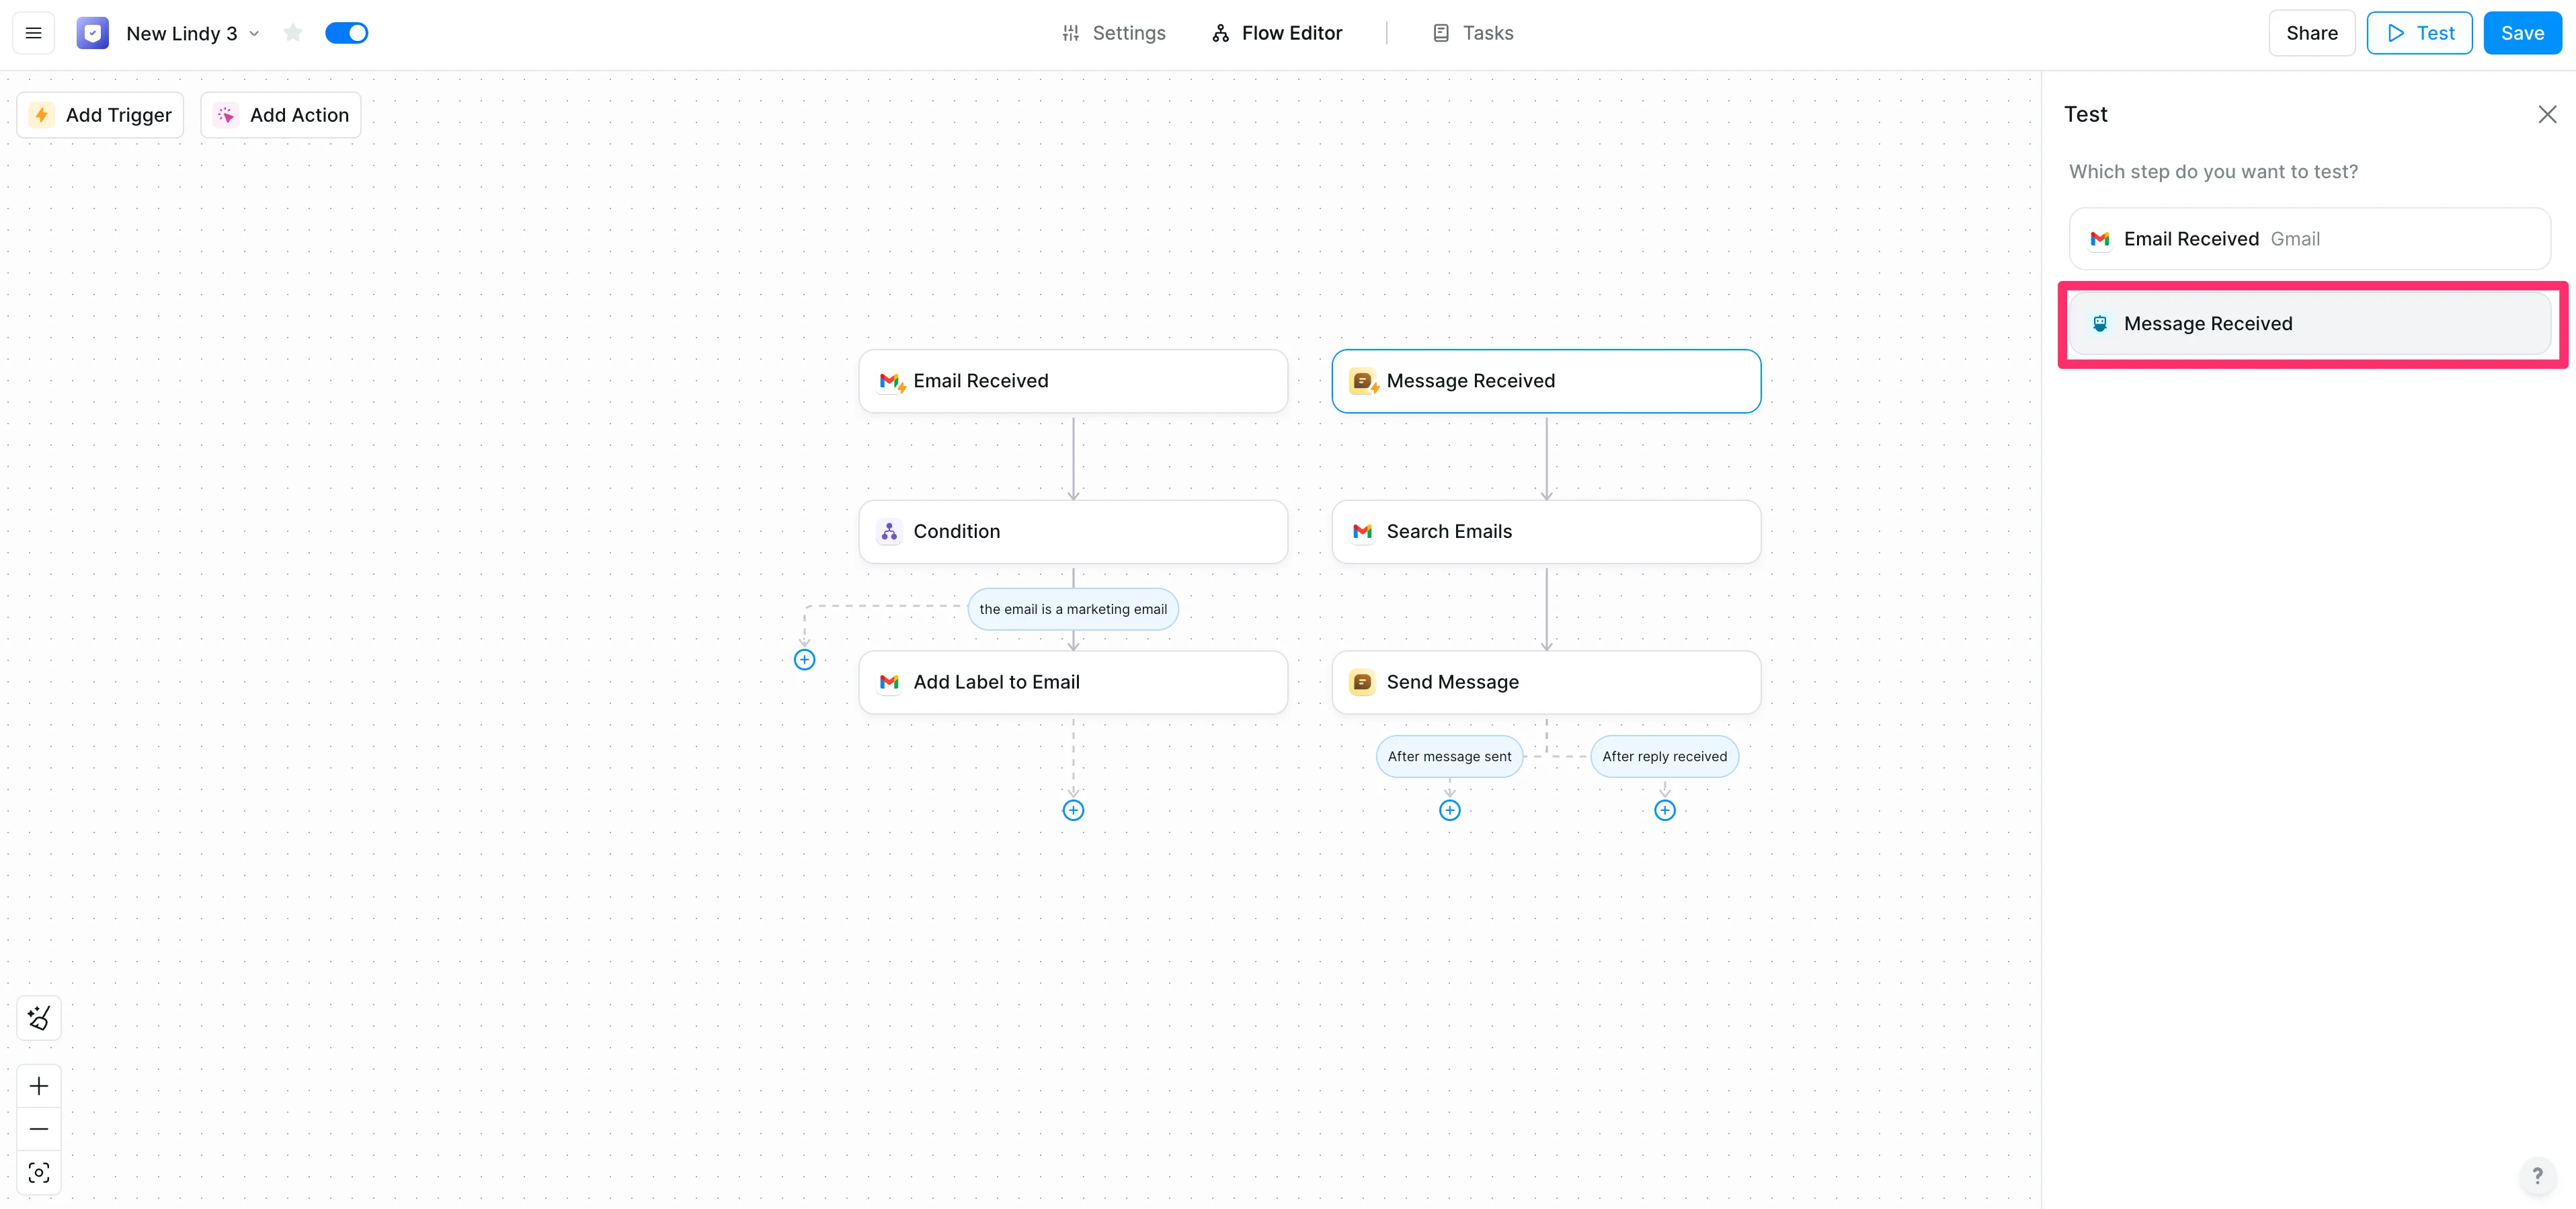
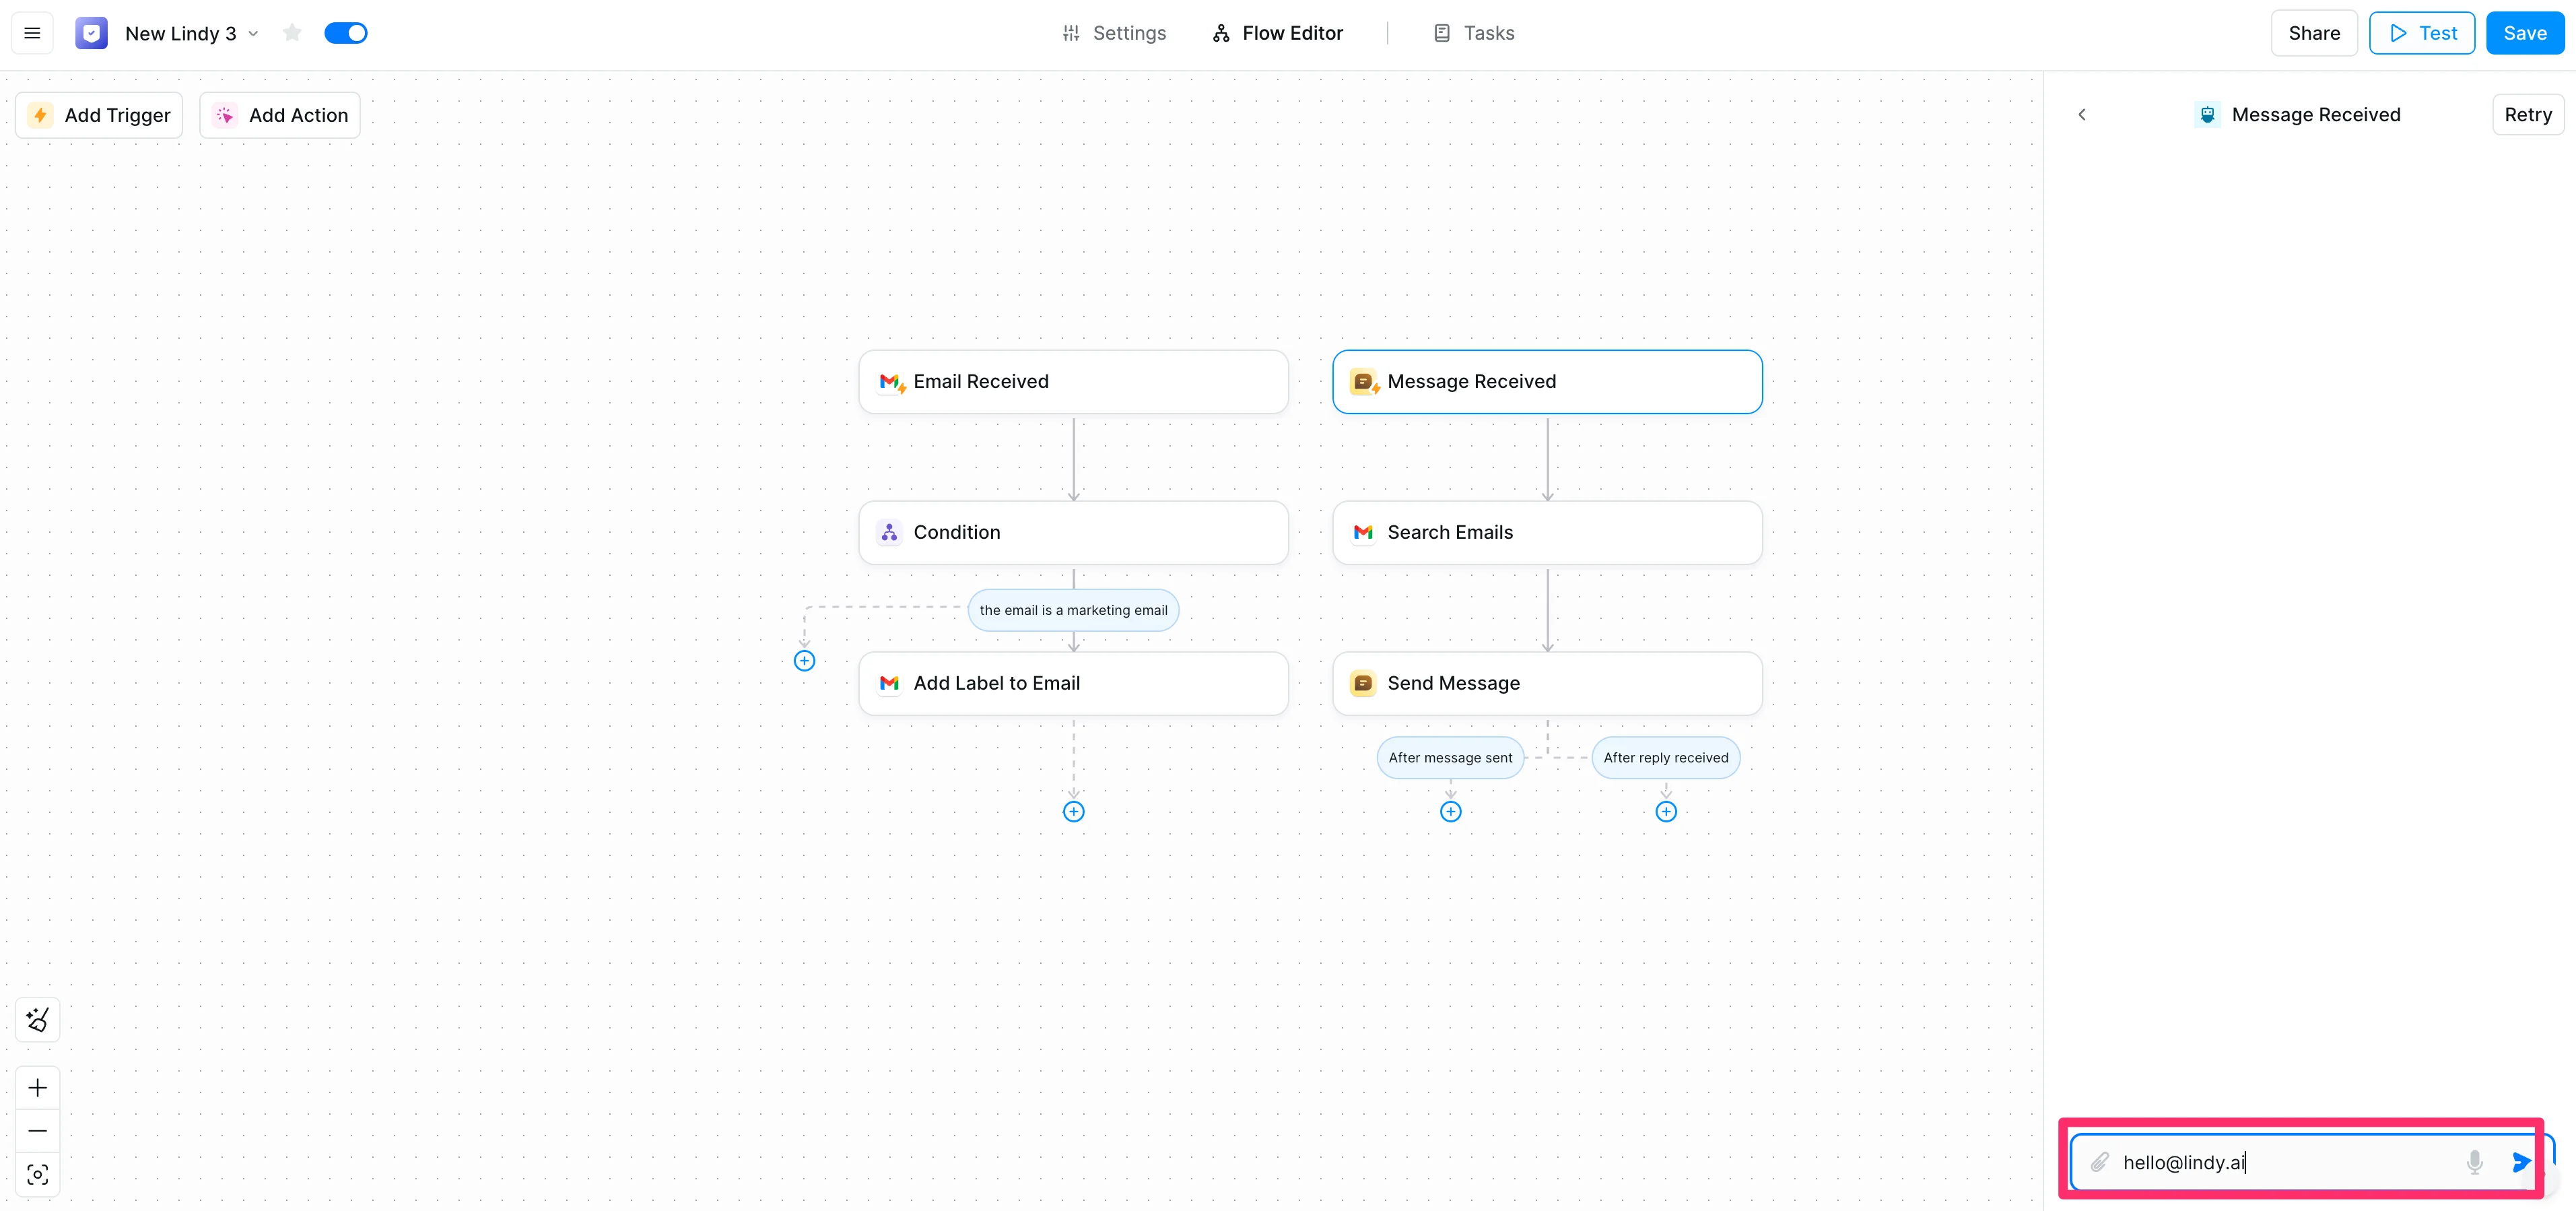
Back in Lindy in the Test pane, we’ll click the “Message Received” option to test that part of the workflow.
In the chat, we’ll type the sender email address of the test emails (hello@lindy.ai in our case).
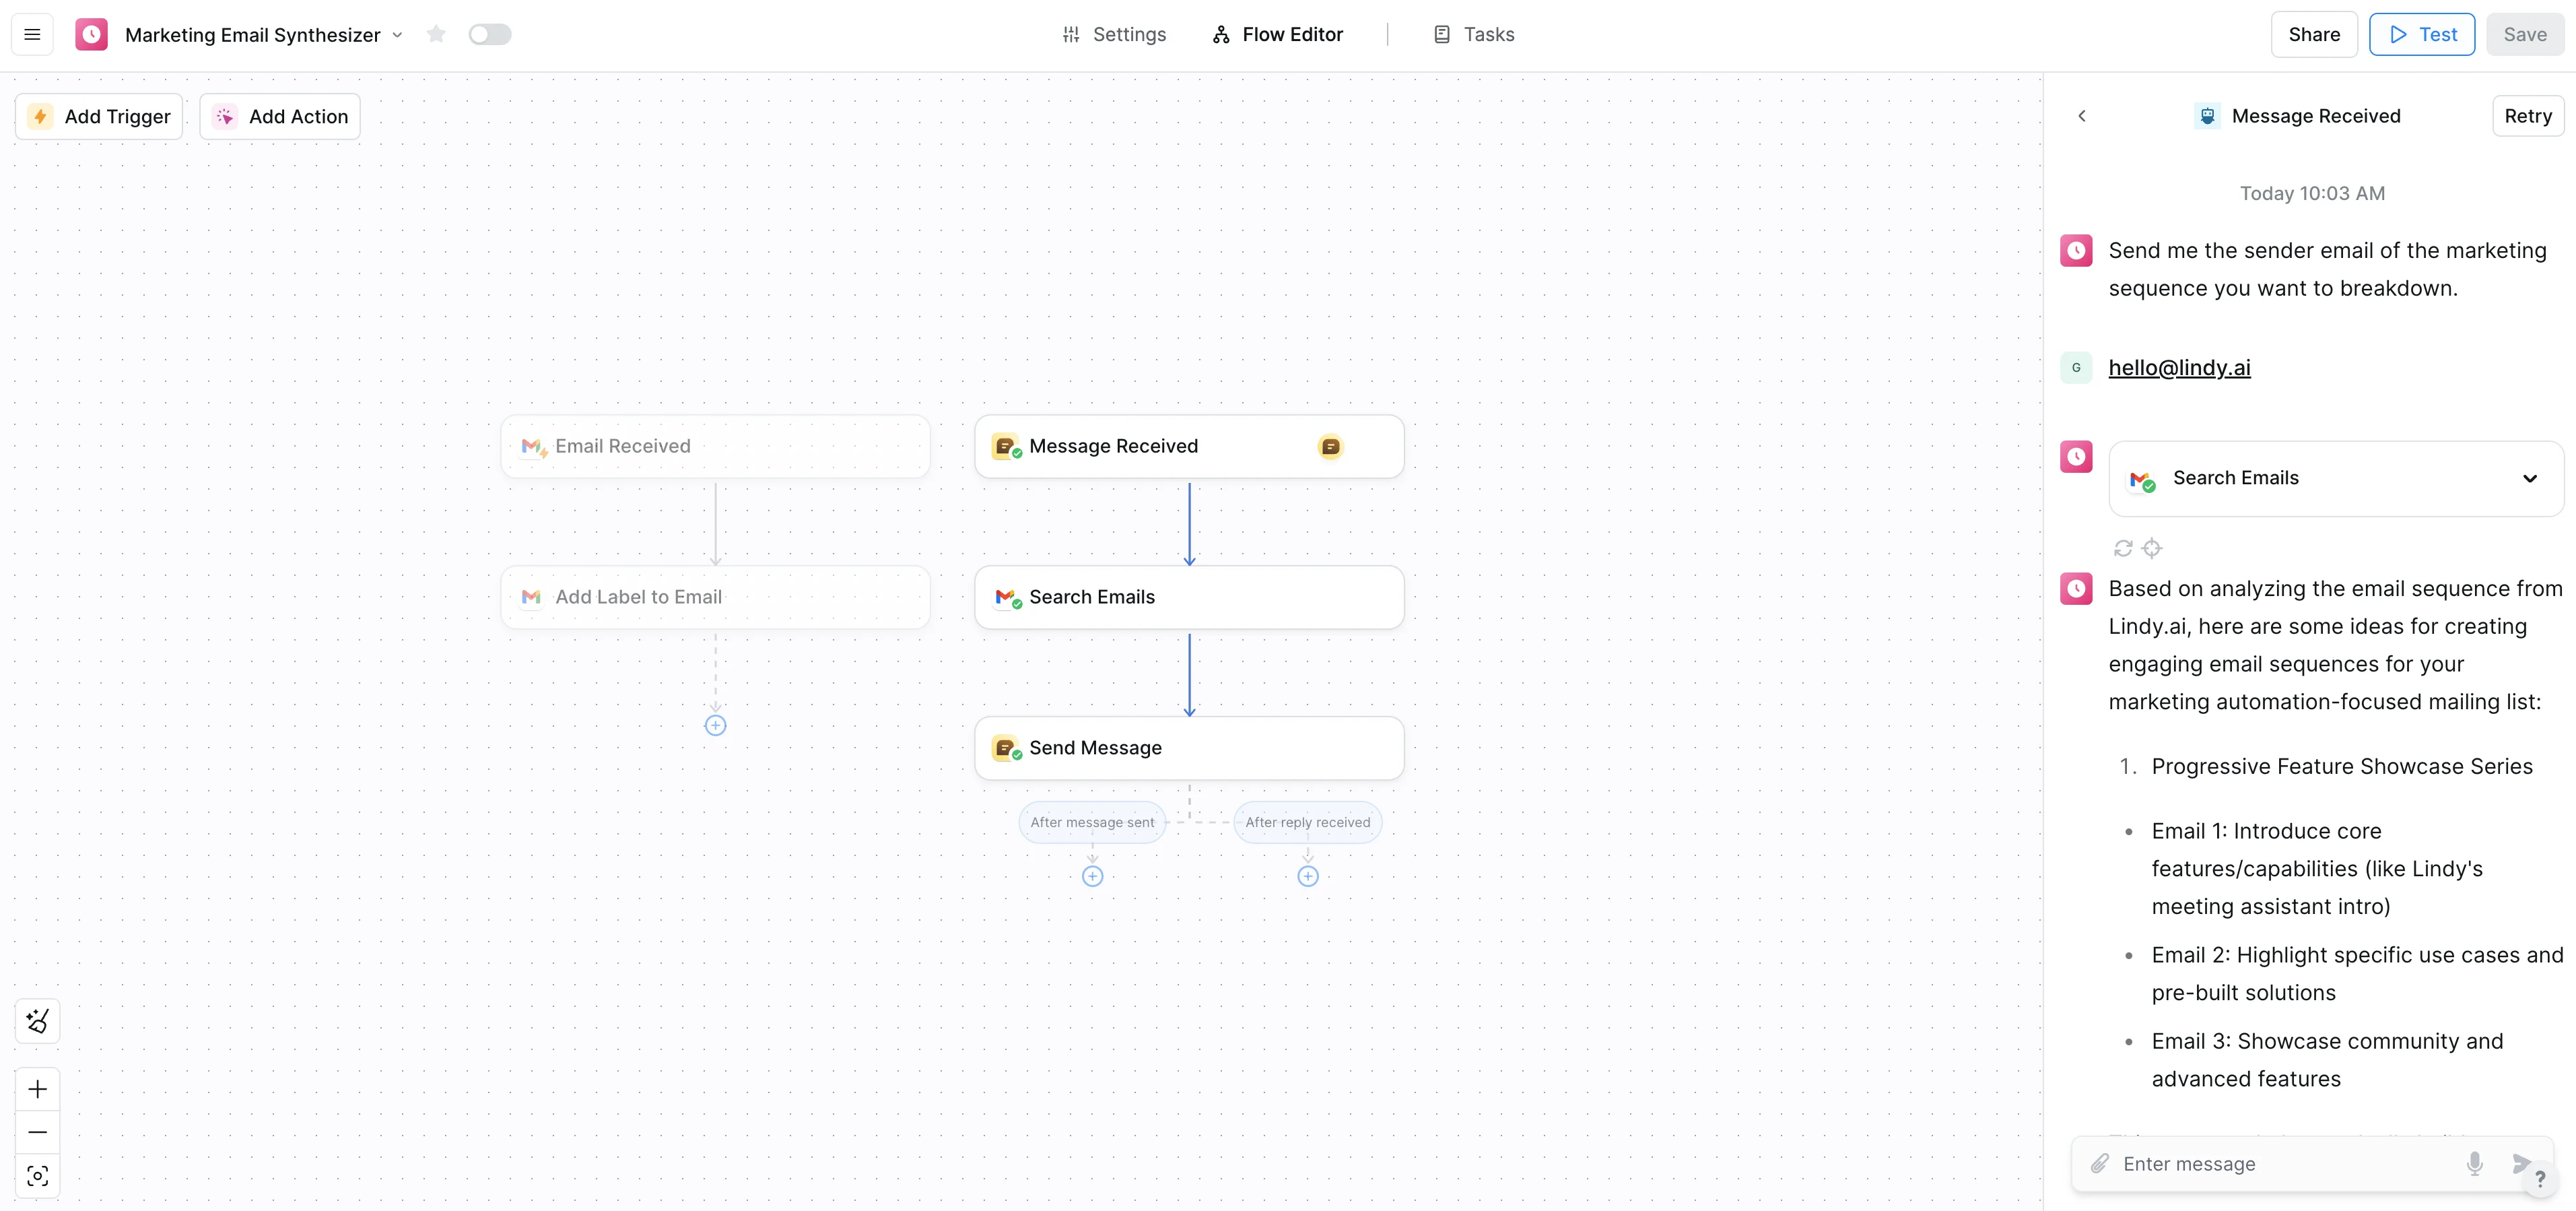
Lindy will query all of those emails that are in the “Marketing” folder that are from that email address and provide us with a recommendation on how we can implement a similar email marketing campaign for our business.
And that’s it! You now have an email AI analyzer that studies marketing sequences in your inbox and recommends effective drip campaign strategies for your business.
This tutorial was created by Garrett.