Scrape, summarise and analyse news articles with Otto
Use Otto and AI to quickly and easily scrape, summarise and analyse news articles.
2024-11-13
Being able to scrape, analyse and summarise news on a specific topic quickly is very useful. Before this would have been technically intensive and expensive, but AI has made this task much easier.
Otto is a versatile tool that can do lots of things - data enriching, business research, and information analysis for example - but today we’re going to see how it can be used with news.
In this tutorial you will learn how to:
- Set up a new table in Otto
- Populate the table with data
- Add new rows to the table
- Add new columns to the table
You'll need:
- An Otto account
Alright, let’s get to it.
Step 1: Set up a new table in Otto
First, sign up for an Otto account. Their free plan gives you 1,000 credits per month.
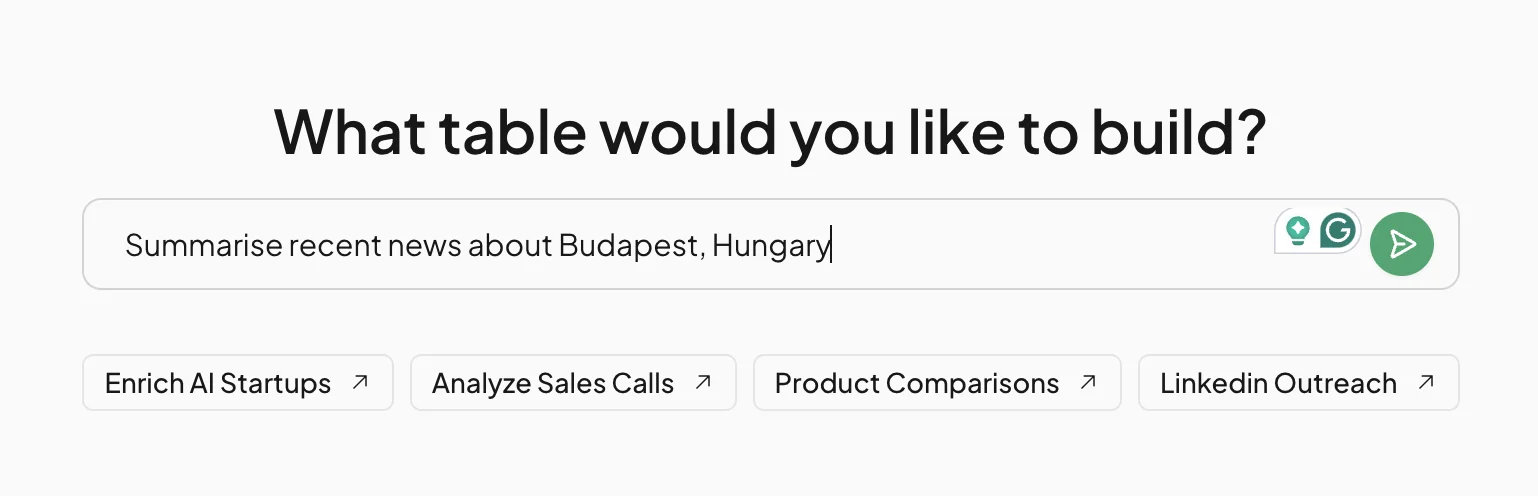
Then, on their dashboard, you’ll see an input where we can tell Otto what you want to build.
As an expat living in Budapest, I want to know what’s going on this week, so I’ll use the following prompt:
Summarise recent news about Budapest, Hungary
Click the green go button and the page will switch to a new view - with a chat panel on the right, and the start of a data table on the left.
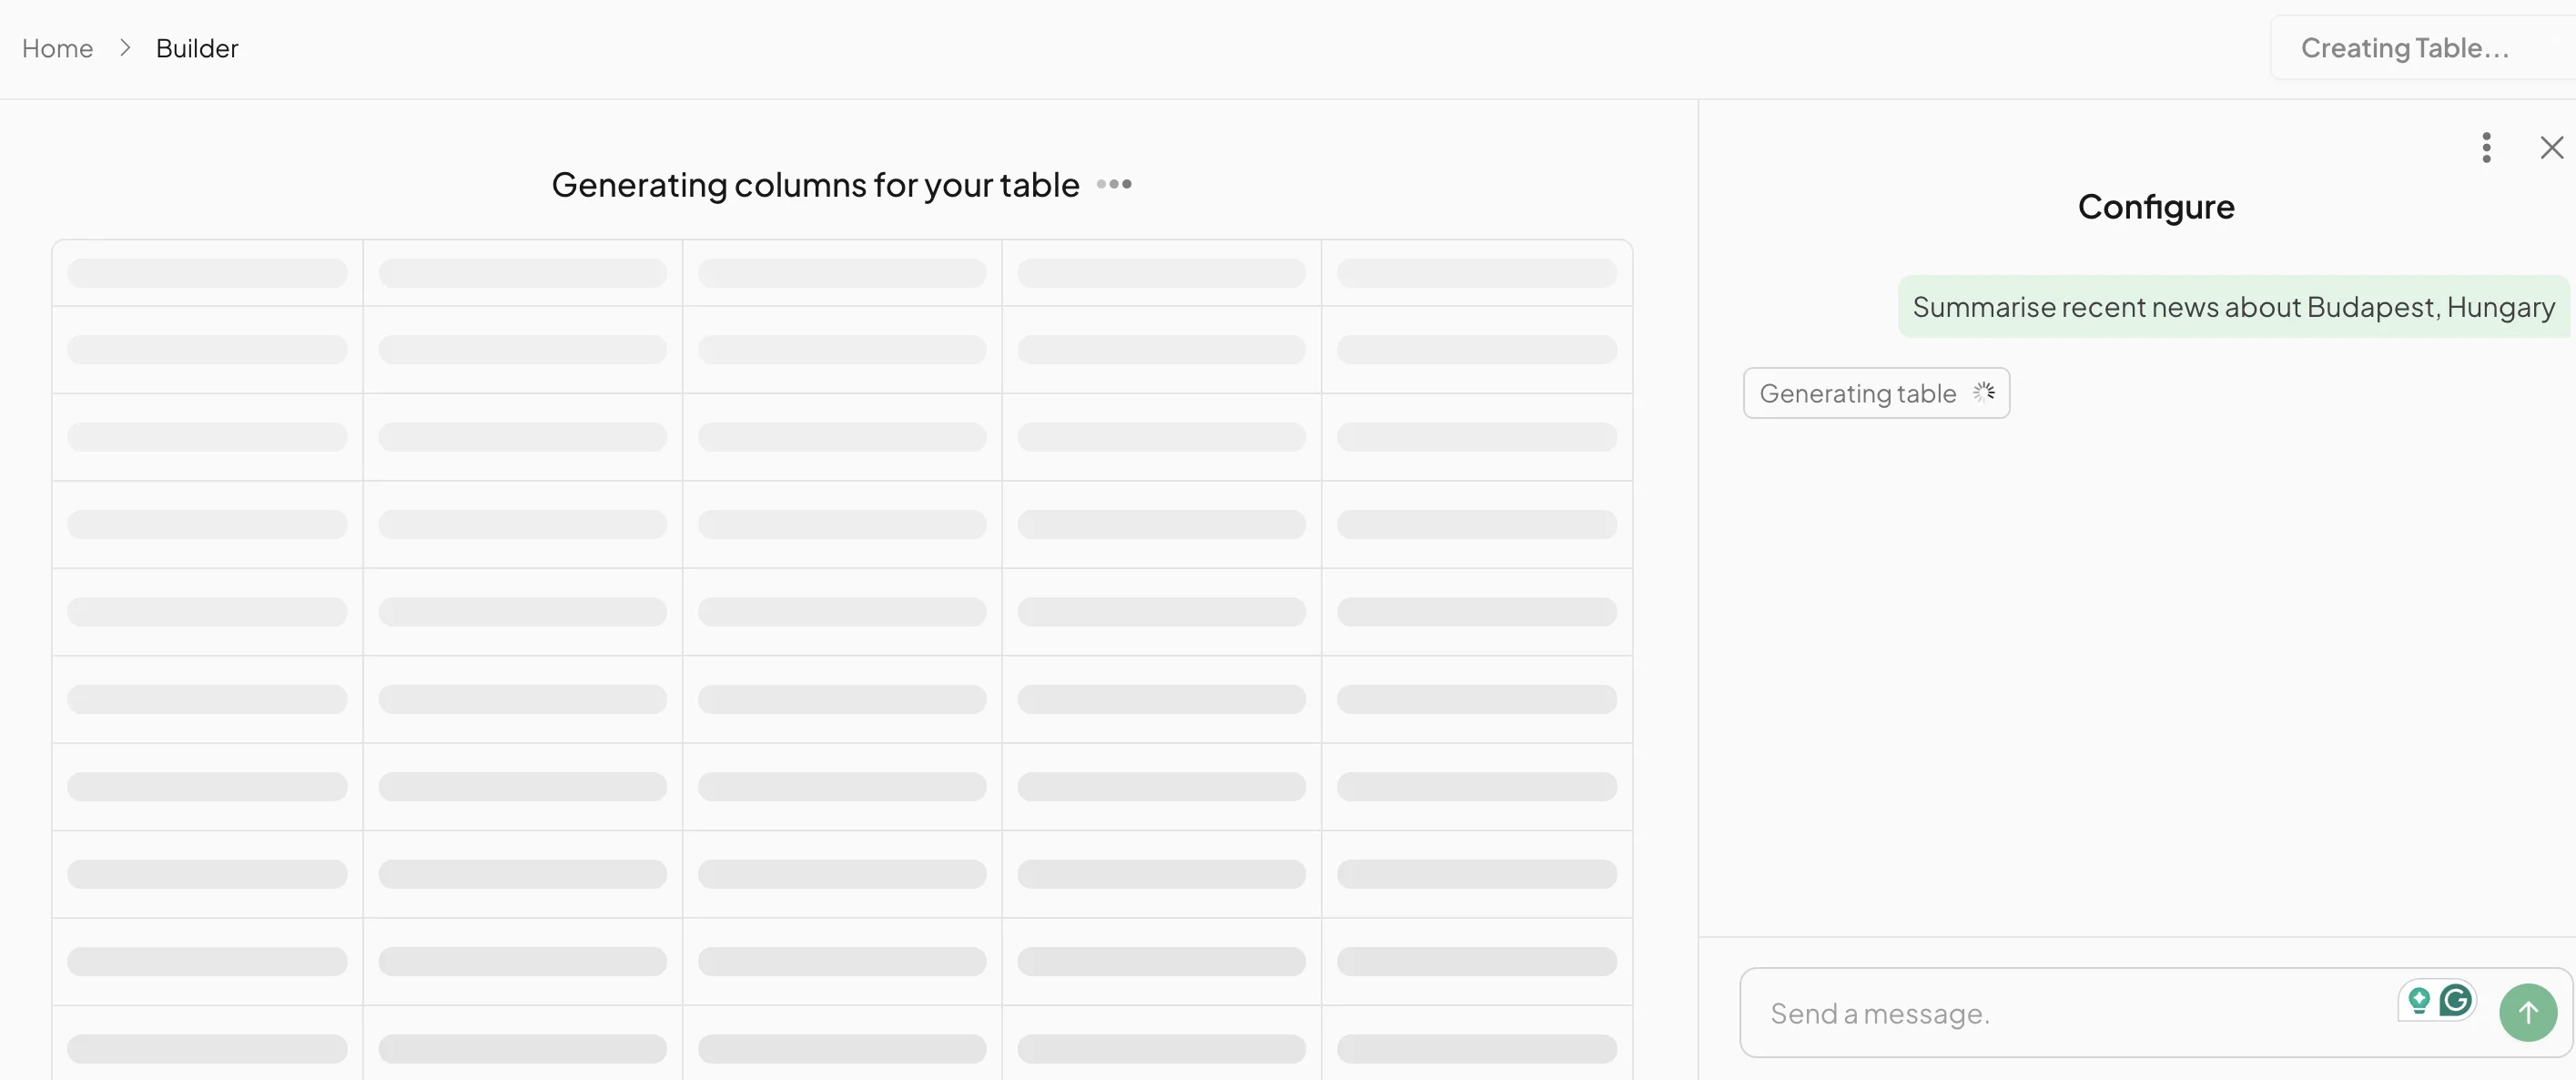
After 10-15 seconds columns for the newly created table will appear.
It’s looking good, but a few changes are needed.
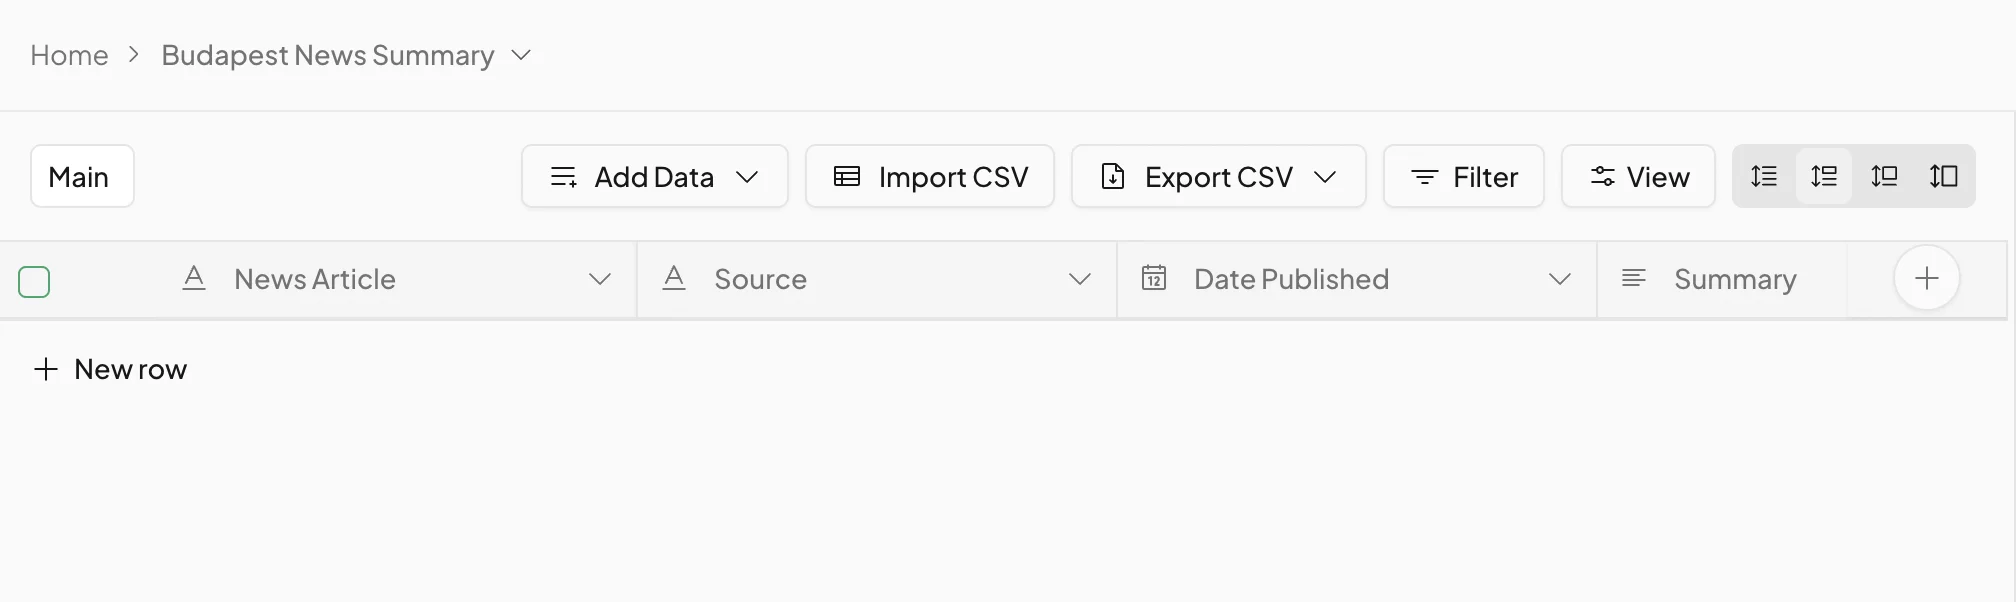
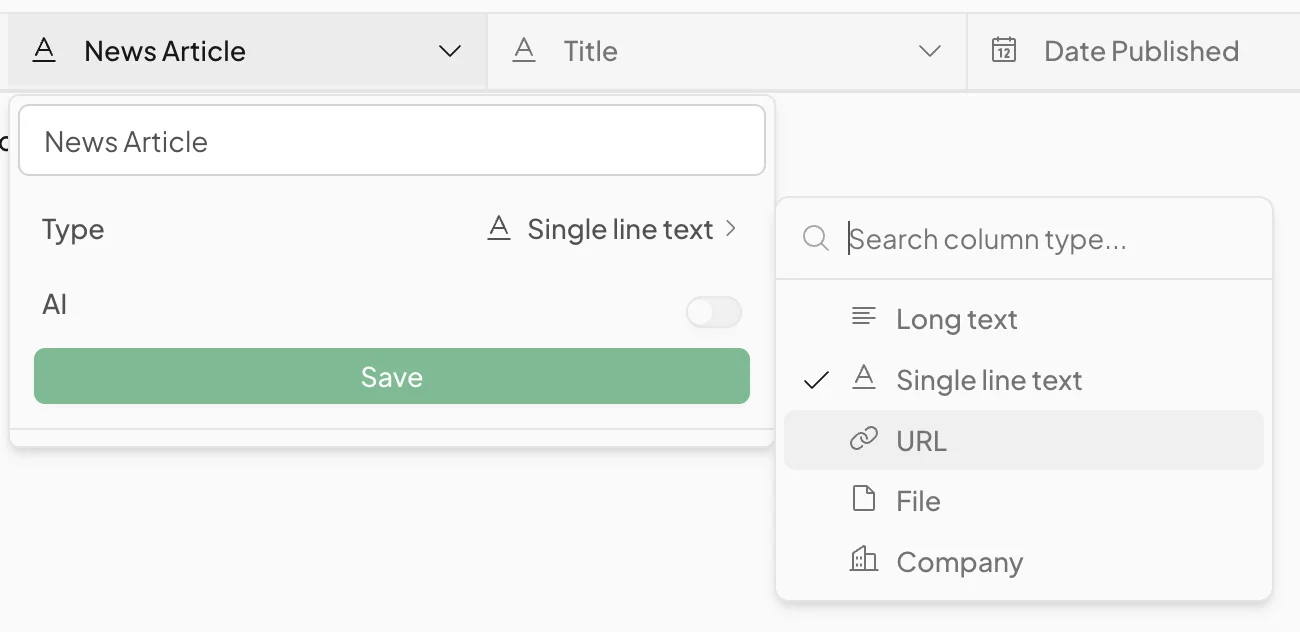
We want the first column to contain the URL of the news article - that way the other columns can scrape data from it.
Click the down arrow, then click “Type” and select ‘URL’.
We’ll also make some changes to the second column.
- Change the name of the column to “Title”.
- In the “Tools” sub-menu, change the selection to ‘Scrape URL’. This ensures that Otto will find the title by scraping the article URL from the first column.
- Finally, adjust the AI prompt as follows:
Find the title of the @News Article
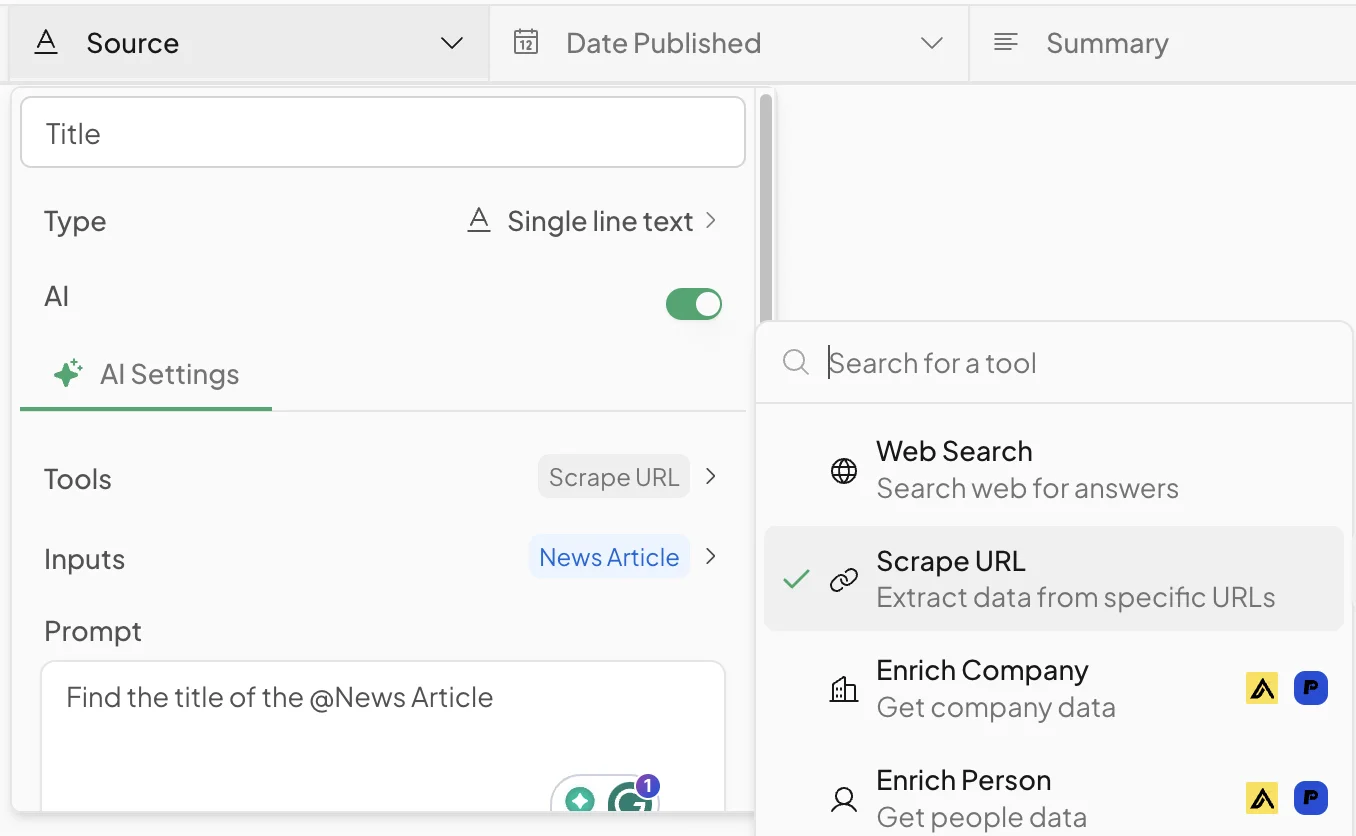
Afterwards, click save.
Similarly, we’ll change the tool selection for the “Date Published” and “Summary” columns to ‘Scrape URL’ as well.
Step 2: Populate the table with data
Now we need to add some live data to our table.
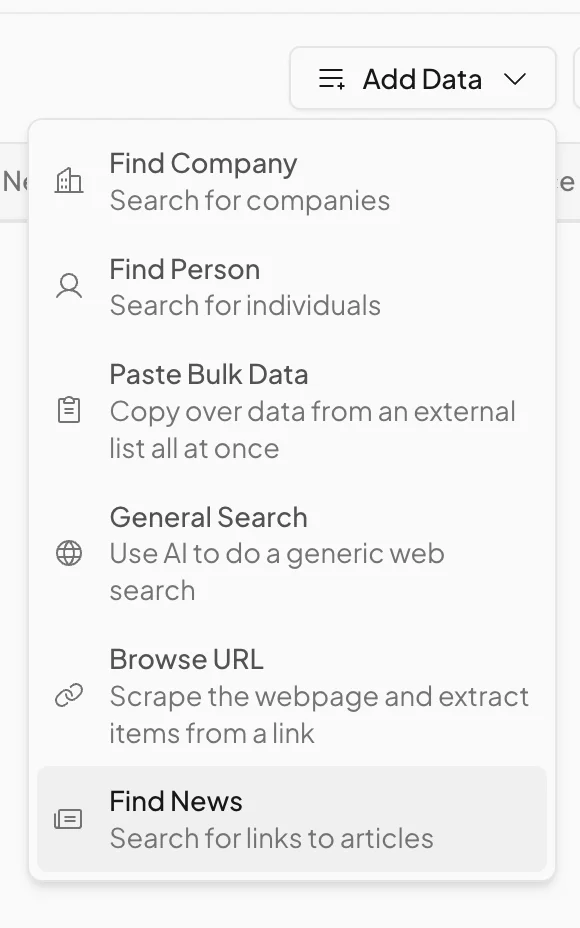
To do this, click the “Add Data” button above the column headers row, and then select “Find News”.
A new page will appear where we can search for news articles. I used the following search terms.
News about Budapest, Hungary
I’m also narrowing the search window to just include articles from the last week.
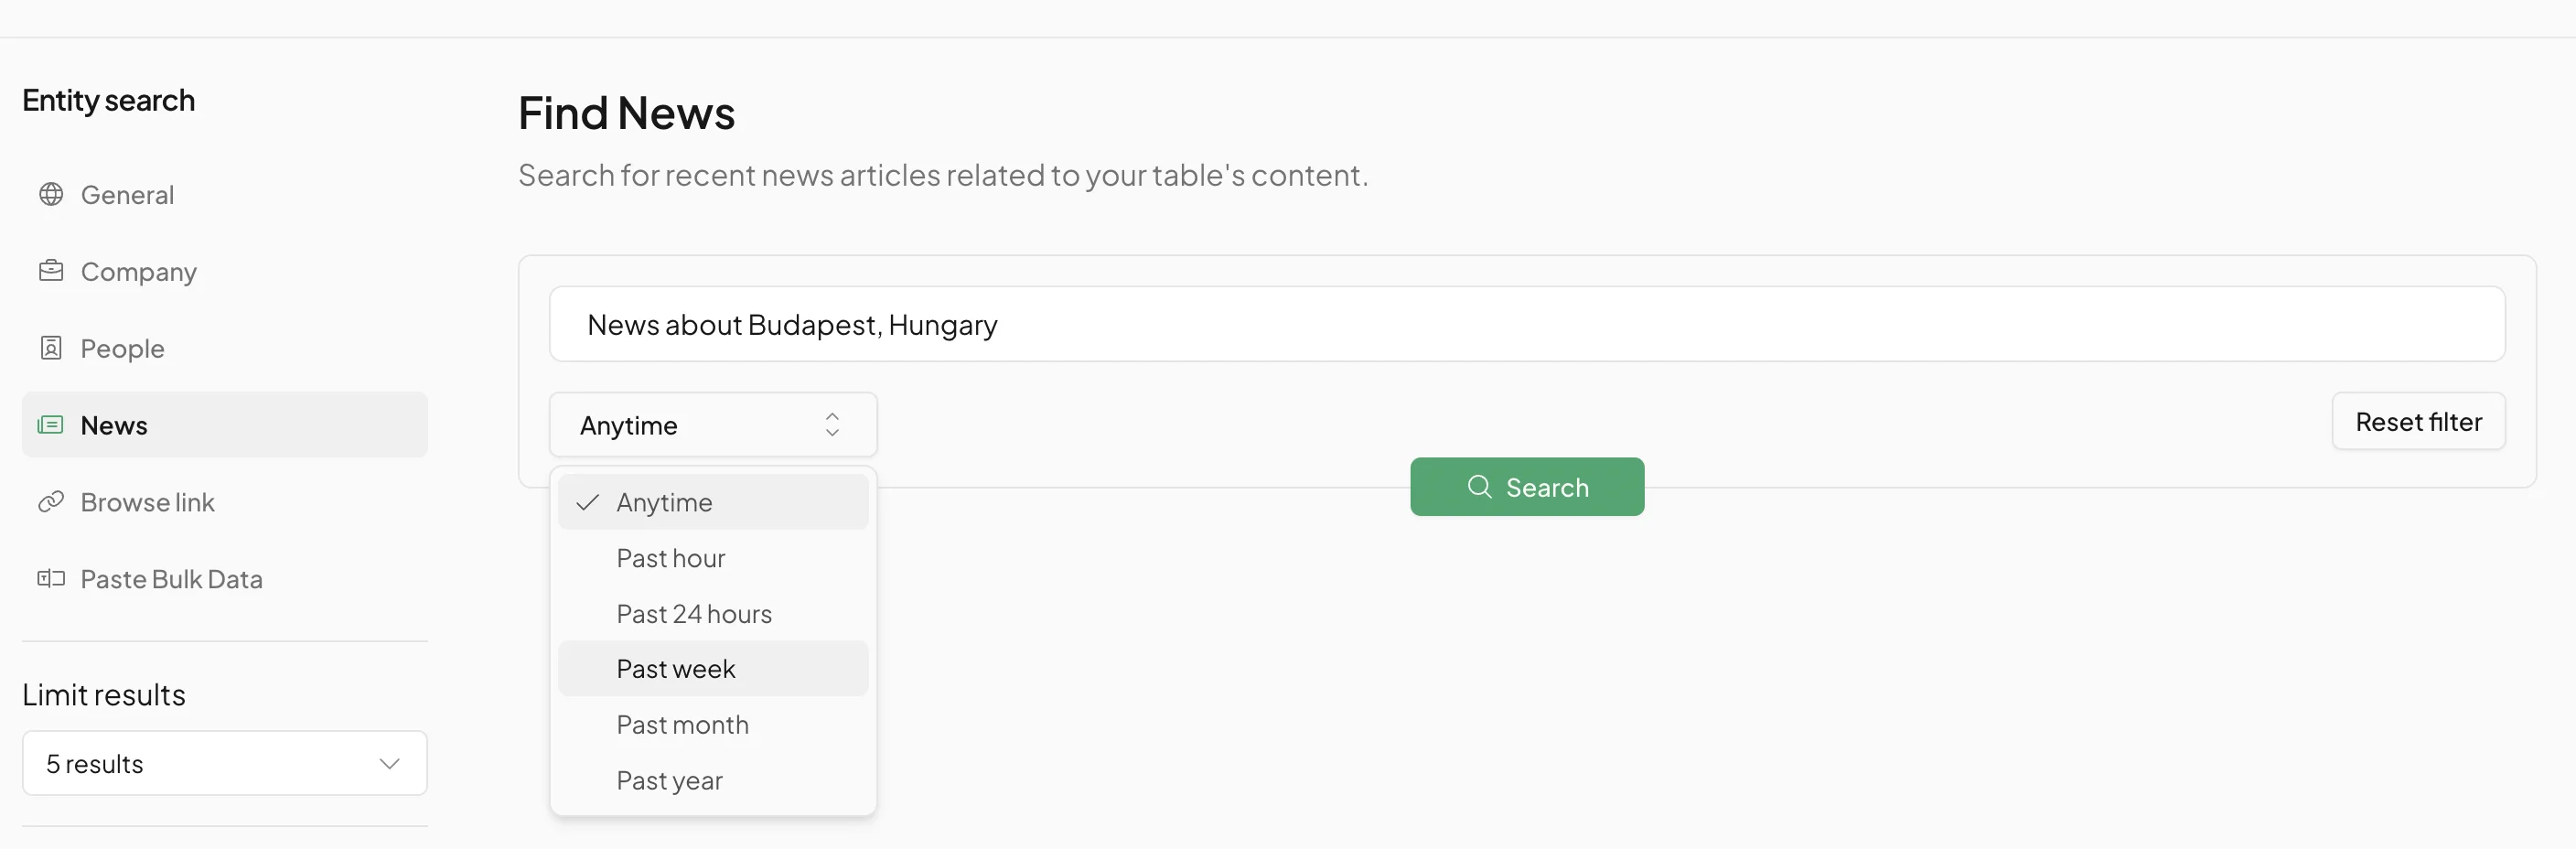
Click “Search” and after a few seconds, some results will appear.
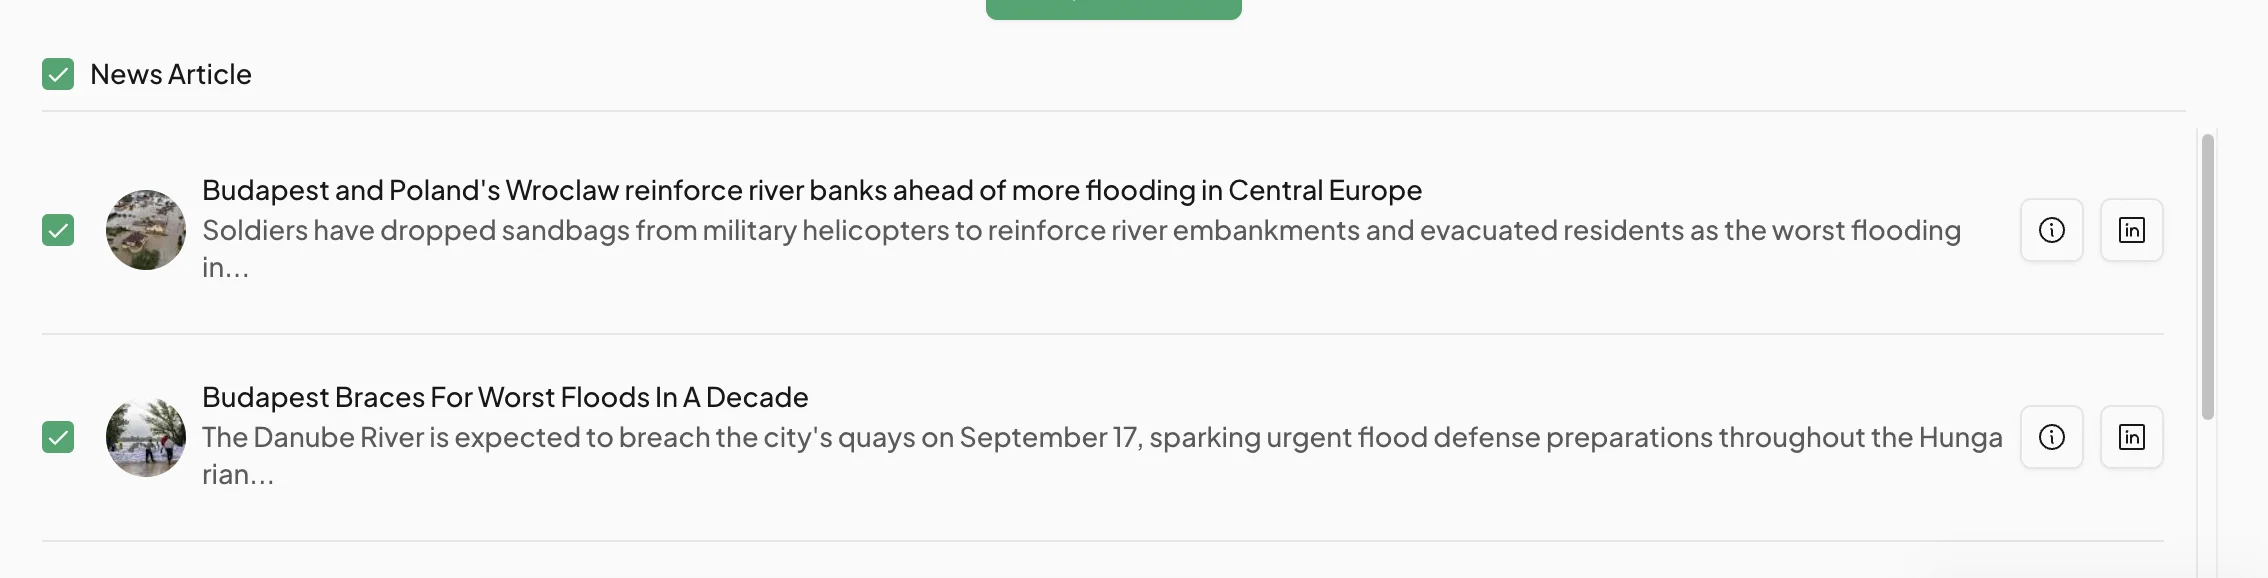
If you’re happy with the results, click “Save” in the bottom left, then select ‘Save and run rows’.

This will take you back to the table view, except this time there will be rows populated under the column headers.
The article URLs will be in the first column, while the other columns will show a status of either “Queued”, “Researching” or “Answering” and will slowly start to fill.
In the background, using the prompt set for each column, Otto is scraping and querying each article to get the data required.
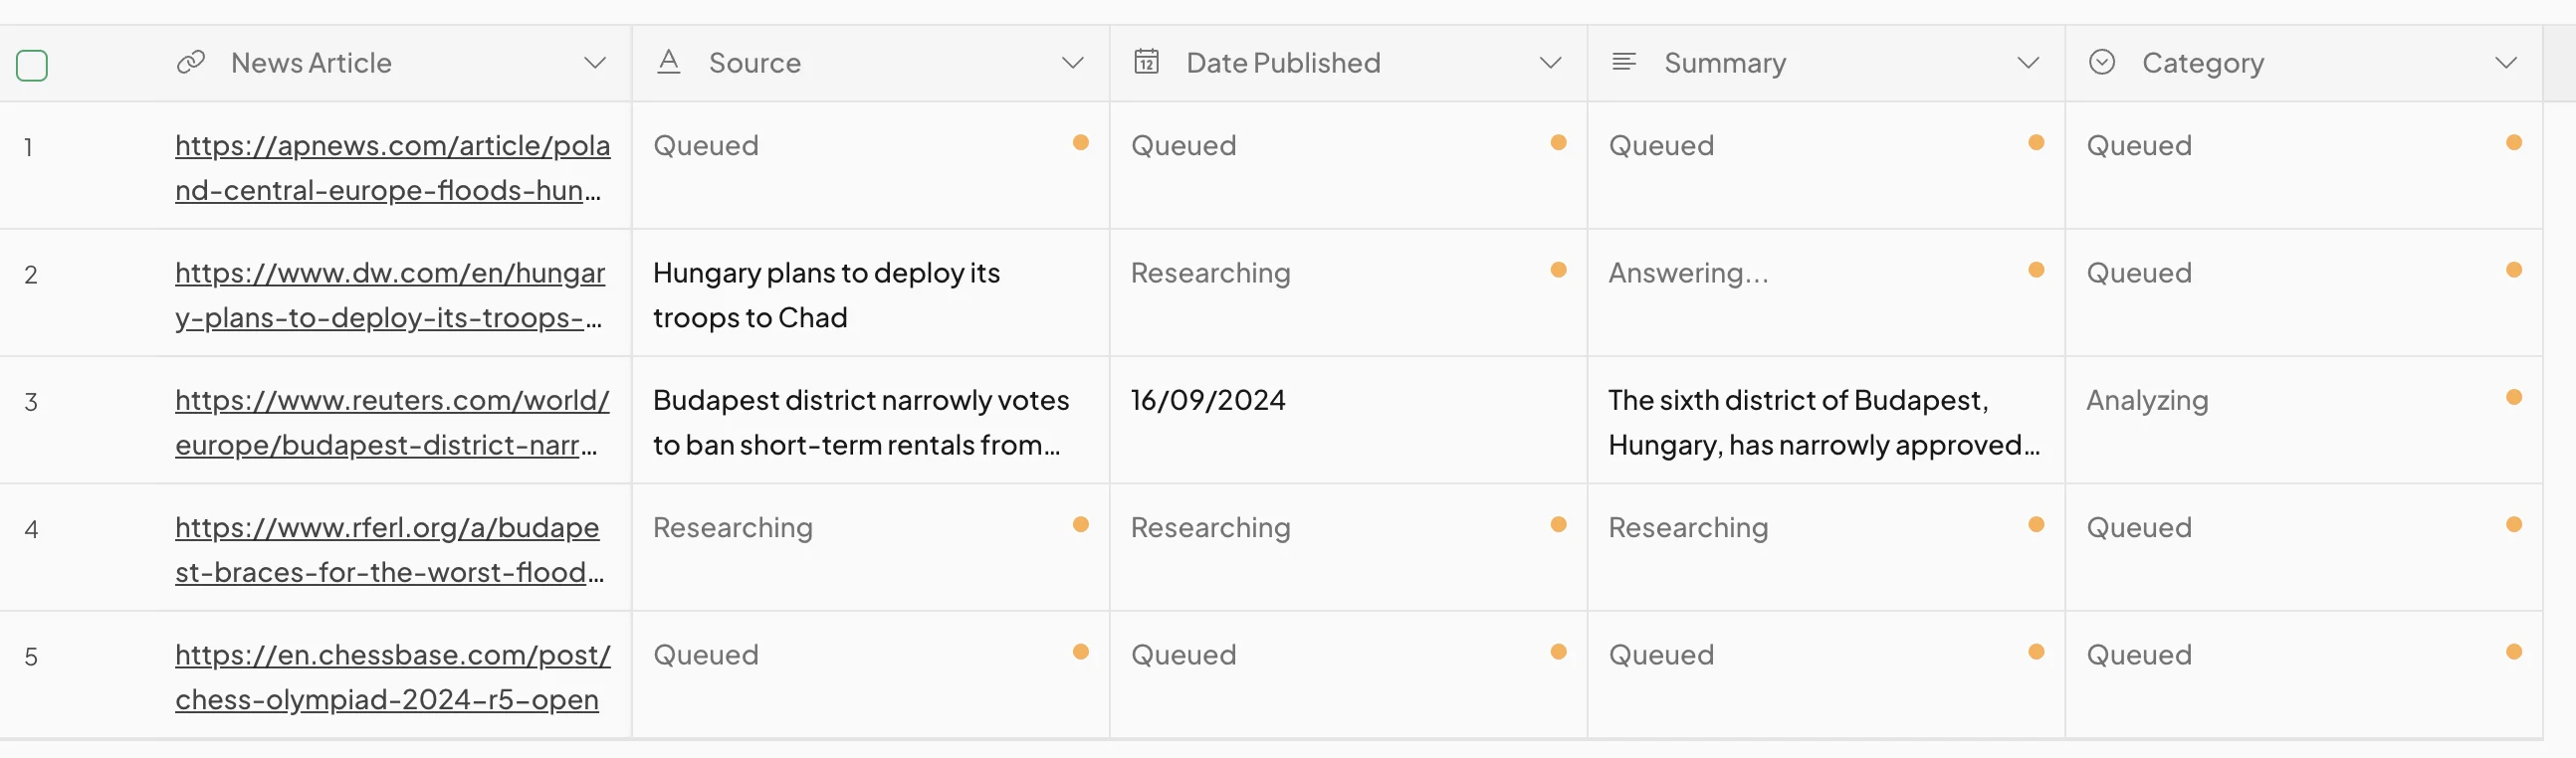
Wait a moment or two and the table should fully populate.

Step 3: Add new rows to the table
At this point, we can say job done, but you can continue to work on the table as you like.
If you want to add more rows, you can keep doing this using the “Add Data” button.
If you want to add items manually, click “New row” at the bottom left of the screen.

You only need to add the URL in the first column.

Otto will immediately kick in and populate each column.

Step 4: Add new columns to the table
Likewise, you can add new columns to your table using the “+” button that sits to the right of your last existing column.
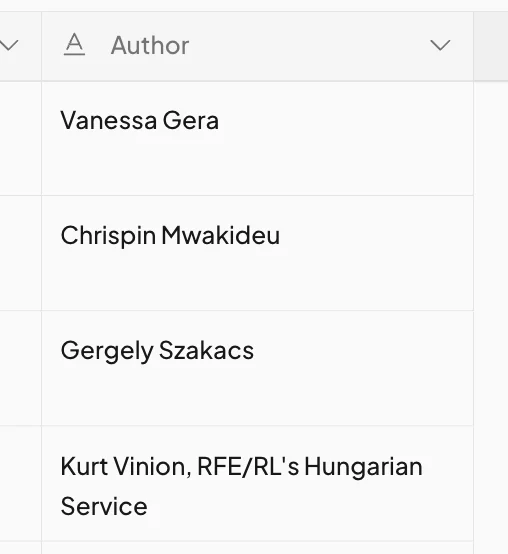
You’ll be prompted to give it a name. Let’s find the author of each article.
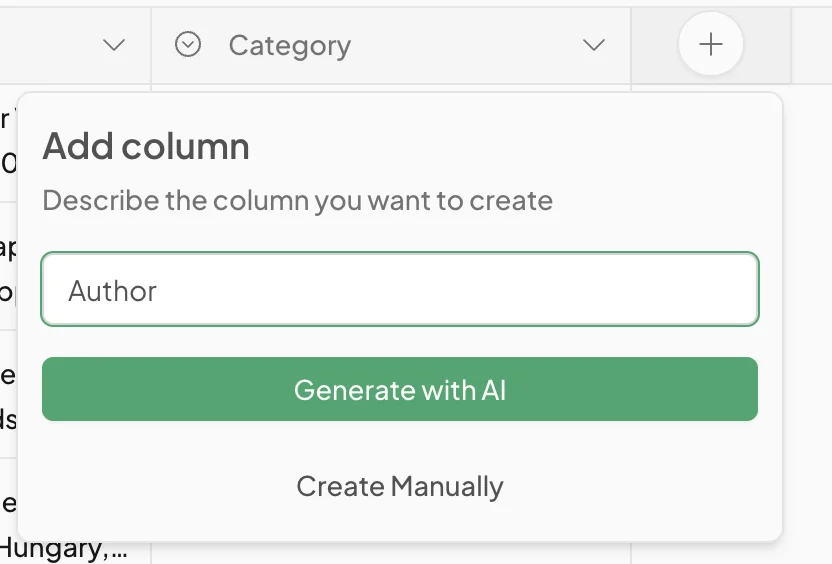
If you click “Generate with AI” a chat window will slide open with configuration options preprogrammed for the new column.
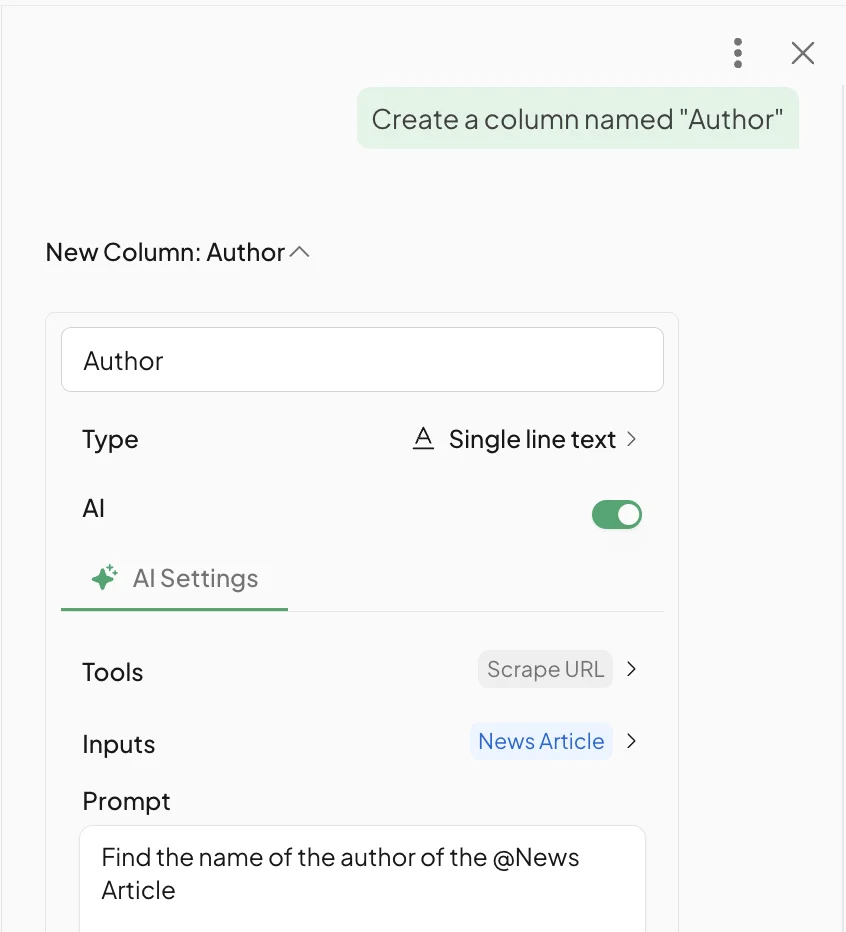
Click “Save” and the column will appear on your table and will prepare to autofill with data.
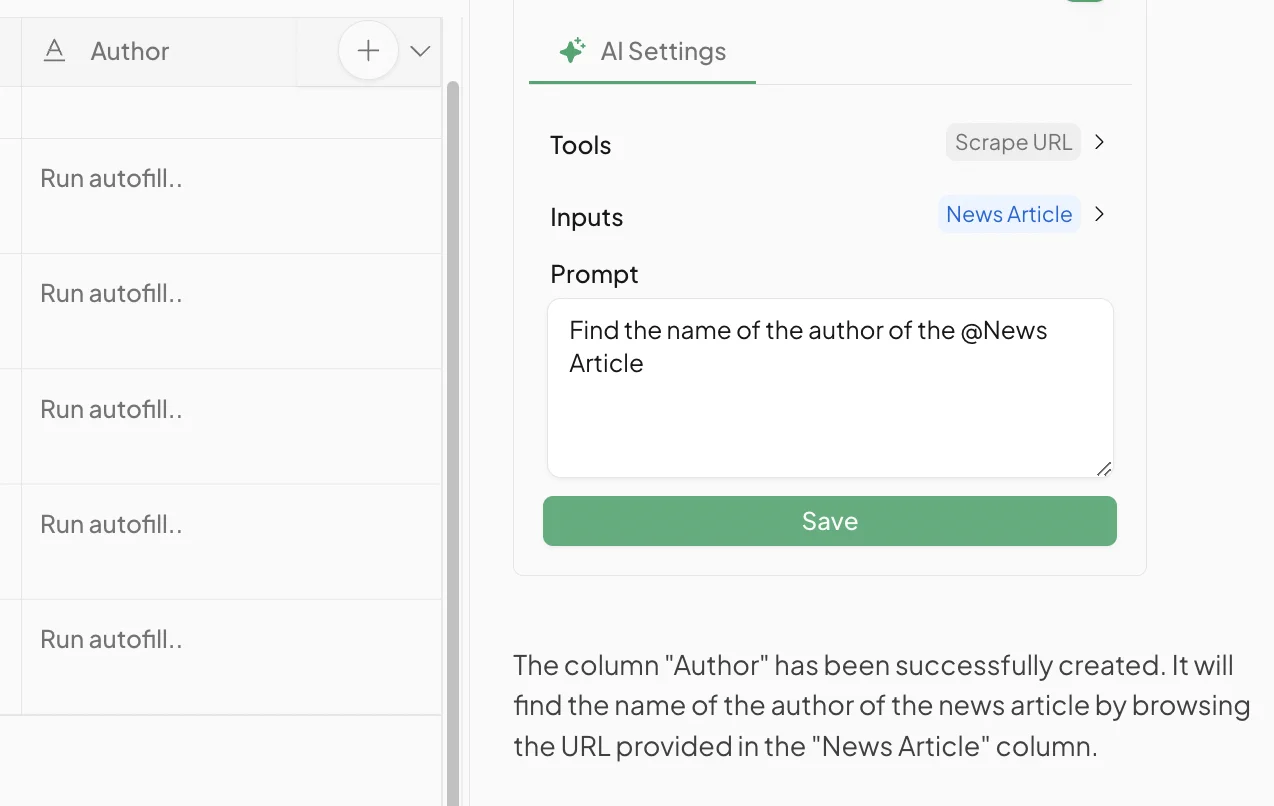
Then you just need to select some or all of the rows in that column and click “Run cells” at the bottom.
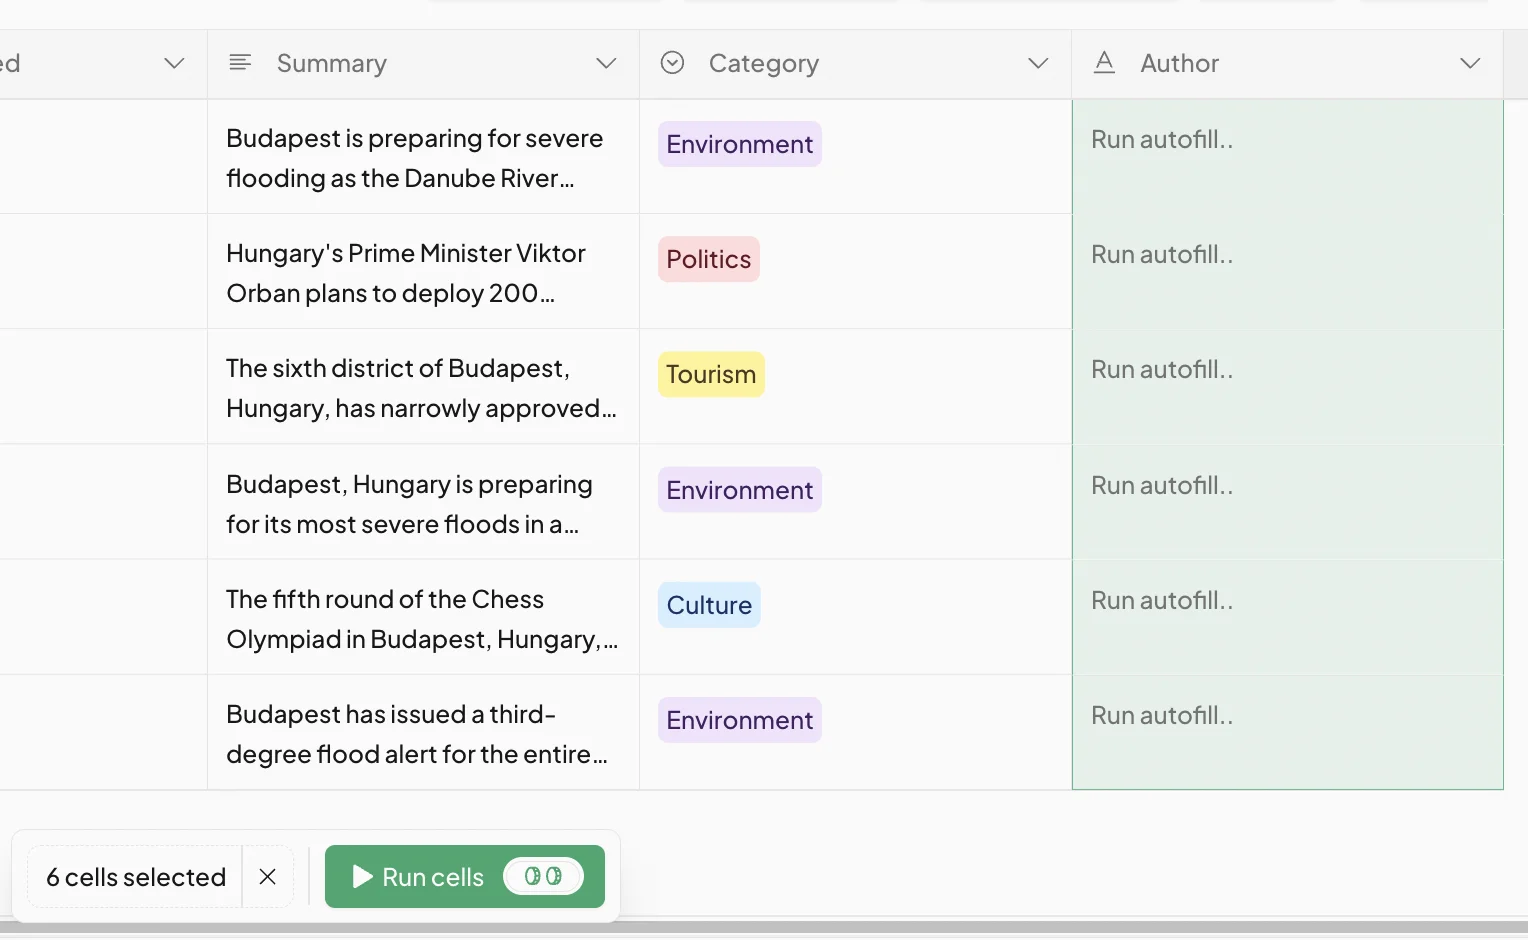
Give it a few moments, and the column will populate.
This tutorial was created by Andrew.