Specialized features and advanced workflows in Midjourney
Learn how to use specialized features and workflows for creative visuals.
2024-12-09
Welcome to part 5 of our Create stunning images with Midjourney course.
So far, we've covered almost all of the basic and advanced settings with parameters and image generation in Midjourney. Now, it's time to take our skills to the next level with some advanced workflows that can truly elevate your creations.
We'll explore techniques to maintain consistent characters across marketing campaigns, embed text inside images while blending it with your unique style, and generate images that appeal to anime-loving audiences.
In this lesson, you'll learn how to:
- Personalize images through face swapping with Insight Face
- Integrate text and typography in images
- Create anime-style visuals with the --niji command
- Analyze images and improve prompts with the /describe feature
Let's dive in.
Face swapping with Insight Face
Face swapping technology has come a long way, and Insight Face brings this capability to your Midjourney creations. While it might sound similar to character references, face swapping is a distinct feature that allows for more precise control over who appears in your images.
Unlike character references, which maintain consistent traits across different scenes, face swapping with Insight Face literally replaces one face with another in your Midjourney-generated images. This can be particularly useful for personalizing marketing materials or creating custom brand visuals without extensive photoshoots.
To get started with Insight Face, create a new private Discord server. Add the Insight Face bot using this link.
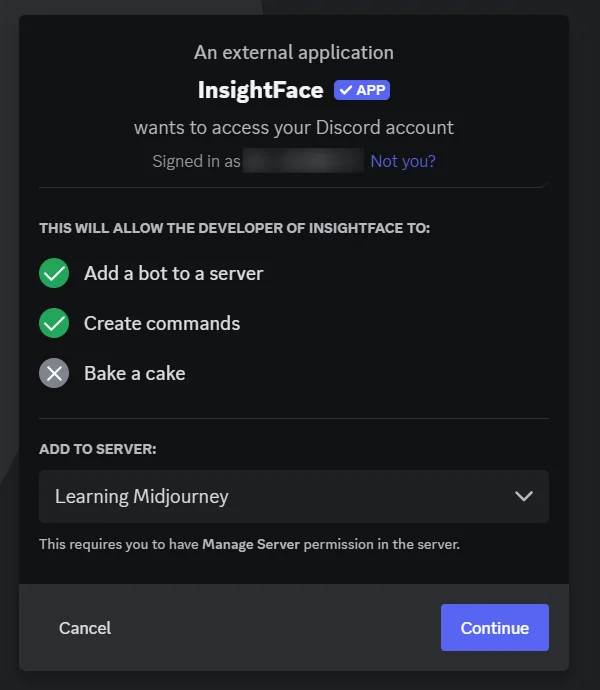
Once the bot is added, set it up by using the command /saveid and uploading an image of the face you want to use for swapping. Give this face an ID name for future reference.
Let's apply this to a business scenario. Imagine you're running a marketing campaign for a new line of athletic wear and want to feature your brand ambassador in various settings. Here's how you'd do it.
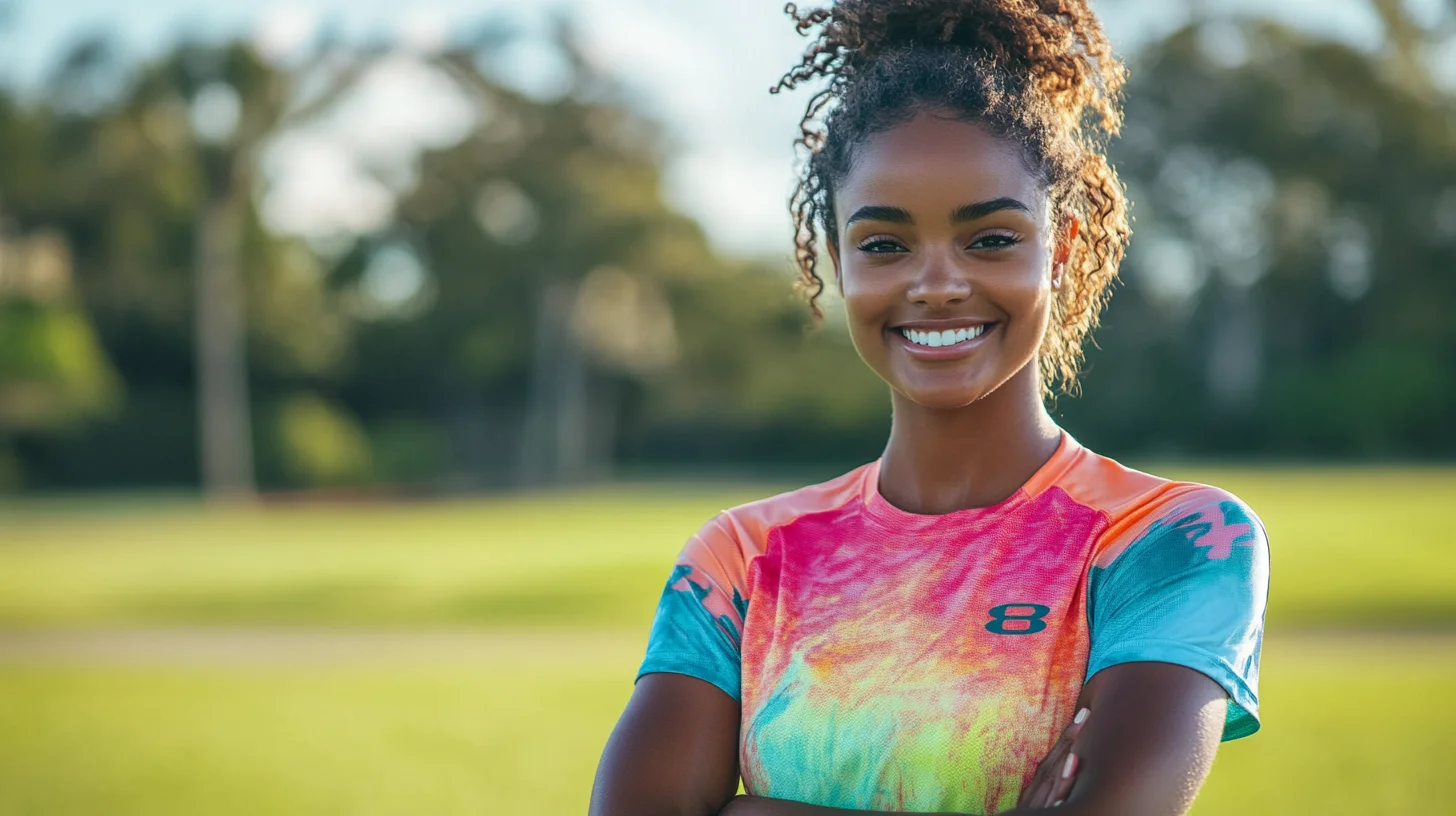
Generate an image in Midjourney of your scene with the subject looking into the camera.
Medium shot of a smiling woman in colorful branded athletic wear, from the waist up. The subject is roughly 2 meters away. Arms crossed in a strong, positive stance. Park or training field in the background. Crisp focus on the athlete. --ar 16:9
After generation, upscale one of the images. Right-click on the upscaled image, hover over Apps, and select Inswapper.
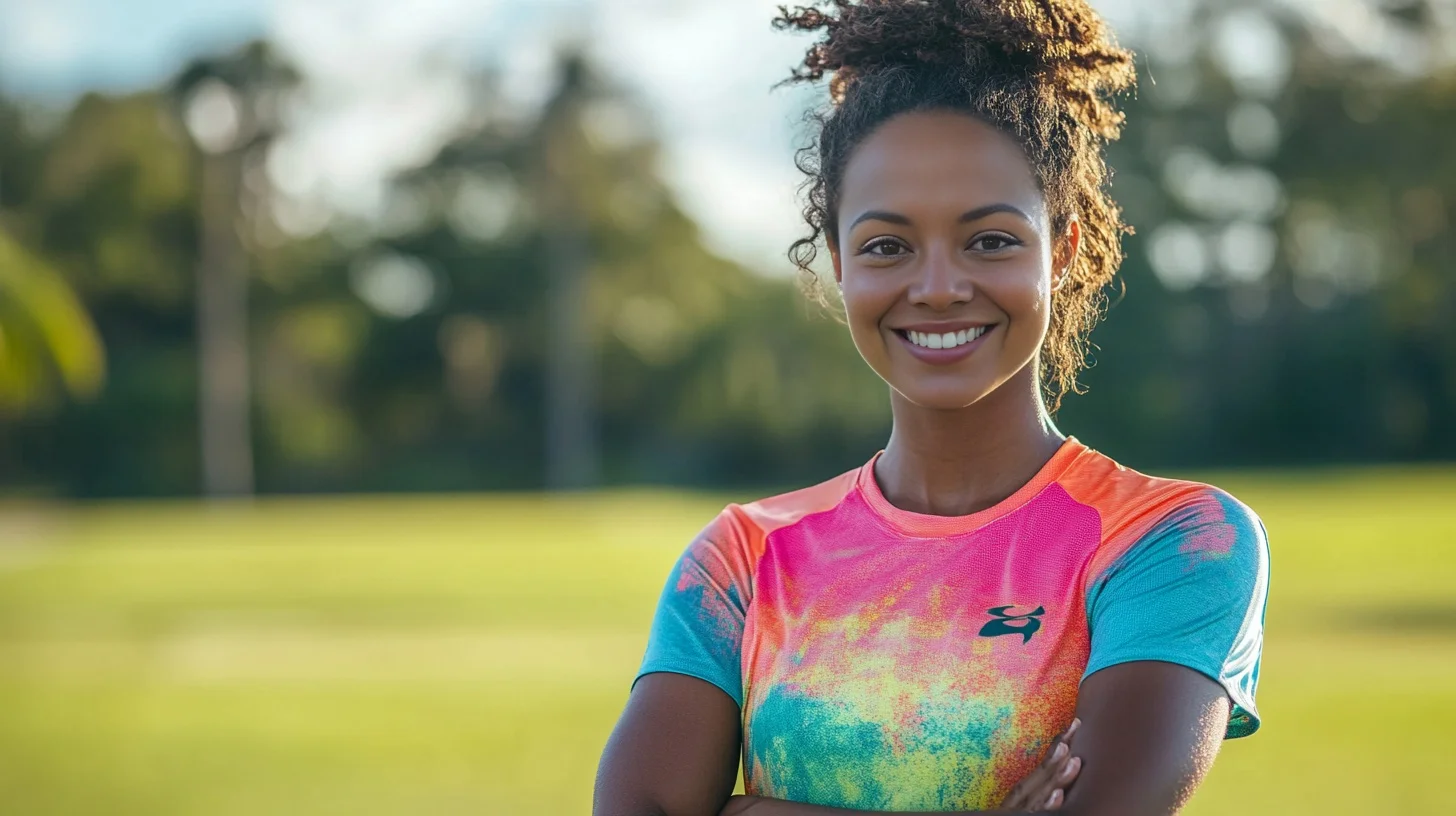
This technique allows for the quick creation of personalized marketing images featuring your brand ambassador in different settings and activities. You start with 50 free face swaps, so use them strategically to create impactful visuals for your campaigns.
Integrating text and typography in images
Incorporating text in an image is a no-brainer with tools like Canva and other simple photo editing software. However, when you want to incorporate text in a way that resonates with your brand or merge your style with typography, Midjourney's text capabilities really shine.
Midjourney V6 has made significant improvements in handling text in images. This is incredibly useful for creating ready-to-use visuals for marketing, social media, or any situation where you need text and image combined.
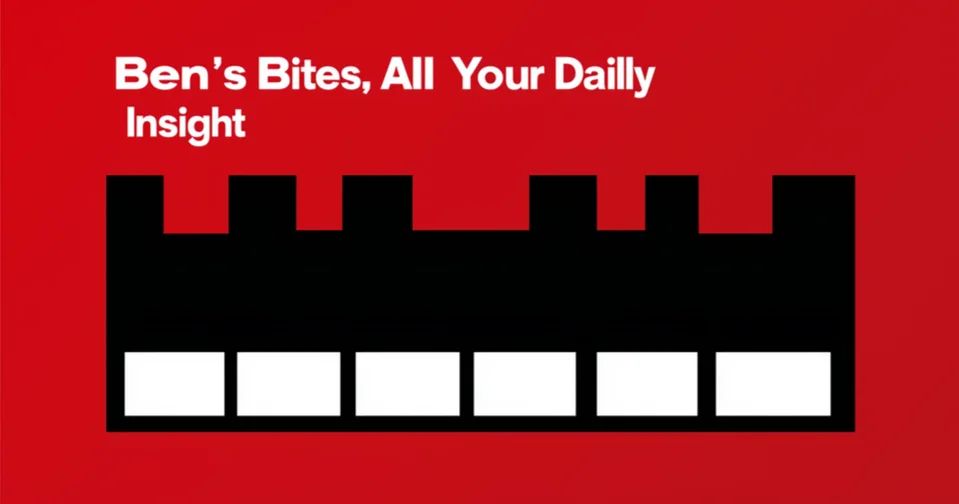
In this section, we'll use Midjourney to create an email banner for the Ben's Bites, inspired by its logo. This example will showcase how to blend brand elements with text to create cohesive, on-brand visuals.
We'll also upload the Ben's Bites logo as an image prompt to get results that closely align with the existing brand style. Prompt:
A simple, elegant email banner for "Ben's Bites," using a red and white theme. The banner features the text "Your Daily AI Insight" in a clean, sans-serif font, positioned slightly off-center. --ar 16:9
It's worth noting that Midjourney may not render the correct text on the first try. In such cases, you can edit incorrect text with the editor, regenerate images to get the perfect text or download and edit it further in tools like Canva.
Using style references or brand elements (like we'll do with the logo) can help maintain consistency across your visuals.
Creating anime-style images with --niji
In our first lesson, we briefly compared anime-style images created by regular Midjourney and the --niji version. Now, let's take a deeper dive into --niji and see how it can be a game-changer for businesses looking to tap into the anime aesthetic.
The --niji mode is Midjourney's anime and manga specialist. It's not just for creating cute characters or epic battle scenes - it's a powerful tool for businesses looking to connect with anime fans or infuse their brand with that anime energy.
Let's say you're running a tech startup and you want to create a mascot that appeals to young, anime-loving consumers:
Cute anime-style robot mascot for a tech startup. Sleek design with blue and white color scheme. Large, expressive eyes and a friendly smile. Tech-inspired patterns on its body. The robot is making a peace sign with one hand and holding a smartphone in the other. --niji 6 --ar 1:1
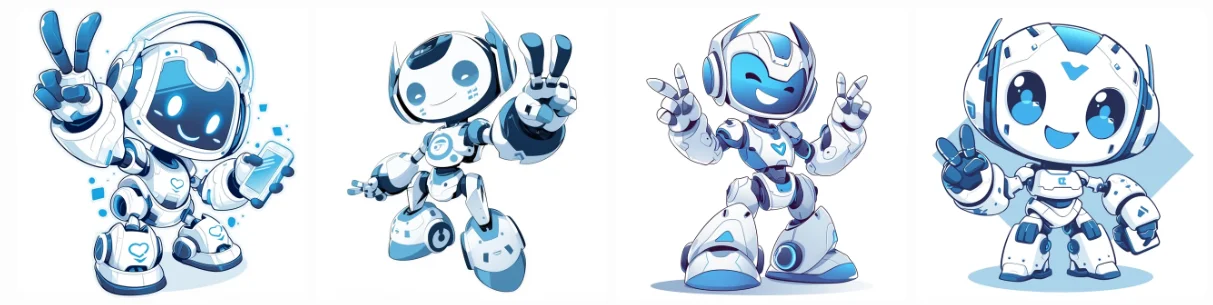
This mascot could work great across various platforms - social media, app icons, and merchandise. The 1:1 aspect ratio makes it perfect for profile pictures too.
Now, imagine you're a language learning app targeting anime fans who want to learn Japanese:
Anime-style scene of two students in a Japanese classroom, one pointing at a whiteboard filled with neatly written characters, the other student watching with focused attention. Soft morning light streams through the windows. --niji 6 --ar 16:9
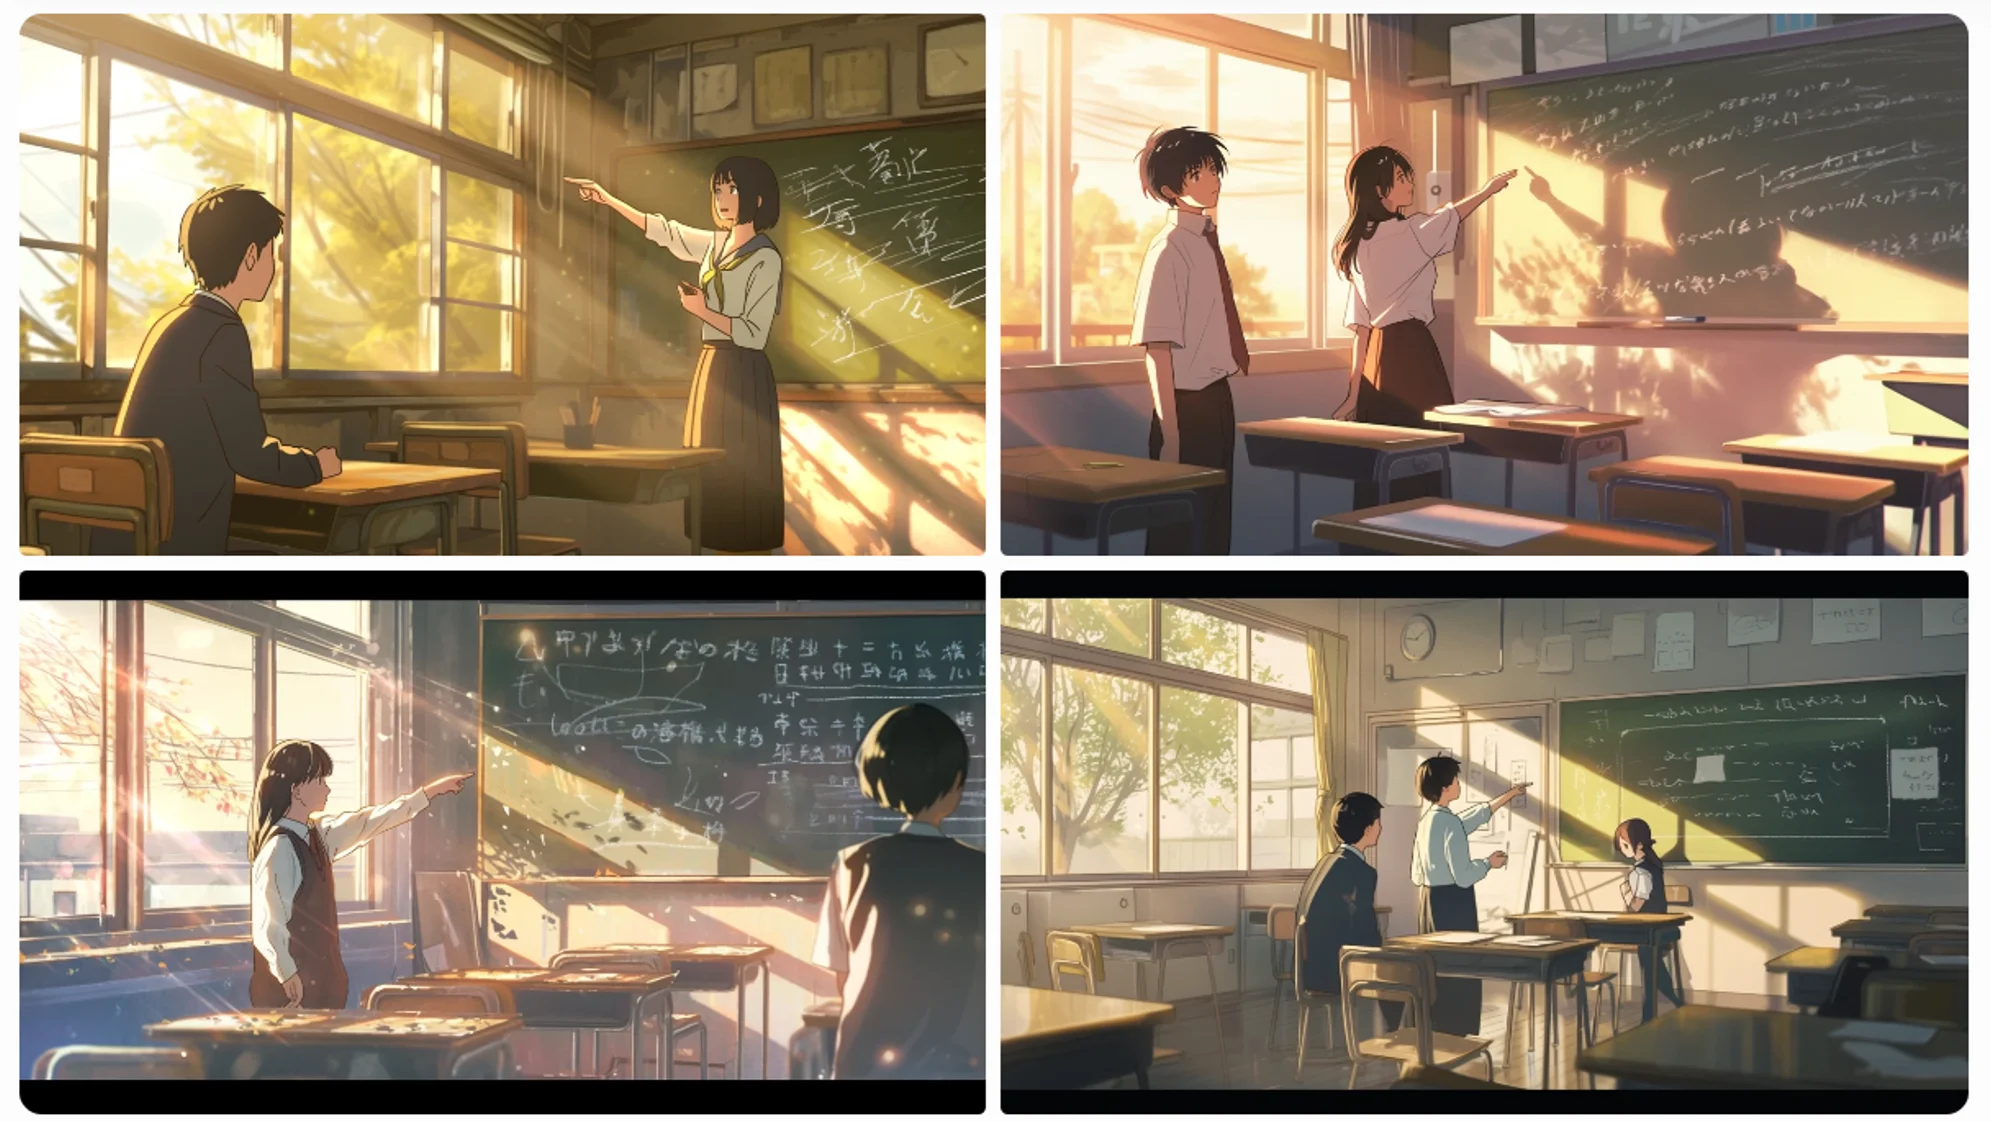
This image can serve as a great starting point for your ad campaign. When using --niji, keep in mind that it excels at creating characters with classic anime features, handles action and motion lines well, and tends to use vibrant, saturated color palettes.
Utilizing the /describe command for prompt analysis
The /describe command is a tool that can help you level up your prompting game. It allows you to upload an image and get Midjourney's interpretation of it in the form of prompts. This feature works differently on Discord and the web interface, so let's explore both methods.
Let's say you're a marketing manager for a luxury watch brand. You've found an ad image that perfectly captures your brand's essence, but you're not sure how to describe it in Midjourney terms.
Open a chat with the Midjourney bot on Discord. Type /describe and either upload an image or use a URL for the image. Press enter, and Midjourney will analyze the image and provide four prompt options.
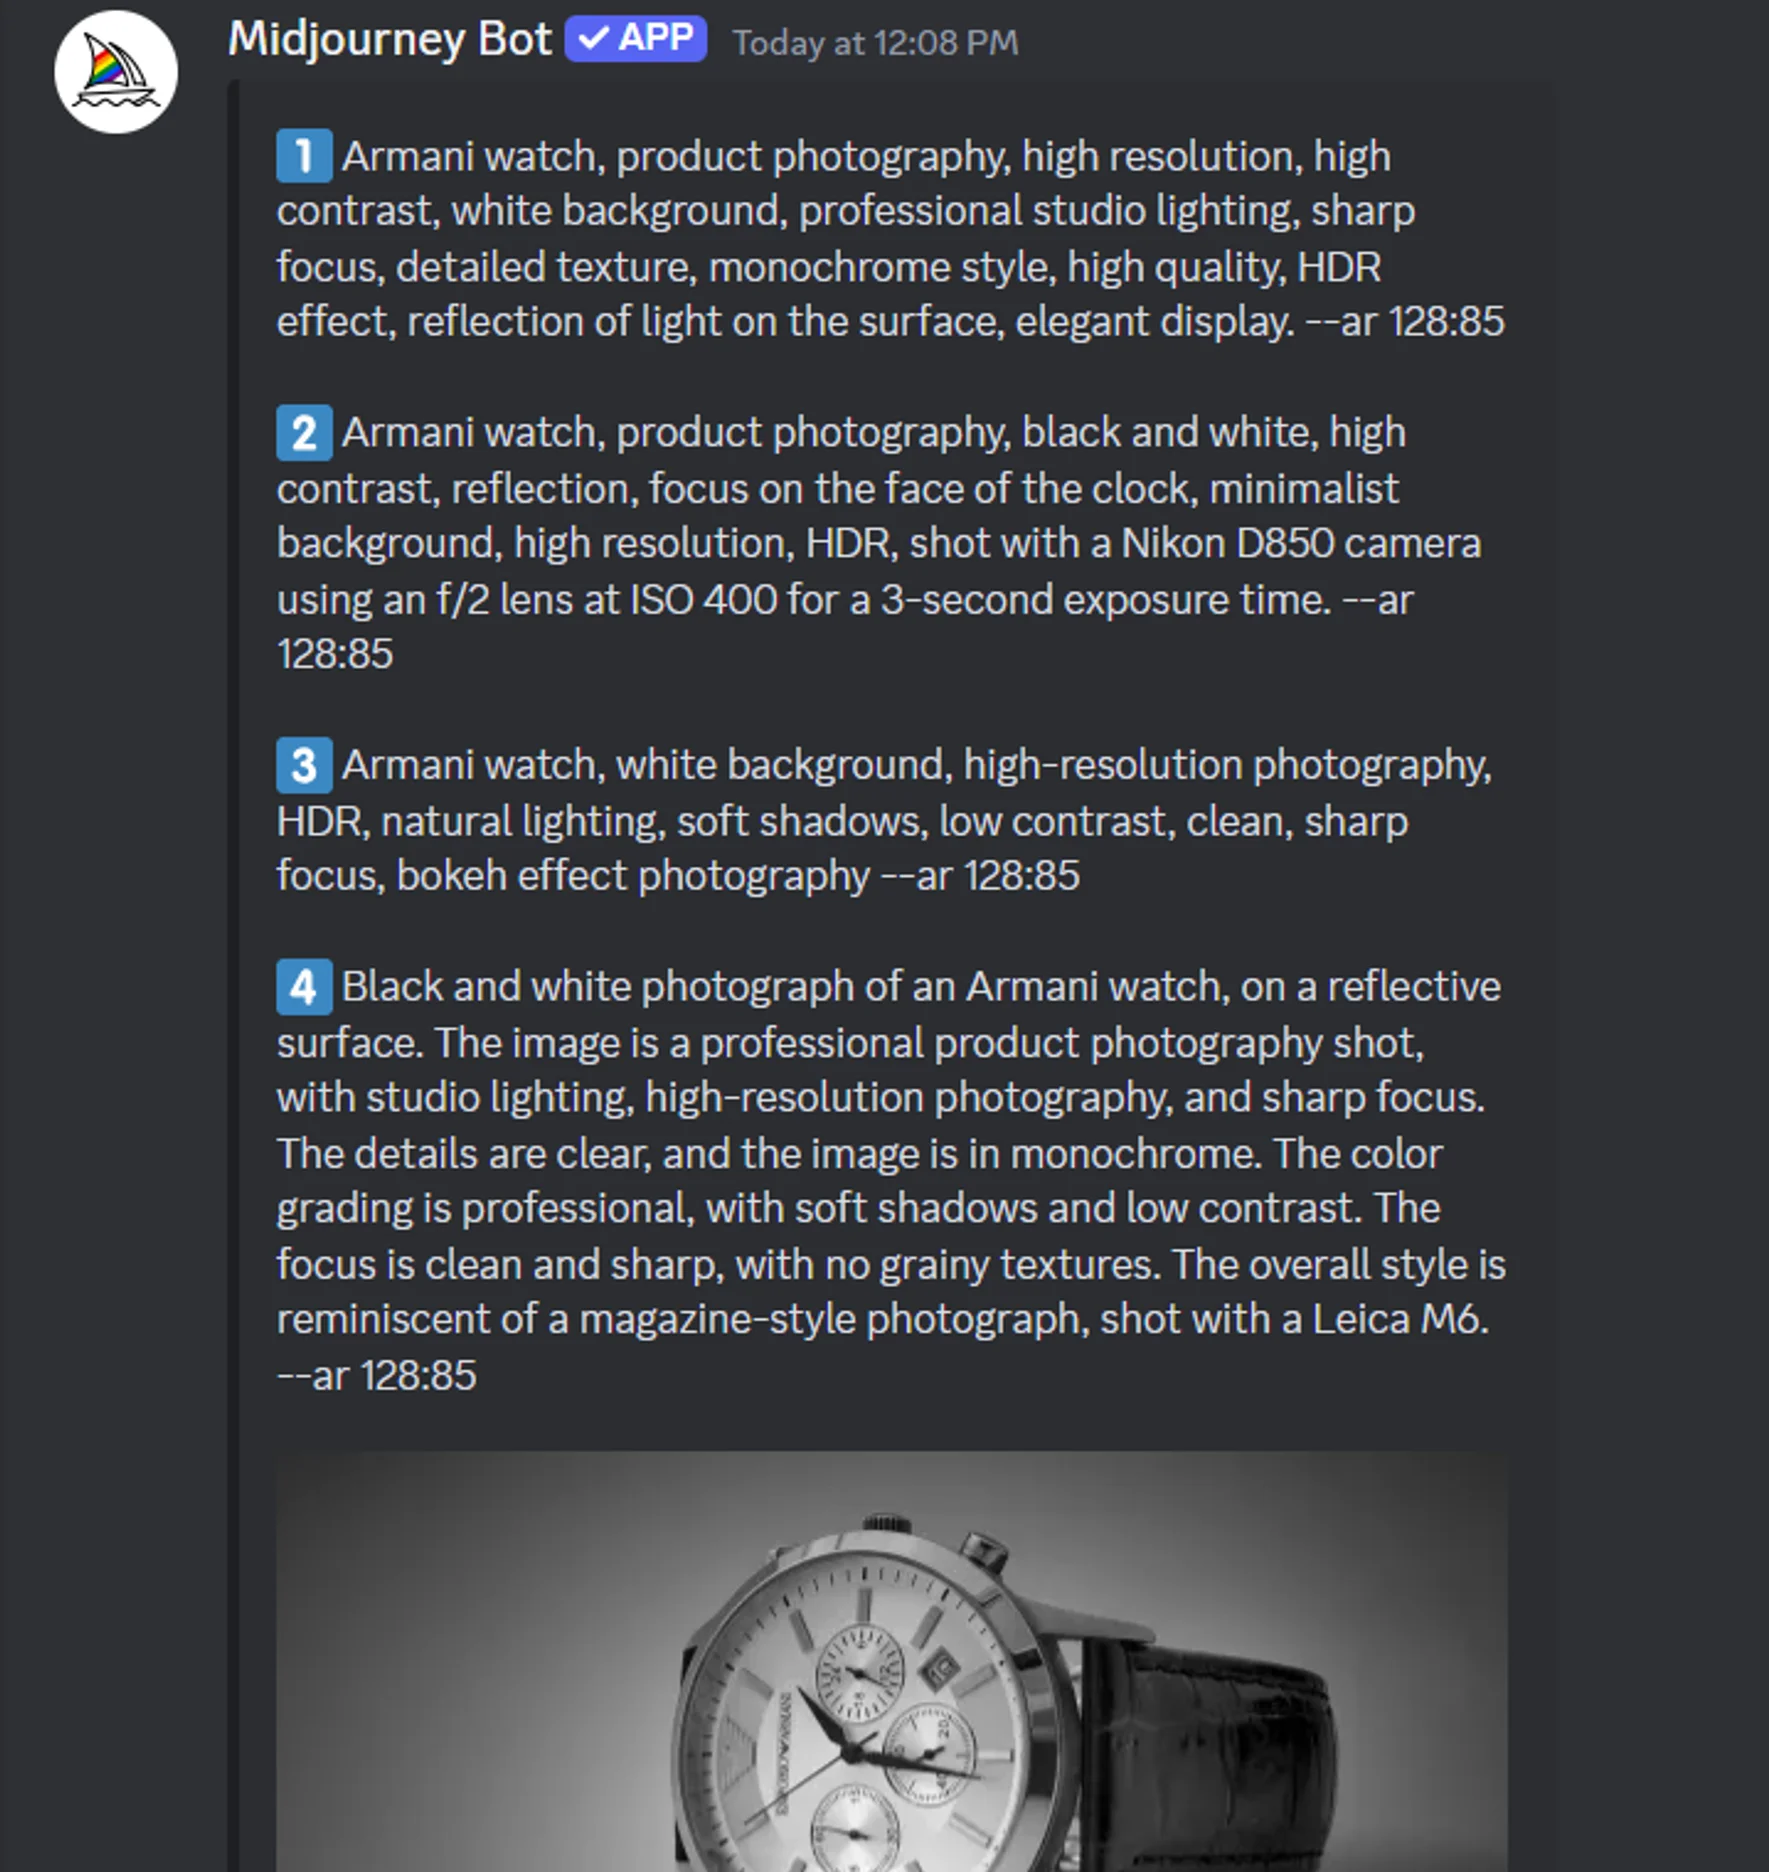
Now, let's try using the second prompt to generate a new image:
Armani watch, product photography, black and white, high contrast, reflection, focus on the face of the clock, minimalist background, high resolution, HDR, shot with a Nikon D850 camera using an f/2 lens at ISO 400 for a 3-second exposure time. --ar 128:85
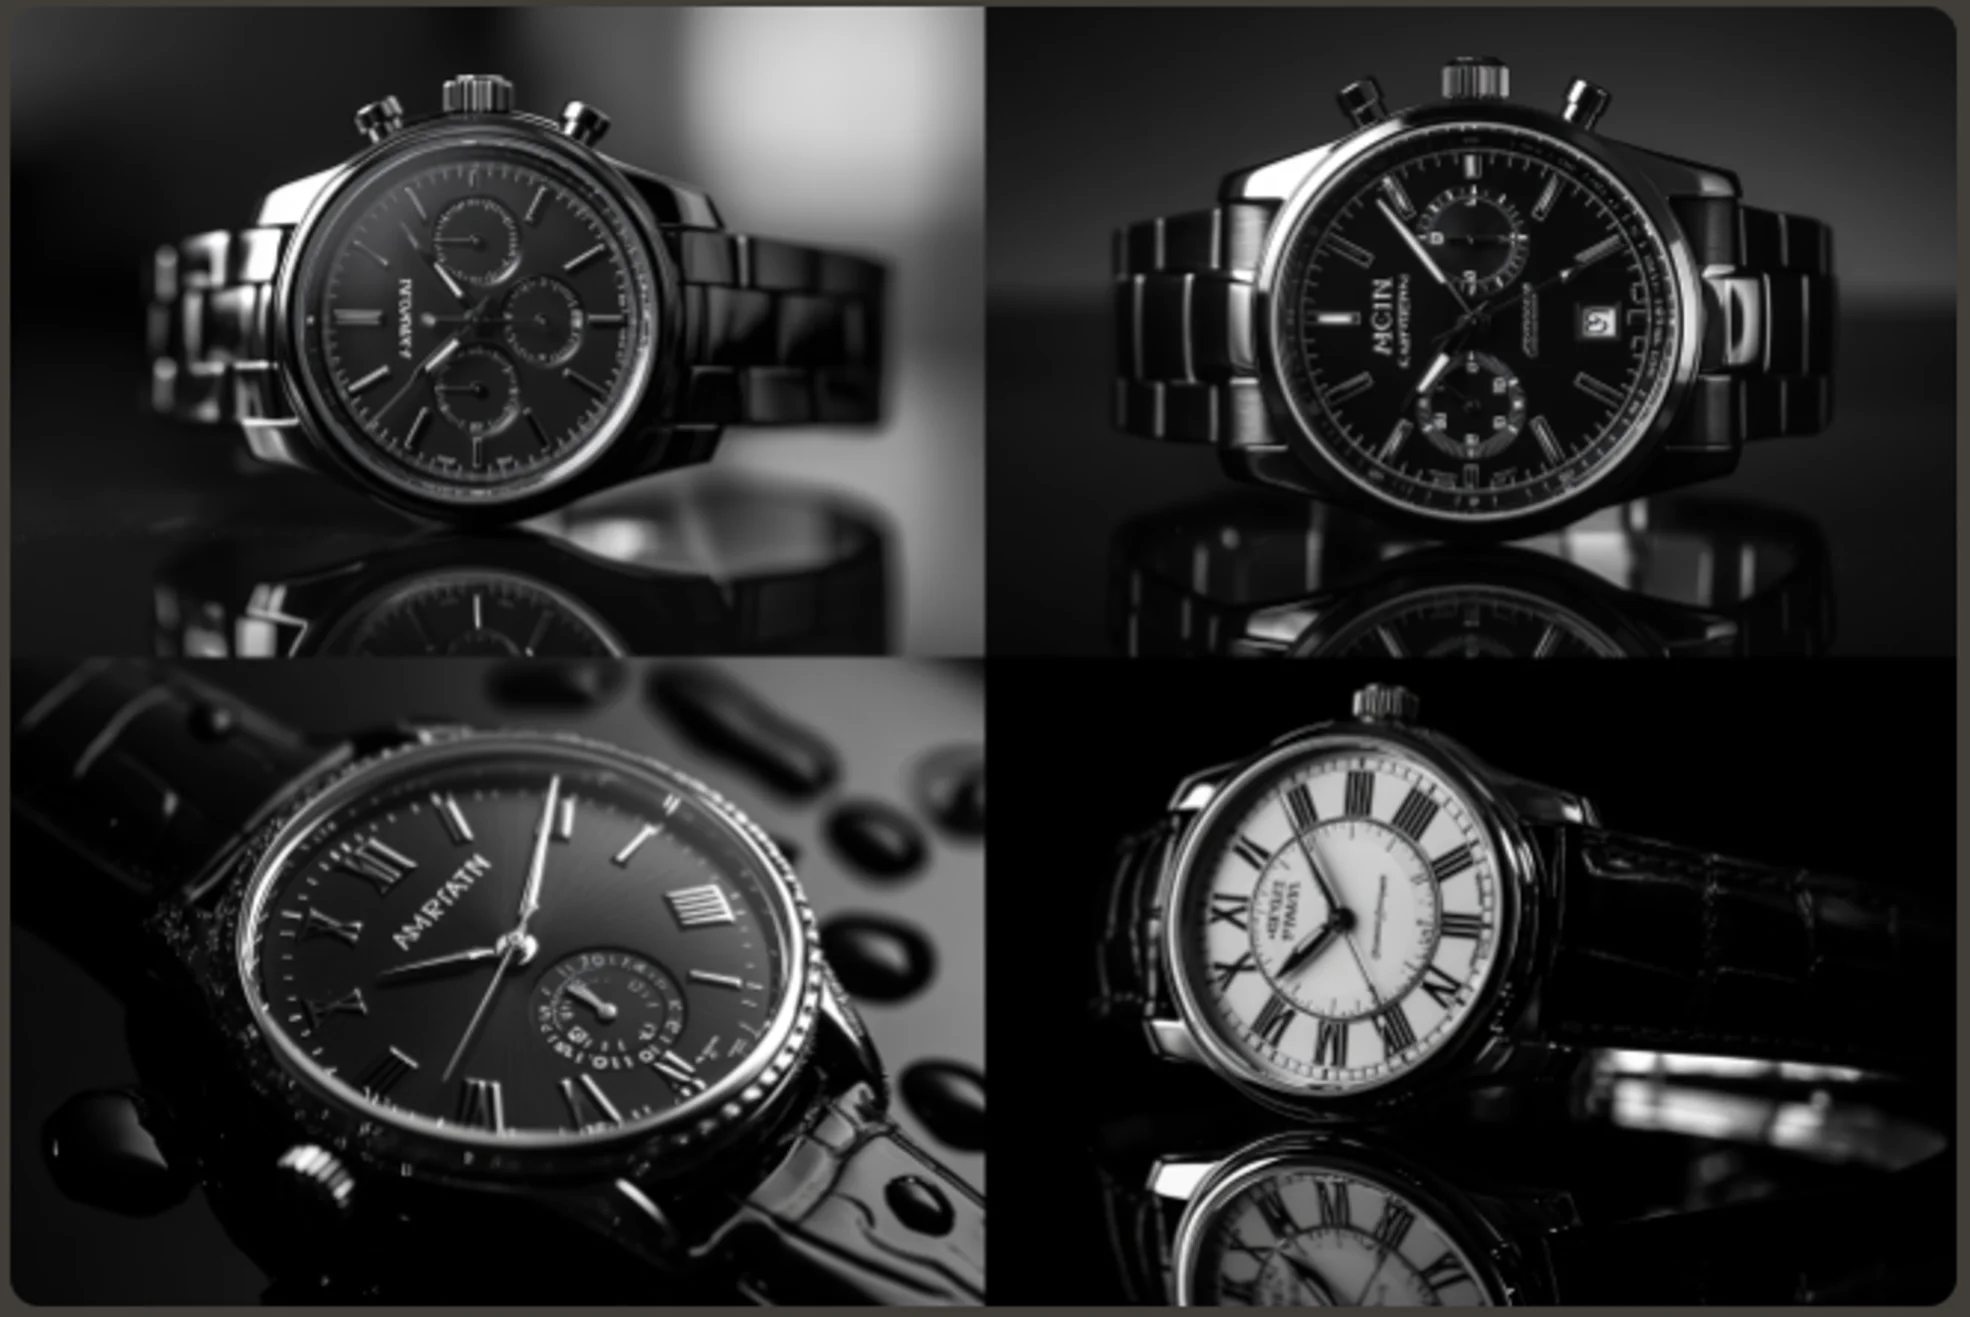
As you can see, the generated image closely matches the description in the prompt. The first prompt often works most precisely, but feel free to experiment with the others as well.
Now, let's explore how to use a similar feature on the Midjourney web interface:
- Upload your image to the web interface.
- In the uploaded image box, hover over the image and click on the info button.
- Midjourney will generate the subject, descriptors, and related artists associated with the image.
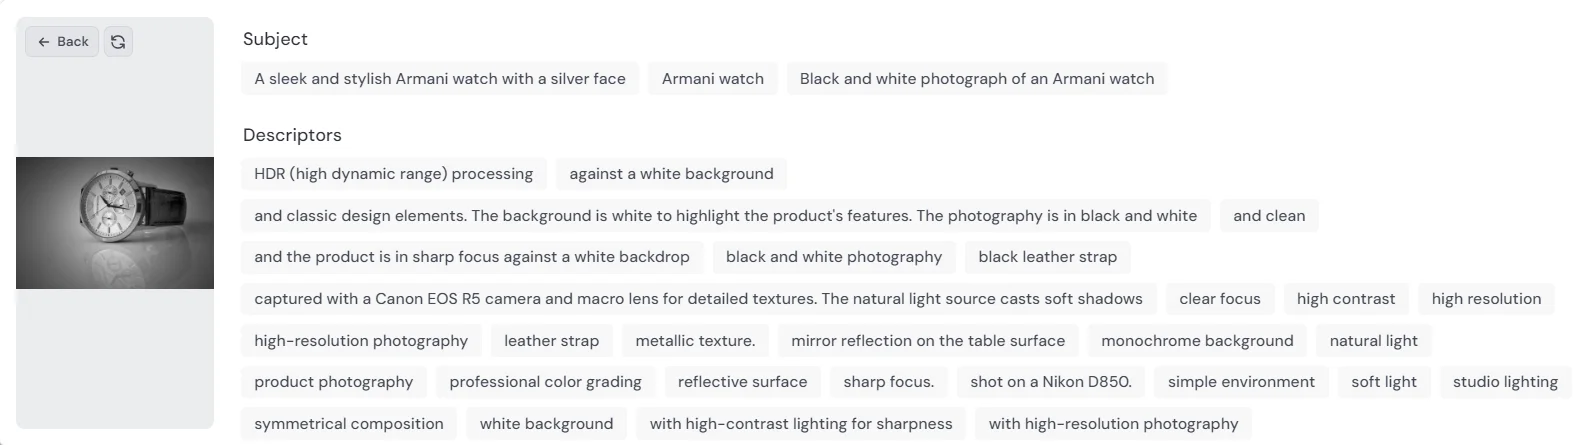
This process helps you understand the kind of language and details that Midjourney responds to. The prompts often include the type of shot, specific details about the subject, information about the setting or background, lighting descriptions, overall mood or style, and technical aspects like aspect ratio.
By understanding how Midjourney interprets images, you can craft more effective prompts and create visuals that align perfectly with your brand identity or desired style.
Exercise: Put your skills to the test
Now that we've explored these advanced Midjourney techniques, it's time to apply them to a real-world branding scenario. Your task is to create a visual identity package for a fictional AI-powered fitness app called "FitAI".
Requirements:
- Design a logo for FitAI using text integration techniques.
- Create an anime-style mascot for the app using the --niji command.
- Generate a promotional image using the /describe feature to refine your prompt.
- Apply face swapping to personalize the promotional image.
Steps:
- Craft your prompts using the techniques learned in this lesson.
- Generate the visuals using Midjourney and Insight Face.
- Iterate your prompts if needed to refine the results.
Share your work! Post your logo, mascot, and personalized promotional image in the "share-your-work" channel on the Ben's Bites Slack community. Briefly explain your prompt crafting process and how you applied the lesson's advanced techniques.
When you’re ready, move on to the sixth and final tutorial in this course.
This tutorial was created by Tanmay.