Turn inbound emails into actionable sales leads with AI
Automatically extract customer details from inbound emails and add them to a leads database.
2024-11-13
If you’re smart, you’ll already have an inquiry form on your website for potential new customers to fill out. The biggest advantage with forms is being able to collect just the information you need, in the format you want, making it easier to process.
But what about customers who bypass the form and email you instead? Previously you’d need to spend time reading the email, parsing the data out and organising a follow-up. A real hassle.
Now, thanks to AI and tools like Zapier, you can build a process that does this instantly and automatically, with no coding skills required!
In our scenario, we’re going to imagine you’re running a print design company that receives an inquiry to produce materials for an upcoming concert. You want the potential order details added to Airtable so one of your salespeople can follow up.
In this tutorial, you will learn how to:
- Create a zap to capture incoming emails
- Build an Airtable database to store lead data
- Process inquiry emails using OpenAI’s API
- Automate adding inquiry email data to Airtable
Step 1: Create a zap to capture incoming emails
Like most businesses, you probably receive emails to an address connected to Outlook or GSuite (we’ll go with the latter in this tutorial), both of which connect with Zapier.
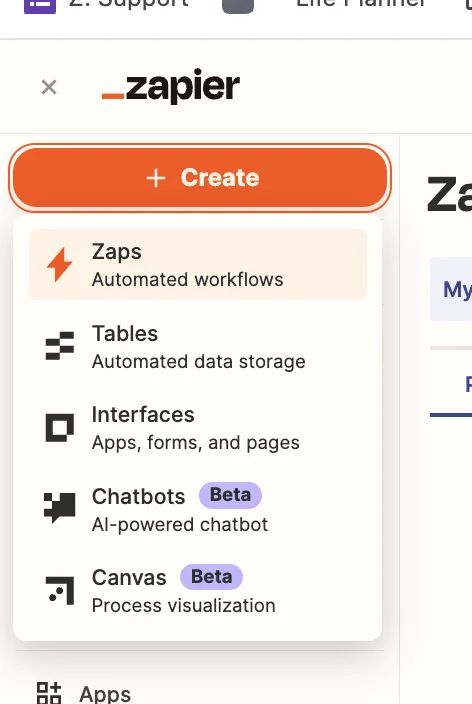
Head over to Zapier, and in the top left, click the big orange ‘+ Create’ button and select ‘Zaps’.
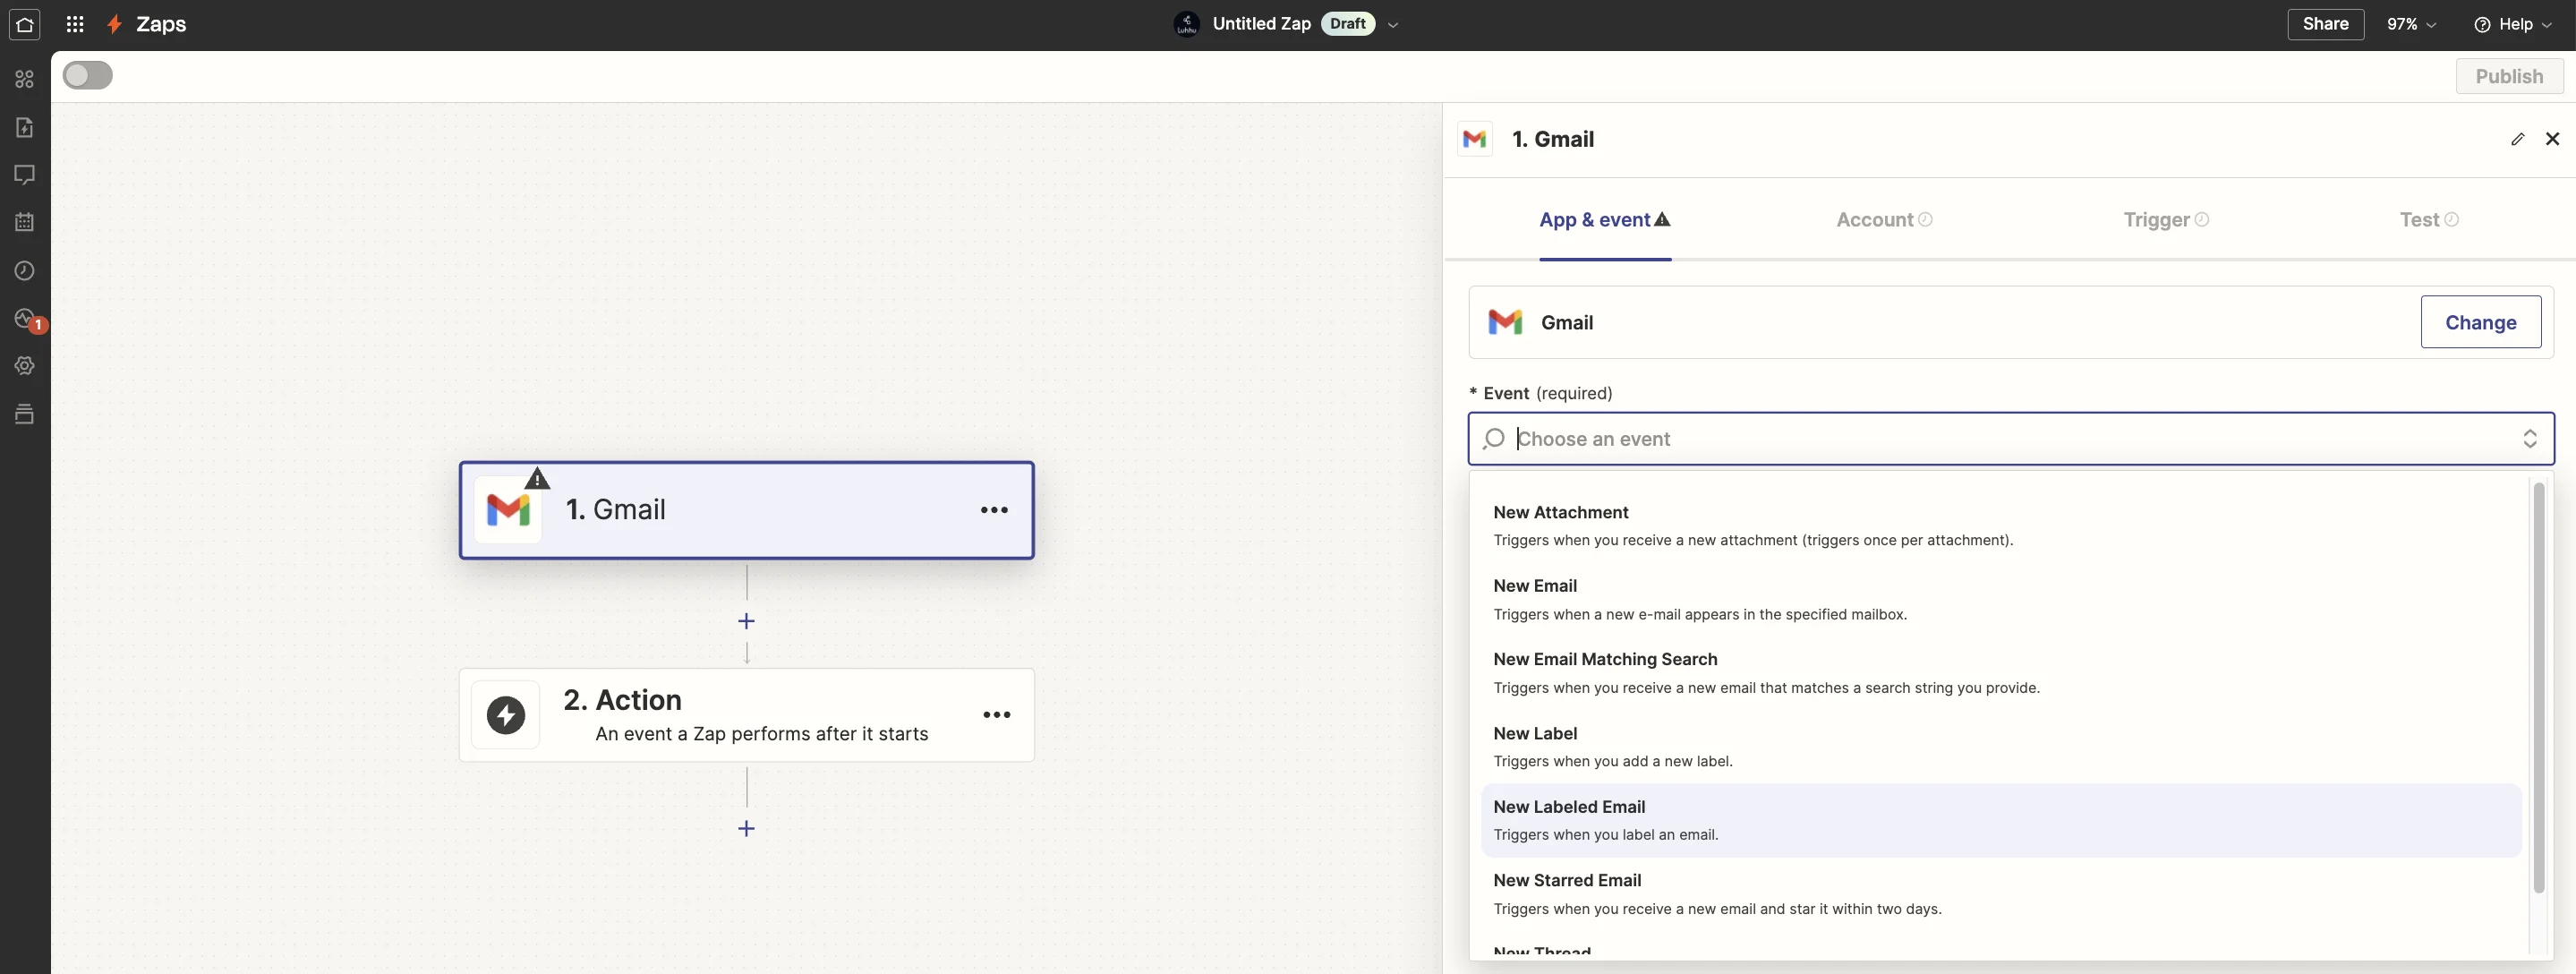
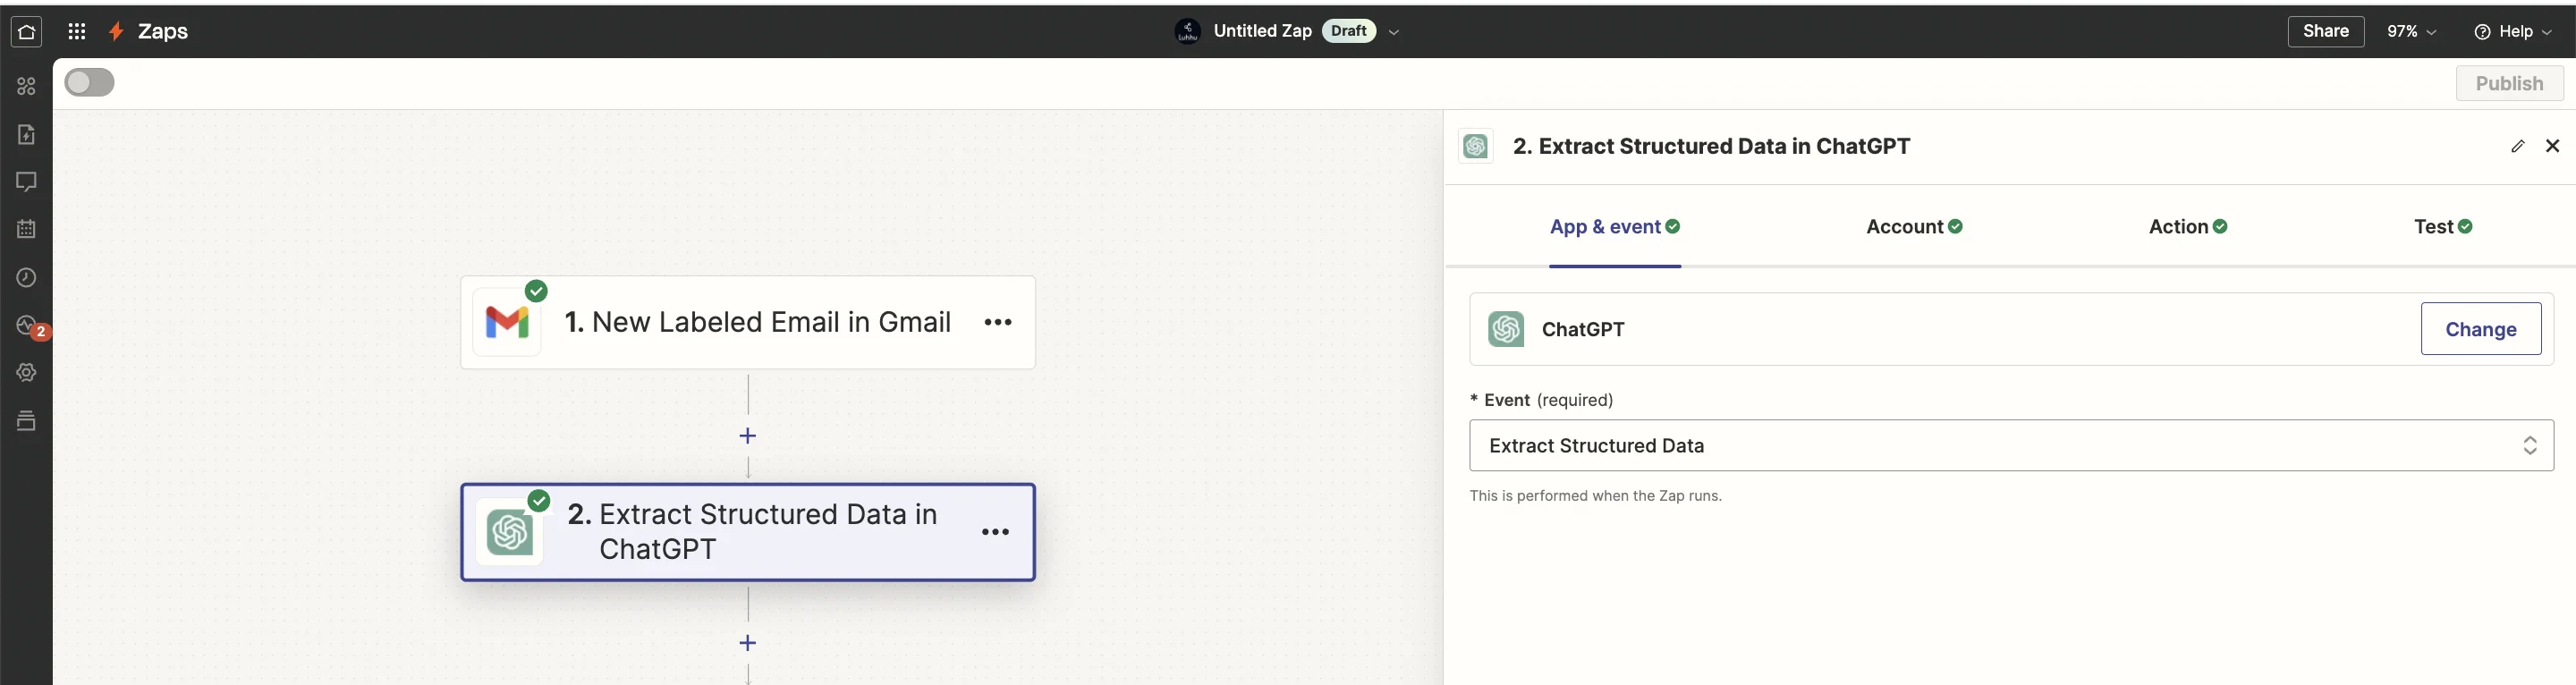
Inside the zap editor, you want to click on the box that says “Trigger” and select/search for “Gmail” as the app.
At this point, you’re probably thinking ‘wait, how will Zapier know what’s a sales email, and what’s not?’. Good question! I’d suggest you create a Gmail label to add to any incoming emails you want Zapier to process - call it ‘New Leads’.
Back in Zapier, on the trigger setup tab select “New Labelled Email” as the event.
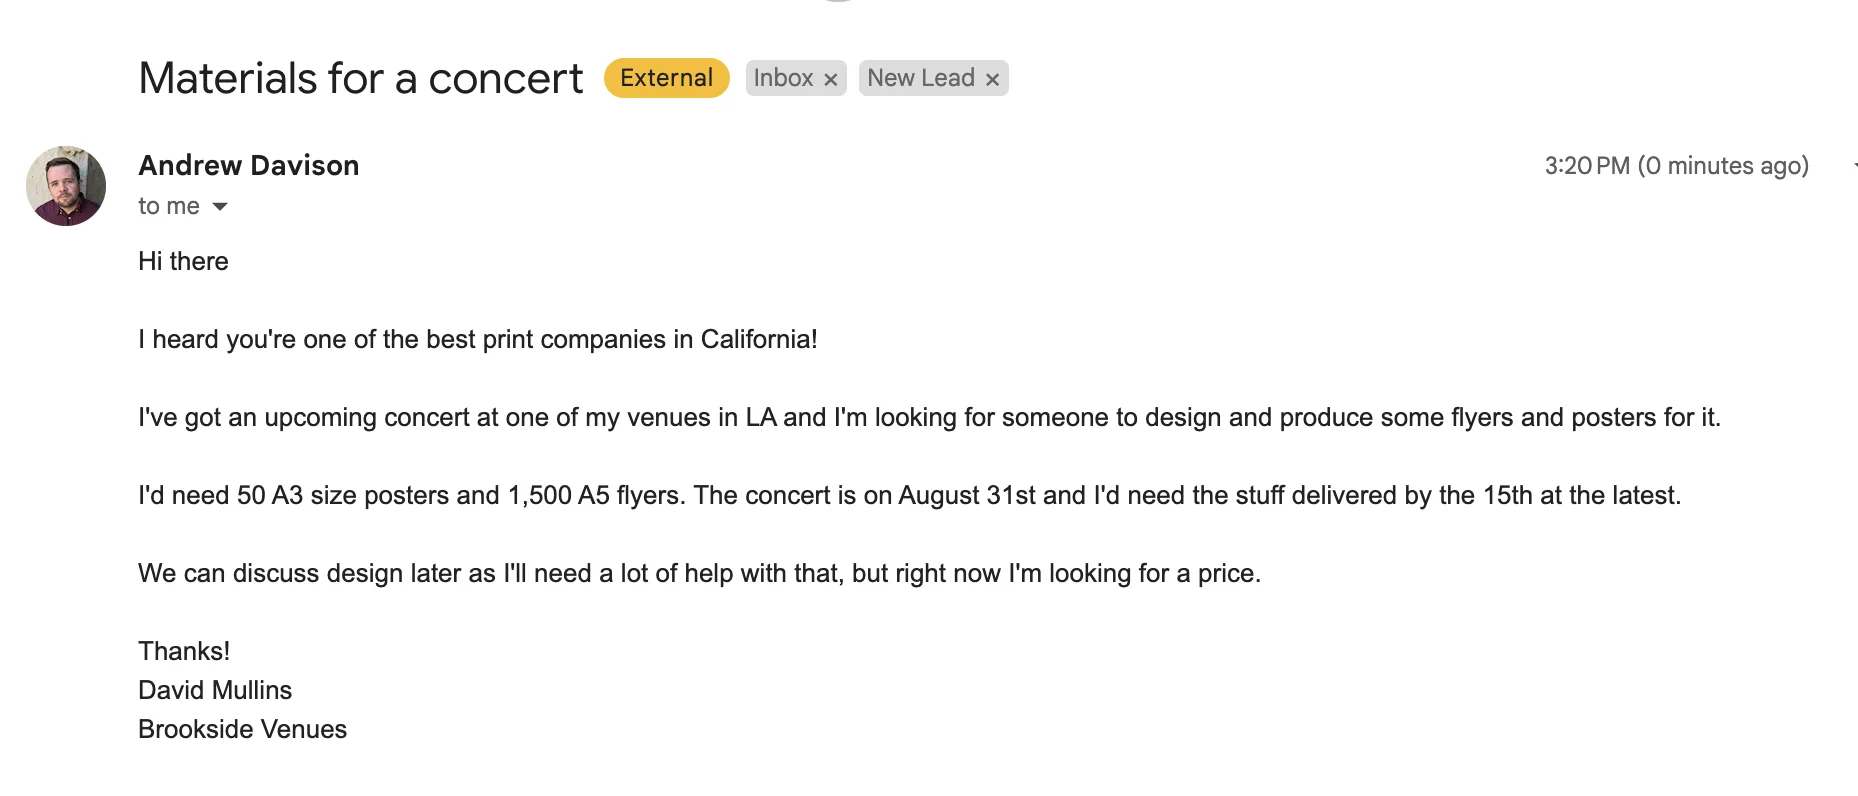
I sent a dummy email to myself that we can use for building and testing this process. I tagged it with the ‘New Leads’ label.
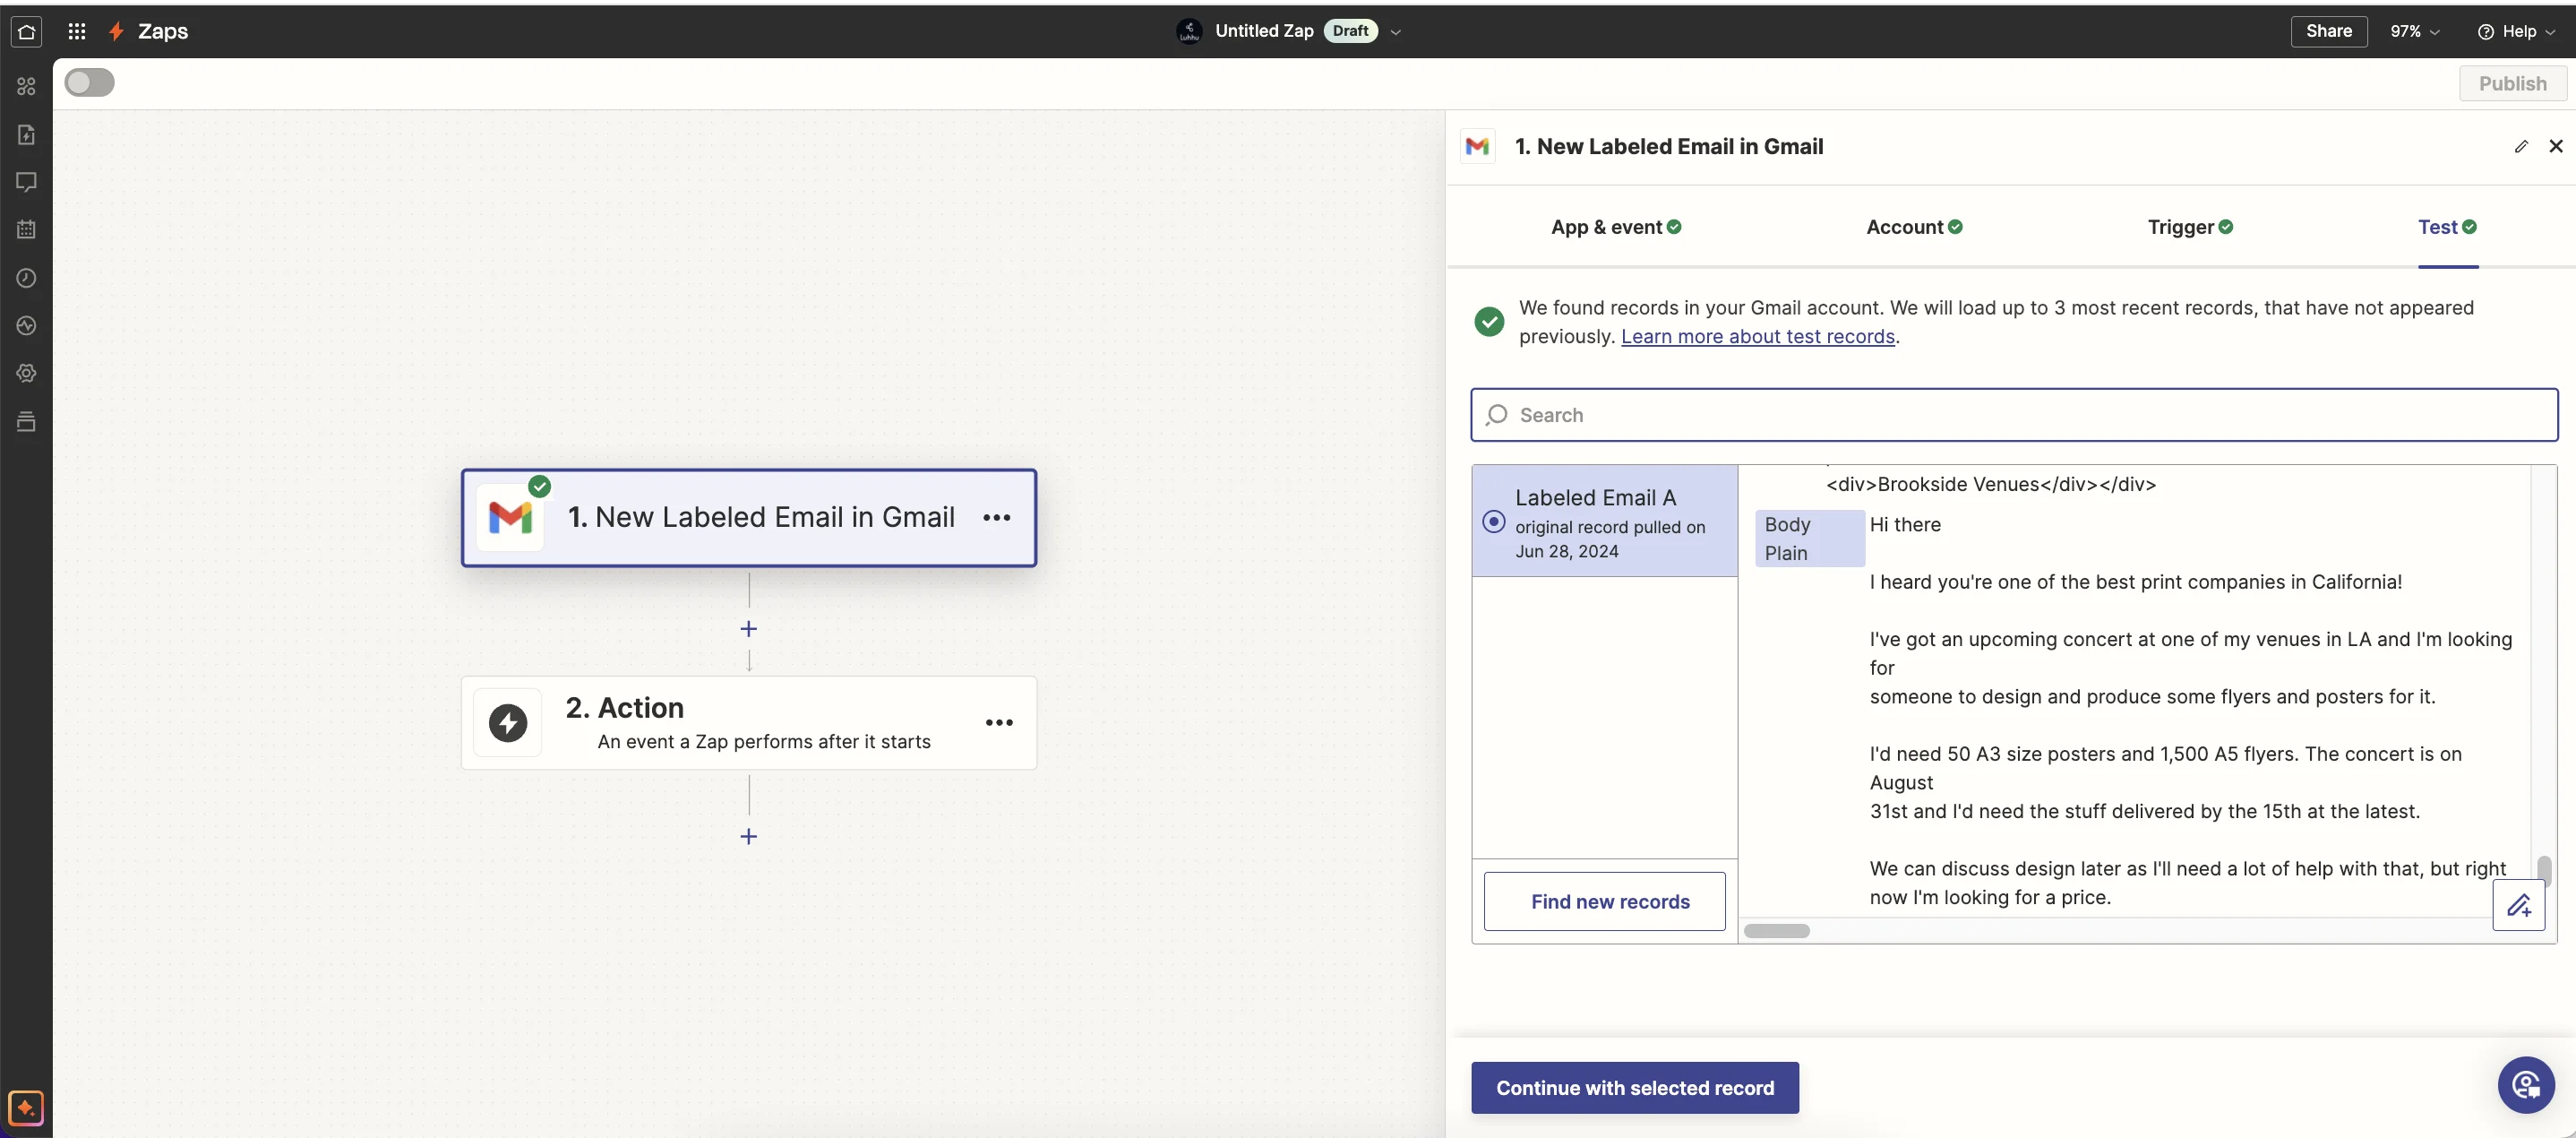
With our trigger configured in Zapier, we’ll pull in this email, ready to be parsed using AI.
Step 2: Build an Airtable to store lead data
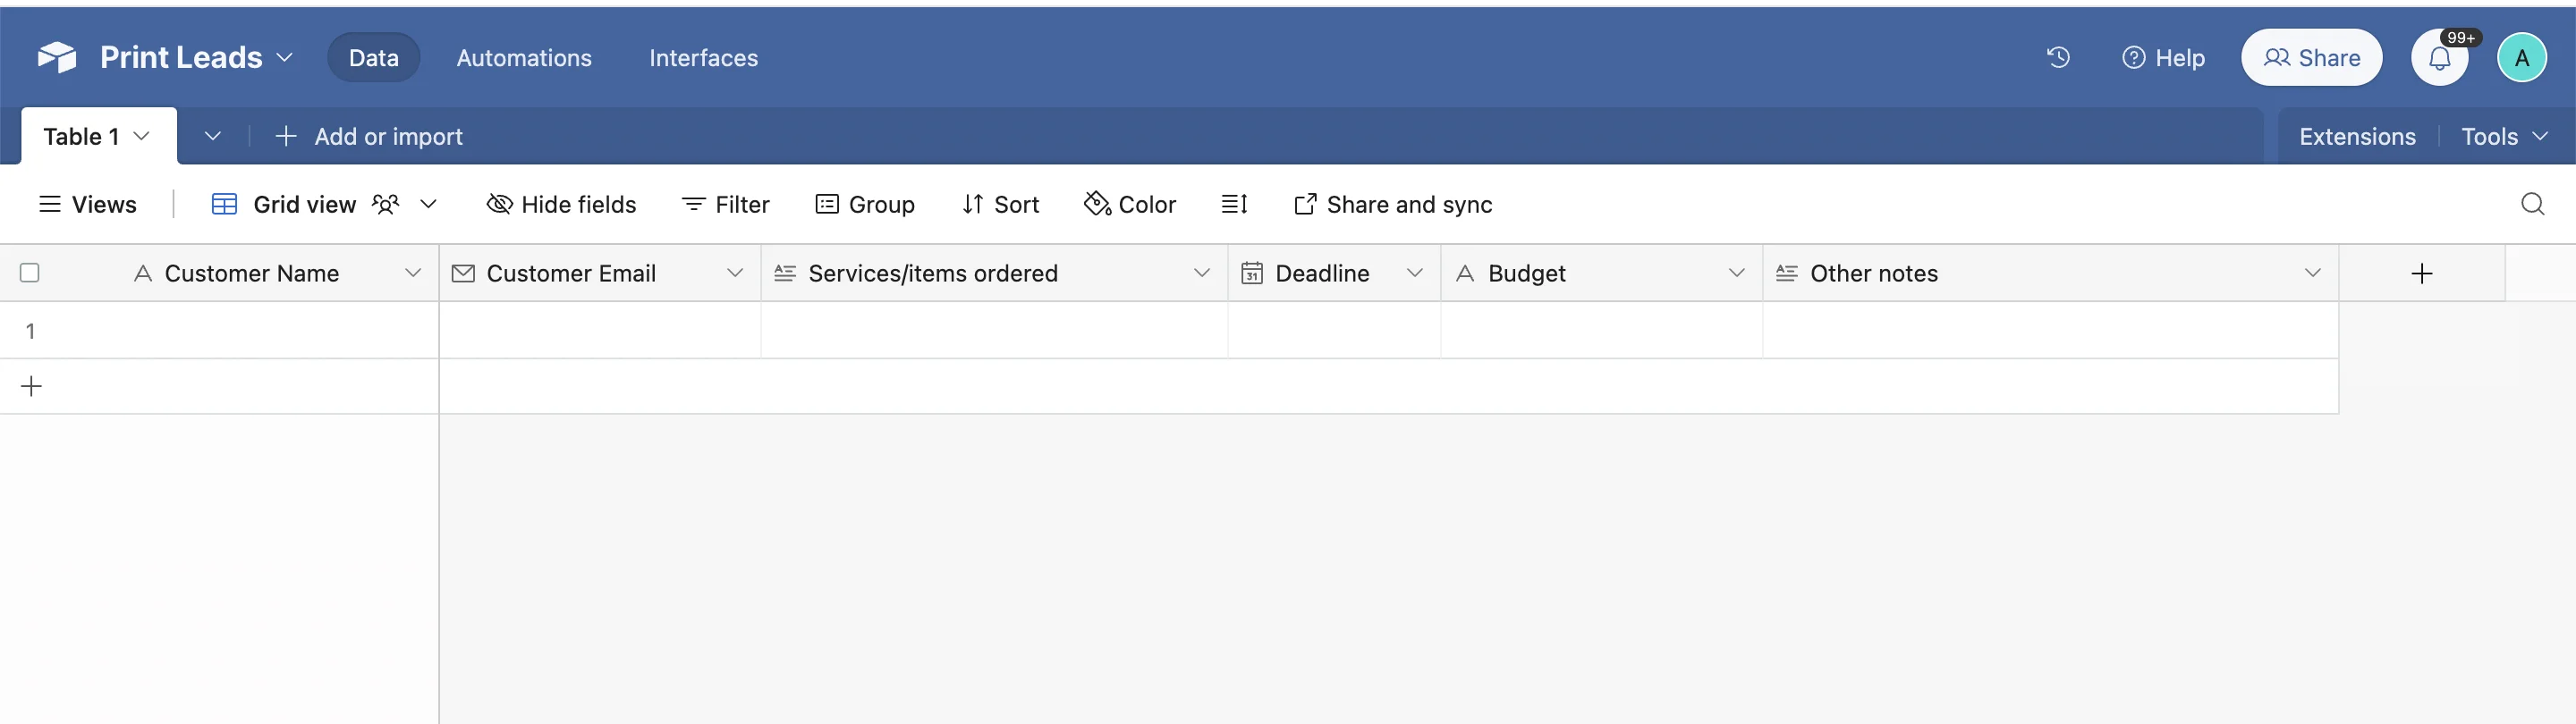
Before we start doing any magic with AI, we first need to decide what data we want to capture and build an Airtable base to store it.
Requirements will vary for different businesses, but in our case, we need:
- Customer name
- Customer email
- Services/items ordered
- Deadline
- Budget
- Other notes
Over in Airtable, create a new base from scratch.
Then, create the columns as needed.
Step 3: Process the inquiry email using OpenAI’s API
To pull the information we need from the inquiry email we’re going to use OpenAI’s API (which powers ChatGPT) - which, handily, is integrated with Zapier, making it super easy to use.
Back in the zap editor, click the ‘Action’ box, then select/search for “ChatGPT” as the app and select “Extract Structured Data” as the event.
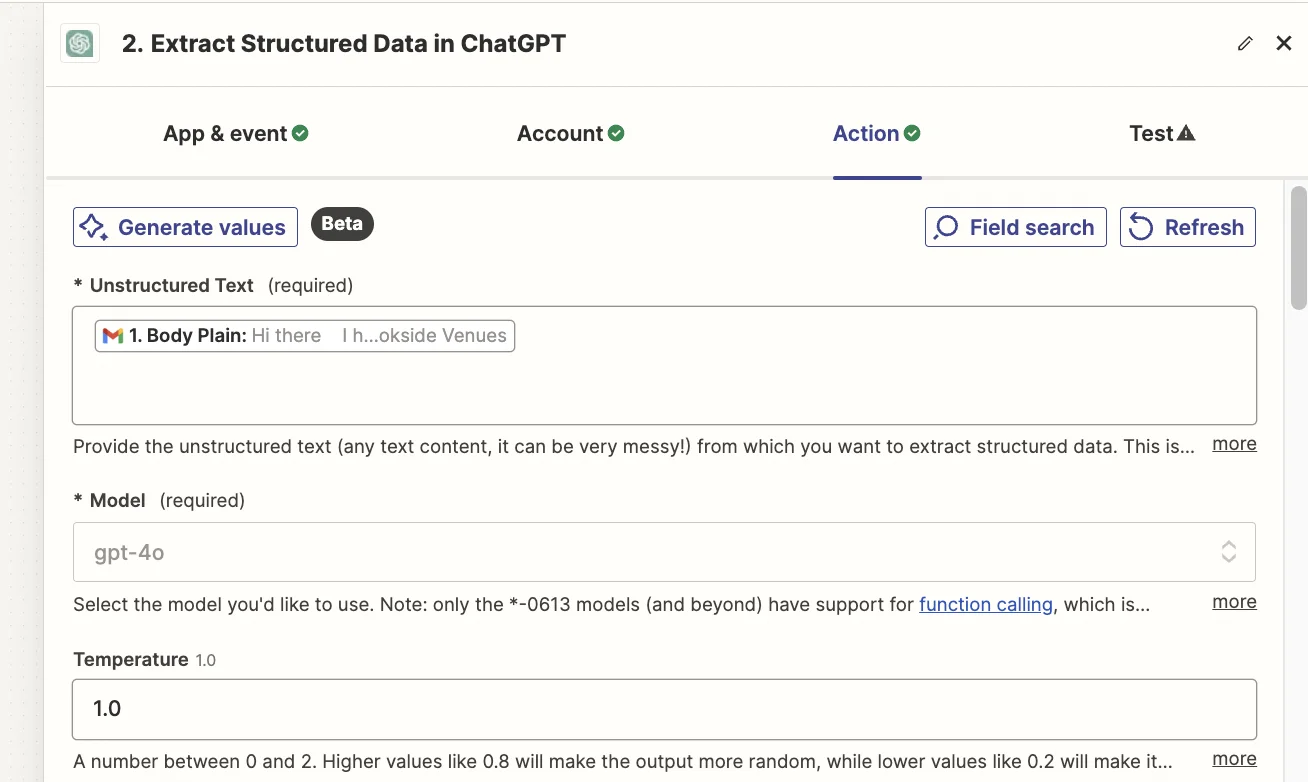
To make this work, several parts need configuring. First, we need to map the ‘Body Plain’ field from the zap trigger into the “Unstructured Text” field. This is what the AI is going to parse from.
Here we’ll use the gpt-4o model. This is OpenAI’s newest and most powerful model. The gpt-3.5-turbo model is significantly cheaper and may also do just as good of a job. You can experiment with both as you wish.
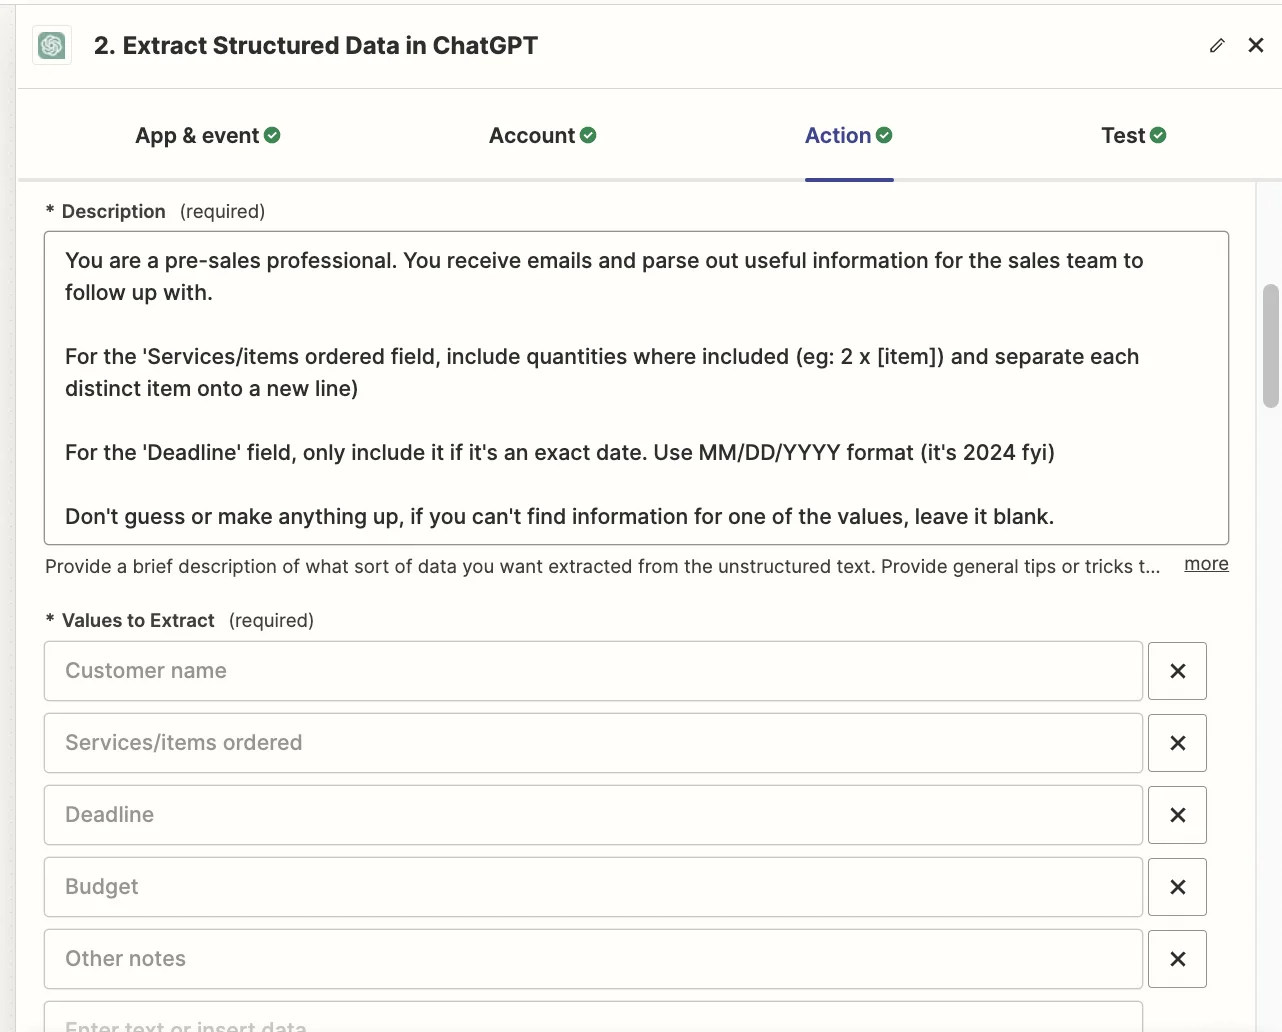
Below this comes the fun part - we need to write a “Description” for the AI to follow and provide. This is where you tell it why it’s extracting the data and give it any granular context it might need.
Experiment here, but for our example, this prompt worked well:
You are a pre-sales professional. You receive emails and parse out useful information for the sales team to follow up with.
For the 'Services/items ordered field, include quantities where included (eg: 2 x [item]) and separate each distinct item onto a new line)
For the 'Deadline' field, only include it if it's an exact date. Use MM/DD/YYYY format (it's 2024 fyi)
Don't guess or make anything up, if you can't find information for one of the values, leave it blank.
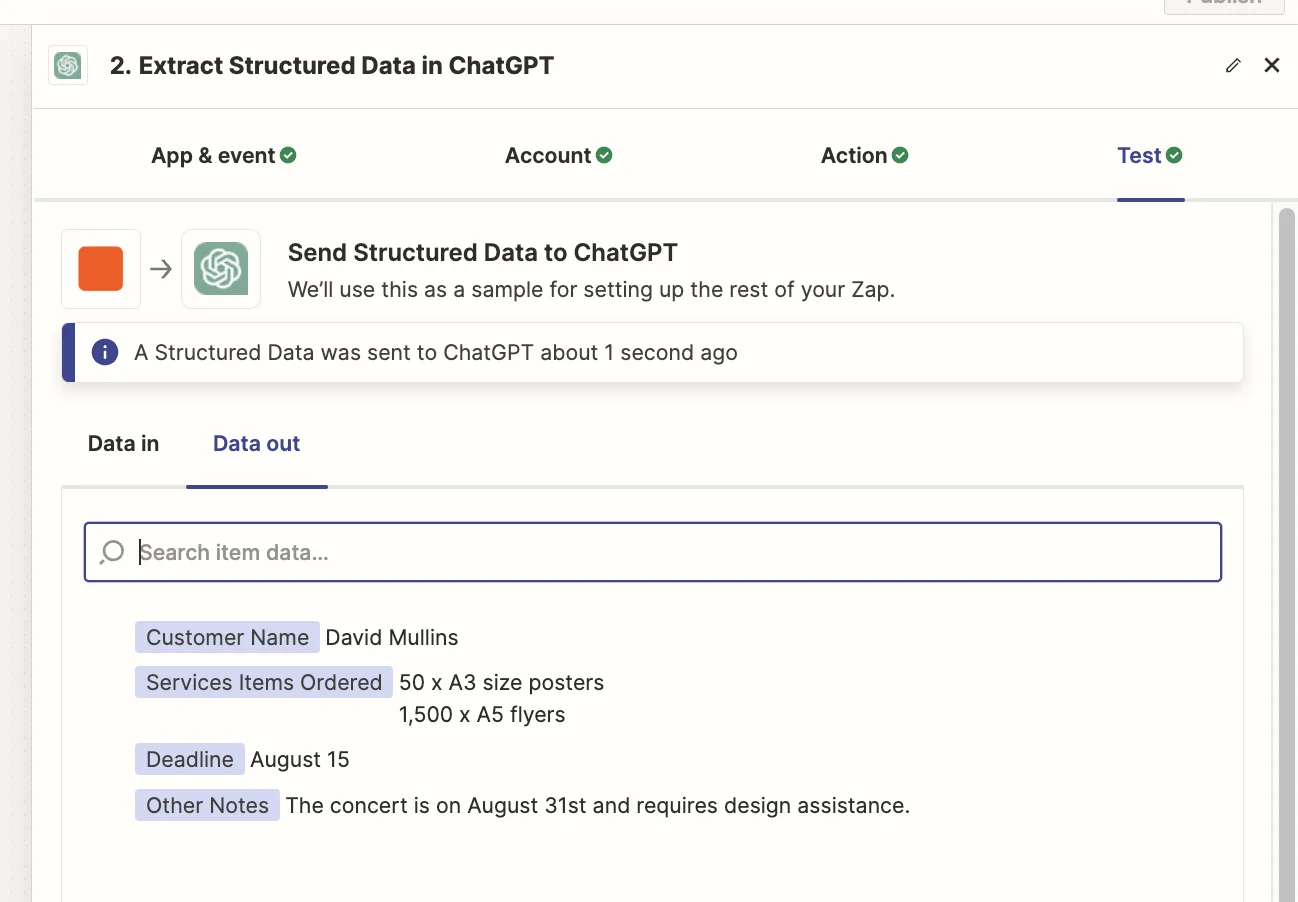
Testing the action step, you should get something like this. Here we can see that the AI has followed instructions perfectly, including leaving the “Budget” value blank as one isn’t specified in the email.
Step 4: Add the data to Airtable
To tie this all together, we need to add this newly extracted data to Airtable.
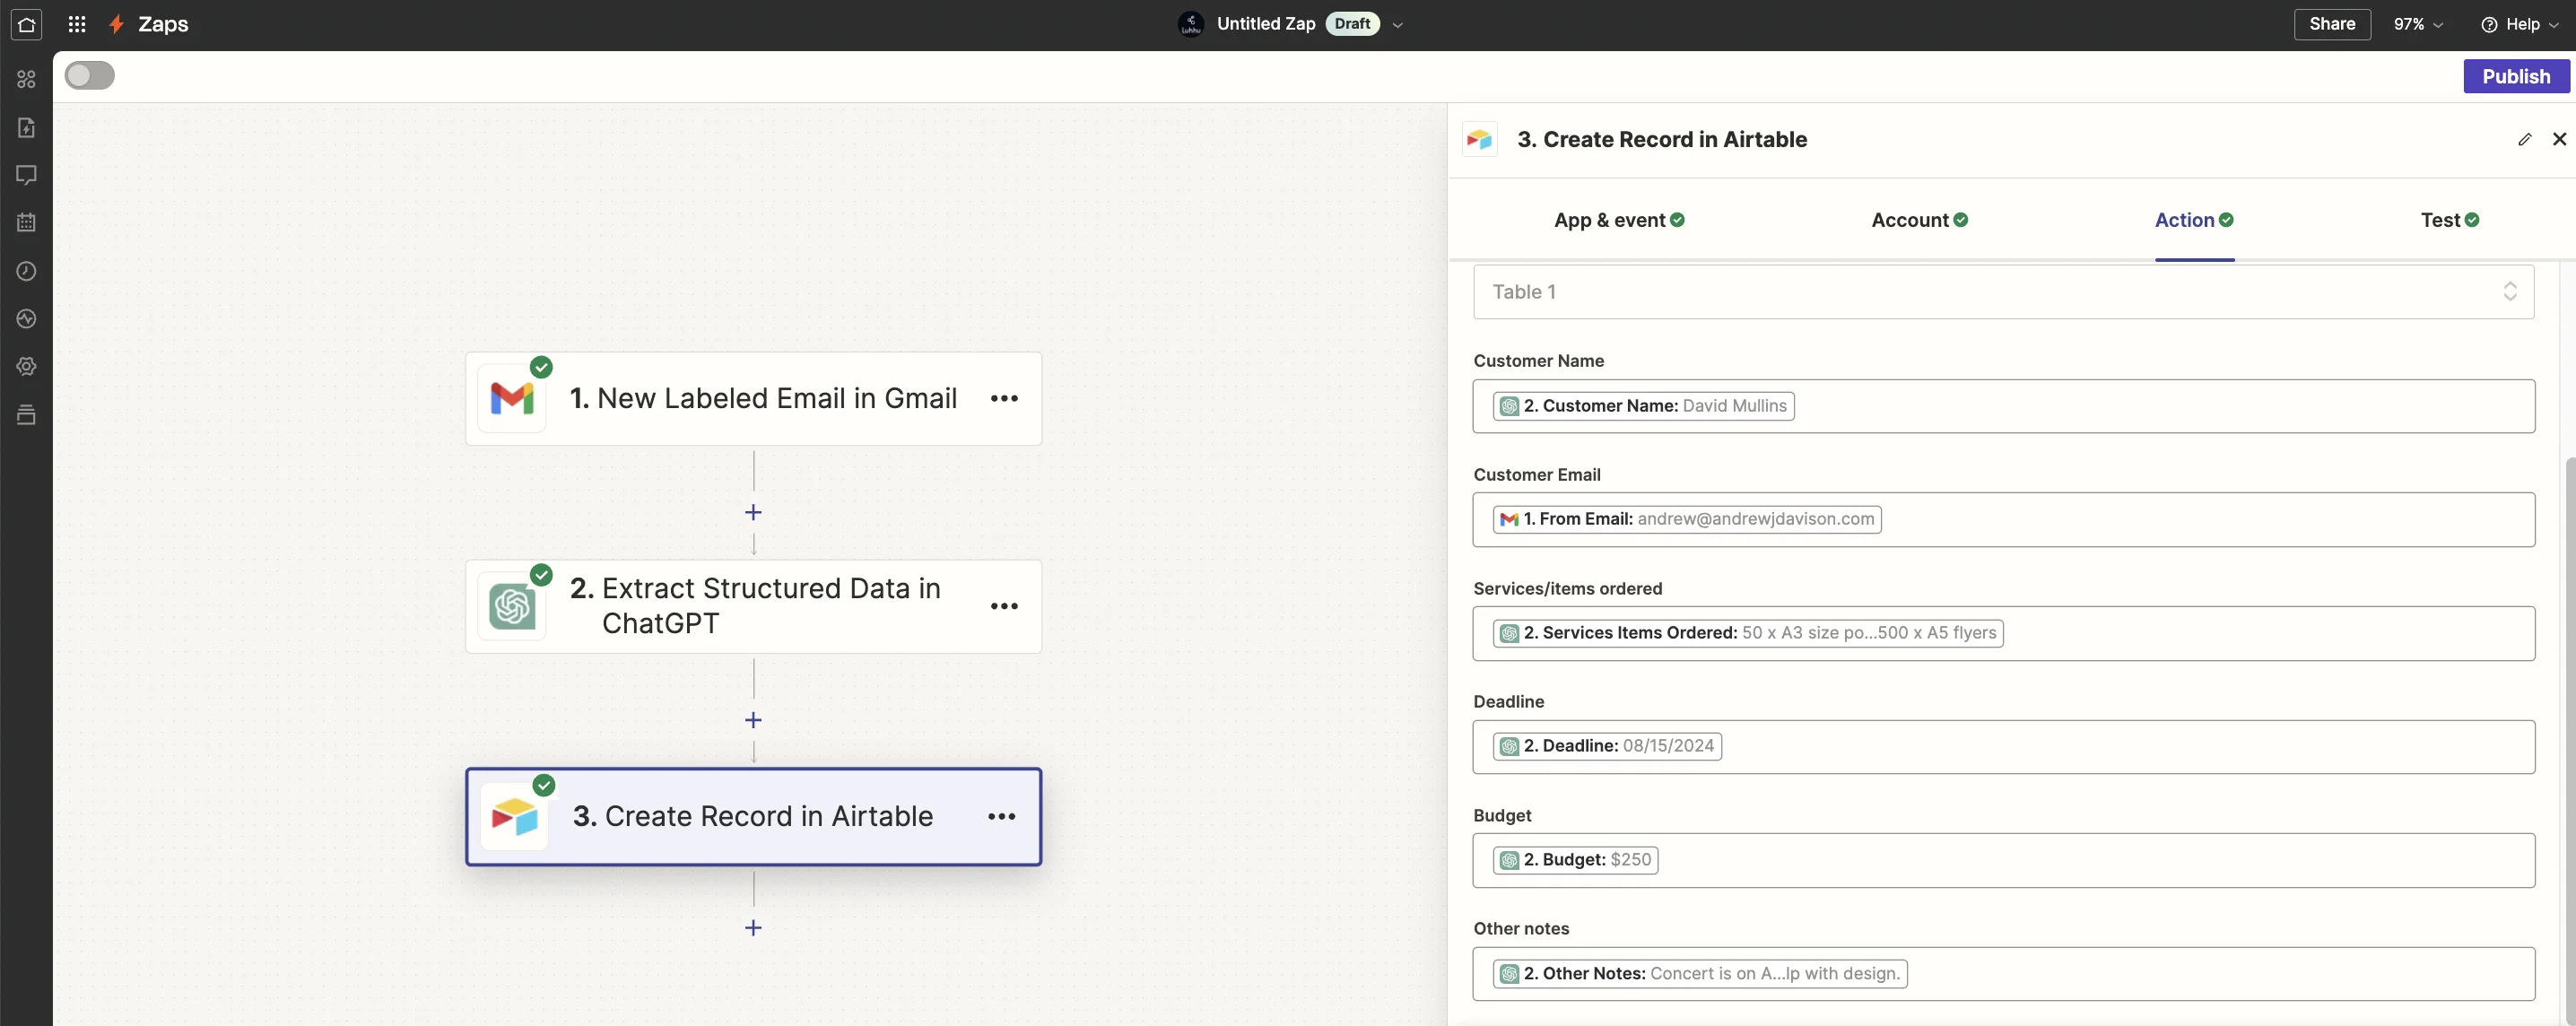
To do this, add another step to your zap and select “Airtable” as the action app and “Create Record” as the event.
Then map the output fields from the ChatGPT step into their corresponding Airtable columns.
We didn’t need to extract “Customer email” using AI because we can get that field directly from the Gmail trigger step. As for “Budget” I went back and ran a new test with an updated dummy email so I’d have a field to map here.
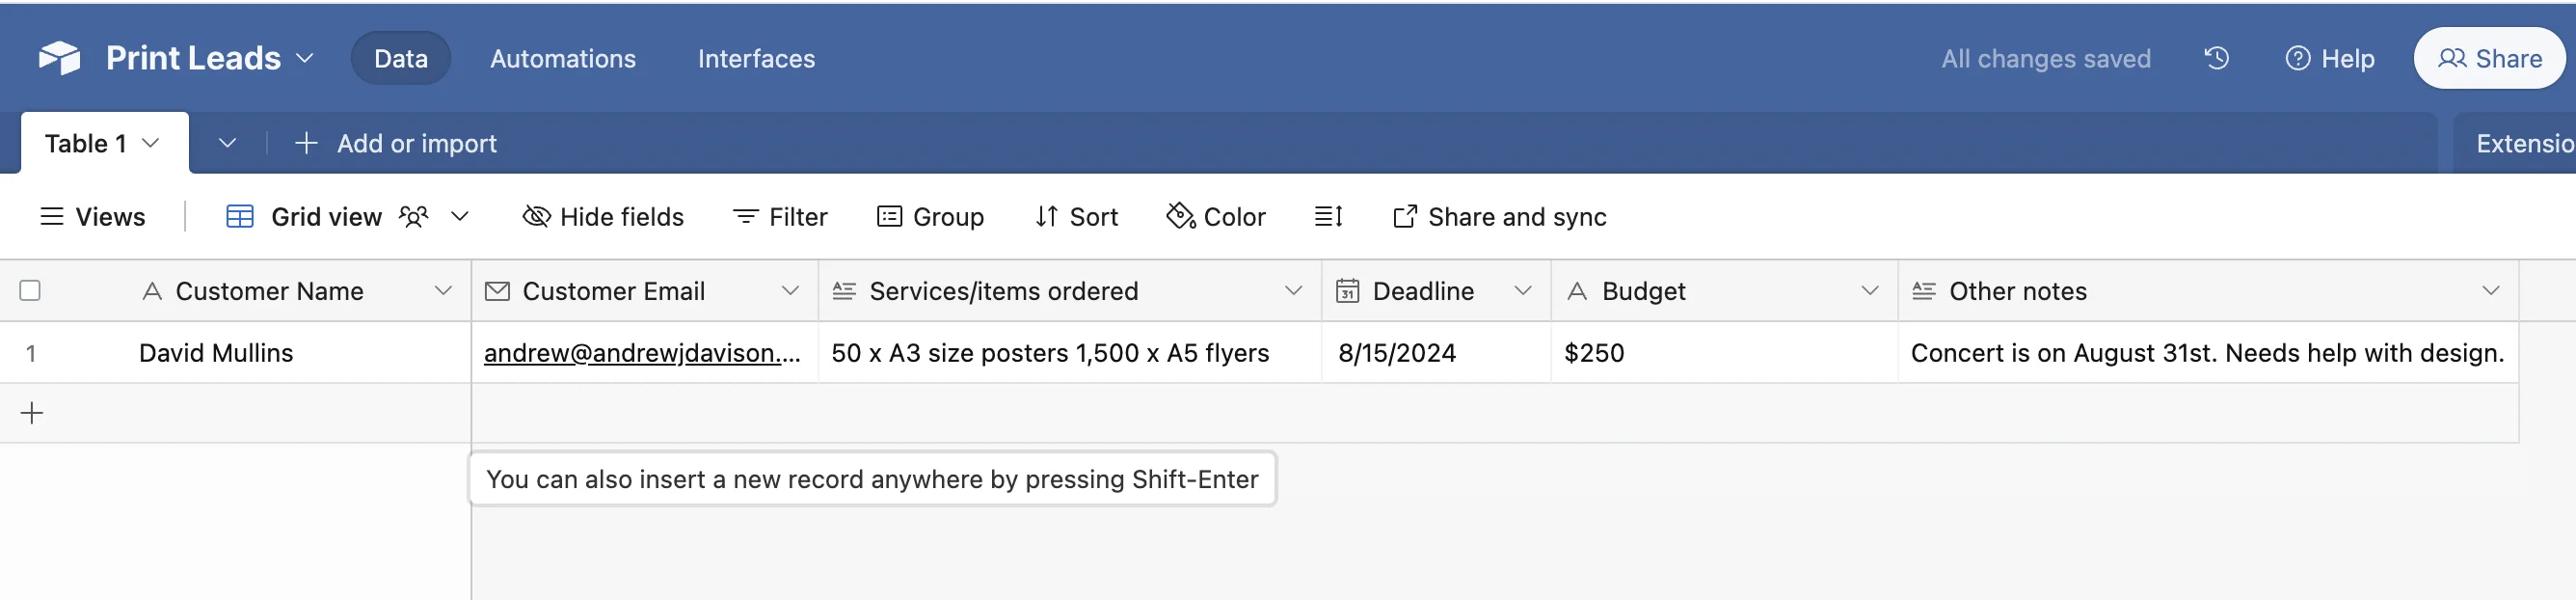
And with that, test the zap and hop over to Airtable where you should see the completed record - ready for your sales team to do their thing!
Extras
- Consider using AI to qualify the lead before adding it to Airtable.
- You could have Zapier send an automated reply to the email.
- You could have Zapier send a Slack message to your sales team and use AI to generate a quick summary of the lead, so they don’t have to open the Airtable.
This tutorial was created by Andrew.