Use AI to do podcast guest research
Use Zapier and Podscan to automate research for your upcoming podcasts.
2024-11-13
The key to a great interview podcast is asking good questions.
You want to give your guest the chance to talk about what they know best, but also ask them stuff other interviewers haven’t to get unique content for your listeners. This requires finding and listening to previous podcasts your guest has been on.
Well, it used to. Now you can use AI and a tool called Podscan to do all the research for you in minutes.
In this tutorial, you will learn how to:
- Build an Airtable to house your research
- Search for podcast transcripts on Podscan using Zapier
- Analyse the podcast transcripts with ChatGPT and create a summary about the guest
- Get ChatGPT to suggest some interesting new questions for the guest
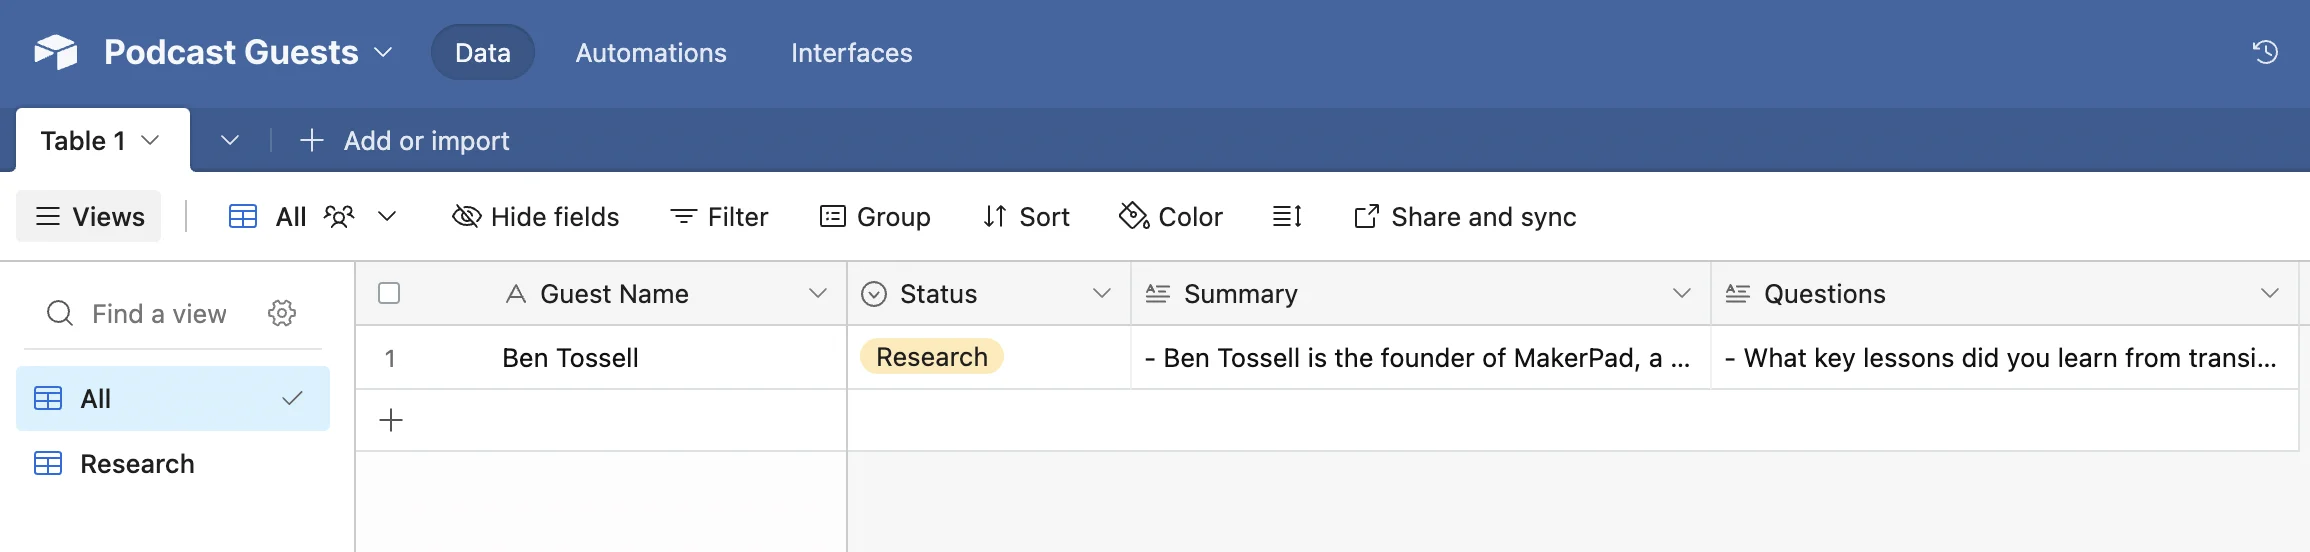
Step 1: Build an Airtable to house your research
For this tutorial, we’ll use Airtable to trigger our automation. However, you could easily use Notion, Obsidian or even Google Docs.
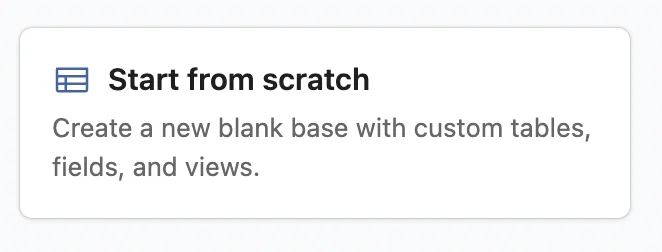
Go to Airtable and click to create a new Airtable from scratch.
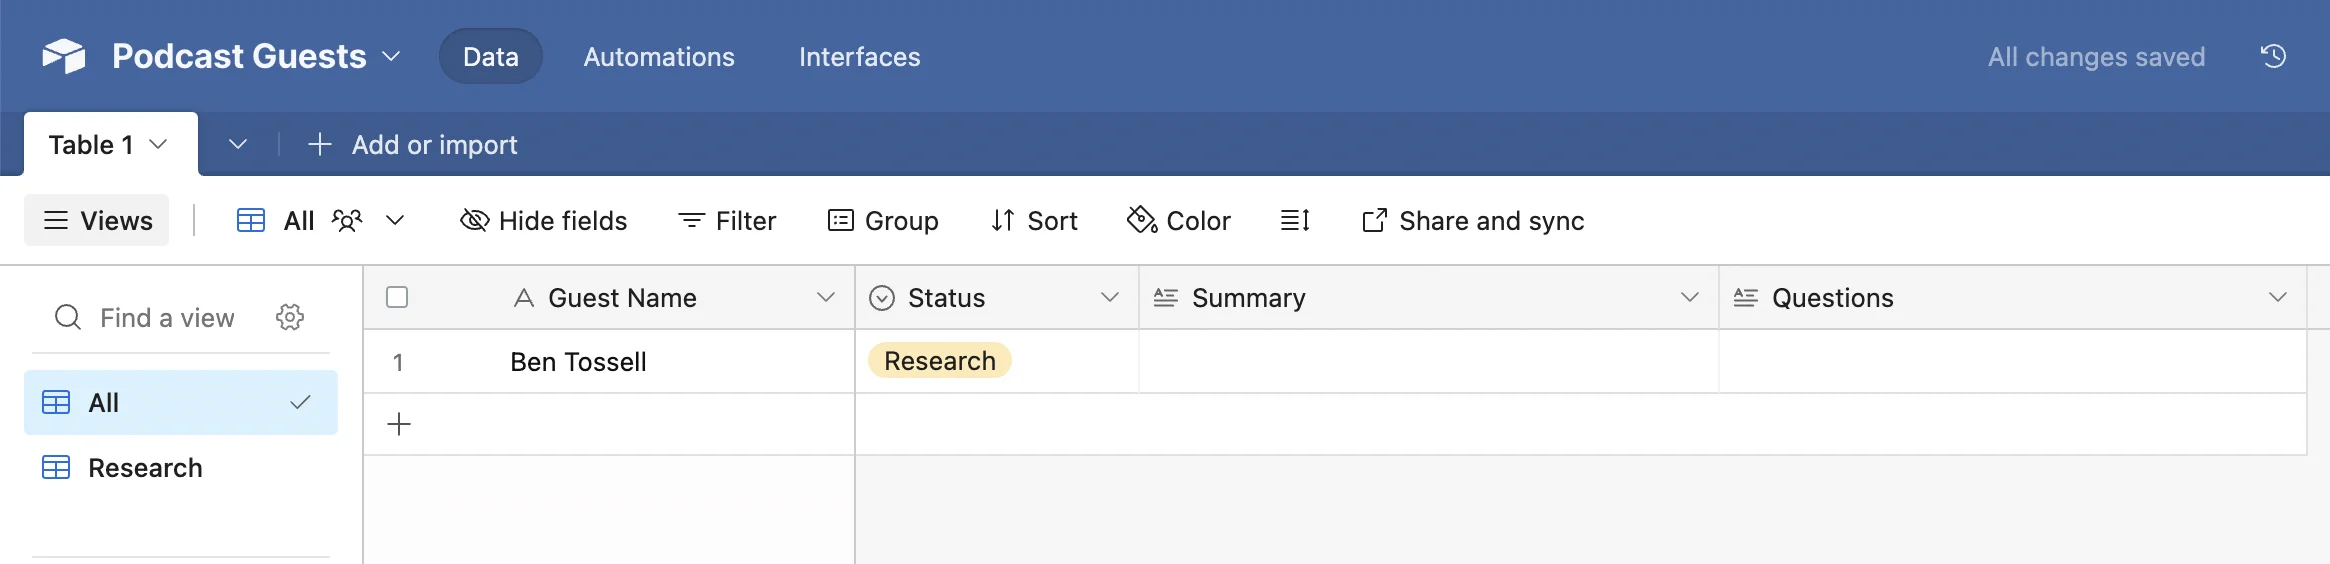
You can then customise it to your needs, but at a minimum, you need the following fields:
- Guest Name - Zapier will need this for the search
- Status - We’ll use a change of status to trigger our Zapier workflow
- Summary - To be generated by AI
- Questions - To be generated by AI
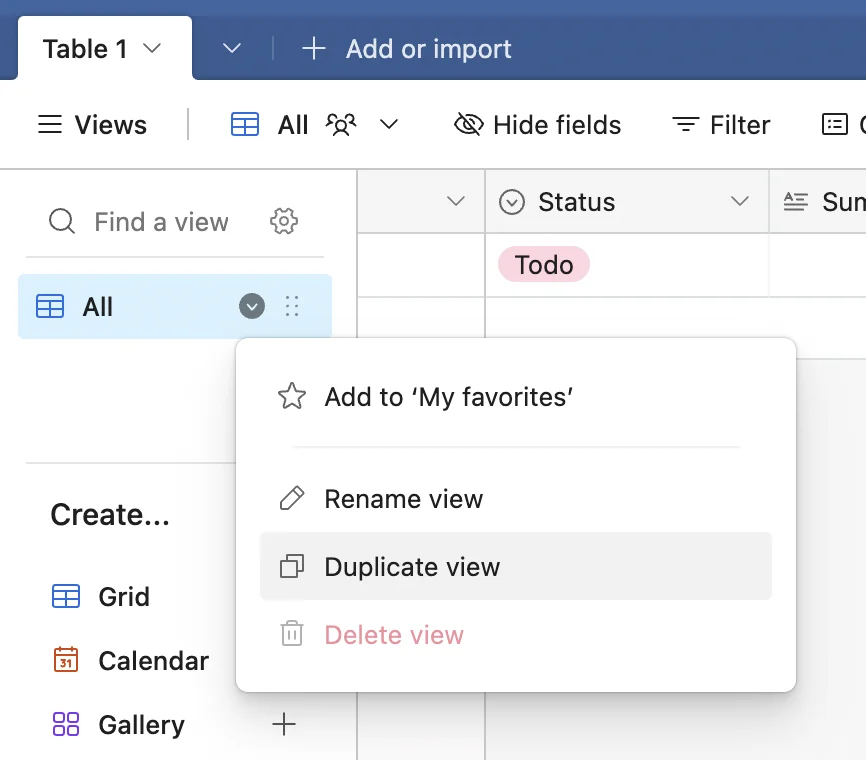
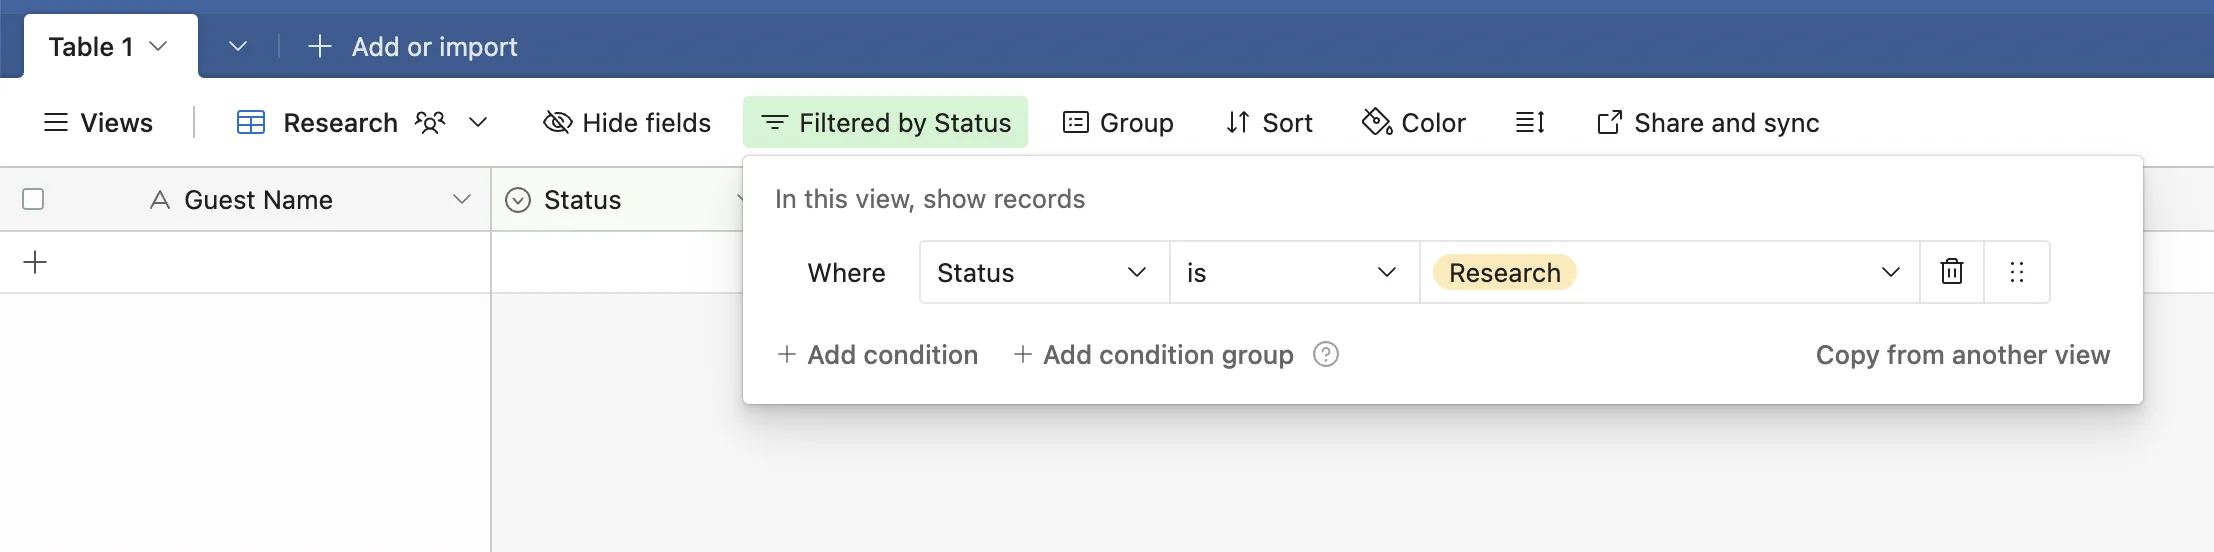
Next, under the “View” tab you should rename the current view to ‘All’ then right click and select “Duplicate view”, and call the new view ‘Research’.
Apply a filter to this new view to only show records where ‘Status’ is ‘Research’.
Step 2: Search for podcast transcripts on Podscan using Zapier
Now we need to create a Zapier automation to get podcast transcripts and analyse them with AI.
Head over to Zapier, then in the dashboard, in the top left, click the big orange “Create” button and select ‘Zaps’.
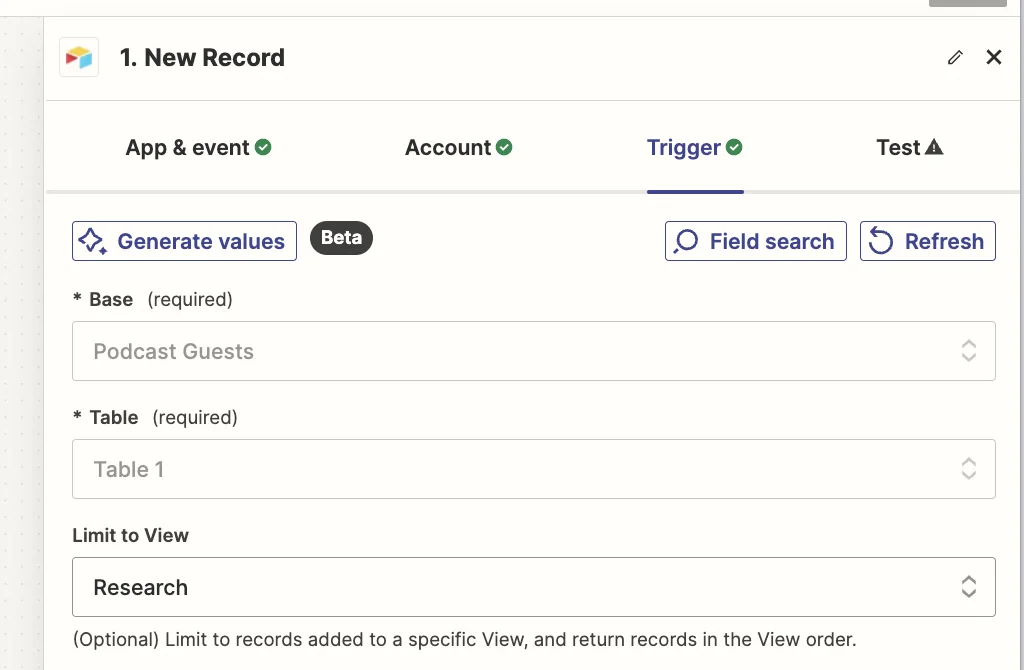
Inside the Zap editor, click on the box that says “Trigger” and select/search for ‘Airtable’ as the app. Then select ‘New Record’ as the event.
When configuring the trigger you want to select the base and table you just created. In the “Limit to View” field you want to select the ‘Research’ view you created.
Records will only enter this view when you change the ‘Status’ field. Make sure to do that only after filling in the ‘Guest Name’ field which Zapier will need.
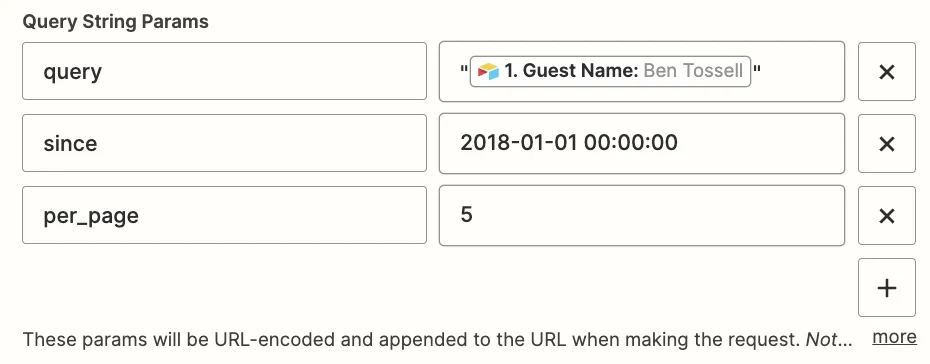
Next, we must search the Podscan database for podcasts where our subject was also a guest.
Podscan doesn’t have a Zapier integration, so we’ll connect to the API directly using a webhook step and use the search feature of their API.
Click on the “Action” box in the Zap editor, then search/select “Webhook by Zapier” as the app and ‘GET’ as the event type.
Here are the important fields for configuring this step.

- Query String Params
- Query - This will be the ‘Guest Name’ value from the Airtable trigger. Surround it with quotes to make sure it’s an exact match search.
- Since - This sets a limit on how far the API looks back. I’ve gone with 6ish years. The date must be in the YYYY-MM-DD HH:mm:ss format.
- Per Page - This limits the number of search results. We’re going to limit it to 5.
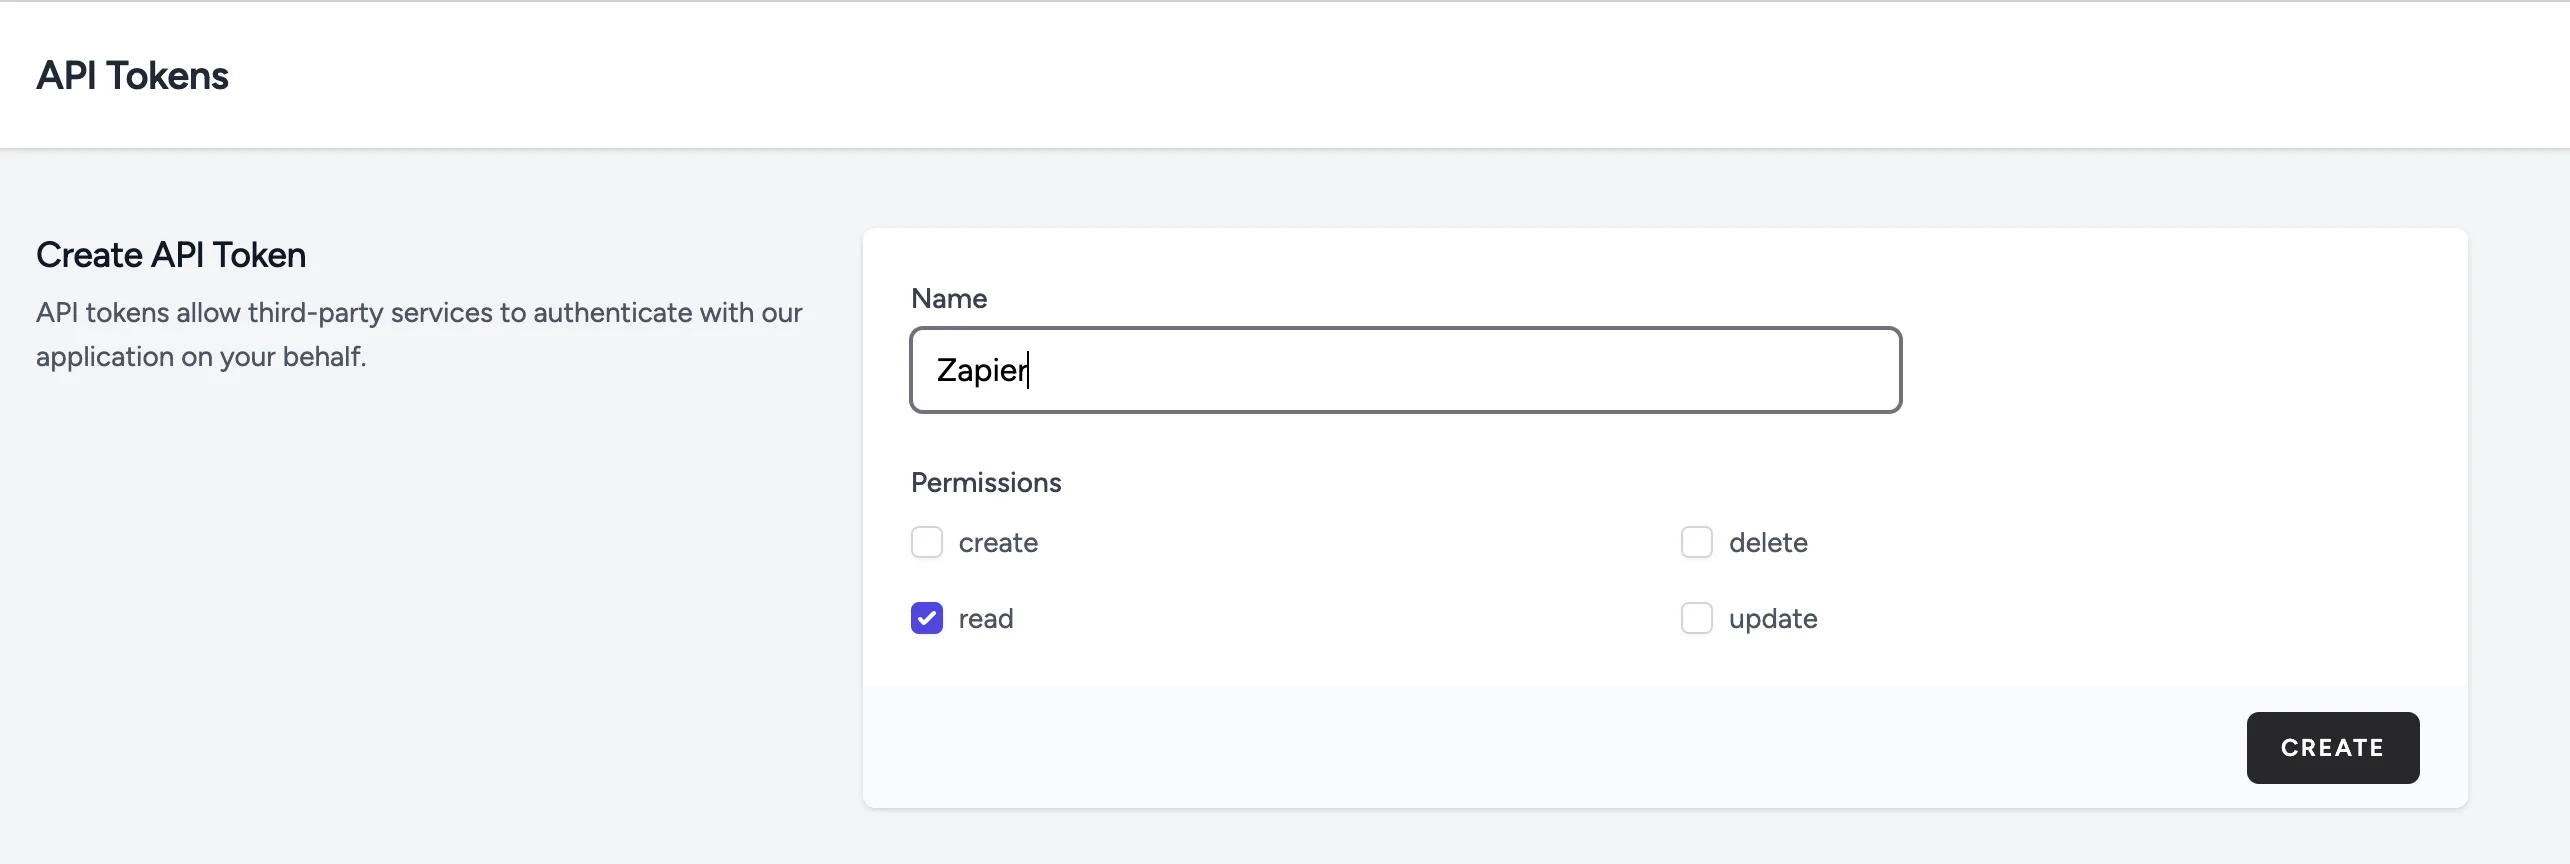
- Headers
Here you need to add your API key after ‘Bearer’. You can create one on the API tokens page in your Podscan account.

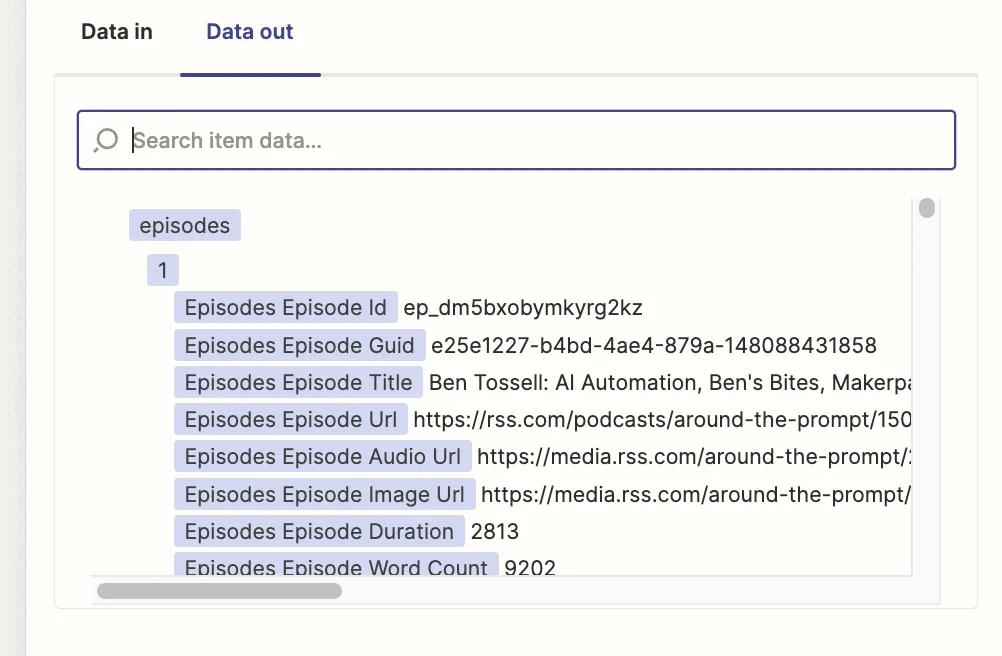
Test the zap step and you should see multiple episodes returned.
Step 3: Analyse the podcast transcripts with ChatGPT and create a summary about the guest
We have a huge amount of text in the form of podcast transcripts. Now we need to distill something useful.
We’d first like to get a summary of the guest, based on what’s talked about in the found podcasts. Then we’d like some suggested questions. We’ll do this by adding two separate ChatGPT steps to our zap.
Add another step to your zap, with “ChatGPT” as the app and ‘Conversation’ as the event.
Then configure the step with these fields:
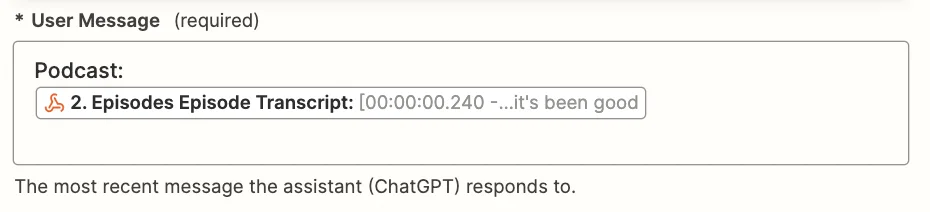
- User Message
Here we should map the ‘Episodes Episode Transcript’ field from the previous webhook step.
- Model
We’re using ‘gpt-4o-mini’ as it’s OpenAI’s cheapest model and has a 128k token context window. Our 5 combined transcripts are likely to get close to this amount.

- Assistant Instructions
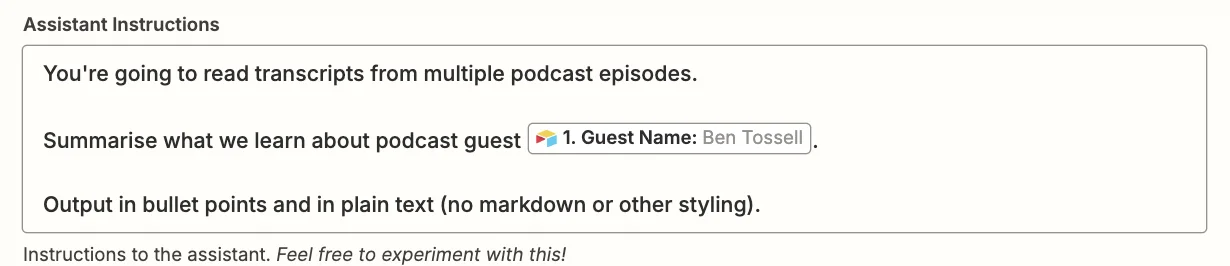
Here we brief the AI on what we need - with the ‘Guest Name’ value from the Airtable trigger mapped in. You can experiment, but this prompt works well:
You're going to read transcripts from multiple podcast episodes.
Summarise what we learn about podcast guest {Guest Name}.
Output in bullet points.
- Max Tokens
Go with a number above 1,000 to ensure detailed output.

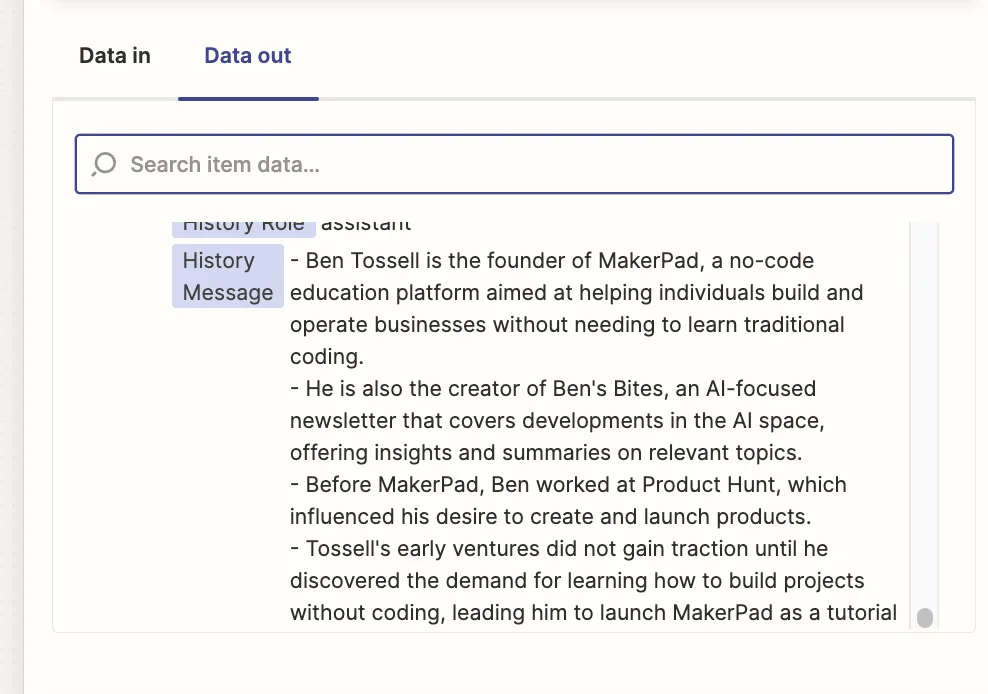
Test the zap step - which may take 5-10 seconds due to the amount of content - and you should see a summary
Step 4: Get ChatGPT to suggest some interesting new questions for the guest
Now we have our summary, we want ChatGPT to suggest some interesting questions we can ask.
Add another ChatGPT - Conversation step to your zap and configure all the fields the same as previously, except for the “Assistant Instructions” field.
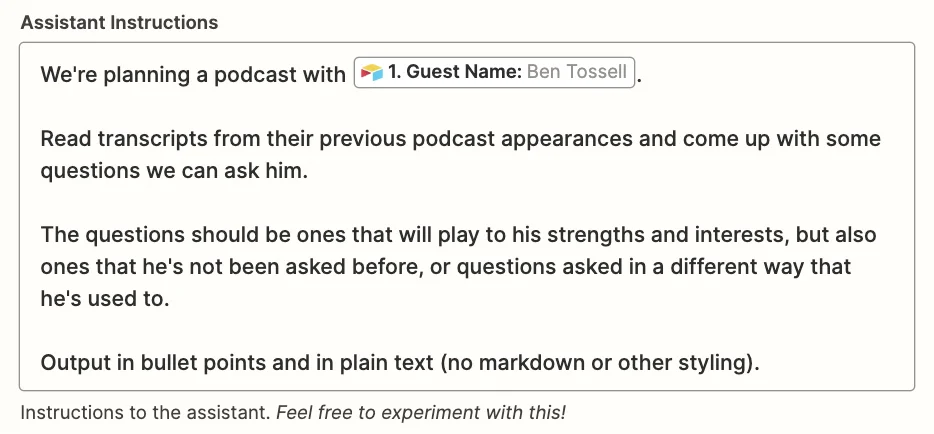
Here is a prompt you can use:
We're planning a podcast with {Guest Name}.
Read transcripts from their previous podcast appearances and come up with some questions we can ask him.
The questions should be ones that will play to his strengths and interests, but also ones that he's not been asked before, or questions asked in a different way than he's used to.
Output in bullet points and plain text (no markdown or other styling).
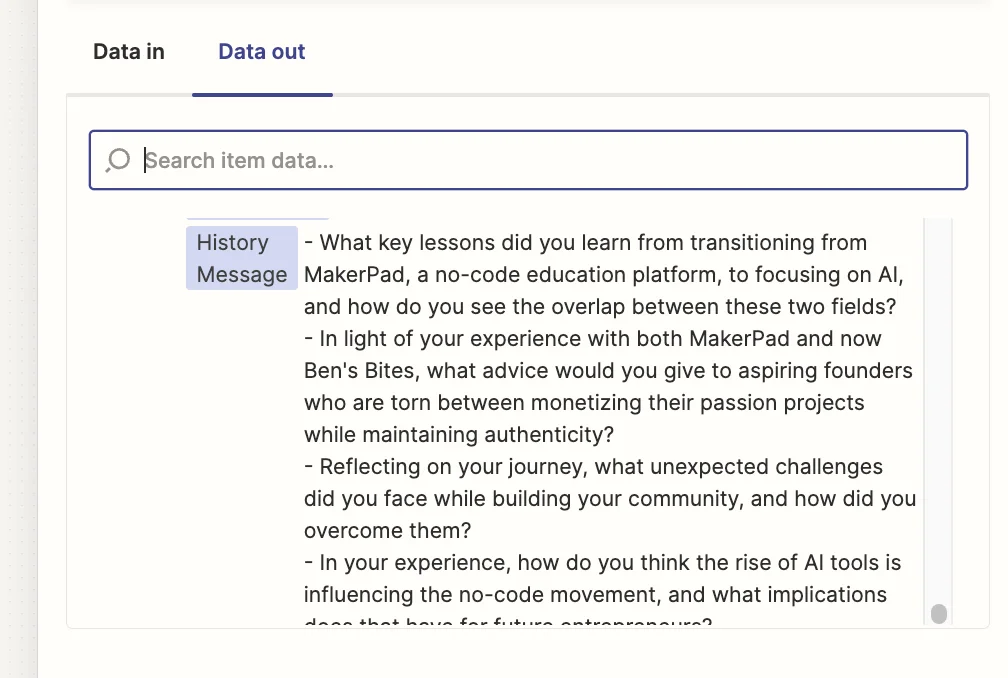
Test the zap step, and again after waiting a few seconds, you should see some questions.
The last part of the process is to add the summary and questions to the Airtable record.
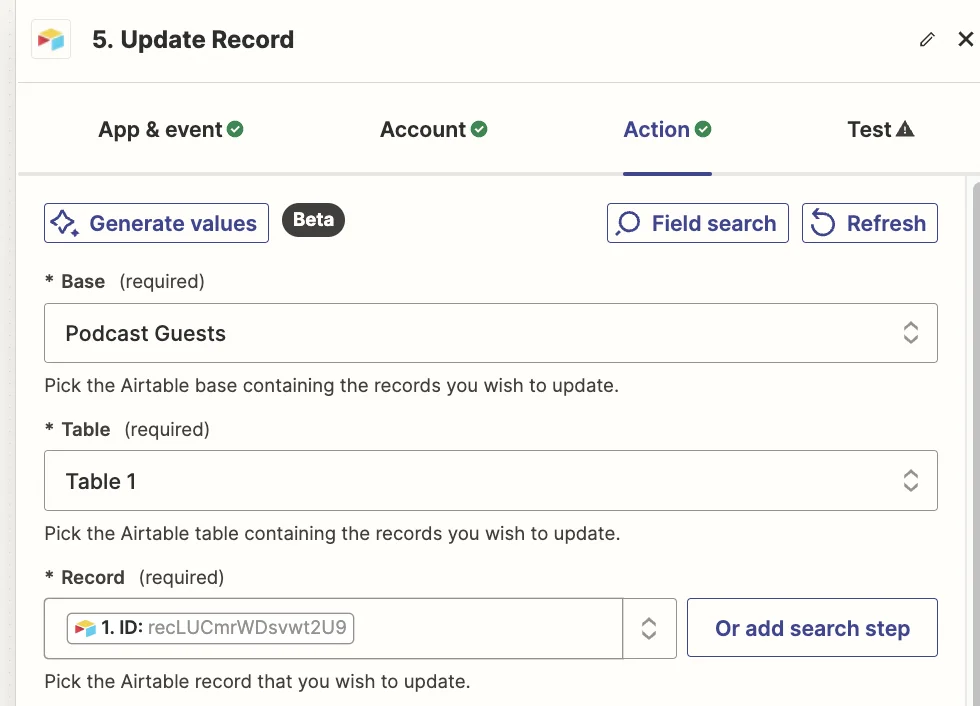
Add a new step to your zap with “Airtable” as the app and ‘Update Record’ as the event.
Select the same base and table as you did in the trigger and for the “Record” field, map the ‘ID’ value from the trigger step.
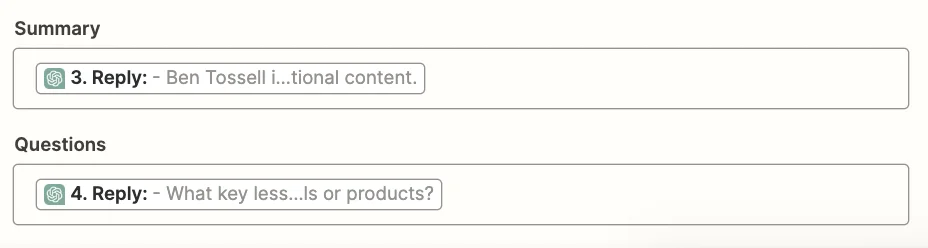
Then in the “Summary” field we’ll map the ‘Reply’ value from the first ChatGPT step, and in the “Questions” field, we’ll map the ‘Reply’ value from the second ChatGPT step.
Test the zap, head back to Airtable, and you’ll see the summary and questions added.
This tutorial was created by Andrew.