Use Zapier and AI to import PDF receipts and invoices and extract their data
Use AI and Zapier to extract data from PDF receipts and invoices ready for bookkeeping.
2024-12-20
If you’re running any sort of business, you likely receive receipts and invoices by email on a daily basis. Extracting the details you need for bookkeeping is probably one of the least interesting things you spend (read: waste) your time on.
Thanks to AI and tools like Zapier, you can now completely automate this process.
In this tutorial, you will learn how to:
- Trigger your Zapier automation using inbox labels.
- Extract key data as JSON using OpenAI Vision.
- Use a code step to turn the JSON object into separate data fields.
Step 1: Trigger your Zapier automation using inbox labels
For this tutorial, we’ll assume you’re using Gmail, but this workflow could easily be adapted to work with Outlook.
Create a Gmail label to add to any incoming emails you want Zapier to process and call it ‘Invoice/Receipt’. For testing in this tutorial, I’ve labelled an email from Google with an invoice for my Google Workspace subscription.

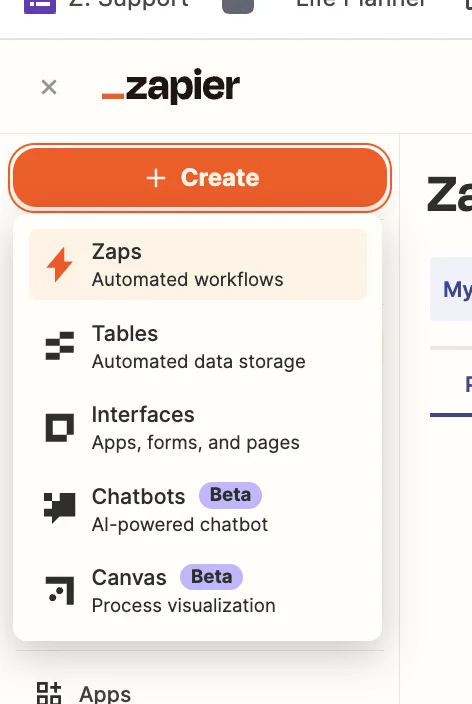
Next, head over to Zapier, and in the top left, click the big orange ‘Create’ button and select ‘Zaps’.
Inside the zap editor, click on the box that says “Trigger”, select/search for “Gmail” as the app and then select “New Labelled Email” as the event.
In the “Label/Mailbox” field, select the Gmail label you just created.
.webp)
Test the zap step and you’ll see the data from the Google email pulled in, including the PDF invoice attachment.
.webp)
Step 2: Extract key data as JSON using OpenAI Vision
Zapier’s ChatGPT integration supports text and image inputs but doesn’t support files, so we need to convert the invoice PDF into an image file.
We can do this using a tool called ConvertAPI which has a free trial and PAYG paid options.
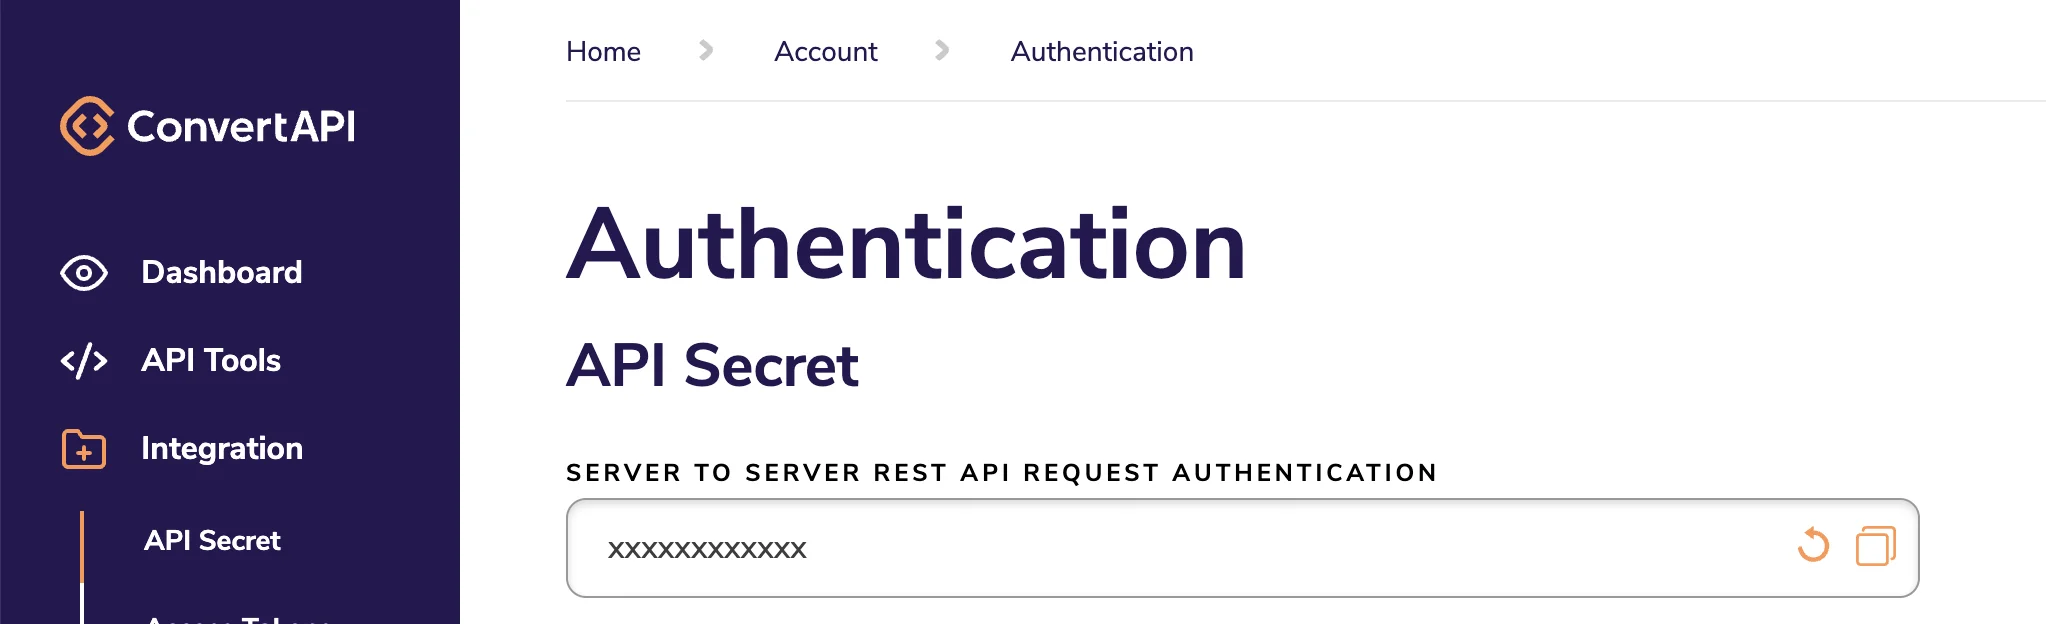
Sign up and then go to the “Integration” tab and copy the value in ‘API Secret’ field.
Back in the Zapier editor, click on the “Action” box, select/search for “ConvertAPI” as the app and then select ‘Convert File’ as the event.
You’ll need your ConvertAPI API secret from earlier to connect.
You should then configure the step as follows.
- File
Map the ‘All Attachments’ value from the Gmail trigger step.
- Convert from
This should be set to ‘pdf’.
- Convert to
This should be set to ‘jpg’.
.webp)
Test the zap step. Each page of the attached PDF will become its own JPG image and each will have its own download URL.

Now the attachment is in an image format, we can send it to OpenAI.
Add another step to your zap, select/search for “ChatGPT” as the app and then select ‘Analyze Image Content With Vision’ as the event.
At this point, we also need to think about what we want the output to look like.
To map the various data values in later steps of the zap, we’ll need consistently named fields each time the zap runs.
To achieve this, we’ll ask ChatGPT to output the data as a JSON object. JSON is a specific format for data, widely used in IT.
Here are the important fields when configuring this step.
- Message
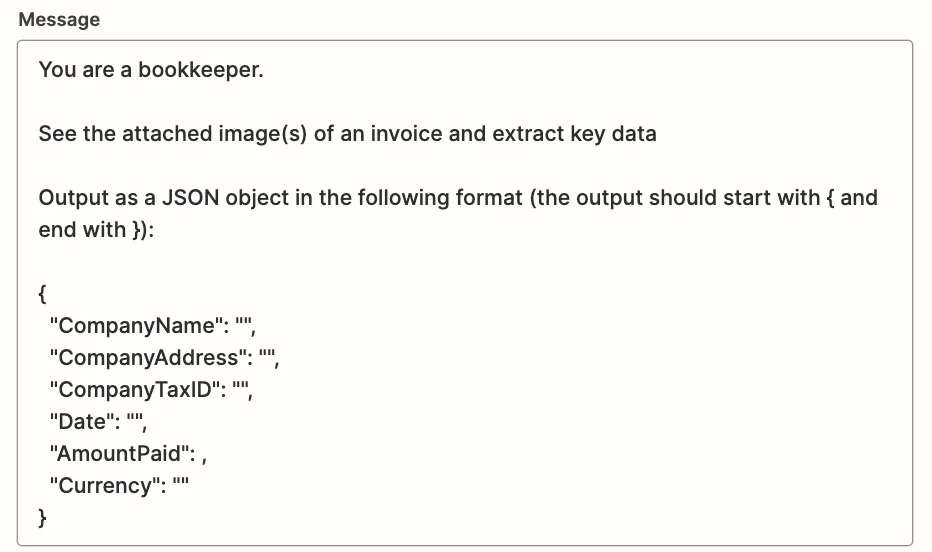
This is the AI prompt. You can experiment, but something like this works well. At the end of the prompt, we state exactly how we want the JSON object to look.
You are a bookkeeper.
See the attached image(s) of an invoice and extract key data
Output as a JSON object in the following format (the output should start with { and end with }):
{
"CompanyName": "",
"CompanyAddress": "",
"CompanyTaxID": "",
"Date": "",
"AmountPaid": ,
"Currency": ""
}
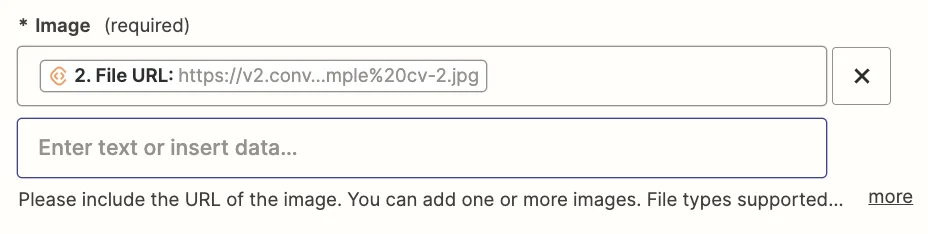
- Image
Map the ‘File URL’ value from the ConvertAPI step. This will include all the image download URLs which Zapier will upload to OpenAI along with the prompt.
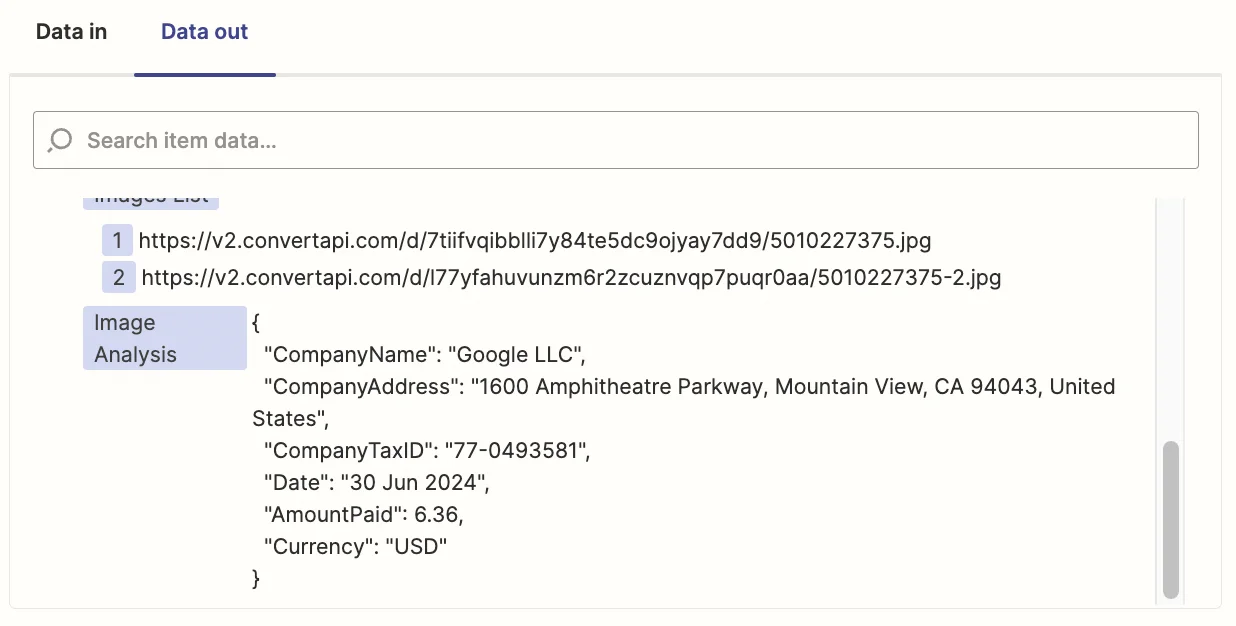
Test the zap step and you’ll see the JSON object containing the invoice data.
Step 3: Use a code step to turn the JSON object into separate data fields
Right now the JSON object is stored in a single field in Zapier. We need to break it into its separate fields. We’ll do this with a Zapier Code step.
Add another step to your zap, select/search for “Code by Zapier” as the app and then select ‘Python’ as the event.
In the “Input Data” field you should put ‘data’ in the left column and then map the ‘Image Analysis’ value from the ChatGPT step in the right column

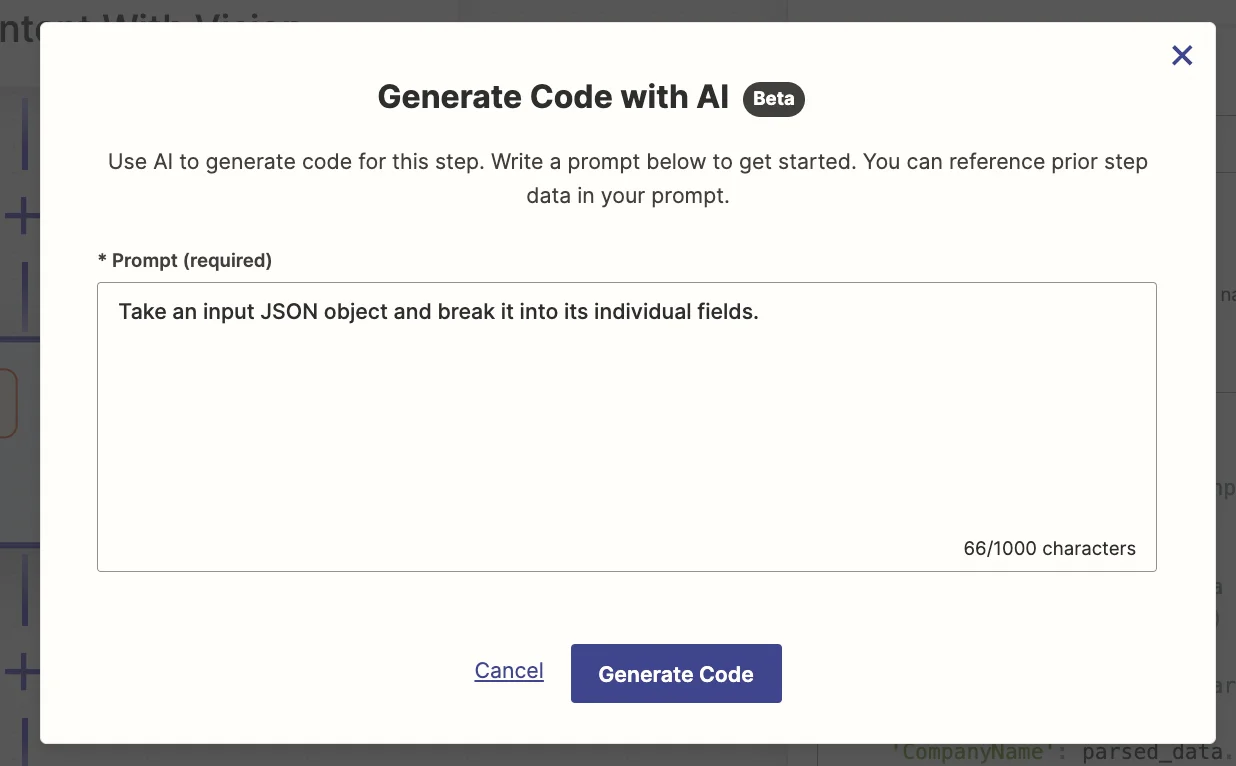
Don’t worry if you can’t code because Zapier has a AI assistant for code steps. Just tell it what you want the step to do and the code will be generated for you.
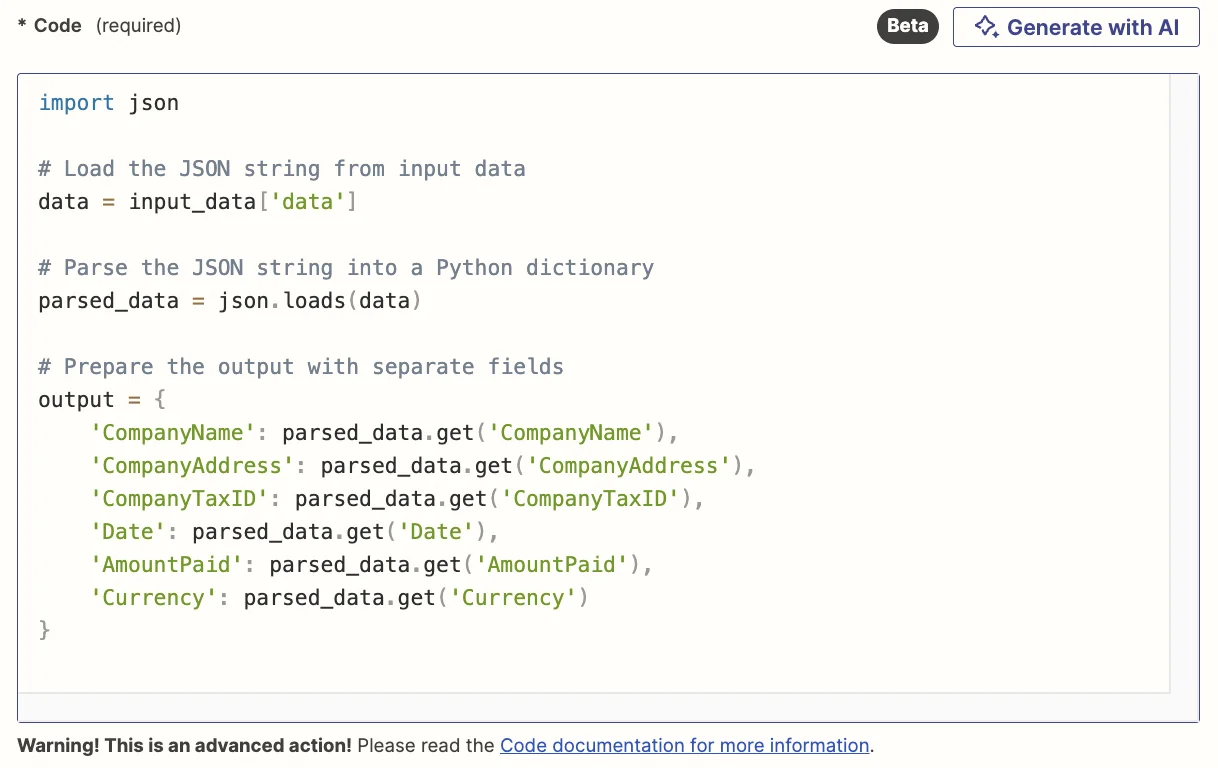
In case it doesn’t for any reason, you can use the following code:
Test the zap step and you’ll now see individual fields you can use in later steps of your zap.

This could be to add to a new row in a spreadsheet or to create a transaction in Xero or Quickbooks - whatever meets the needs of your business.
This tutorial was created by Andrew.